Showing posts sorted by date for query podcast. Sort by relevance Show all posts

Thursday, August 6, 2026

Throwback Thursday: Talking Ops Podcast

Way back in early June, I was the featured guest on a "Talking Ops" episode of the Around the Layout podcast. From the show description:

How can you turn your layout into a historical reenactment? For our Talking Ops guest Chris Adams, that was the mission when he created his layout, The Valley Local. Chris shares how his passion for history drove his desire to have an operating railroad that immerses his operators into a full late 1940's experience. Chris also shares how his methods for running his operating sessions have evolved to balance his passion for prototypical accuracy with a enjoyable time for guests.

Here's hoping you click here and give it a listen!

Wednesday, April 8, 2026

(Not So Wordless) Wednesday - Layout Update Video

Here's a HUGE THANK YOU to all of you that took the time to leave a comment on my last post. I honestly wasn't fishing for comments/compliments per se, but sincerely wanted to get a sense of how many folks might not be on Facebook and look to this blog as their only source of updates on The Valley Local.

Suffice it to say, you all really encouraged me - so thank you!

Although I'm going into (literally) the busiest 4 months of my work year (legislative session adjourns as of midnight May 6), I'm going to try and get this blog updated to bring y'all up to the current state of affairs. Of course, I won't do it all at once - neither you nor I have the time for that! - but over the coming days/weeks I'll post the highlights of the progress that's occurred over the past months. Suffice it to say, I'm frankly a little embarrassed at how little I posted in 2025. . . Yikes!

But for those of you that wanna jump right to the bottom line and see the layout as it is now (well, as of Feb. 12), thanks to the Iron City Roundhouse Report Podcast you can(!) since they recently hosted The Valley Local as an Iron City Showcase.

So if you can stand hearing me narrate a tour of the layout while barely taking a breath (and just mute me if you'd rather just see the pretty scenes), here's a video that's about as close to you coming to visit as I can muster.

Enjoy!


Sunday, August 17, 2025

Ralph "The Mudfather" Renzetti, RIP

Even though I never met him in person, his friendship and mentorship did more to improve my modeling than anyone else I've known. Sadly, Ralph Renzetti passed away suddenly last night and with his passing I - and so many others who had the good fortune to know him and learn from him - lost a loyal friend and patient teacher.

Like many others, I first heard of Ralph during the NMRAx days during COVID and I'll never forget the first time I tuned in to one of his online clinics. He started his clinic and, patiently and methodically, started to describe in detail all the processes and techniques he used for weathering freight cars. About 20 minutes in, the moderator interrupted him to say that the feed wasn't working and/or that it wasn't being recorded and asked if he'd mind starting over.

And, without missing a beat, Ralph literally went right back to the beginning of his PowerPoint and - without a hint of annoyance or frustration - just started over and did his clinic a second time as if nothing had happened.

Our paths started to cross regularly as we both began participating in the Wednesday night zoom chats sponsored by the A Modeler's Life podcast (AML). I was always impressed - and a little surprised - by how readily he would share, in detail, different weathering processes and secrets of the trade, despite his running a weathering business. It was obvious that he had the heart and soul of a teacher, and his love for helping others achieve good results was obvious.

But he could also have some pretty strong opinions, and his disdain for the use of craft paints and PanPastels in weathering freight cars and locomotives became legendary as a constant inside joke, which even he laughed at from time to time (but he never changed his mind :^)  One of the first times he and I corresponded directly through FB Messenger, we got into a debate about airbrushing craft paints. Suffice it to say, I was for and he was against. Also, suffice it to say, that he eventually convinced me that part of my airbrush phobia was due to getting bad results from using inferior products.

In fact, Ralph Renzetti is alone responsible for getting me over my fear of the airbrush. Not only did he recommend what airbrush to get (and sent me a coupon code when he heard that model airbrush was on sale), but he would also "go with me" via online chat to local hobby shops to help me purchase the "right" paint. Best of all, he would patiently "watch over my shoulder" via FaceTime, FB Messenger, or Zoom, teaching me the correct techniques and talking me through (and down) whenever something went wrong. "Don't worry - we can fix that," spoken in the same patient tone I'd remembered from his NMRAx clinic, reassured me that whatever happened would turn out ok. You can't put any kind of price on the boost of confidence that provides, especially when trying to learn something new.

But the two most profound influences Ralph had on my modeling was in helping me develop some skill in weathering - as well as (the other extreme) creating a "show room finish" on a couple of model automobiles.

Before Ralph, my weathering "technique" (if I bothered to weather at all) was to slap on some chalks and hope they didn't disappear when I applied Dullcote. But he graciously offered to tutor me through weathering a new locomotive - all virtually & online. His watching over me, offering tips and advice along the way, and helping me avoid mistakes (and sharing his expertise in fixing any mistakes I made), allowed me to produce a model that was WAY beyond my natural ability. I often jokingly referred to him as "ObiWan" (another one of his nicknames was "Obi Wan Cannolli") but he'd give it right back, calling me "Young Padawan." I also called him my training wheels and guardrails, since I was able to make MUCH faster progress with him by my side (even if only virtually) than if I'd been reaching around in the dark on my own.

And outside of model railroading, he was my partner in building "Two Old Fords for Christmas" for my dad last year. I hadn't known that he was not only a professional weatherer of model railroad stuff, but was an accomplished contest quality automobile modeler as well. I hadn't built a car kit since I was 9 years old. But - again - with his patient guidance, teaching me everything I needed to know, step-by-step along the way, and even teaching me brand new skills, I was able to finish those two models for my dad in time for Christmas.

Whether hanging out during online chats, or down in my basement via zoom, Ralph was a wonderful friend, amazingly generous with his time and sharing his talent. His legacy will live on in the many others like me that have become much better modelers because of his teaching and example. Even more important than that though, I've become a better, more patient person myself for having had the privilege of knowing him and I'll miss him terribly.

Monday, January 9, 2023

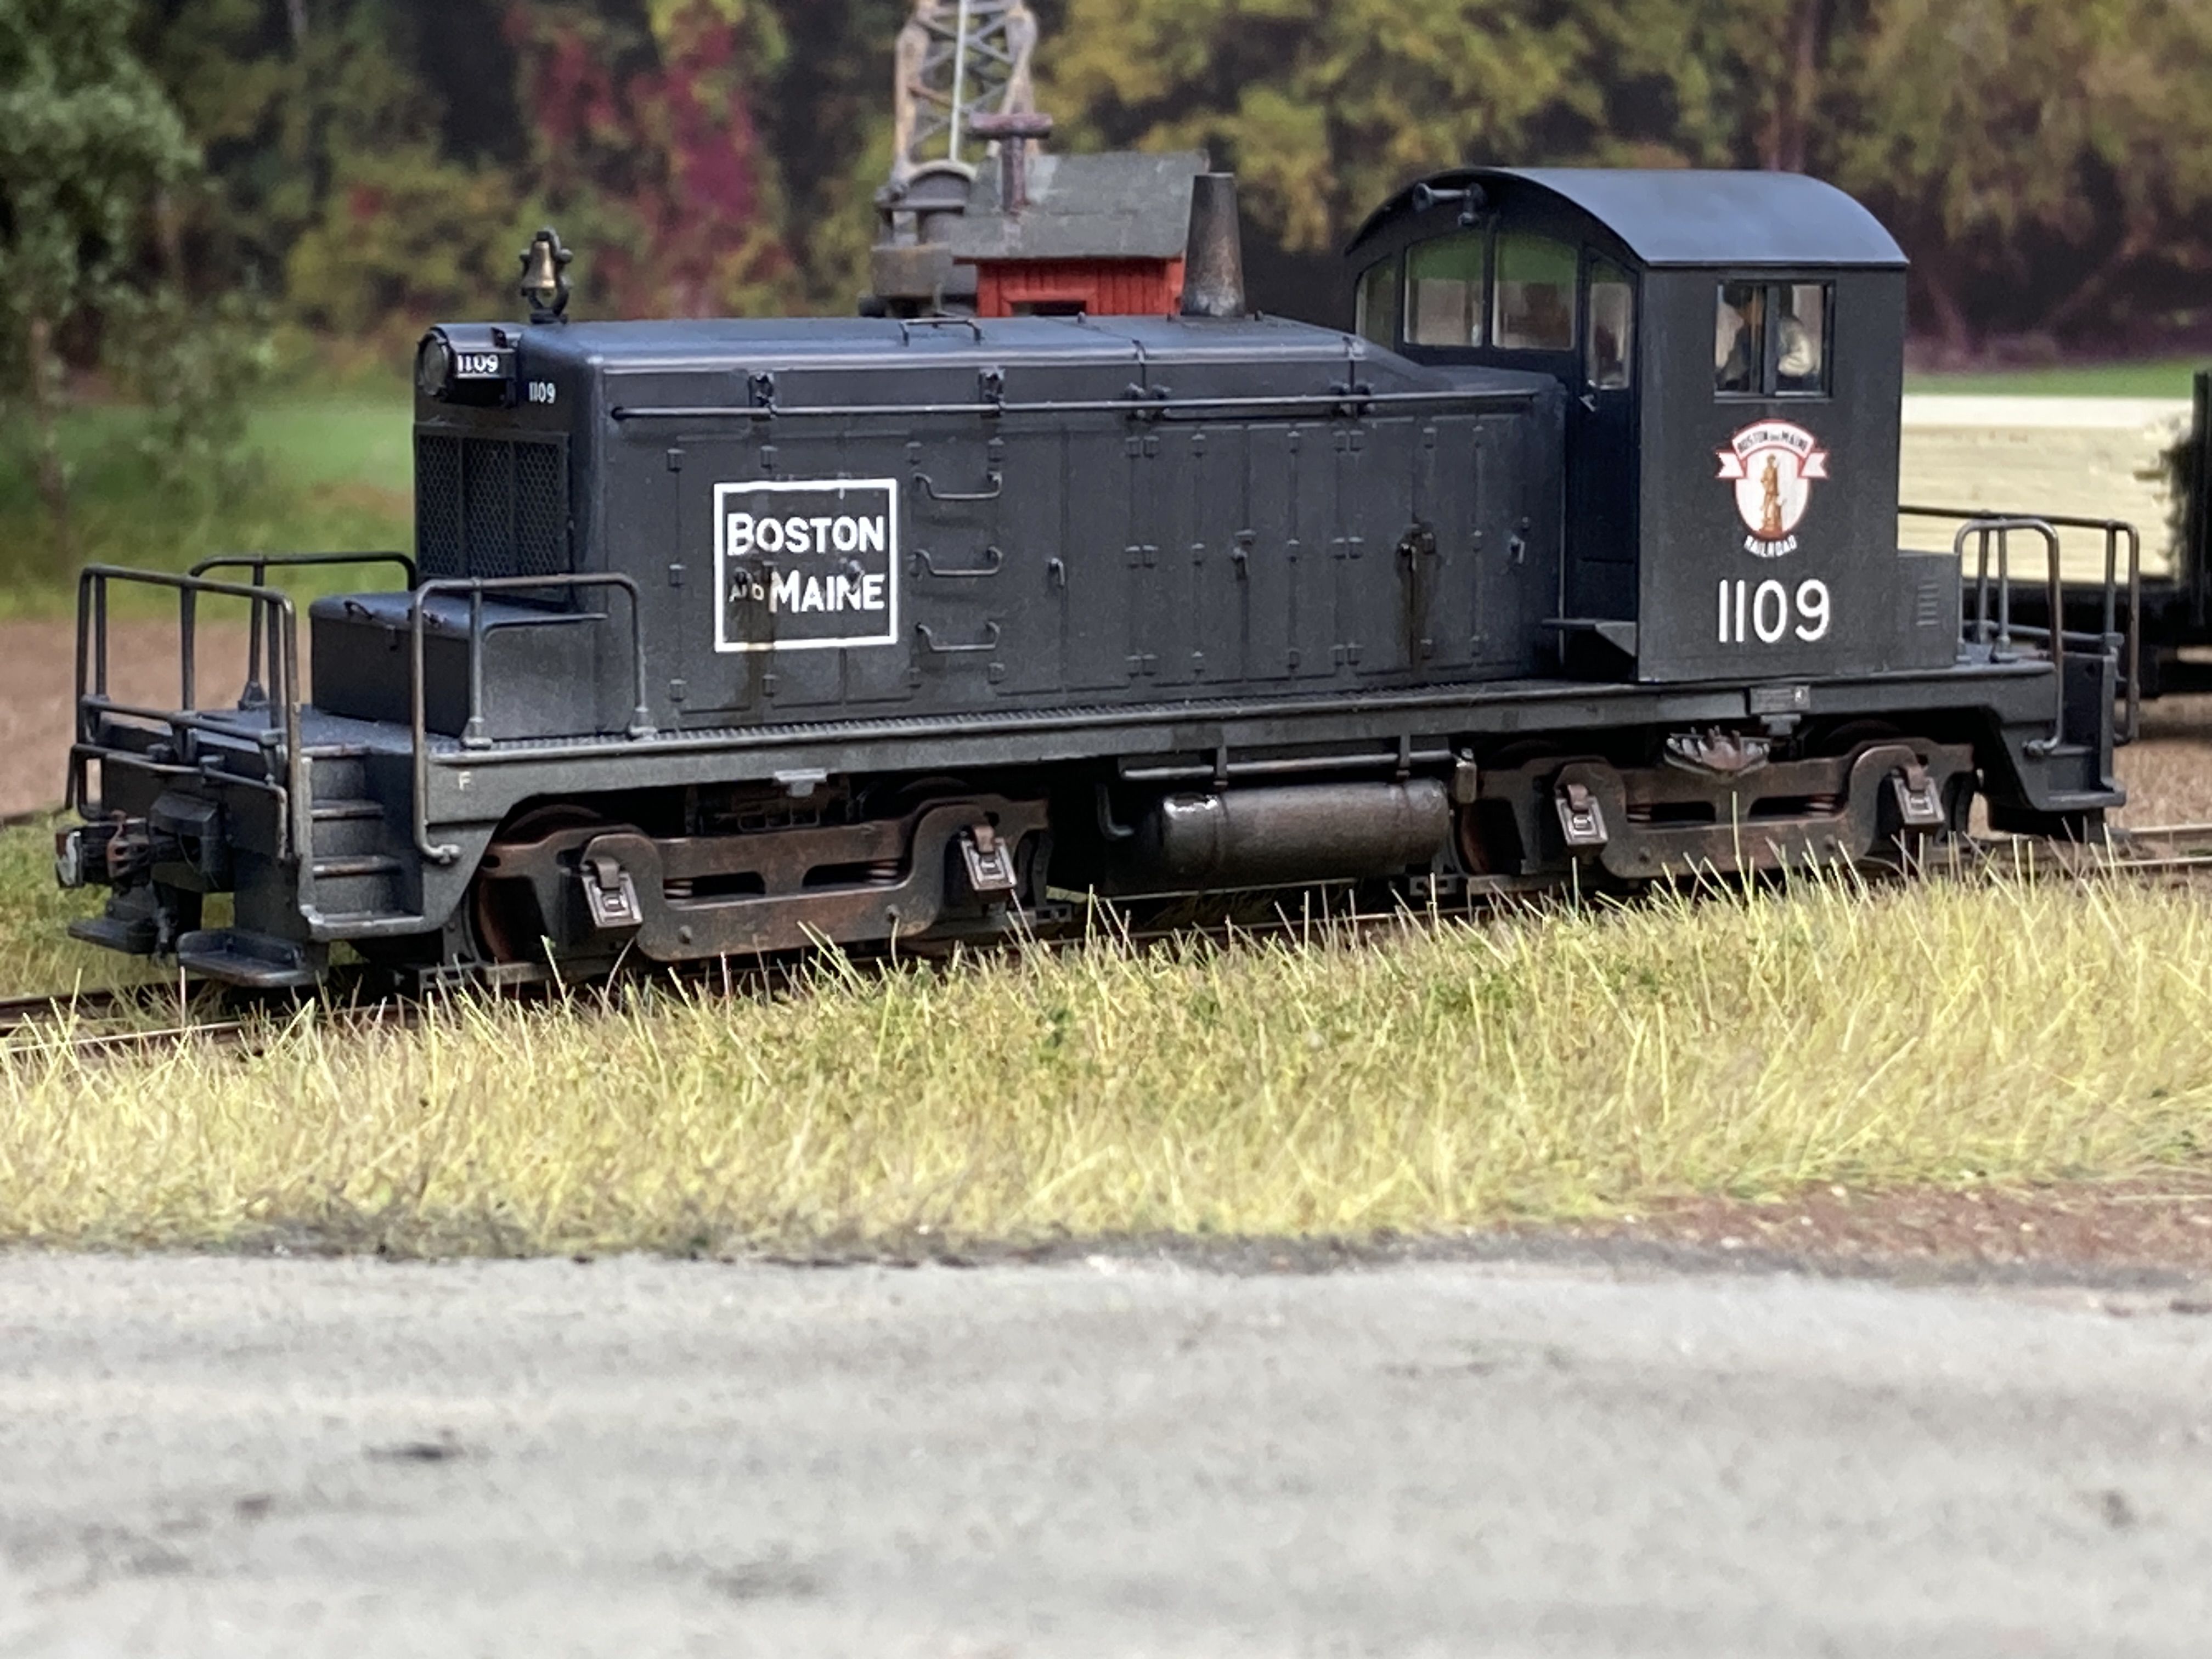
Modeling Monday: B&M SW1 #1109 is Finished!

After adding the final details (except for the lantern, which is on its way), I just had some final weathering to do.

Here are the steps I took:

  • Applied an overall coat of semigloss.
  • Using prototype photos as a guide, added major oil spills using dots of lamp black oil paint, "pulled down" with a brush dampened in mineral spirits.
  • Added many minor spills and details using Tamiya Black Panel Line Accent Color (a.k.a. "Taco Sauce").
  • Applied some burnt umber gouache "rust" to the handrails, grabs, cooler/lunchbox, and couplers.
  • Waited 3 days for everything to dry thoroughly (mostly cuz I couldn't get to it again for that long - YMMV).
  • Sealed the whole engine with a coat of Dulcote
  • Rubbed the side of a pencil along the handrails, grabs, door handles, hood railings - anywhere crew members would be handling metal. Oh - don't forget the top edge of the lunchbox, step edges, top edges/corners of the truck sideframes, etc.
  • "Freshened up" some of the oil spills with AK "Engine Oil" and Mig "Fresh Engine Oil" applied with a small brush.
  • Applied black Pan Pastel to tone down the brass bell (no pun intended), more to the top of the stack, and along the top of the hood and cab roof.
Thanks again to The Mudfather for his extensive weathering advice & guidance, including all the final finishes noted above (except, notably, the Pan Pastel - which he most certainly would not have recommended :)
Once the final weathering was done, it was time to remove the masking tape, add a crew, and put everything back together!


I've really come to love the Walthers model. It just comes apart and goes back together so easily - thankfully! After removing the masking tape from the windows, I had to reinstall the glass, then glue the rear light mount back to the top/inside of the cab roof, press fit the rear light contact board to the cab, and route the wires/light back to the housing.

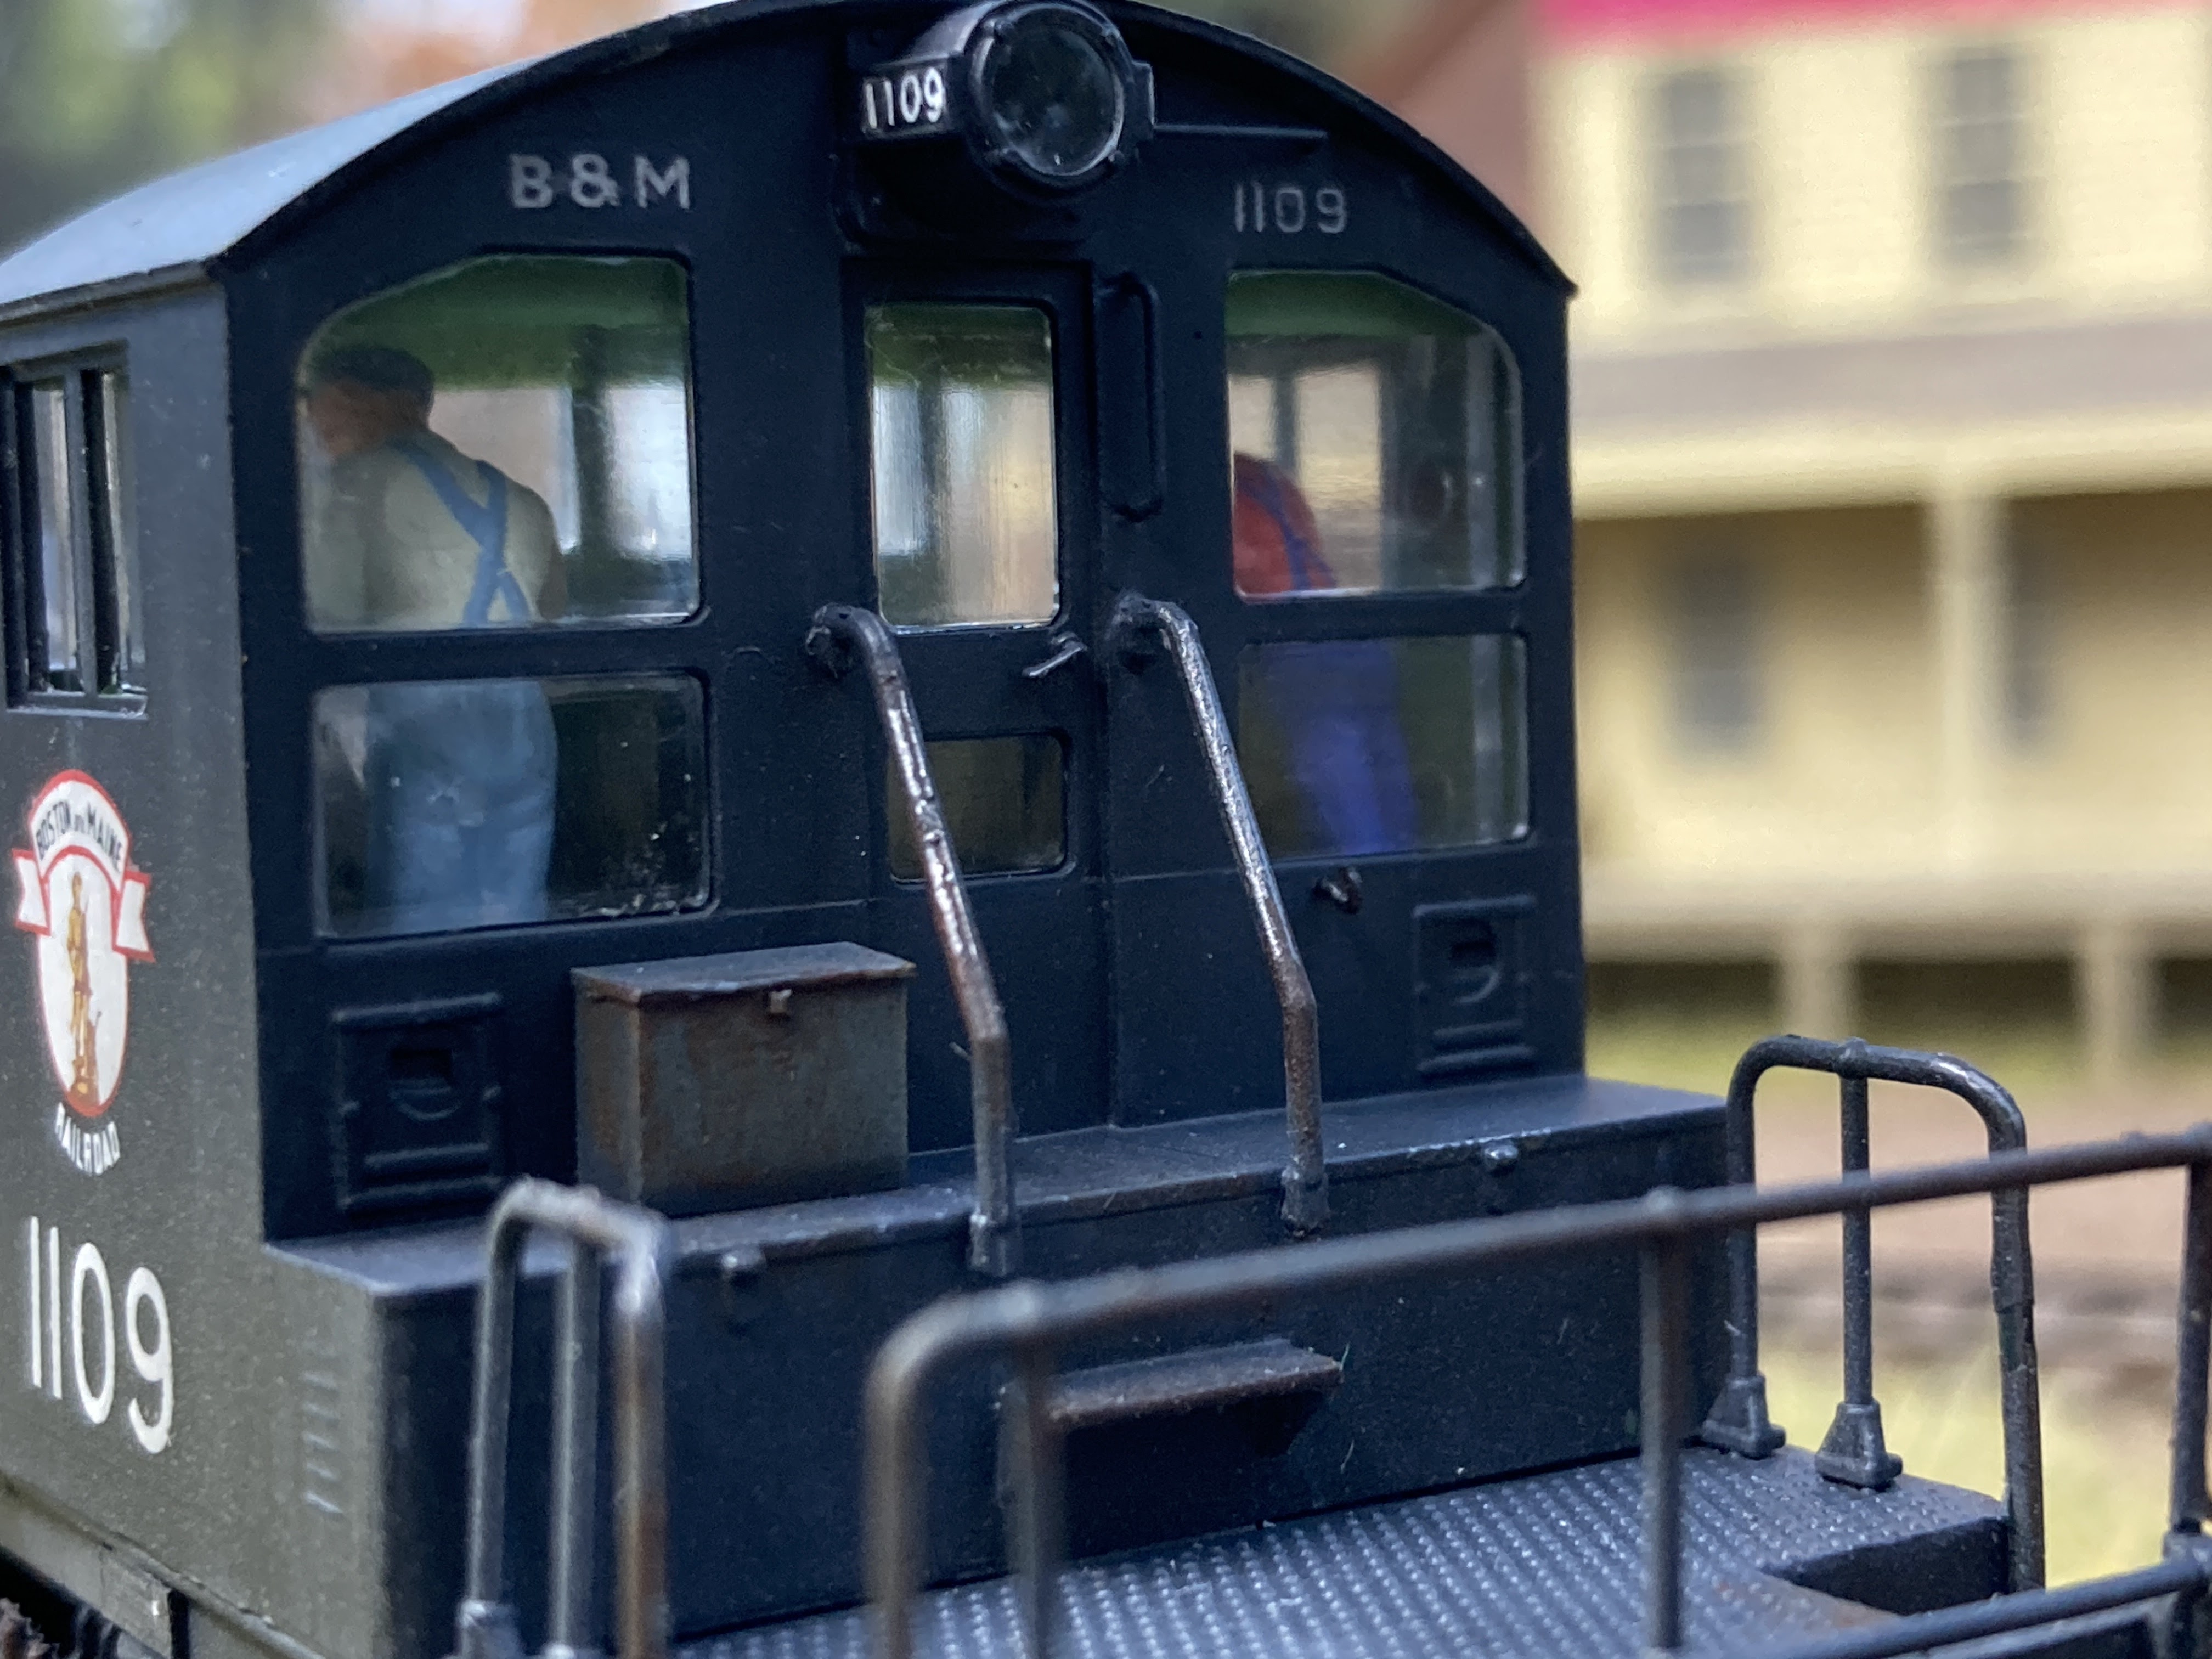
All along, I wanted to try and include a crew, but the Keep Alive takes up a lot of the cab space. Thankfully, it doesn't rise above the windows, so I figured I'd do a little surgery and see what I could come up with . . .

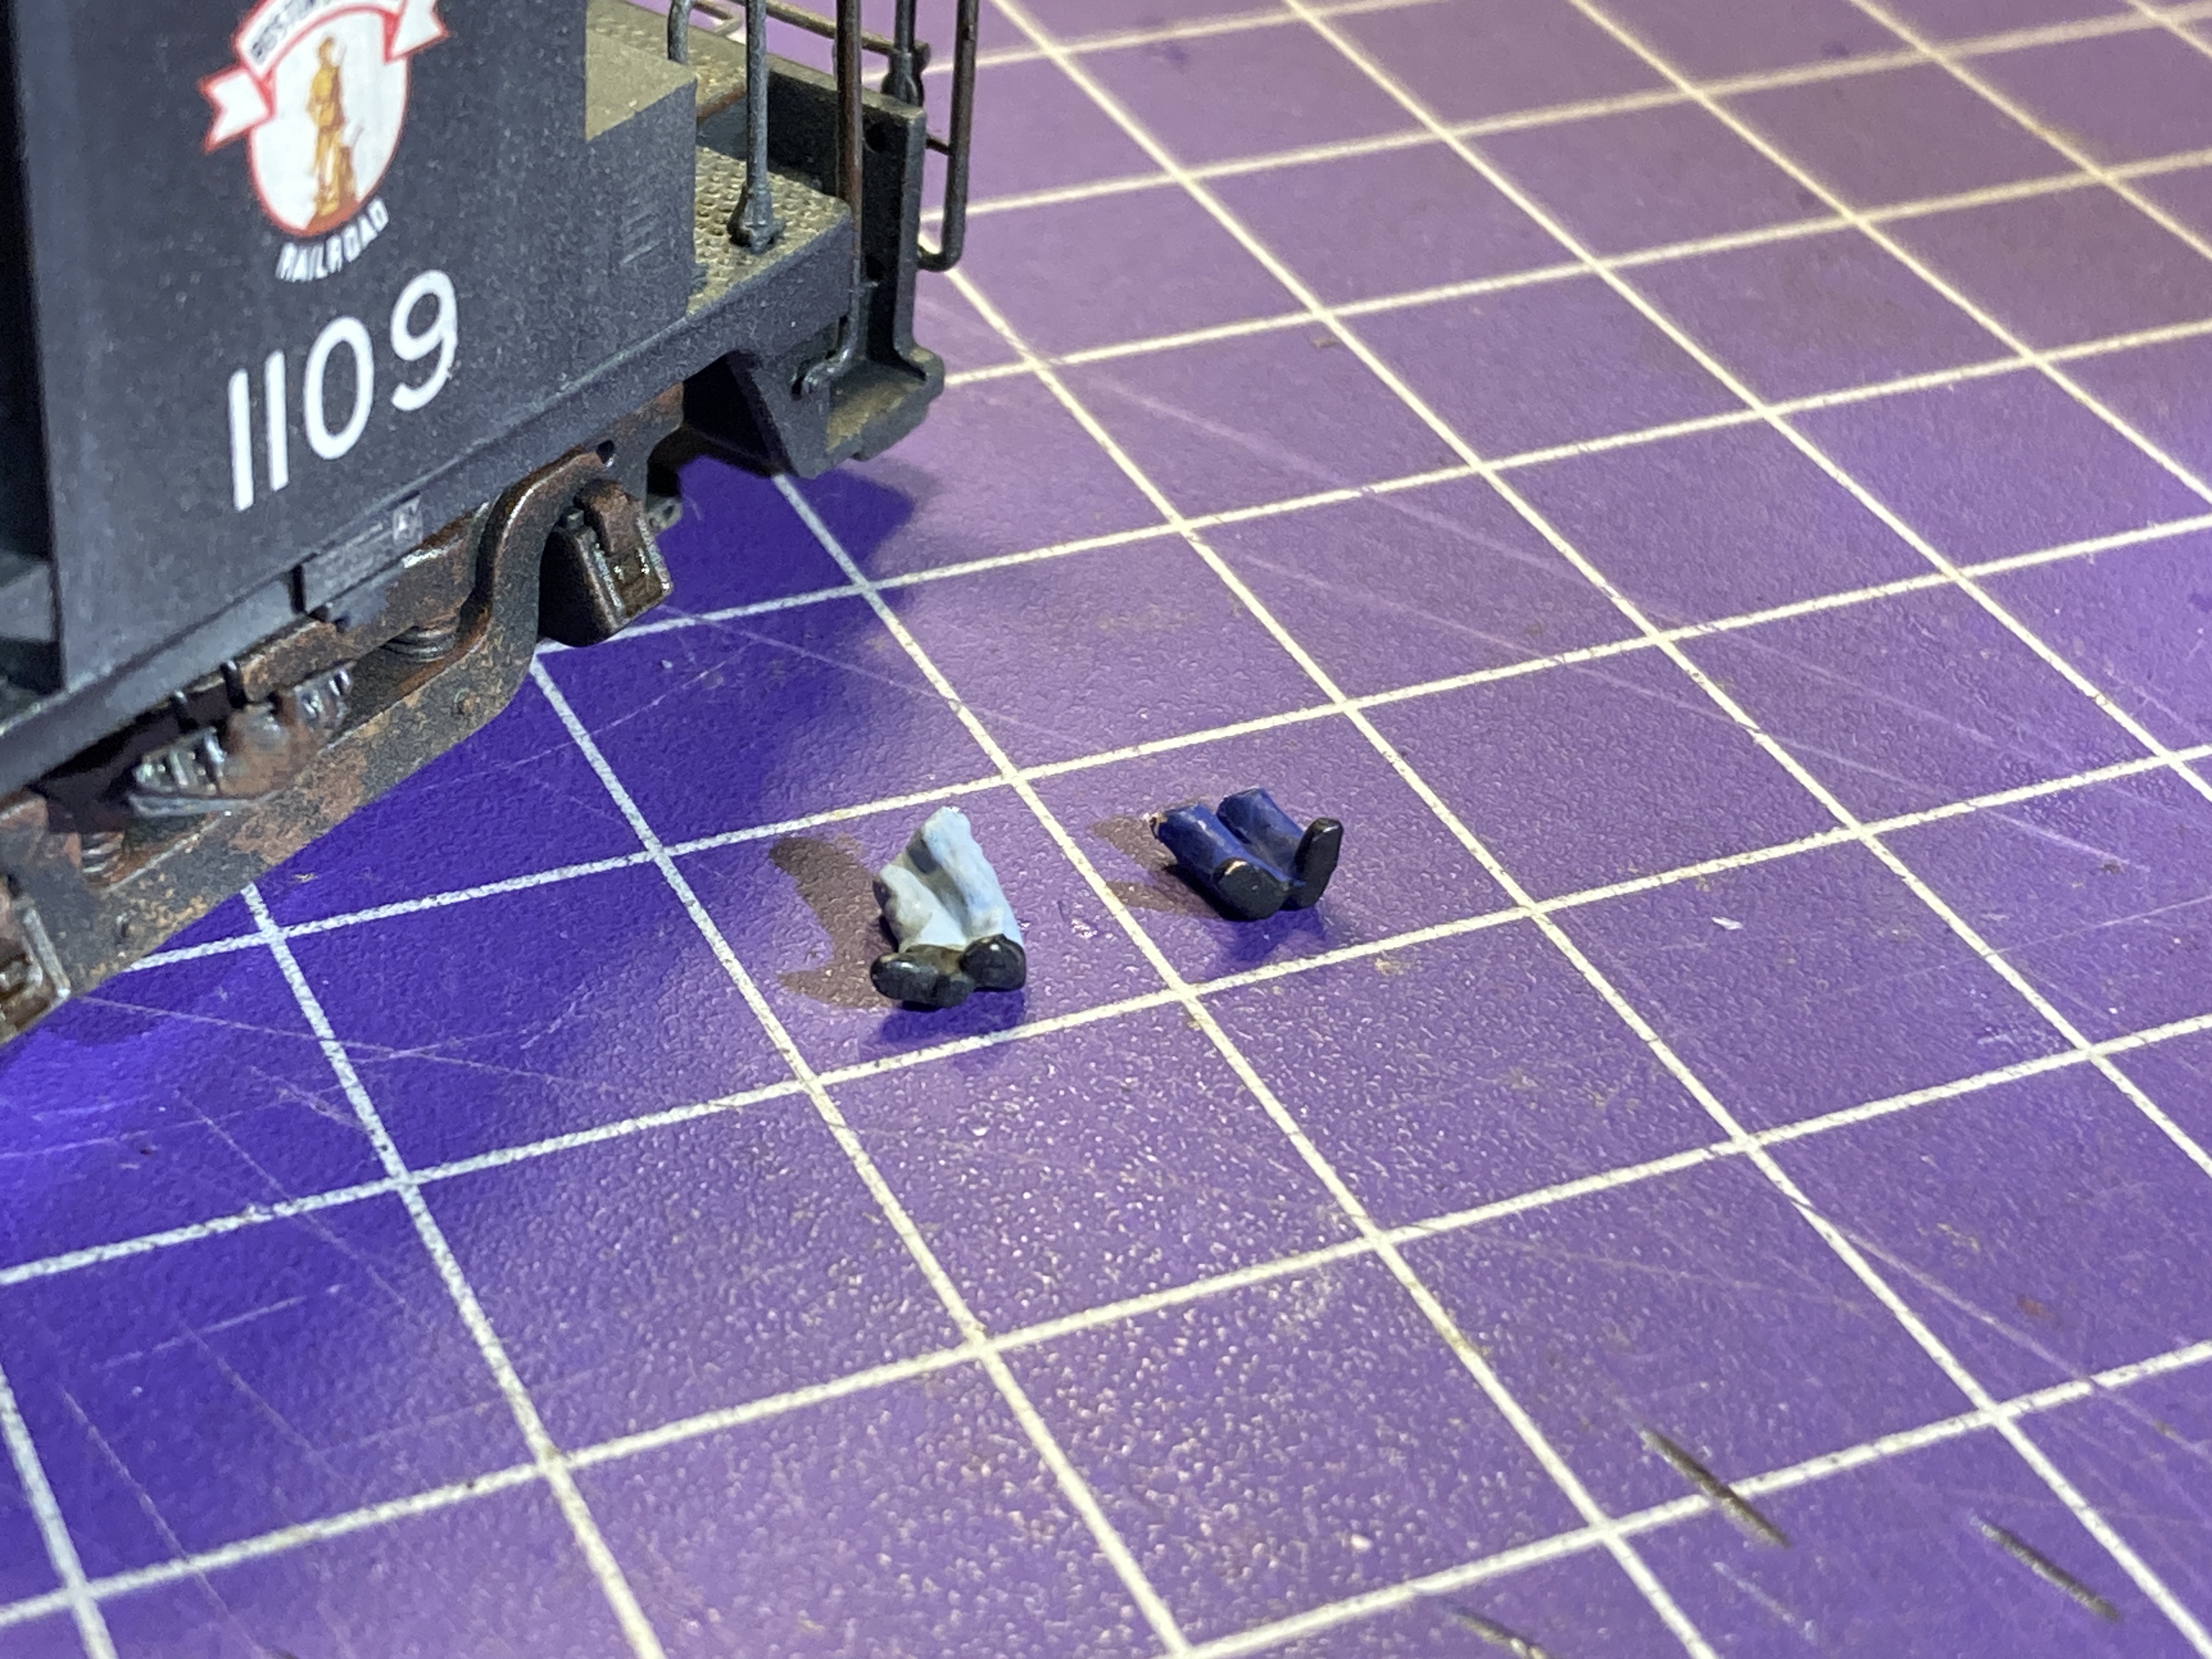
I think the Brotherhood may have something to say about my crew "accommodation"


I searched through my stash of crew members and found a couple that I could get to fit.


They're not super easy to see, but you notice if they aren't there and they sure to add a lot to the interior (and incidentally help to disguise the KA).

Once the crew were added (affixed in place with wax candle adhesive - I'll use thick CA if they start to come loose...), all I had left to do was insert the front light into the housing, put the hood on, then the cab, and FINALLY put it on the layout!

Enjoy the "finish photos" and the video - I hope to have more detail shots (and a much better video) in a future post (and remember, you can always click on the image for a larger view) . . .


From the first time I even considered modeling the 1109 way back in the fall of 2021, this project has been a group effort. While I may have been the one to do the "work," many have made this final product possible and deserve many thanks:
  • First and foremost, Philip Taylor who I'd met through the A Modeler's Life (AML) podcast and who - when he heard I was looking for an SW1 model - sent me a brand new Walthers engine (and even the "right" 2nd run one!). Anyone that's been following this project knows that it's provide many, many hours of enjoyment.
  • The Walthers model was painted for the PRR, and to model the 1109 in the livery I wanted, I needed decals. Dave Owens and Tom Murray came through with what I needed.
  • A quick search of the internet pointed me to "The Model Railroader's Guide to B&M/MEC Diesel Paint Schemes" which not only educated me on all the different liveries, but is a wealth of information and photos.
  • David Hutchinson - who happens to be the moderator/owner of that FB group - gets a HUGE thank you for not only providing many prototype photos of the 1109 right off the bat, but he also contributed some critical detail parts and additional decals. I couldn't have finished the detailing and lettering without his help.
  • Hunter Hughson and Seth Lakin provided some fantastic articles and prototype information that was priceless early on and helped me figure out what details I was going to need.
  • Speaking of details, thanks goes to Rick Abramson and John Kasey for additional details I'd forgotten.
  • And finally, this project could not have been truly finished without a good "finish" - and by that, I mean weathering. Other than a quick dusting with chalks and dulcote, I'd never truly weathered a locomotive before - especially not based on prototype photos. But Ralph Renzetti (a.k.a. "The Mudfather"), someone else I met through the AML, offered to help - being my "training wheels" and guiding me through the process. No small feat considering he lives in Canada(!) We spent many hours "together" in my paint room, with him watching over my shoulder via FB Messenger Video and my iPad. One of the biggest challenges in weathering - for me at least - is knowing what materials to use, when to use them, and what they're (in)compatible with. Knowing Ralph was there to keep me from totally screwing up such a nice loco gave me the confidence to go for it. The final finish is the direct result of his helpful guidance..
Being a New Haven modeler, I never considered the 1109 as anything more than "just" a "leased" loco (so why do it at all? click here for that story), so I figured it'd be a good project to practice on and develop some new skills. No risk of screwing up one of my NHRR locos . . .

But as the project evolved, and more folks became involved, the 1109 became so much more - and I don't mind saying that it's become my favorite diesel. And I've definitely learned many new skills that I'm looking forward to using on future projects!

Now that this loco is done, I really need to get back to the layout. There's only a few weeks left until the Big Springfield show and it'd be great to get some scenery down in Essex before then. Onward!

Thursday, December 8, 2022

Thankful Thursday

A couple of weeks ago, I posted what - for this blog anyway - was an unordinary post, but something that's often on my mind when I'm engaged in this great hobby. Without repeating it all here, suffice it to say that our creative endeavors can provide much needed time for R&R&R (Rest/Relaxation/Reflection) and that time will often remind you how blessed you are not only to have that time available to you, but to have so many others that are so willing to spend some of their precious time helping you along the way. Given the feedback I've received on that post, it sounds like many of you feel the same way.

So while this isn't my first edition of Thankful Thursday (click here for that), they've been far too infrequent and - like Wordless Wednesday, which I hardly ever miss posting - I'm going to try to make this a weekly thing. There's certainly enough to be thankful for - I only need to stop and think for a moment...

I've posted here and here about the folks that have contributed so much to the progress of the Valley Line - I literally couldn't have gotten this far without them. But an update is long overdue. So, at the risk of leaving somebody out, but in the spirit of the season, here's a quick list of elves that have helped out in recent months:

(apologies that I don't have pictures of everyone - or "you're welcome" if you don't like having your pic posted)

  • B&M SW1 Project
    • Philip Taylor for contributing the model which has provided many hours of enjoyment, before it even enters "revenue service"
    • Dave Owens & Tom Johnson for contributing decals
    • David Hutchinson for contributing detail parts and additional decals (not to mention MANY prototype photos and technical information)
    • Hunter Hughson and Seth Lakin for Mainline Modeler articles and additional tech info
    • Rick Abramson, and John Kasey for contributing additional detail parts
    • Ralph Renzetti for help with airbrushing & decaling advice (and TIA for help with weathering!)
  • Scenery help

Jim Dufour

Bill Schneider (as well as for the Cromwell Diner and other structures)
  • Trackwork help
Jim Lincoln (and special thanks to Randy Hammill for the scale track and office building that Jim's installing here)
  • DCC and Technical Help
Kaylee Zheng

Nick Santos
Chris has created a bunch of cool NHRR-specific details, whistle posts and these cool crossing signs.
  • Podcasts specifically, and Lionel Strang & his A Modeler's Life podcast specifically. Lionel has created a rich & extensive community of folks from all walks of life with a wide variety of skills that are all eager to help each other with their projects and generous with their time - usually offered with a healthy side of good-humored ribbing. Anyone who follows the Valley Local Facebook Group knows I owe a lot to the folks on the AML Wednesday Night chat, not only for their insight but their company as I labor at the workbench.

While I've thanked my regular crew elsewhere, apologies in advance if I've forgotten somebody on this list even though I tried to limit it to just this past year. Like most of you, there are countless others we can think of that have offered a bit of advice at a critical moment, some helpful feedback on a process, or have in some other relatively small way helped us make some additional progress on our layouts. I know you'll join me in offering our thanks to all those that take the time to give back to the hobby and help us all along.

It's sometimes easy to take for granted all of the generous people this hobby introduces to us, so let's take some time this week to thank those who have contributed something to our efforts, who have spent some of their valuable time to help, influence, inspire, and inform us.

Finally, thank YOU for continuing to follow the blog, for your comments and feedback, and especially for your patience when I'm not posting as often as I'd like. While I do the blog primarily for my own future reference, having the benefit of your experience and encouragement makes it even more worthwhile.

Here's hoping you and yours are having wonderful holiday season.

Thursday, August 25, 2022

Friday Fun: Another Episode on A Modeler's Life podcast...

I've mentioned before how much fun it can be to listen to podcasts while you're working - and if you're working on your layout, what better way to pass the time than listening to some model railroad podcasts. 

There's some great ones out there (including Around the Layout, The Crossing Gate, Second Section, Crew Call with Mike Rose, and the grand-daddy of them all, Model Rail Radio - which even has a website reminiscent of the late '90s).

But my favorite one by far (and not only because I'm often a participant ;^) is the A Modeler's Life podcast hosted by Lionel Strang. It's about a lot more than model railroading - there are a lot of fun folks there talking about a wide range of topics, all with model railroading in common. The best way to describe it is that it's like you're down at the hobby shop hanging out with the folks, discussing all and sundry topics - from the latest locomotive release to who's in the chase for the pennant.

The episode that posted this past Monday though may be of interest to folks here at the Valley Local. Yours truly goes on (and, admittedly, sometimes on and on) about the latest goings on with the layout - including painting fascia, choosing skirting, lighting, and stripping the SW-1 shell.

Whether you give this - or one of the other podcasts - a listen, I think you'll enjoy the company while you're at your workbench, down in the basement, or even mowing the grass(!)

And if you have any recommendation of other shows to listen to, be sure to let us know in the comments below!

Monday, July 25, 2022

Modeling Monday: SW-1 Disassembly & Stripping

I guess I should just bite the bullet and admit it: I can't keep up with this blog as much as I'd like. Either I'm too busy with the usual stuff of life/work (which nobody wants to read about - and I sure don't want to waste time writing about), or there ends up being so much cool stuff going on at once that - before I know it - days/weeks have passed and it's then old news. That's a nice problem to have, but still a "problem" when it comes to blogging. I'll just try to post more often so things don't backlog & build up too much.

And there have been a LOT of things lately. Since my last full progress report (way back on May 18 - ugh!) I:

That's just the layout-related stuff. In addition, The Missus and I celebrated our 27th wedding anniversary, attended a concert in NYC, spent a long weekend at the Cape, then I went to PA for four days of RR fun (Reading, Blue Mountain & Northern RDC ride, steam loco shop tour, Strasburg, Ken McCrory's legendary PRR Buffalo Division layout, Tom Jacobs' Reading Crossline layout, Colebrookdale RR, and the Reading Railroad Heritage Museum). And now that I'm back home, we're starting on another (semi)major house project.

Whew!

But all that is probably not why you're here. As I alluded to in last week's Wordless Wednesday, I got started on converting PRR SW-1 #9137 to B&M #1109. In addition to the decals (thanks again to Tom Murray and Dave Owens), David Hutchinson contributed the correct bell (and an extra stack) to the cause, and while I was away my order for KV Models stainless steel details arrived in the mail along with the bell & stack. 

So the SW-1 project went to the top of the priority list and the first step was to disassemble it and strip the paint. Thankfully, this turned out to be much easier than I expected/feared.


First, remove the cab by rocking it side to side and lifting up the front. There's a large locking tab at the back, but only two small ones at the front of the cab sides. Once the cab is off, the hood lifts up at the back (its large locking tab is at the front).

Next, pull gently on the shrink tubing (cushioned tweezers are ideal for this) to pull out the headlight from the casing. Remove the headlight lens by pushing it out from inside the hood. I then used a small screwdriver to gently pry the handrails off of the hood.

The cab is a bit more complicated and at first I was just going to try and mask the windows and paint right over the factory paint (maybe trying to remove the road number first). But on advice from friend Schuyler, I used a (very!) small screwdriver to gently pry up the contact board for the rear light (see pic above). . .

. . . used tweezers to peel off the electrical tape . . .

. . . and pulled the rear light out of the casing. I also used a small screwdriver to pry out the windows (remove the side windows first) and pry off the headlight casing. Unfortunately, the rear light lens is so well glued in that I couldn't remove it. So I may end up just having to mask that off for painting.

With everything taken apart down to the main styrene body parts, it was time to strip the paint!  (Beware - graphic images - PRR fan viewer discretion advised).

Reminds me of a frog in formaldehyde %^)

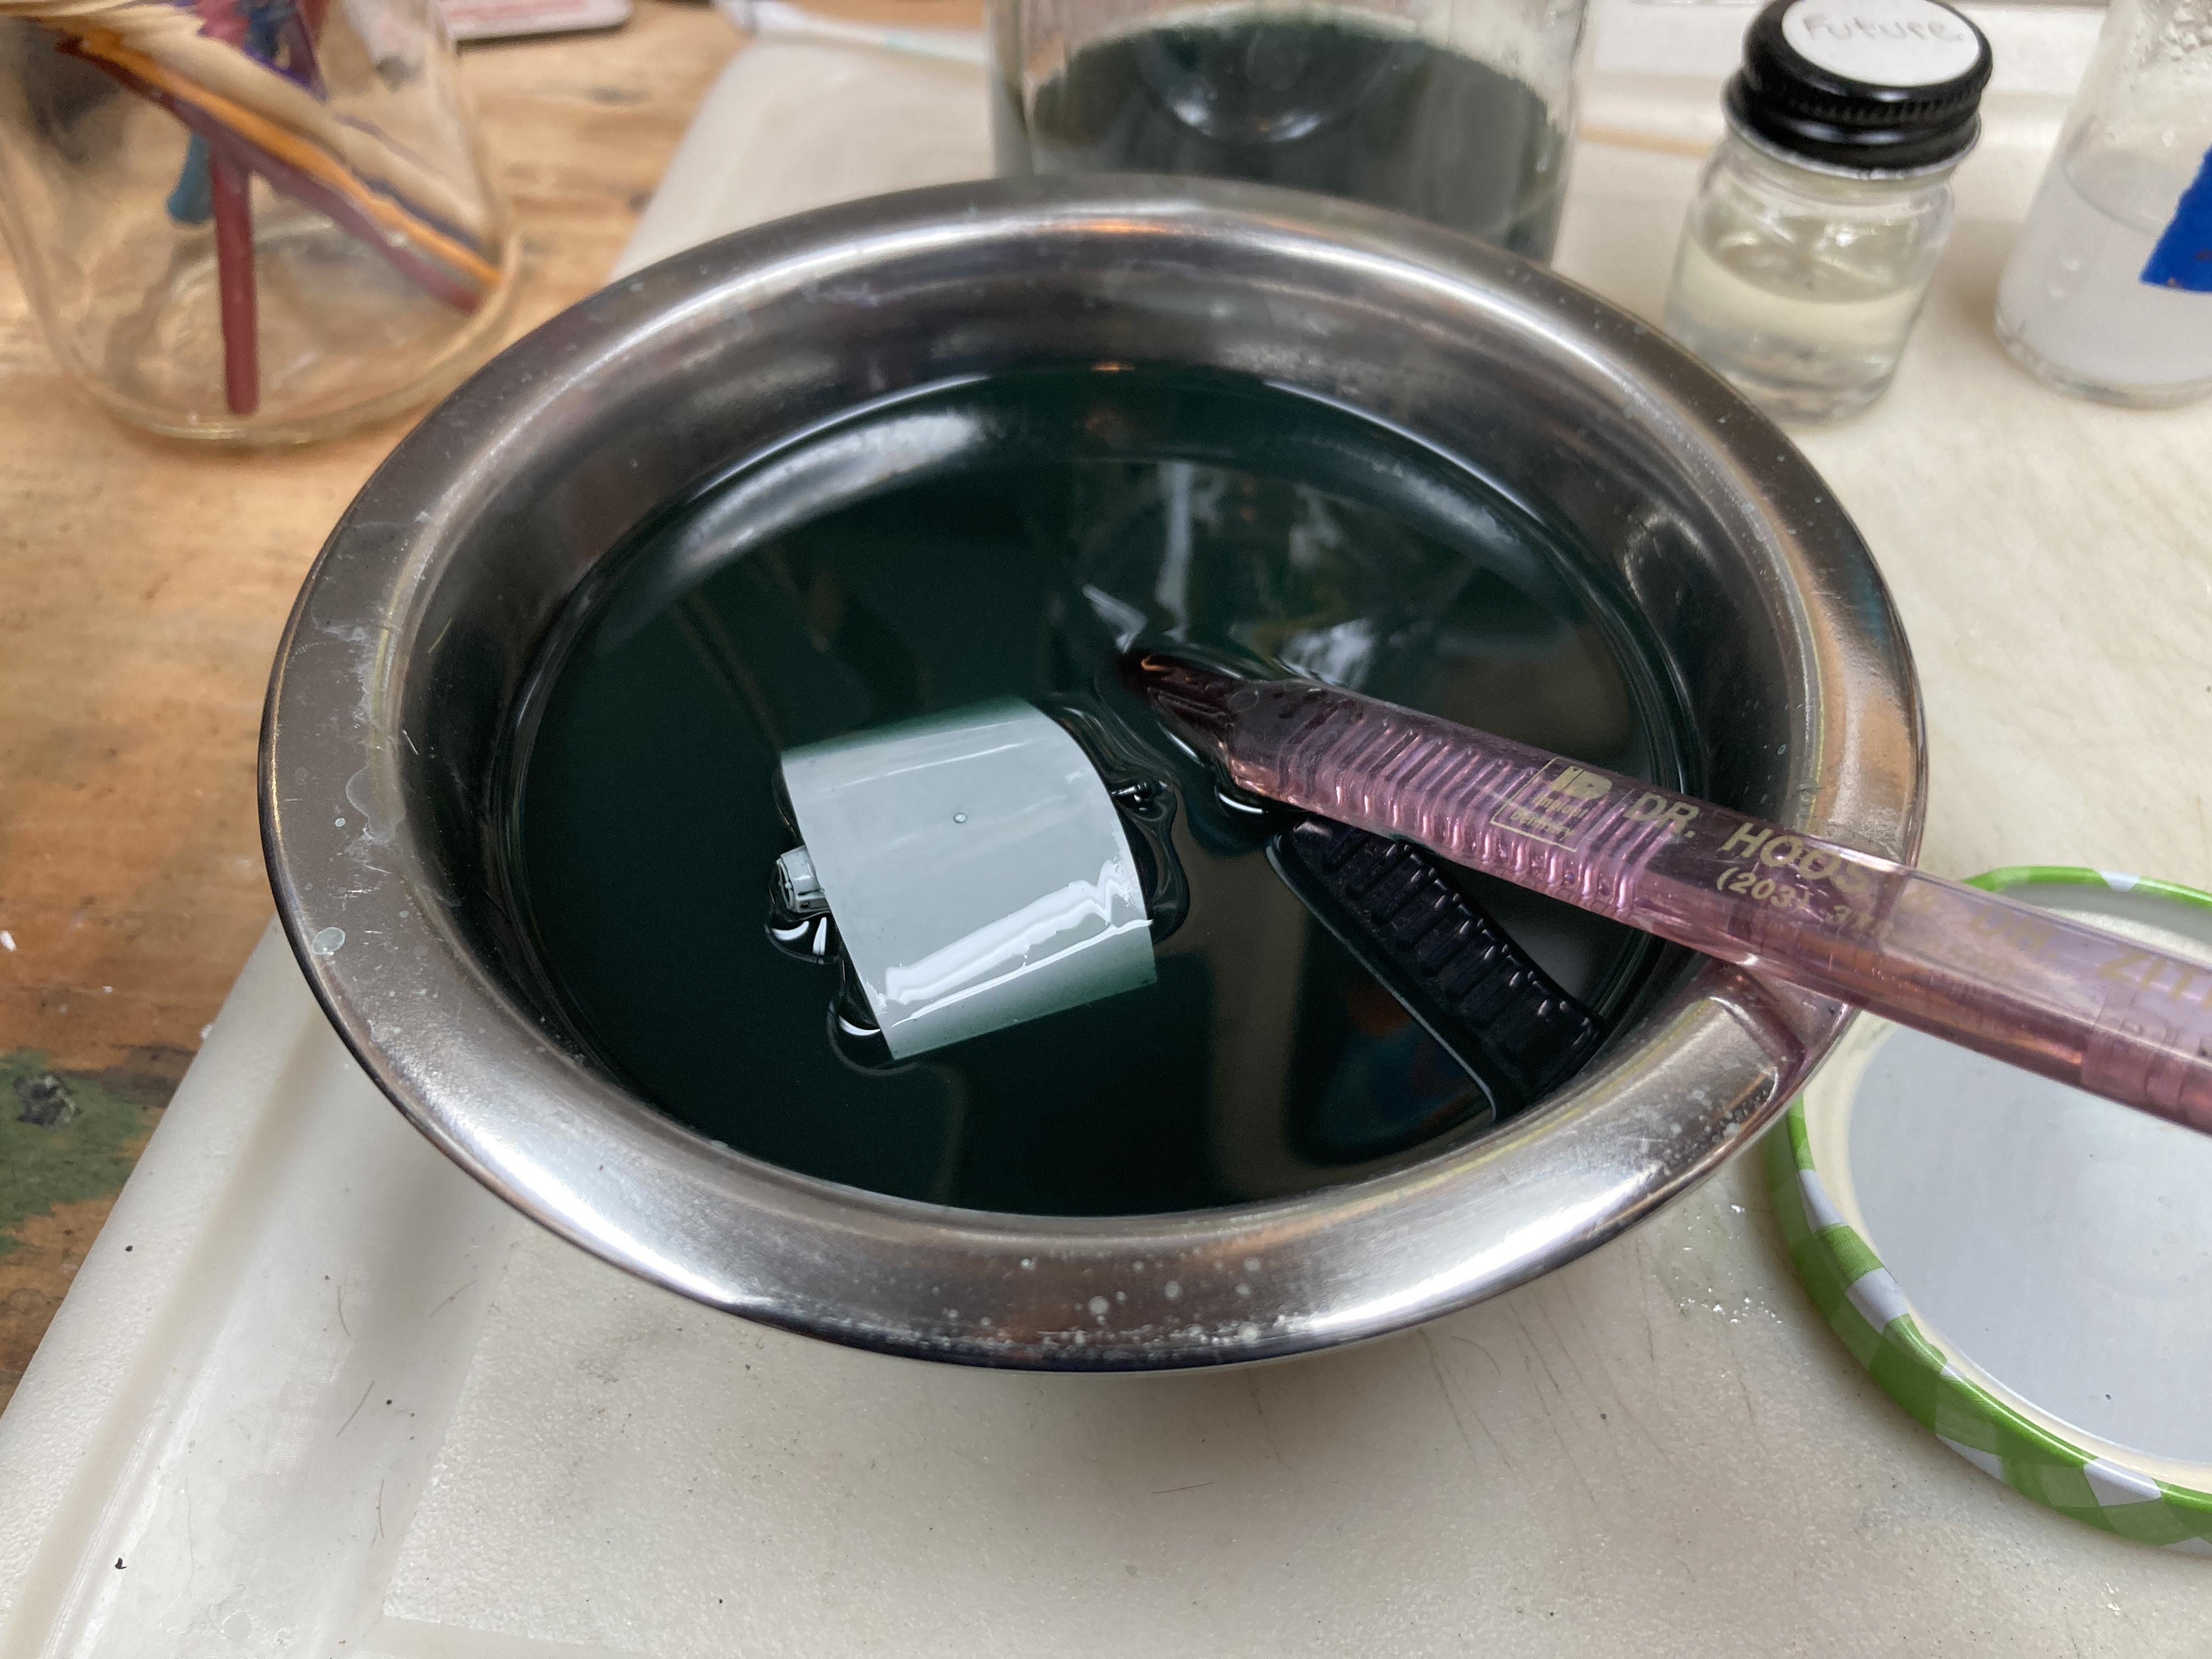
I'd never stripped paint off a model before, so after consulting the helpful folks over at The Valley Local Facebook Group, I decided to give 91% alcohol a try . . .


After soaking for less than 10 minutes, the paint and lettering/numbering started to dissolve.


I then dumped the whole jar & parts into a bowl and, using a soft/old toothbrush, gently cleaned off the remaining paint residue. I was pleasantly surprised at how easy it all came off - no hard scrubbing needed at all.

While I've since heard from others that 91% alcohol is safe for plastic (some folks claiming to have left parts soaking for days/weeks!), and won't even unglue details, I moved the parts over to a "stop bath" of soapy water for final cleaning.

After a final rinse under running water, and air drying, this former PRR unit is ready for additional details, paint, and decals to convert it to B&M 1109!

I haven't just been working on the SW-1 though.... While I was in PA, I scored a set of ESSO gas station decals at one of the hobby shops we visited. So I've been trying to get that finished too. But I'll save that story for next time...

Tuesday, June 21, 2022

Quick Update: NER Convention & Around the Layout Podcast

Wow - what a couple of weeks! After a huge flurry of activity to prepare for the layout tour during the NE Proto Meet (aka NERPM) - and of course the 'meet and tour itself - I've been a bit sidetracked catching up on some stuff that the Missus graciously let slide while I focused on railroad stuff.

At the risk of its being old news by the time I get around to it, I do plan to do at least a short post on the NERPM - especially since it was the first one I've been able to attend since 2018(!) - but before getting into that, I wanted to do a few quick things:

1) First off, a huge WELCOME! to any folks that are discovering this here blog for the first time, whether from the 'meet, from the tour, or elsewise. I wish I'd had a chance to post some more up-to-date content lately, but stay tuned - more is coming :^)

2) Speaking of content, be sure to check out the the Valley Local website where I've done my best to archive the most helpful content, and for the most up-to-the-minute goings on (like my daily posts of layout progress leading up to the NERPM %^) be sure to join the Valley Local Facebook Group. It's free and we welcome all passengers!

3) And at the risk of over-saturating the internets with Valley Local stuff, be on the lookout for Ray Arnott's Around the Layout podcast. He had me on recently and our discussion will post around July 5.

4) Last, but not least, be sure to make plans to attend this year's NMRA Northeast Regional Convention, which will be held in Windsor, CT September 15-18. It just so happens that the convention email that went out today (copied/pasted below) features a few items you may find familiar...

Now that the end of the (I must admit, very reasonable :^) honey-do list is on the horizon, I'm looking forward to getting back to some RR stuff. I've already started programming the SW-1 and hope to be converting that from a PRR unit to B&M very soon (click here for more on that strange story). And I'd like to get some more layout progress done in time for the NER.

So be sure to stay tuned and thanks again for coming along for the ride!


Sunday, January 30, 2022

January Update & Feedback Solicitation

Taking a cue from my "accomplishments & goals" post at the beginning of the month - and figuring this will be a great way to hold myself accountable & give me a huge dose of motivation - here's what I have to report as progress during this most modeling season of modeling season months . . .

In short, I:

  • Painted my first HO scale figure
  • Painted the foundations at Hartford Rayon
  • Airbrushed/painted my 2nd-ever locomotive (1st since 1987(!) - and first loco decal job
  • Scratchbuilt a concrete loading dock
  • Fixed the foreground to background transition in East Berlin
  • Started - and finished! - the backdrop in Rocky Hill
  • Made significant progress on the Wethersfield backdrop (though some feedback would be welcome)
All but the figure painting were/are on my "2022 goals" list, so I'm starting the new year with a LOT of wind in my sails (and with the added motivation that Busy Time at Work starts Feb. 9 . . .)

Li'l Lionel


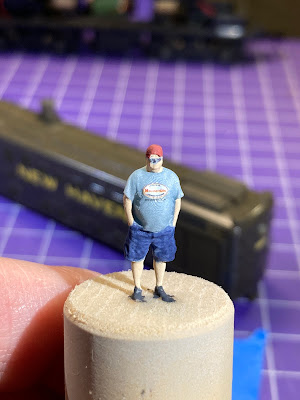
Folks over at the Valley Local Facebook Group (if you're on FB, be sure to join!) know about Lionel Strang's A Modeler's Life Podcast and his support of the Princess Margaret Hospital. This year, in addition to his fundraising walk, Bernard Hellen over at MiniPrints decided to offer this 3D scan of Lionel as an additional incentive to donors. Mike Budde even provided "Modeler's Life" decals to go on his shirt! The figure comes unpainted, and this was my first-ever attempt at figure painting. I think it came out pretty good - even the decal! By the way, this is 1/87th scale. He's glued to a wine cork for ease of handling - and that's my finger on the left. Talk about teeny tiny!

As soon as I shoot him with some Dullcoat to seal him, he'll come unglued and start riding the Valley Line!

Hartford Rayon Foundations

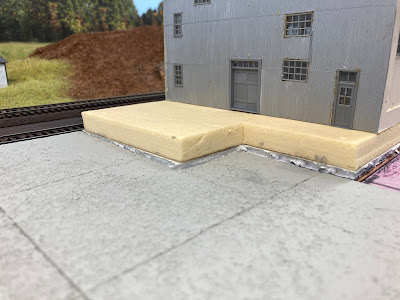
You may recall that this foundation needed to be raised on the aisle-side and leveled - and this resulted.

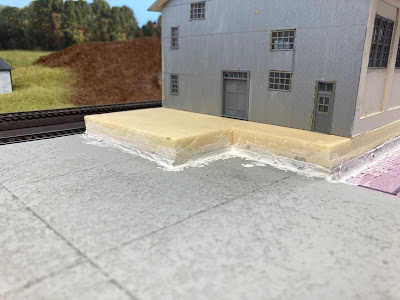
So I troweled on some spackle prior to painting it . . .


. . . and then chose a craft paint that would look the most like concrete - you can see the different sample swatches.

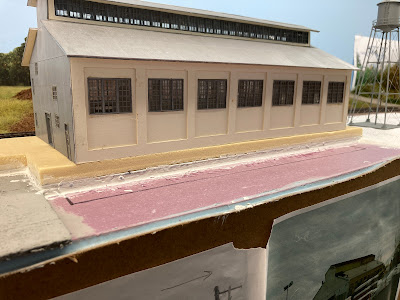
Since this foam soaked up paint like a sponge, I decided to paint only around the bottom of the structure.

And here's the result! Still need to add stairways and such . . .

. . . but I'm happy with how it came out. Turns out, this scrap foam insulation board from James Mayo has been a revelation! It has great texture for making concrete structures (as you'll see below) and it's super cheap! For more info, check out my original post on doing these foundations.

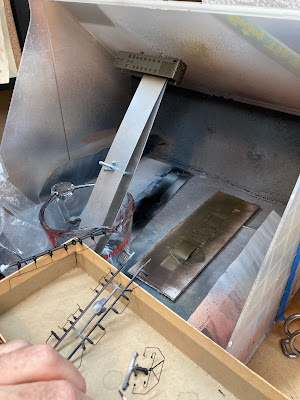
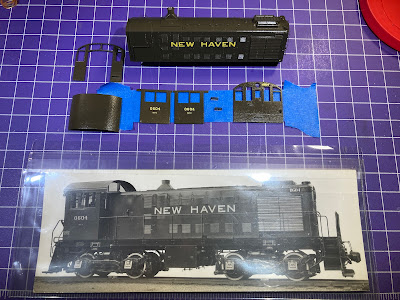
Airbrushing DEY-5 #0604

The first time I airbrushed a locomotive was about 35 years ago(!), and back then it was an Atlas S-2 (for more on that story, click here). What you see above is my second ever attempt at airbrushing a locomotive. And guess what? It's an Atlas S-2. Talk about coming full circle!

I'm pretty happy with how it's coming out though - especially with a custom NHRR-specific cab from NE Model Works. This will be DEY-5 #0604 - the power on PDX-2 which operates on the south end of the Valley Line.
(click here decaling details)

Concrete Loading Dock

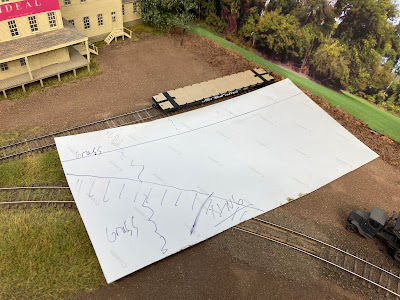
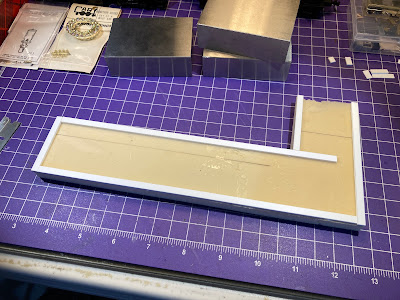
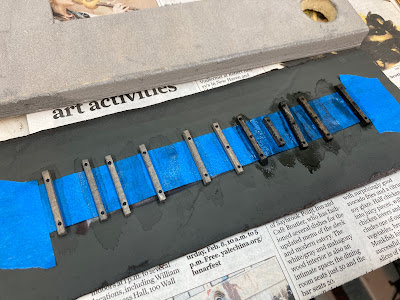
To get the right size - and to avoid having to go back & forth so often between site and workbench - I made a quick template of the area.

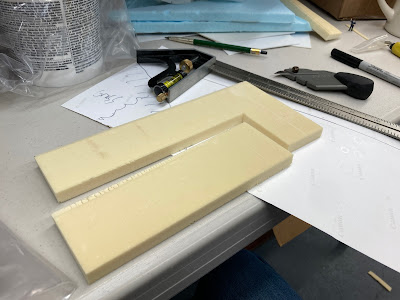
I started with more foam board scrap and rough dimensions from the site and other loading docks.


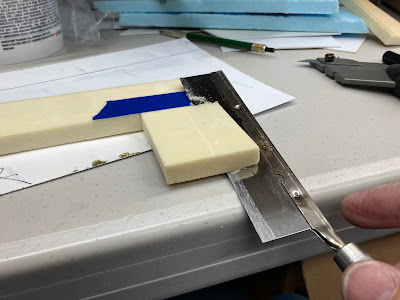
To cut the ramp, I marked the top edge with tape and used a razor saw at an angle.

The dock was a little lower than a freight car floor, so I used some strip styrene to raise it up a bit. Aleen's Quick Grab Tacky Glue worked great for this.

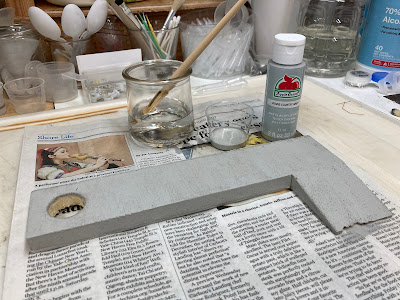
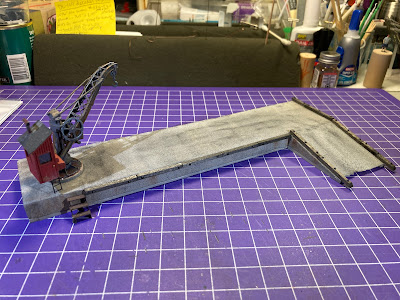
Next, I painted it with my go-to color of craft paint for concrete color. The hole on the left will accommodate a crane I got from Dave Messer.

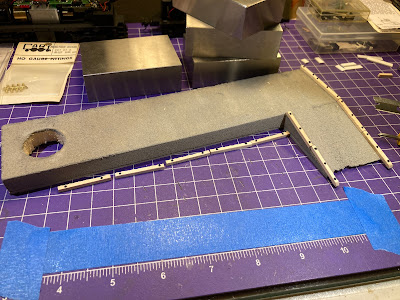
Making the dock itself was really easy, but it looked pretty plain. So I added some "RR ties" and nut-bolt-washer castings for guard rails and bumping posts.

I "creosoted" the ties with, I think, 4-5 washes of India ink and alcohol.

And weathered the dock with a variety of powders & chalks - black, rust, brown.

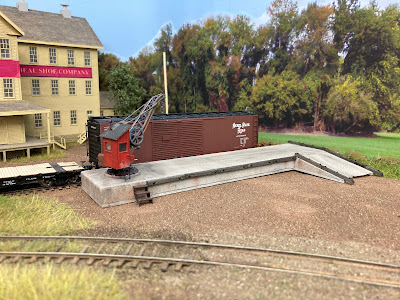
And here it is in place at East Berlin. I still need to "plant" it with some ground goop, weeds, and grass. Its primary purpose is to provide a way to load pallets of bricks from local brickyards, but as a team track ("bulk track" on the New Haven) I can ship/receive just about anything - especially with that cool crane!

East Berlin Scenery Fix

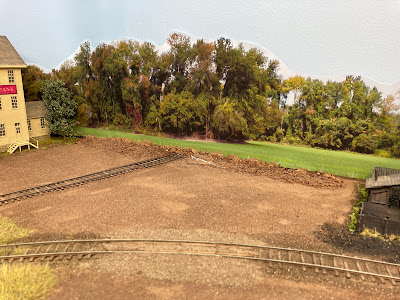
Before planting the dock though, I wanted to fix something that's been bugging me for a while here - namely, that "berm" of ground up leaves & twigs at the bottom of the backdrop. I think the thinking here was that that would be a forest floor and I'd have lots of trees planted there. But that's not how the scene has evolved.

So I decided to try and "bring the backdrop grass forward" and do my best to disguise the transition from foreground to backdrop. First though, I needed to protect the backdrop . . .

. . . then I spread on some glue . . .

. . . added a paper towel "mask" - purposefully staggering the edge . . .

. . . . and added static grass, trying my best to match the backdrop color. It's not perfect, but I think you'll agree it's an improvement!

Rocky Hill Backdrop
Long time readers know that I have a love/hate relationship when it comes to backdrops. I love the fact that they're "instant scenery" - but hate the work that they require. I take all my own backdrop photos in the area I'm modeling (being lucky to live near my prototype) and stitch them together using Photoshop Elements.  It seems I can never quite get the photo(s) I want/need and even my stripped-down version of Photoshop has a bit of a learning curve.  But I for some reason this month I really got the bit in my teeth to tackle the backdrops in Rocky Hill and even (gasp!) Wethersfield . . .

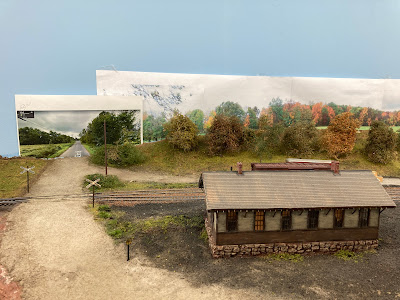
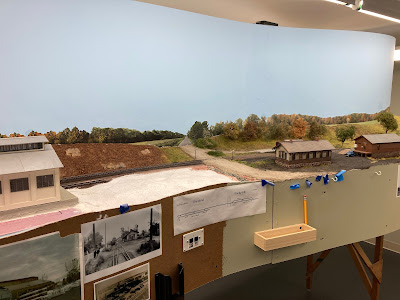
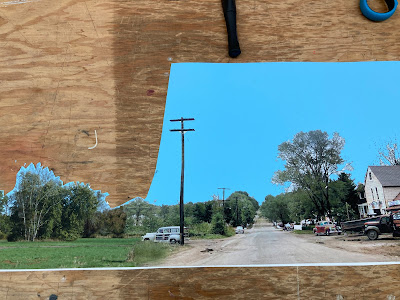
The Rocky Hill backdrop had stalled at the road. I just couldn't figure out how to do it - especially since I didn't have a suitable photo (despite having literally dozens of photos of roads-going-off-into-the-distance). Fortunately, Google Street View came to the rescue here. It's not the actual prototype road, but the view isn't TOO far off from what I imagine that road to have looked like in the late 1940s. So I printed it out and mocked it up.

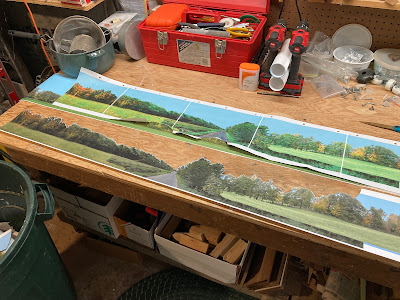
My photo backdrop mockups are just printed out on copy paper - I'm only interested in size/scale & positioning at this point. I haven't found a way to print a banner in PSE, so I save the file as a PDF and print it using Adobe Acrobat. It's easy to align all the sheets of paper using a floorboard as a straightedge.

My final step before final printing at Staples (click here for more details of my process), is to select the sky and change it to the color of blue I use to paint my masonite. That ensures that any border above the tree tops/limbs isn't as noticeable. Above, you can see the mockup and the final print (which I've started to trim).

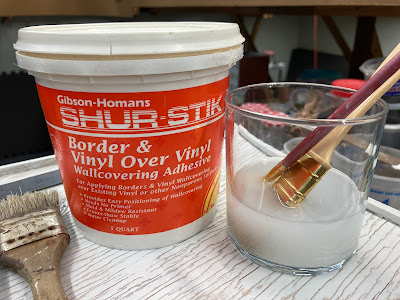
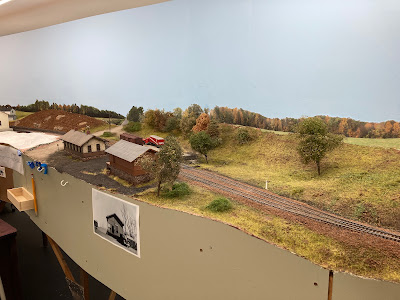
To attach the photo backdrop to the masonite, I first make sure I can slide it down between the scenery and the masonite - even cutting a slot in the scenery if necessary. Alternatively, you could trim the bottom of the photo to fit, but that doesn't allow you to move the print up/down for final positioning. Once the backdrop is in final position, I tape it to hold it in place, then - starting at one end - I peel it back from the top and brush on some wallpaper adhesive using a 1" brush. I smooth it out, being careful not to squeeze glue out the top of the print (if you do, just use a damp cloth to wipe it off). Once I've gone down the whole length of the photo, I go back and touch up any small areas at the top of the print with another application of adhesive, this time using a 1/4" brush.
(more details here)


And here it is in place. . .

I still have road blending to do, as well as scenery. but it sure looks better than the plain blue masonite. And it's done!

Wethersfield Backdrop
Ah yes - the notorious "Wethersfield backdrop" - the bane of the Valley Line's north end for years. I've mentioned before what a mental roadblock it's been since I know how the area is "supposed" to look during my era, and there's no way I can figure out how to replicate that. Well, not and have any time to do anything else in the hobby . . .

So I've finally decided to avoid making the perfect the enemy of the good and take an "impressionist" approach. No, not that - but just doing a backdrop that gives the impression of what I want to convey: Fairly flat former farmland, with a bit of autumn trees. Bonus if the terrain tilts up a bit toward the west (away from you & the aisle). Bigger bonus if the roads-into-the-backdrop look at least plausible for the area - and era. So I decided to experiment in earnest. . .

I went through a comprehensive process of trying different photos/panoramas, printing them out, and mocking them up. It's an iterative process of importing photos into PSE, stitching them together, using various tools to resize & blend them together, then doing a test print & fit on the layout.

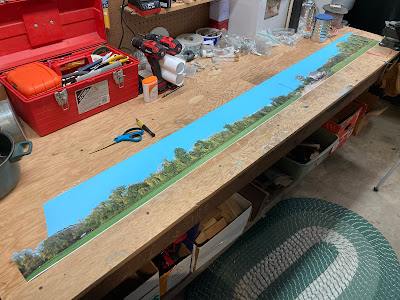
Once you have something that works, you print it as a banner & start the painstaking process of trimming the sky. This photo is 7.25 feet long and took me over an hour and a half to trim.

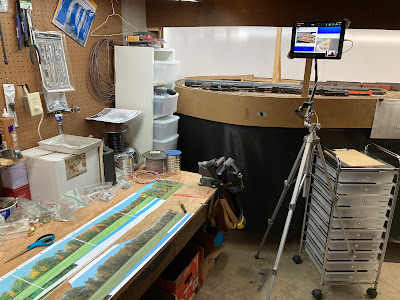
This is the longest print I've trimmed so far. Thankfully, on this particular day, I had the AML crew to keep me company (via Zoom on the iPad/tripod)

One thing that looked great in the photos - but I'm not sure it's going to work on the backdrop - is this telephone pole. In hindsight, I think I would photoshop it out. But I'll live with it and see . . .

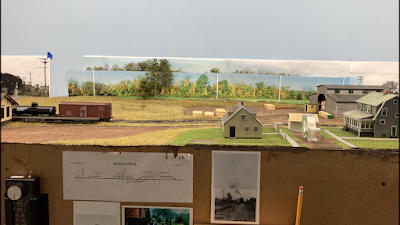
The last thing I did today was tape up the Wethersfield backdrop. It's quite a milestone to have gotten this far with it - finally. But it's not giving up without a fight . . . there's still a bit of obsessing left to do . . .

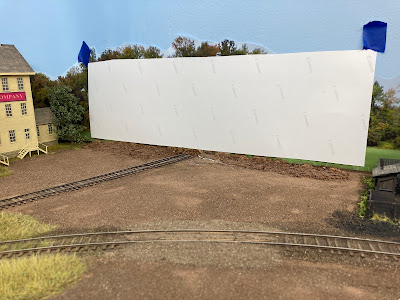
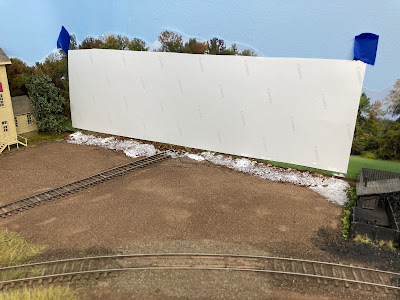
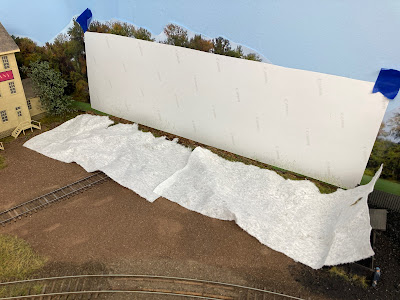
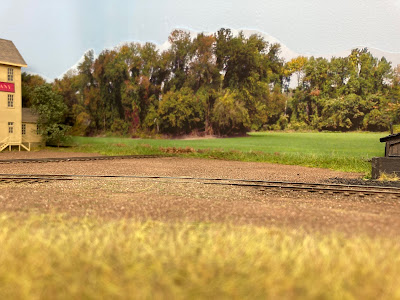
I can't figure out exactly where to place the backdrop vertically. To compare, I've taken 4 photos from the viewpoint of an HO scale figure. What do you think? (as always, you can click on the image to enlarge it)


While I can make persuasive arguments for/against any one of these positions (heh - welcome to the inner world of the obsessive. And I'm a lawyer on top of that. Pity me), I haven't decided which looks best and/or which one would provide the best basis for further blending/disguising with bushes, trees, and colors. For reference, the truck in the photo is the tiniest bit undersized from HO (an HO scale truck is in front of it).

I'm not too worried about the difference in color between the foreground & background roads - I'm confident I can deal with that. Also, with regard to the shoulders: if needed, I can either disguise/blend them with shrubbery or modify the existing scenery to "pull them forward" into the 3D scene.

I guess the main thing is to figure out what looks best from this perspective (considering future model photography) - while freely acknowledging that that might not look the best to viewers standing in the aisle (and over 100 scale feet above the scene).

Heh - unlike Rocky Hill, it's clear I can't call the Wethersfield backdrop done yet, but I sure have made some significant progress on it! And once I figure out final positioning, it's just a matter of gluing it to the masonite . . . and creating the REST of the backdrop south (left) to Goff Brook.

Thankfully, I'm still in "backdrop mode" - and I don't want to forget (again) all the Photoshop tools I've learned - so I'll keep at it until it's DONE!

<><><><><><><><><><><><><><><>
If you've made it this far, thanks for hanging in there! Like I said, I'm going to try and do at least weekly updates so I (and you) don't have to suffer through marathon posts. But I like to keep track of my progress - if nothing else, doing so reminds me not only that I have actually accomplished something on the layout but also spurs me on to accomplish even more.

Here's hoping you're able to take advantage of these winter weeks and make some progress on your projects as well. And if you do, be sure to let us know in the comments below!