

Wednesday, February 24, 2021
Wednesday, February 10, 2021


Thursday, February 4, 2021
A Few Words about Wordless Wednesday #348 - Colorizers
Long time readers of this blog will no doubt recall my persistent road block (pun not intended) when it comes to running foreground roads straight into the backdrop. I have no less than 3 such roads in my Wethersfield scene - and, thus, I have avoided doing the backdrop in Wethersfield for years. Literally.
So, instead, I've been focusing my efforts on completing the Dividend section of the layout. But I inevitably eventually had to confront the Backdrop Problem. Fortunately, no need for roads going straight into the backdrop here. Unfortunately, I needed to try and relearn PhotoShop Elements in order to even start a photo backdrop. Thankfully Bill was willing to help walk me through some of the basic tools and along the way I happened to mention the old Hartford postcard another friend had colorized for me to create a "Hartford" backdrop at the north end of the Wethersfield scene. Then he casually mentioned that he'd been playing with some online colorizers.
Whaaaaat?? There's such a thing? I had no idea.
Before he had a chance to send me a link to the one he was using, I worked the Google on the Internet Machine and came up with a few to try out. I'll go through them here to give you a sense of what's possible - and I suspect you're going to be just as excited as I am to discover such wonderful technology.
The four I tried out were:
Here's the image I started with:

As you can see, this would be a perfect image for a road-going-into-the-backdrop on a layout set in 1948, like mine. In fact, MANY photos that would provide great backdrop fodder for older-era layouts would be wonderful - but for the fact that almost all of them are in black & white.
That's where colorization comes in - and you don't have to do it yourself manually in Photoshop.
Here's the same image uploaded and processed by Algorithmia:


As you can see, each site processes the image a bit differently, with different colors, saturation, etc. And, while they're all free (at least to try), they accept different image sizes. For those reasons, IMO, one site came out on top. For direct comparison, here's the original photo again:

And here's the same image uploaded and processed by MyHeritage:

Now, lest you think these free (and fast! each image only took a few seconds to process) are perfect, remember YMMV (your mileage may vary). While the above image was my first attempt, I realized it was also a bit of beginner's luck. Here's the next image I tried:

 |
| Algorithmia |
 |
| DeepAI |
 |
| PlaybackFM |

But for backdrop use, it's still a lot more suitable than the original B&W image. And I should be able to take this image into PhotoShop Elements and play a bit with the lightness/darkness, etc.
Heh - and I'm back full circle to having to deal with PSE(!) But now that I can (relatively) easily convert late 1940s images to suitable backdrop photos, I have a much stronger incentive to master PSE and finally get that Wethersfield backdrop done!
For those of you that model the "black & white" era, don't despair for finding suitable images for your photo backdrops. Sure, you can do what I and others have done (and will likely continue to have to do) and take current-day photos of scenes that "look like" the scenes you need for your backdrops. But for in-town photos, or - as in my case - road photos, you can't beat finding shots that have lots of vintage autos and architecture already there for you. And now that we can colorize these image so easily, a whole new world of photo backdrop possibilities opens up for us.
If you've found a colorizer that you like - or if you have any additional tips or suggestions on how to create photos backdrops for pre-color eras - I hope you'll share them here!
Wednesday, February 3, 2021


Tuesday, February 2, 2021
Tuesday Tip - Adding a Foundation
Heh - it's Tuesday, so it must be time to talk about rocks again, or in this case rock walls. After so much success with coloring rock castings, I decided to try my hand at coloring a rock wall foundation. Why? Two reasons: 1) I'm curious to see whether my technique will work the same, and 2) I have have to mind the gap . . .
 |
| This little barn - my first "major" (LOL) craftsman structure build (after doing a few garages) - has been sitting here for months. On top of the grass. |
 |
| The resulting, unsightly, gap needs to be addressed, so the barn needs a foundation. |
 |
| To prep the site, I marked the barn's footprint . . . |
 |
| And then scraped away the grass - or at least as much as I could. |
 |
| I also created a template for the foundation by tracing the base of the barn onto some scrap paper, which I then cut out. |
 |
| To make the foundation I needed, I used some stone wall molds I had on-hand. |
 |
| I also used a couple of my favorite mixing pitchers - favorite since Anchor Hocking was the main sponsor of one of my favorite old-time radio shows ("Anchor Hocking - The Most Famous Name in Glass") |
 |
| I mixed some plaster, according to the instructions. I put the water in the larger pitcher since you have to add the plaster to the water. |
 |
| Add the plaster slowly and then let it sit a bit. I forgot to let it sit and proceeded right to stirring/mixing. But I lucked out - it worked fine. |
 |
| Pour the plaster into the mold slowly, filling all the corners but not overflowing. Once the mold is filled, tap on the table to encourage any bubbles to rise to the top and pop. Pro Tip: Don't do what I did and fill the molds to the very top - and slightly overflowing. That creates flash you'll just have to break off later - and the walls just have to be thick enough not to break. |
 |
| After breaking off the "flash" around the edges . . . |
 |
| . . . you just have to sand the edges smooth and straight. |
 |
| Obviously, this is a casting of a full, large wall. But we don't need much for a small foundation under the barn. So I just cut off two courses of stone. This is a slow process - and one that will probably dull your blade :^( |
 |
| And the plaster is brittle, so be careful not to force things - or else you may break the casting :^( |
 |
| Once I had enough run of material, it was time to cut the sections to fit. This is where the template comes in handy. I first cut one end at a 45 degree angle . . . |
 |
| . . . then use the template to mark the outer end of the other angle. |
 |
| I'd cut the first angle using a guide line I made using a protractor. Then I remembered (duh!) that I had this handy miter box. |
 |
| Unfortunately, I didn't heed my own advice, forced things a bit, and broke the piece. |
 |
| Fortunately, though, plain ol' white clue is the perfect adhesive for plaster - especially if the ends mate perfectly. |
 |
| I used my handy-dandy 1-2-3 blocks to keep things square. |
 |
| While white glue is perfect for joints that mate perfectly, I found that gap-filling ACC is great for joints that aren't so perfect. And no clamping required! |
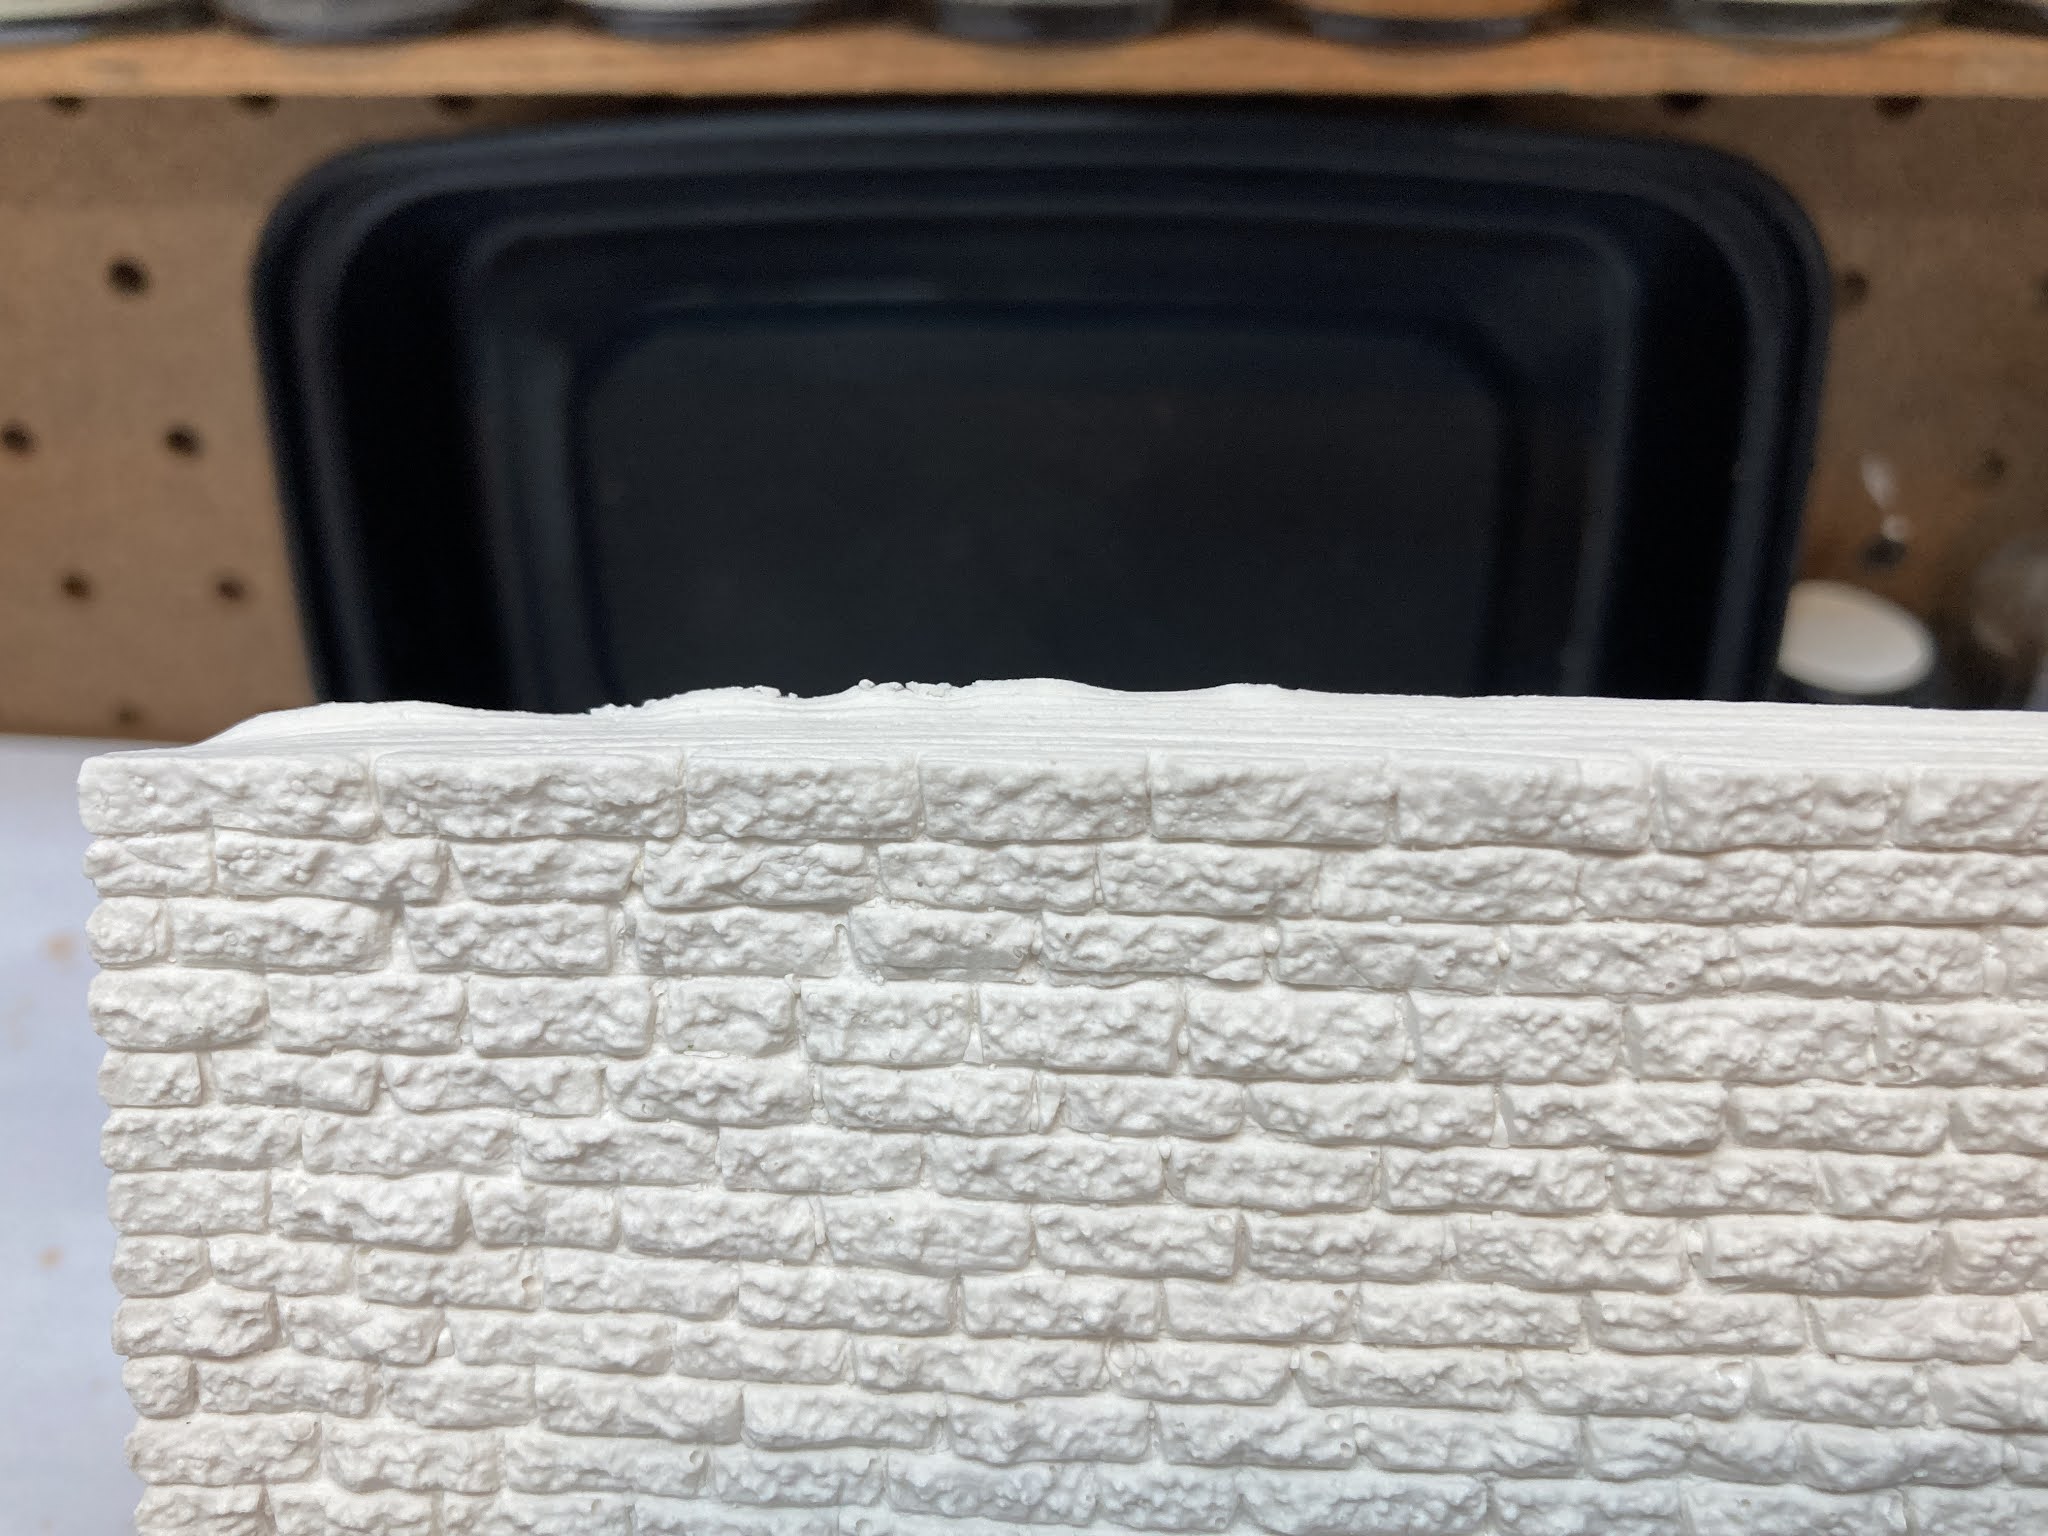
You may have noticed in the pics that I kept track of which ends joined together, as well as what side of each piece was the "top." I'd intended to assemble this upside down in order to keep the top edges all flat & flush with one another. But I somehow managed to forget.
So the next thing I have to do is sand or file the top to mill it down all nice and level. Otherwise, there'll be a gap between the barn and the foundation - which would kinda defeat the whole purpose of adding a foundation to begin with!
That's where things stand at the moment. Certainly not much left to do - just level then color. But I've been distracted by the backdrop in Dividend lately - and backdrops generally. . .
But more on that in the next post!
Monday, February 1, 2021
Manic Misc Modeling Monday
Have you ever had a modeling project that has languished on your workbench for some reason? You know the ones I'm talking about - projects that have stalled either from a lack of parts, a lack of skill, or just plain lack of motivation.
Well, I'm embarrassed to admit I had two such projects, especially considering how little it took to finish them up.
Literally all the house at Dividend needed was a chimney and a vent stack.
 |
| My excuse here is that these little 4-sided "chimney kits" are pretty finicky to assemble well. I did my best using a pair of 1-2-3 blocks to (try and) keep everything square. Then it was a (minor) pain to paint them and do the mortar lines. Any tips/suggestions you have on doing these little chimneys would be most appreciated. |
 |
| Then all I had to do was my little "vent stack" trick of cutting the point off a toothpick, "painting" it with a black sharpie, drilling a hole in the roof, and gluing it in. |
Like I said, this was an easy project to wrap up - just needed to take the time to do it. Since I'd weathered the walls before assembly, all I have left to do is weather the roofs, porch, and steps.
But that's all done down in the paint room - this project is now off my workbench . . .
The next thing I decided to finally tackle and get out of they way was the the structure formerly knows as Stanly Chemical. I'd last worked on this building way back in April 2019 (well, actually, February 2020 when I reversed it... but that came later). The original plan used Walthers modular parts to create an angled structure that would fit between a siding and the wall in East Berlin (click here for the build). But about a month after starting this project, I acquired a number of gorgeous scratchbuilt structures from Bill Maguire, including one that was a perfect fit for the StanChem location.
Suffice it to say, the structure I'd been working on for that space went on the FAR back burner.
Not wanting to trash it though, I figured - being one of the few brick structures on the layout - I could use it somewhere in Middletown. But the only location that made any sense was practically a mirror image of the space it had been built for - so I had to reverse it. Thankfully, since the structure wasn't finished, all I had to do was swap the end walls, end for end - and, also thankfully, I hadn't gotten around to cutting the roof to fit.
So that was the last big thing I had to do to get this project off my 'bench. . .
 |
| After marking the roof to follow the new "roofprint"/footprint, I scored and snapped the styrene. This technique usually works well - but apparently not on styrene that's this thick. . . |
 |
| I had better luck with the larger roof section, but it still didn't snap as cleanly as I would have liked. |
 |
| Both roof sections trimmed and ready for painting (I did a quick rattle-can spray of flat black along the white edges). |
 |
| Once the paint was dry, I just needed to butt-joint the roof pieces together. I added a splice to help reinforce the joint. |
 |
| To help the seam cure perfectly level/flat, and since the splice would have caused a "hump" if I just laid the roof on the bench (and since I couldn't lay the roof on the top side given the stacks), I used some additional strips of the same thickness as the splice to level everything up while the glue cured. |
 |
| Once the roof was done, I still had the roof details, loading docks, docks roofs, and steps to do. The little white pieces of styrene on the bottom of the docks raises them to accommodate for the thickness of the structure base. |

And here's the finished building. I used my now-favorite glue (Loctite Gel Control super glue) to add the rest of the details. It works well even if the gluing surfaces are painted (as was the case with the joint between the brick walls and dock roof supports), and it works fast so no clamping is needed - just hold in place for half-a-minute.
It's SO nice to have these projects off the list - literally and mentally. I've since discovered that the ideal location for the factory building is going to require some, um, excavation in Middletown. But that's ok. There's certainly no hurry. I still have Dividend to finish - and thankfully, getting the house off my bench means I'm one step closer to that goal as well.
Thanks for staying tuned and following along!
Subscribe to:
Posts (Atom)