


 |
| Valley Local Conductor Bernie Edison approaching the callbox at Middletown Yard at the end of Miller Street to call the Hartford Dispatcher for clearance and orders to return northbound from Middletown to East Hartford Yard to tie up for the day. |
That’s the bad news - and the reason why you may see me mention Boston and DCFI from time to time.
Which is a nice segue to the good news. I’ve been under close monitoring for this since July 18 of last year. They knew it wasn’t a matter of “if” but “when.” So they caught this at the earliest possible moment, I’m at the world’s best hospital for multiple myeloma, asymptomatic, already in a clinical trial, and the prognosis is good. And other than not sleeping much for three days of every week so far, I’ve had no bad side effects. We’ll reassess after completing the 8th cycle late May/early June next year. I actually consider myself very very blessed under the circumstances.
AND I've been making a lot of lemonade out of the lemons. During each treatment, I Google "historic diners between Boston and Providence" for lunch afterwards and have already discovered a couple...


 |
| With Ray Arnott at AA Hobbies in Warwick, RI |
 |
| B.F. Clyde's Cider Mill, Old Mystic, CT |
But that’s enough of that and I won’t mention it again since you’re here for the Valley Local - so let’s get to it! Here's how the scene is shaping up - compare to the photo at the top of the post . . .


A big part of my motivation for recreating the Valley Line is to keep alive the memory of the men & women who were responsible for getting the stuff of life delivered to you, each and every day. From coal for winter heat to a bicycle to ride in the summer, for over 100 years in this country the stuff of life was delivered almost exclusively by rail. And sometimes, if you're lucky, your historical research will unearth a ghost or two.
Given that it’s Halloween-time, here's a question for you:
Do you believe in ghosts?
The answer for me depends on what kind of ghosts you mean. I don't believe in the creepy un-dead or goulish wanderings of departed souls. But I do believe in the ghosts of the past - the hauntings of a place by the memories of the people who were there. Who were they? What were their dreams and plans? Were they anything like us? While dead people don't actually haunt us, the spirits and memories of the past can - and often do. Especially if you're paying close attention.
During this time of year especially, if you keep your eyes open and know where to look, you can see some of these ghosts of the past materializing. You have only to slow down, pay attention, and keep your eyes peeled.

This is a bridge on the old line between Middletown and Berlin, CT. The railroad was abandoned and torn up years ago, and the trees have long since reclaimed much of the right-of-way. But this bridge remains - a monument to the memory not only of the railroad, but to the spirit of the men who built it.
If during your travels you stop at a spot like this and imagine, even for a few minutes, how those men lived, what their hopes were and whether they ever achieved them, you might see some ghosts.
And if you're especially quiet, you may even hear in the sound of the leaves floating by on the breeze a whisper of thanks from those men for not letting them be forgotten.

Believe it or not, this month marks the 15th(?!) year since I've been working on the Valley Line. I wish I had more progress to show for the time spent, but a short trip back shows that I've still come a long way. So, in the spirit of Throwback Thursday, here are a few fun photos from the early(est) days . . .
 |
| October 29, 2011 With Randy's help, I'd developed a rough trackplan, but most of the final planning was done with full size mockups on the floor like this. This will be Middletown, with a "typical" Valley Local for scale. |
 |
| Looking back toward the peninsula, with Wethersfield roughed in on the far side. |
 |
| November 16, 2011 To be fair, October-December 2011 saw the final planning & mocking up. This is Essex, being roughed-in in the other room. I wouldn't start laying the first track until January, 2012 - and I wouldn't get to Essex until two years later. |
 |
| Another view of the Wethersfield/Rocky Hill peninsula, with Rocky Hill being mocked-up. |
 |
| November 25 First benchwork going up - so maybe I'm a bit early for a 15 yr anniversary? :^) |
 |
| November 26 View toward Middletown, with Rosie supervising. |
 |
| November 28 Looking toward Rocky Hill & the peninsula. |
 | ||
| December 17, 2011 Overall view of the main (Middletown/Cromwell/Rocky Hill/Wethersfield) room.
|
 |
| Using all this info, I drew outlines around the track and proposed building footprints to determine the subroadbed/plywood cuts. This is Dividend, looking through where the backdrop will eventually be, toward the Goff Brook/Wethersfield end/side of the peninsula. |
 |
| Next, it was "just" a matter of cutting up the paper and arranging the cutouts on plywood in cookie-cutter fashion . . . |
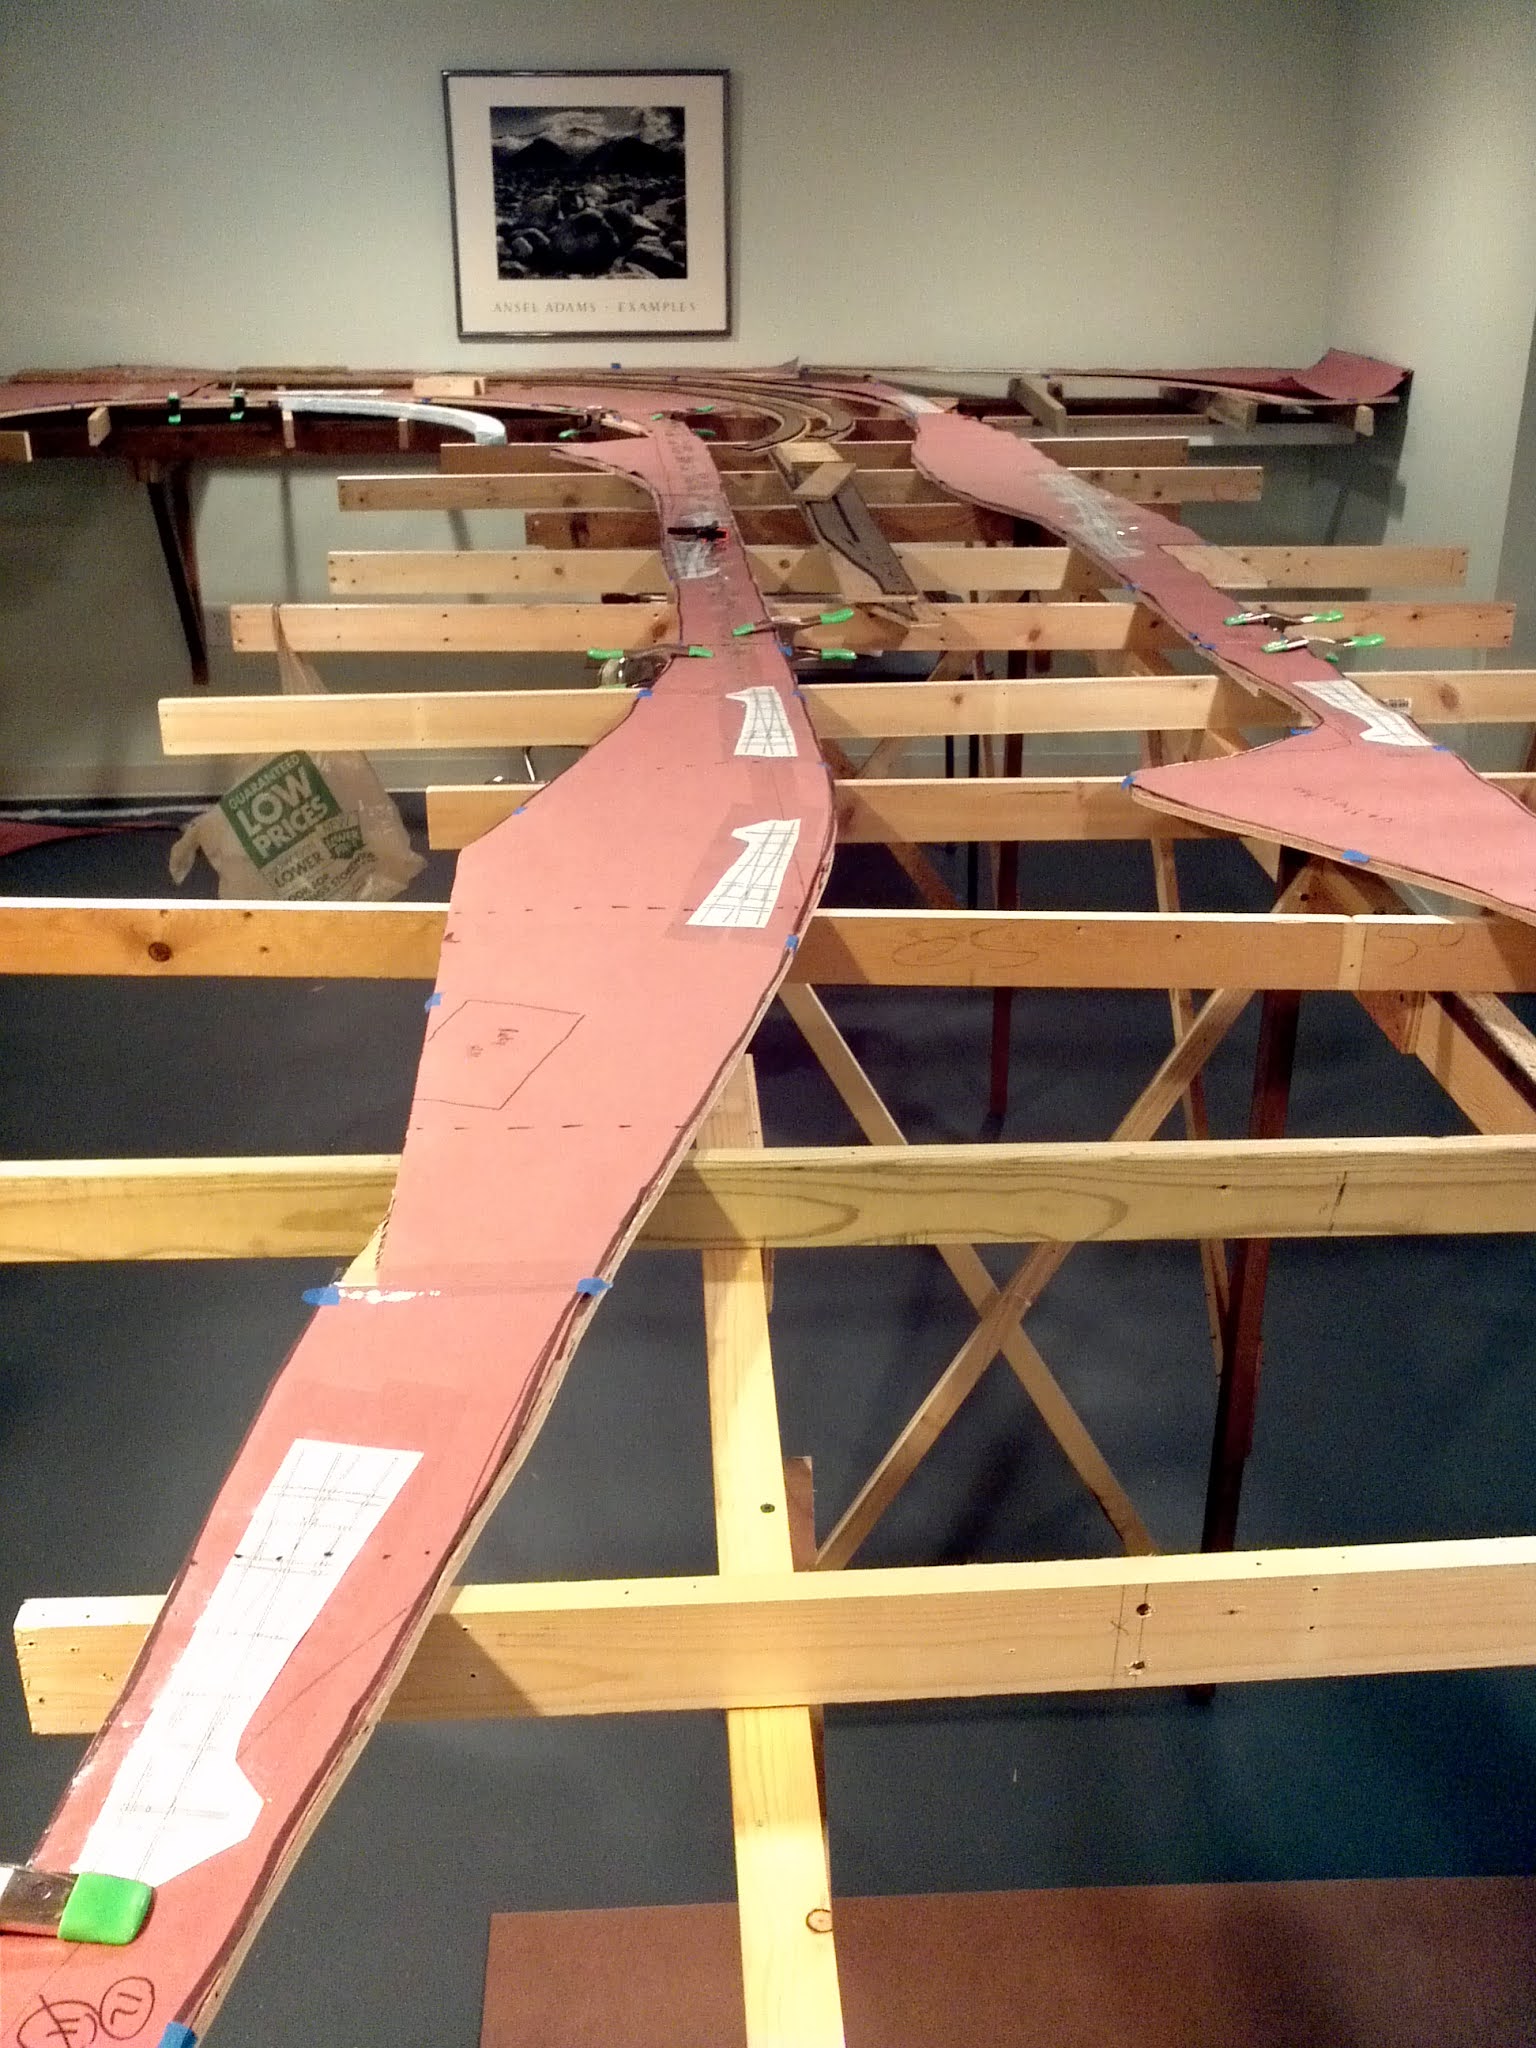 |
| . . . then lay it on the benchwork. This is looking toward the "neck" of the peninsula - Rocky Hill on the left and Wethersfield on the right. |
 |
| New Year's Eve - December 31, 2011 This was an ill-fated experiment in raising the layout to eye level. As you can see, given the benchwork/girder height, it would have required really long risers! I'm glad I rethought this idea. |
 |
| January 3, 2012 Speaking of risers, with the coming of the new year - and all the subroadbed cut for the layout in the "main" room - it was time to set up a "riser construction workstation." For that, I needed a chop saw, wood glue, clamps, and LOTS of 1x2 & 1x1 material. |
 |
| Risers galore! |
Towards the end of the last post, you saw that the Airline bridge had been "terrain-ed in" (to coin a phrase), but that was getting a little ahead of ourselves... Follow along in the captions for the process I used for the terrain around Route 9 (and the Airline bridge) - as you'll see, I use a variety of techniques depending on what's needed.
 |
| The foam board base had been here for YEARS, acting mostly as a shelf for tools and such, but it provided the foundation for Route 9 itself - which was made up from foam core (foam core posterboard with the paper peeled off makes for great concrete road texture). |
 |
| We can't avoid at least a little compromise when it comes to scaling things down from the prototype - and, unfortunately, and the distance from the Airline bridge to the Washington Street intersection had to be severely compressed, resulting in an unprototypical hill/grade. But it at least conveys the sense of the area I'm modeling - it's impressionistic - and would you have noticed if I hadn't pointed it out? |
 |
| The area "south" of Washington Street to Sumner Creek is totally open here and will get the cardboard lattice treatment. |
 |
| This is a good view of the two major methods I use to cover & fill in terrain - it's typically some combo of foam board/scraps and cardboard lattice. |


 |
| The cardboard lattice technique is pretty easy and straightforward - just hot glue (or even staple) vertical strips... |
 |
| ... and "basketweave" horizontal strips. It's incredibly versatile and can be squished and manipulated to get the rough contour you're looking for. |
 |
| It's an especially effective and easy technique for quickly covering large, open areas. How would you go about covering this with foam board? |
 |
| It's super easy and quick with the cardboard lattice. |
 |
| Unlike foam though, it does require the extra step of adding plaster-impregnated gauze (or plaster-soaked paper towels, which are way too messy IMO). |
 |
| Back to the Airline bridge area, I used more cardboard - and my foam core wing wall templates - to rough in the terrain around the abutment. There's no "right" way to do this - just keep gluing strips in as supports for the plaster cloth & Sculptamold/ground goop layers (so be sure to allow for those). |
 |
| Plaster cloth layer applied |
 |
| Ground goop layer applied |

As you can see, the "terrain-ing" (aka "terraforming") stage goes very quickly and provides a HUGE bang for the time, vastly improving the overall look. The next step will be to start adding color and texture in the form of ground foams, grasses, bushes, etc.
But that will come a bit later. One of the perks of having a large-ish layout is that there's always something different you can do, depending on your mood. Not ready to start adding ground cover yet? How about we do something with Washington Street?
Next time we'll try to make some Walther's city streets a bit more realistic . . .
Continuing in Middletown, as promised last time, here's how I did the Airline Bridge over Route 9.

 |
| I started with a standard Micro-Engineering through plate girder bridge kit, built according to the instructions. |
 |
| But I discovered quickly that I was going to have to try and "skew" the bridge in order to follow the Airline's track alignment over Route 9. Thankfully, the bridge was long enough that I could afford to trim back a bit. Here it is mocked in place to start figuring the proper angles. |
 |
| I eyeballed it in the proper alignment with the track centerline and then marked the cutting lines with a ruler. |
 |
| Then used my bandsaw to cut it to the proper angle. |

 |
| The bridge rested on the west end abutment fine - next I needed to figure out the east abutment. |
 |
| In order for it to actually rest on the layout, the east abutment had to come in a bit closer - which required another trip to the bandsaw to cut the bridge down further. |
 |
| Once it fit nicely between the abutments, I leveled it out using pieces of styrene as shims/bridge shoes. |
 |
| And, of course, the bridge track required trimming too. |
 |
| Once the track was installed, I weathered the bridge using Rustoleum Camo Brown paint & Bragdon powders. |
 |
| Next up - doing the somewhat distinctive (or at least not at all standard or symmetrical) wing walls at the west abutment. I took the angles directly off of the prototype photo as you see above. |
 |
| I made templates for the wing walls out of scrap foam core, which is much cheaper and easier to work with than styrene. Trim & fit to your heart's desire before committing to styrene. |
 |
| And here are the foam core templates mocked up in place to compare to the prototype photo. |
 |
| Once I was happy with how they looked, I used them as cutting templates to cut and trim the .060" sheet styrene. I used strip styrene to make the "cap"(?) on top of the walls. By the way, thanks to Bruce Wilson for convincing me to get this Ultimation sander - it's a super helpful tool, especially for this sort of work! |
 |
| I painted the walls a base of Sky Grey (Tamiya XF-19)... |
 |
| ... and got some AK "Concrete" to try out for some concrete texture. Plain styrene certainly needs texture in order to look like concrete and this AK product - brushed on according to the instructions - does a great job. |
 |
| Initially, it may come out looking a bit too coarse or larger than scale (left), but you can keep working it and even sand it down a bit if you like (right). |
 |
| But there's no denying that the texture makes all the difference... as you'll see below... |


Hopefully you'll agree that these "finish" photos compare pretty favorably to the prototype pics earlier in this post. I'm pretty happy with how they came out.
You may have noticed some timeline inconsistency in these photos though - we haven't yet covered (figuratively or literally) the terrain in the vicinity of Route 9 (despite what you see above :^) so that'll be next!


