Monday, July 17, 2023

Painting Sculptamold, Filling Trenches, Coloring Rocks

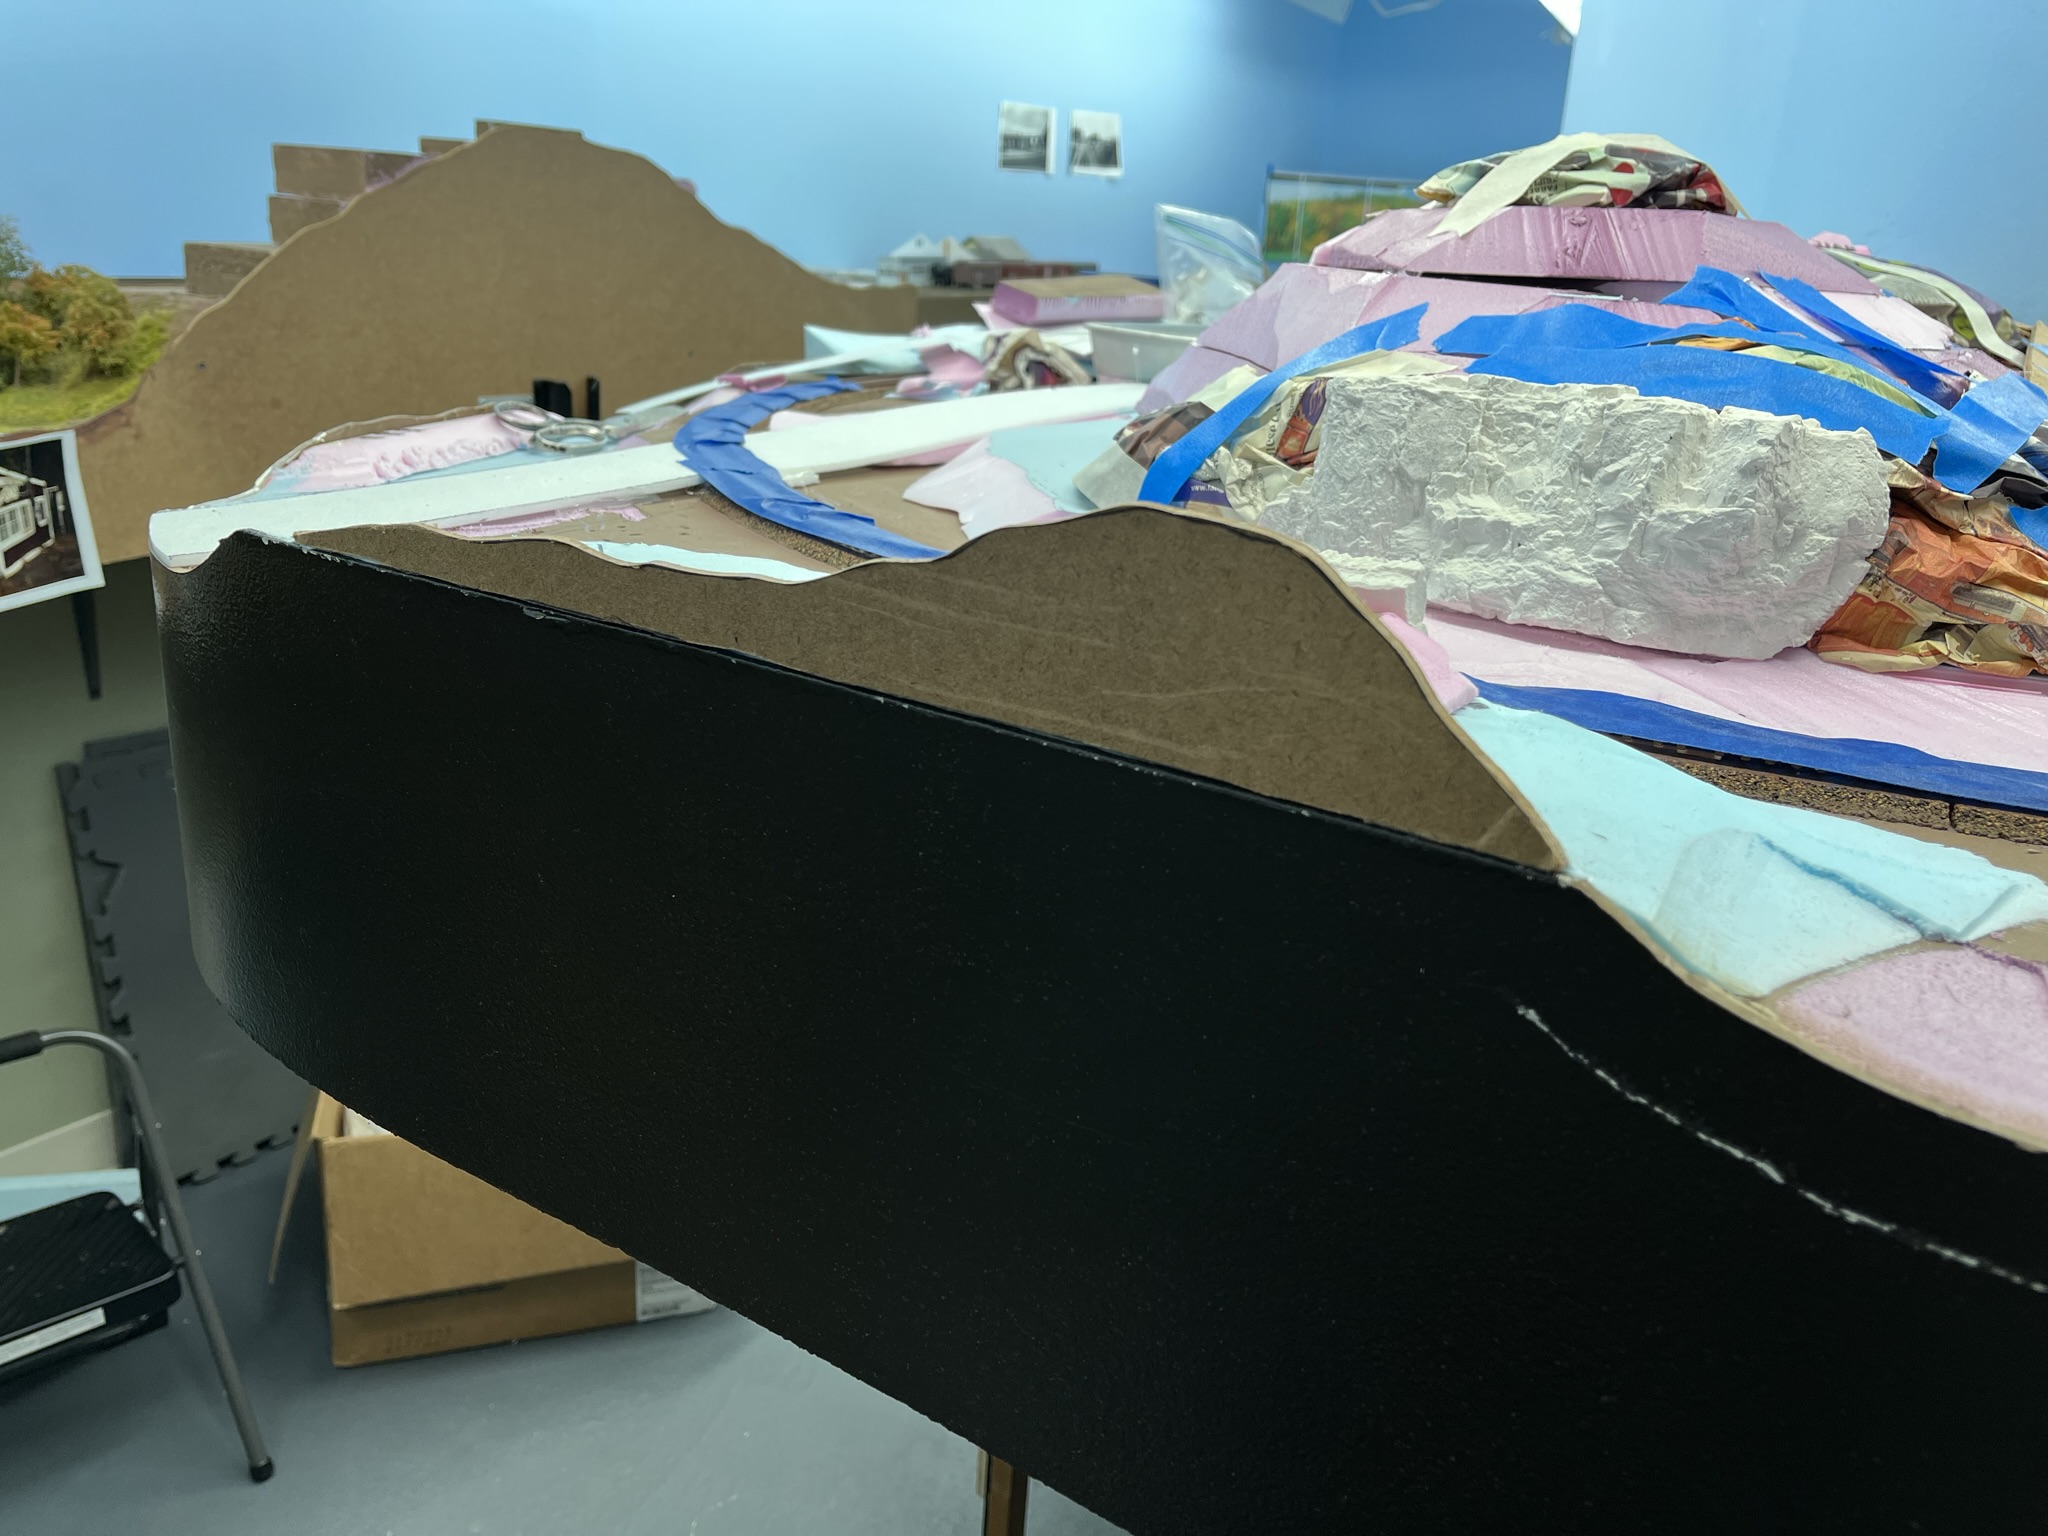
As I mentioned in my last post, I've been striking a different balance between pre-work workouts and pre-work scenery work. For better or for worse, the scenery has been winning more often than the exercise.

So while my waistline may not be showing any positive effects of my current pre-work routine, the layout is certainly showing some signs of progress. Emulating my friend Tom Jacobs, "An Hour a Day" keeps the layout moving forward. Here's the latest since last time...

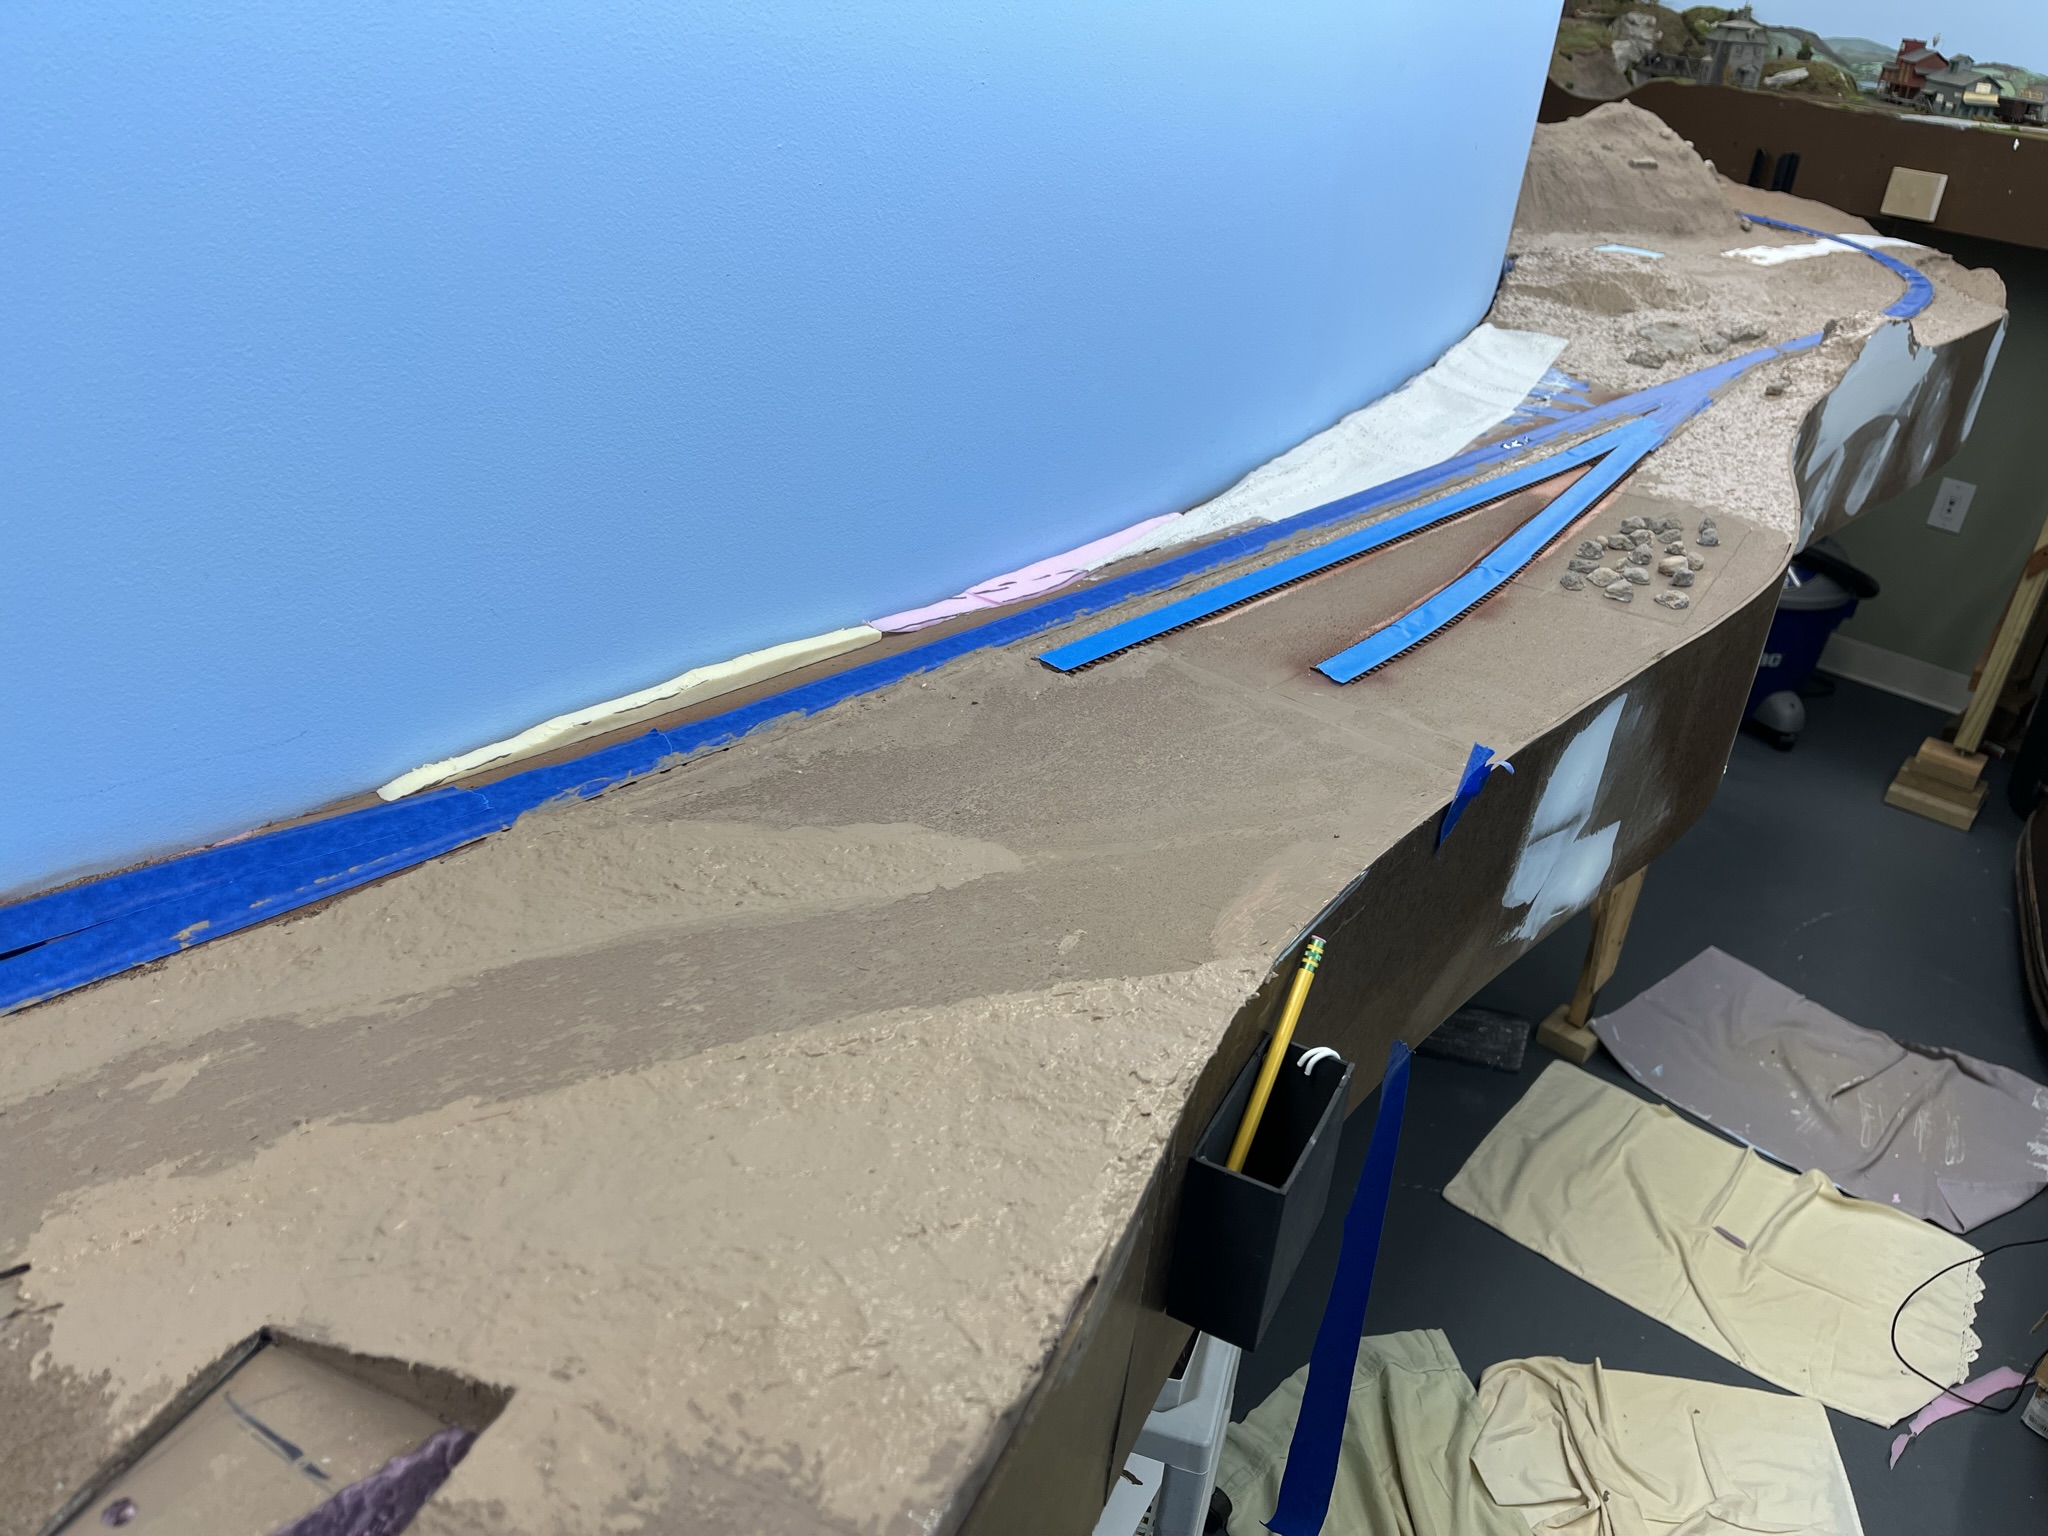
I added some skimcoats of plain ol' Sculptamold over top of the "popcorn"-effect ground goop fail to even things out a bit.

Once dry, I painted it all with my "dirt" colored paint (custom color matched to dirt I found/sifted from the area - turns out it's Behr "Davenport Tan" Go figure...)

One of the benefits of having "too much" layout (and, depending on your perspective, the downside of same), is that there's always something to do. So, while waiting for all the Sculptamold and paint to dry from Old Deep River Road north to East Haddam, I decided to turn my attention to Old Saybrook.

Now, the Saybrook Scene has been about 80% complete for years, with only the Route 1 overpass to be done, as well as finishing the backdrop. The overpass is being constructed by friend DickO, and I'm not quite ready to do the backdrop yet. So I figured I'd FINALLY (after 5 years?!) choose a ballast and get the ballasting done in the area.

But first, I needed to do some more minor terraforming - by which I mean . . .

Filling Trenches Between Tracks


When I first laid track through this area, I just laid it on cork roadbed placed side-by-side. But that results in a trench between tracks and - as you can see in the photo above - there are no such trenches on the prototype.


So I got the "bright" idea of filling in the trenches with a pouring of plaster - figuring it'd fill in nicely, find its own level, and level everything out.


Well, the "bright" idea turned out not to be so bright. Not only was the plaster-filled pitcher hard to maneuver around buildings and such, making it difficult to pour *just* in the trenches without pouring on the track too (I should have at least masked the track!), but in many places the plaster cured "proud" of the trench - where I had trenches before, now I had a BERM of all things!! So, as you can see above, I'm using a chisel to bring it back down . . . ugh.

Now, what I should have done, was either:

1) filled in the trench with play sand, leveled out and glued like ballast (as friends Seth and Bill suggested over at the Valley Local FB group), or
2) not worried about it and just filled the trenches with ballast during the regular ballasting (as friend Randy suggested, also over at the FB group).

This has definitely become a sad example of being penny wise (trying to save ballast) and pound foolish (having to spend so much time trying to salvage it).  Ah well, lesson learned - and a lesson worth sharing if it saves even one of you from making the same mistake!

Rock Casting & Coloring

If you were paying attention last week, you'll likely find the pic below familiar...


That's a LOT of rock castings! Thanks to Pete and Bob for loaning additional molds so I could cast a variety of different rocks which, as New England's most famous "crop," I need a LOT of . . .

I also wanted to have enough castings on-hand to try some different coloring techniques . . .


If you click on the image above, you can see the results. I think they came out pretty good but probably need at least a bit of drybrushing before placing them on the layout. And then, once on the layout, they'll need some vegetation (lichens, etc) added so really "plant" them in.

While I experimented with different coloring techniques, I ended up settling on a variation of the technique that worked so well for me last time. The results aren't as predictable or as repeatable as I'd like, but I suppose the inevitable variation is closer to nature than my left-brained preference would dictate. You can click here for the 3-step method I've used before - the only change these days being that I tend to "leopard spot" the color more than just brush it on as I describe in that post.

And to see how I did it recently (literally, just this past weekend), I created a quick (15 minute), impromptu (one take and done), video which you can click on below . . .


Let me know if you use this technique and/or if you have a technique that's worked well for you.

In the meantime, I'm going to get back to chiseling plaster berms in Saybrook and hopefully making more layout progress this week . . . or maybe I'll just go for a bike ride instead :^)


Thursday, July 13, 2023

Throwback Thursday: Wood Ops Session & Jason Fontaine's Layout

Hopefully you've noticed the progress on the layout lately . . . As I mentioned in my last post, I've been exchanging before-work workouts for before-work layout work and I've been making steady progress. But it's time to swing the mental health pendulum back a bit since 1) while mental fitness is important, so is physical fitness - and I haven't been on the bike or treadmill in over a week; and 2) (and, I'll confess, more due to this>) I really should wait until all the Sculptamold, plaster, and ground goop fully cures before proceeding.  So while I wait for that, I'll get back in the saddle at the sunrise. . .

But hearing about my workout schedule is likely the LAST reason you'd be here . . . so let me turn back the clock a few weeks for this edition of Throwback Thursday and tell you about a day in late June when I got to operate on a cool switching layout and got to visit an amazing basement-filling empire that's soon to be retired . . .

I first met Alexander Wood at the NER Convention back in '21, and he was instrumental in helping me sort out some shorts and even got to operate on the Valley Line for the first time that October. So we were long overdue to get together for an ops session on his layout. He needed to wait until getting settled into his new place, but you can see in the pic above that he's well on his way with an engaging switching layout. No structures or scenery yet, but he's been focusing on getting his ProtoThrottle dialed in and it's a testament to his configuration, as well as his track arrangement, that even "just" switching cars became very immersive. Thanks for the invite Alex - very much looking forward to seeing your layout evolve even further!

Moving from a layout-just-beginning to the other end of a layout's life to a layout-about-to-be retired, my buddy Pete and I headed up to Massachusetts to visit Jason Fontaine and his beautiful Southern New England Rwy. layout before he started dismantling it due to an upcoming move down south. . .


The SNE Rwy. is based on an actual railroad that was proposed to be built by the Grand Trunk from Palmer, MA to Providence, RI. It started out as the last major railroad building project in the region, but its president went down with the Titanic and the project stalled and eventually died.


But in Jason's world, and with a little help from alternative history, the SNE was built and thrived, eventually making it into the 1950s era he models.


And what models they are! As you can see from the pics, everything is superdetailed and fully built-out. They say a layout is never finished, but this one has to be pretty close!


And it runs as well as it looks. While I'm so grateful I got to see this layout (on the strong recommendation of none other than Marty McGuirk!) before it followed its prototype into history, I'm sorry I never got to operate on it. I had Jason describe a train going from one end to the other and was really impressed with the way he had it all designed.


He'll be the first to admit to getting a lot of help along the way and his good friend, the sadly recently departed Dick Elwell, was a big part of that and a great inspiration. In fact, anyone familiar with Dick's Hoosac Valley layout will recognize the heavy Elwell influence in the SNE Rwy.


But enough talk - since "a picture is worth a thousand words" I'll let the photos tell the rest of the story (with additional info in the captions) . . .

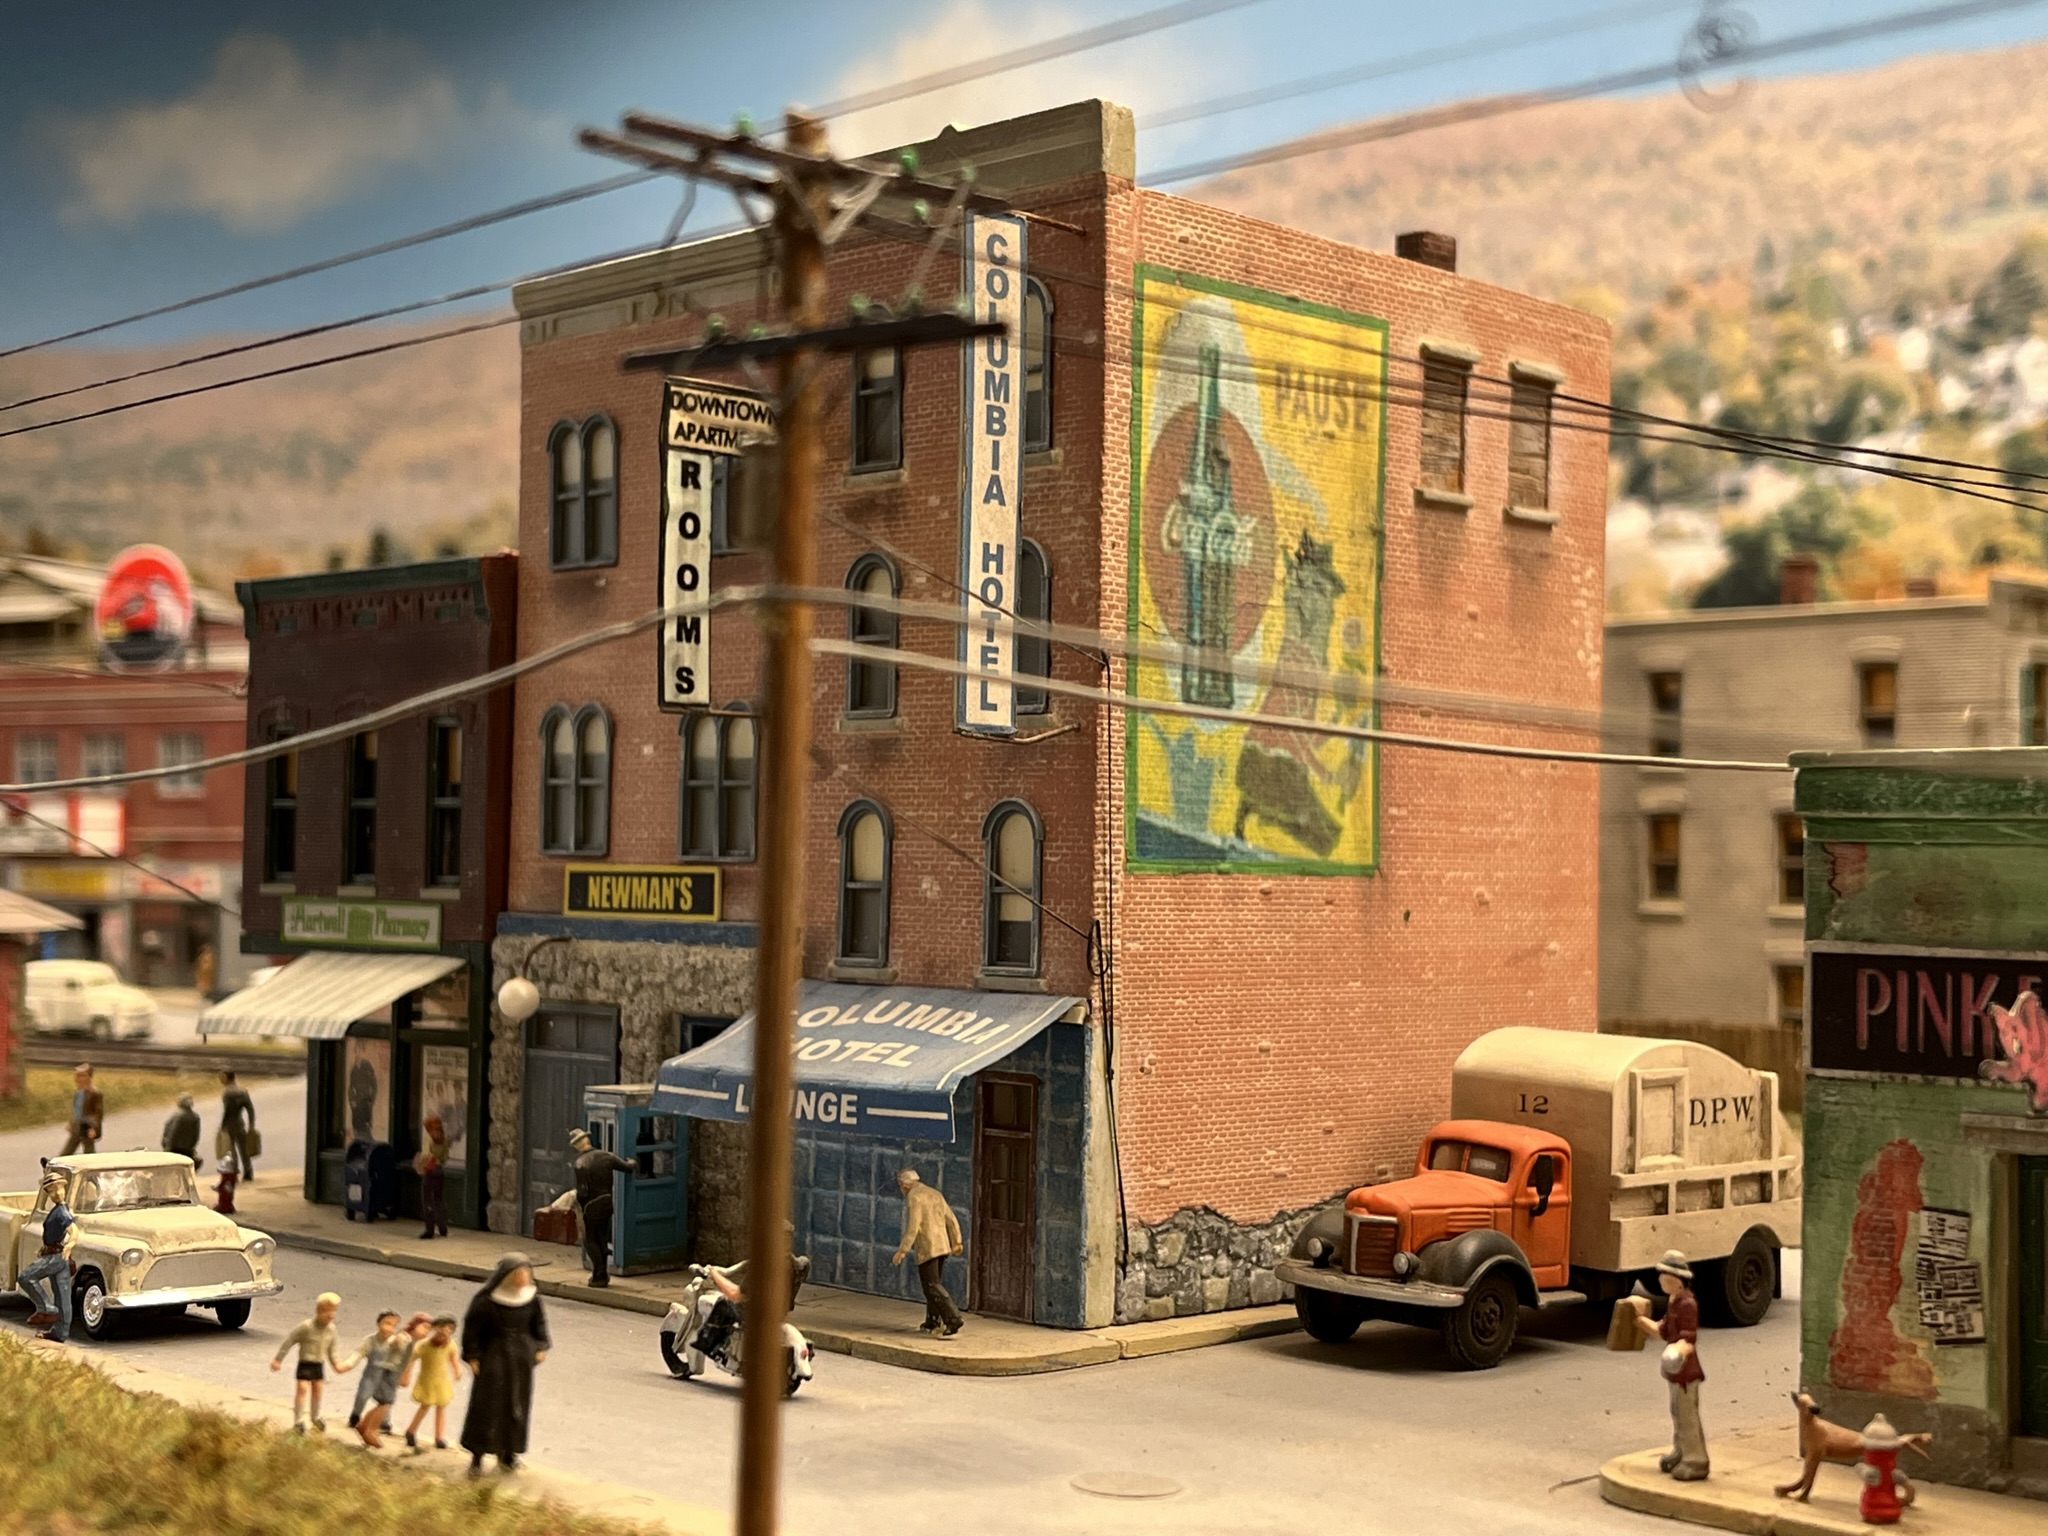
Speaking of Elwell influence, folks that saw the Hoosac Valley will find this scene especially familiar.

While the rugged mountain scenery around the helix is more "northern" rather than "southern" New England, there's no mistaking the season . . .

Seldom attempted, and never - to my knowledge - actually accomplished . . . a full HO scale race track, complete with spectators!


Fully strung power lines are an Elwell - and now apparently also a Fontaine - trademark.

I found the elevation changes all around the layout particularly compelling - no flat-top tables here...


This diner has a full interior and lighting so you can see it.


A huge thanks and shoutout to Jason for being so generous with his time and allowing Pete and I to visit his gorgeous layout on relatively short notice. Jason was a welcoming host and is a great example of the wonderful folks we meet in this hobby. While we'd just met a few hours earlier, by the time we left and I got this selfie, I felt like we'd already become great friends. I hope, despite his up-coming move, that we'll be able to stay in touch - and I'm really looking forward to hearing what he has planned for his next model railroad!

As you might imagine, I took a TON more photos and only shared a representative number here. But if a picture... well, you get the idea.... then what about a video? That'd be worth "millions" of words, I'd wager. So hereya go - and enjoy!


Sunday, July 9, 2023

Scenery Base Progresses Northward, Despite Ground Goop Gotchas...And Mind the Mental!

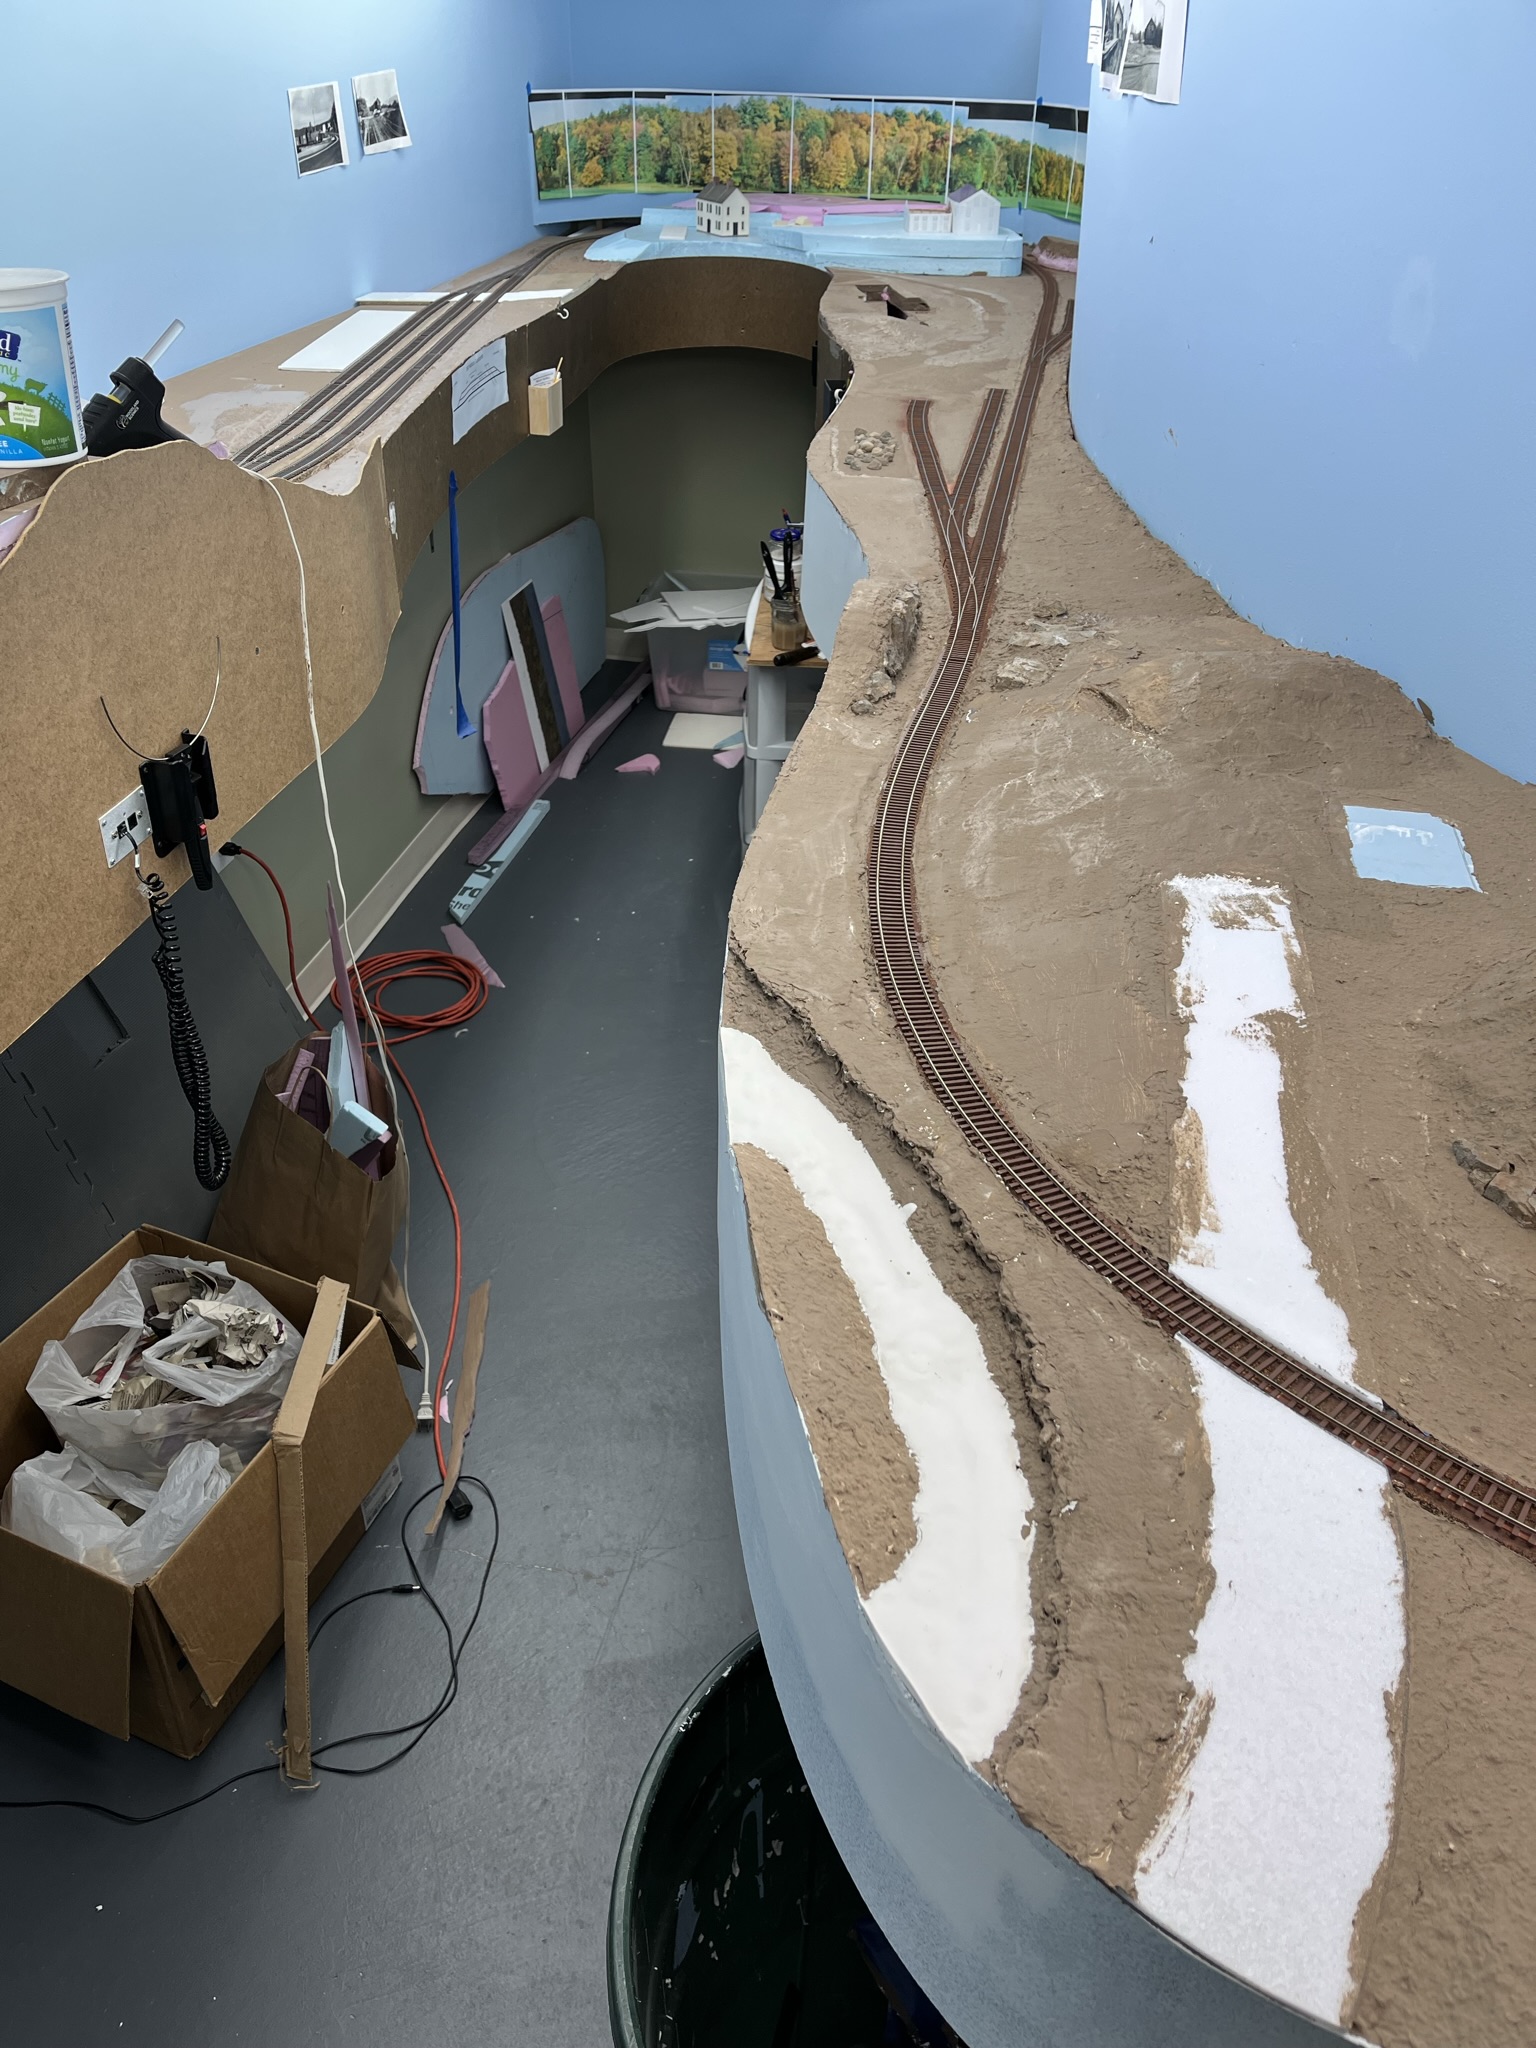
I'm happy to report that the "flow" of scenery work I discussed in my last post is continuing northward from the Old Deep River Road area up to Deep River itself. Unfortunately though, while I'm in a scenery flow, my ground goop recipe seems to have ground to a halt . . .

Ground Goop Gotcha


As you can see in the pics above, the latest batches have come out VERY lumpy/bumpy. I'm using the same formula that's worked fine in the past (2 parts Sculptamold, 1 part brown latex paint, 1/2 part white glue, 1/2 part water - adding more if 1/2 part doesn't seem to be enough), but for some reason, while it looks smooth enough when I trowel it on, once it dries all the bits of paper stick out like a sore thumb.

I mixed up another batch this morning, adding more water to make the goop easier to smooth out, but so far it seems to be doing the same thing.

I'm beginning to wonder, as some folks pointed out on the Valley Local Facebook Group, if I'm using too much paint and the paint is shrinking as it dries - leaving lots of undissolved bits that are even more prominent since everything around them has shrunk.

So next time I need some "ground goop", I'm just going to mix up some Sculptamold according to the instructions, just adding water to it - no paint & no glue. I'll see if that ends up drying smoother and, if it does, I'll just get in the habit of painting it as a separate step rather than try to prepaint/color it.

Stay tuned! And if you're getting good results with my (previously used) formula, let me know what you're doing and/or what I'm doing wrong. . .

We're Rockin'!


I've had some pretty good luck with the few rocks I've cast and colored (see above), but - like with the goop - my latest efforts have been less satisfactory. Since I figured I could use some more practice - and knowing that modeling New England requires LOTS of rocks - I've been a rock casting fiend lately . . .


Thanks to those that have offered advice, as well as pointed me to videos and such, on different coloring techniques. As you can see in the pics above, I have plenty of castings to practice on - I just have to wait a week or so for them to fully cure before coloring . . .

Plaster Riverbed


While watching one of those videos, I learned that foamboard - even if painted - could offgas underneath resin water. Certainly not something you want! You need to seal the riverbed with a batch of thin plaster. Since I was already plastered in a plastering mood working on my rocks, I mixed up a batch, "dammed" the ends of the creek at Old Deep River Road with blue painters' tape, and poured it out, allowing it to find its level.  So far, I'm liking the results - and hopefully not only will this eliminate the offgassing possibility, but should also prevent any resin pour from leaking onto the floor . . .

Ballast Experiments

Yikes! It's been over FIVE years since I first solicited opinions about, and started researching, different ballast choices. If that's not the epitome of Analysis Paralysis, I don't know what is!

While I've been making scenery progress "up the line" in the Deep River area, the Saybrook station area continues to taunt me with its lack of ballast. An otherwise perfect prototype scene is marred by the "obviously a model" look of unballasted flextrack.

Thankfully, in addition to samples from KayleeZ and JimD, my buddy Randy dropped off a number of different grades of ballast - all sifted from local traprock (e.g. the exact same thing our prototype used for ballast). I won't admit to how long ago he did this, and I'm too embarrassed to try and remember anyway.


Since my main goals for the day (coloring rocks, doing base scenery, groundfoam, etc) were thwarted, I just pivoted to finally figuring out what ballast I should use on the Shore Line through Saybrook. So I took out my trusty test tracks and poured out three different grades, affixing them in the usual way. I'll be interested to see not only how the color ends up but, most importantly, which grade is going to look best - and most like the mainline ballast I'm used to seeing in the old prototype photos.

Foamcore Road - Rt. 82 in East Haddam

While all that was drying, I turned my attention even further up the line to East Haddam. Going full circle to the beginning of this post, I figured this would be the next best place to try some additional ground goop formulas - starting with plain ol' Sculptamold.

But first! I wanted to finish some terraforming in the area - specifically the roadway that crosses the tracks at the south end of the scene.


In the pic above, you can see my method for creating cutting templates so I don't waste any good foamboard.


This method comes in particularly handy when trying to fit odd spaces. The road itself is made up of pieces of foamcore board with the paper peeled off to reveal a nice textured surface.

Mental vs. Physical Health

So that's where I had to quit for the day - not bad for an afternoon's work! And I'm still chomping at the bit to make even more progress in the coming days. Unfortunately, weekends - and their big blocks of time - only come once a week (duh!) and it's tough to get to the basement after work during the week.

But The Missus gave me a great idea . . . while in this state of flow, why not spend the time in the morning before work, when I'd normally be hitting the treadmill or riding the bike, working on the layout instead? She reminded me that mental health is just as important as physical health and as long as working on the layout doesn't become a source of stress, it can be a great way to reduce stress (something sorely needed lately, given my day job). Mental and physical health are more closely related than many of us realize, and it's all too easy to neglect one or the other. Or both.

While I certainly wouldn't recommend giving up exercise to work on a model railroad (since you can't enjoy your layout - or anything else for that matter - if you're in poor health), she raises a good point. And as long as I'm in this flow - and the resulting immersion gives my dayjob brain a rest - I can just get some extra steps in during my lunch break :^)

And when this flow period inevitably ends, the treadmill will be right where I left it and the balance can swing back the other way until the next flow hits.  But for now, instead of riding my bike, I'm going to enjoy riding this wave . . .

Tuesday, July 4, 2023

Progress Report: Scenery Advances at Old Deep River Road

I can't believe it's already been over two whole weeks since this year's NERPM - and what a busy couple of weeks it's been! In addition to making some major (and hopefully final, for this season) progress on the house and yard, my buddy Pete and I got to visit Jason Fontaine's amazing layout and I got to operate on friend Alex Wood's layout. Those activities will be the subject of a future post - but for now, I have some fairly major progress to report since my last update way back on May 21(!).

When I haven't been otherwise occupied, I've had the bit between my teeth and been making some progress on scenery north of Essex, coming into Deep River . . .

Old School Hardshell


Specifically, I've been focusing on the area around the grade crossing at Old Deep River Road. If you'll click here, you'll see the genesis of this spot - as well as prototype photos. Eagle eyes will notice that the hill above has evolved somewhat from what Bill started way back then . . .

I wasn't quite happy with the layered foam look, so I added a couple of additional old-school hard shell techniques - specifically masking tape over balled-up newspaper, as well as cardboard strips. This all will support plastercloth which will be added later to make the hard shell.


Extending fascia to cover hillsides

If I was an especially good scenery planner (which is to say, if I'd planned my scenery in any detail at all), I would have known where my fascia would have to rise up to accommodate varied terrain, hills, and such. I may not be a good scenery planner, but I've become pretty good at taping & topping. The pics above and below illustrate the point: Above, I've tacked up some cardstock to make a template for cutting masonite, which I will then attach to the top of the fascia.
 

I draw a "hill line" on the cardstock, then cut the masonite using the resulting template.


I used a combination of hot glue (to hold the masonite temporarily in place) and PL300 (to attach the masonite permanently to the foam board). The only good thing about having a flat top edge on what was there was that it made it easier to extend later. Going below "grade" is a simple matter of cutting the top edge down with a saber saw (as you can see on the right).


Making the masonite look like I *planned* it like this is a simple matter of taping/topping the seam like you would drywall (or seams in a backdrop - which I also have lots of practice with).


While the photo above shows the result of a nice smooth seam which disappears, you can also see how the hill is now covered nicely in the plaster cloth.


Painting track

While that was all drying, I decided to continue painting the track northward. While I've long been a fan of Rustoleum's "camo" line of paints for painting track, without adequate ventilation the fumes are dangerous and unhealthy. Unfortunately, even though it's now summer, I still have my basement windows sealed and, besides, they're all in the other room. This location in Deep River is about the most UNventilated part of the whole layout (in a cul de sac, surrounded by walls and a tall backdrop).

So my go-to track painting process now involves my airbrush and Tamiya's "Linoleum Deck Brown" paint, thinned with 91% alcohol. Since I'm using such a small amount of paint, and it's an acrylic, the fumes are minimal - and (bonus!) I get low-risk practice using my double-action airbrush.


Once the track was all painted as far north as Tate's Cut (at the end of the aisle, right at the bend), I taped it all to protect it from the oncoming scenery...

Casting & Coloring Rocks


If you checked out the prototype photos of the Old Deep River Road area, you probably noticed how many rocks and rock outcroppings there are there. So I needed to make a LOT of rocks.  I go into the process in more detail in this post, but here are the bullet points:
  • I used Woodland Scenics "Super Strength Plaster" (C1199) mixed according to the directions, and poured into a variety of rubber molds (WS C1231, C1232, etc).
  • Once the castings are done (24hrs or so), I pop them out of the molds and color them using washes of raw sienna, raw umber, and black (detailed process here)

I used ground goop to cover the hard shell, and added the colored rock castings to the wet ground goop to "plant" them in place. Alternatively, I've added uncolored/white castings to uncolored Sculptamold and colored the rocks in place (having to paint the Sculptamold later, of course). Click here for that method. Frankly, I'm not sure which method I like better. What about you?


Ground Goop

Speaking of Sculptamold, I use it as the basis for my version of Lou Sassi's famed "Ground Goop" which is used to cover the hardshell - including any cardboard "lattice" that's showing through - and provide some thickness for planting trees and such. It's a versatile material that can be used to make small hillocks, eroded embankments, etc. I used it over foam board base as well to provide some much-needed terrain undulation.  While you can use it plain (it looks like mud), you'll most often want to add ground foam and other scenery materials to it.

There are a variety of formulas - here's what works for me:
  • 2 parts Sculptamold
  • 1 part brown latex paint (I use a Home Depot/Behr color called "Davenport Tan")
  • 1/2 part Elmer's Glue All
  • 1/2 part water - just enough water to make a oatmeal consistency
So the last couple of days has involved a lot of rock casting & coloring as well as ground goop mixing & applying. But once you're in a groove, progress is made by the foot rather than by the inch, and the layout starts to look like something other than a Plywood (or foam) Pacific.

Here's where things currently stand:


The Old Deep River Road grade crossing area is coming out nicely, including a rocky hillside (though I need to add more rocks), as well as the creek along the tracks (note the eroded bank...)


Looking south toward Old Deep River Rd from the Deep River station area, you can see that I've added some "gap filling" material between the foam base and the backdrop. There was a huge gap there, so I realized I needed something other than air to hold up my 'goop. Some foam "profile boards" and plaster cloth will provide the needed support. Ground goop will follow during my next work session.


And here we are back were we started at the top of the post - looking south/east from Essex (on the right) to the cut at Old Deep River Road. The top of the fascia has been cut to vary the terrain and LOTS of ground goop has been applied. Thankfully, it looks a LOT better once it dries (folks on the Valley Local FB group had the dubious honor of seeing it wet. Let's just say, that was hard to UNsee).

Long-time readers know that I work in fits & starts and my productivity ebbs and flows. I doubt I'm at all alone in that, but I sure do like it when I'm in a "flow" like I am now. And with scenery no less!

Hopefully, this mood will continue and I'll keep making more progress that I can report here. In the meantime, the basement is a nice, cool place to spend some time during a hot, humid summer. And besides, it's always Autumn on the Valley Line!