Showing posts with label Painting. Show all posts

Tuesday, July 9, 2024

B&M Buggy #104610 - Prep & Prime

After spending an inordinate amount of time ogling this model, it's time to bite the bullet and paint it. The first step is to disassemble it as far as you can . . .

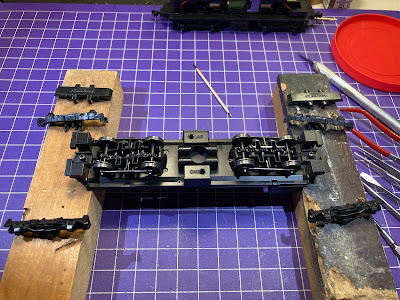
First, I removed the couplers & coupler boxes, then the truck bolster screws.

After the trucks were removed, I could remove the two screws holding the floor in and remove the floor.

Unfortunately, other than disassembling the trucks (just one screw each, allowing you to separate the sideframes), this is as far as this model will disassemble. I wish the end platforms, railings, and steps were separate too since that would make painting easier. But I'll just have to do a good job of masking.

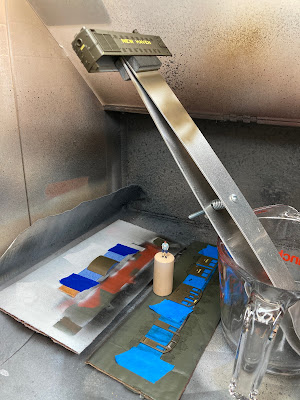
Since the roof panels were so smooth - and since I wasn't planning on media blasting the model - I took some 400 grit wet/dry sandpaper and roughed them up a bit.

Now, as I mentioned, this is the first time I've painted a brass model and there are many folks that suggest media blasting, vinegar wash, etc. But since there was no tarnishing & the brass was in great condition, all I did was wash the model in an ultrasonic cleaner with water and a few squirts of Dawn dish soap.

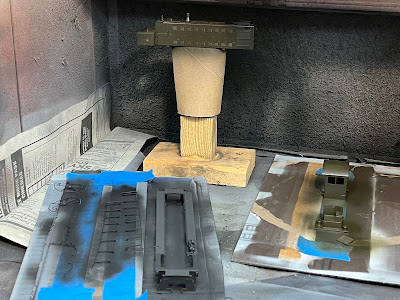
Once that was dry (I shook it dry, then blew any remaining excess water out with my airbrush - then let it sit overnight), I hit it with a rattle can of Tamiya spray primer. Note that the trucks have been disassembled. This is all there is to this model.

I'm actually very happy with how the Tamiya rattle can primer worked. Just spray lightly and evenly, building up the color until the brass color is gone.

Next comes the controversial part . . . Figuring out what paint & colors to use to paint this B&M caboose. But that'll have to wait until next time - stay tuned!

Saturday, June 15, 2024

Part 9 - New Haven DEY-3 (Alco S-1) #0967: Decaling/Lettering/Gauges(?!)

Decaling is one of my favorite parts of a project - and often the most harrowing. But it's a pretty straightforward process (which I go into detail about here) and really makes your model unique.

For the 0967, I used custom-made decals from Highball Graphics (which are now available to everyone here), and builder's plate decals from Microscale.


Since decaling IS pretty straightforward, I'll just make a few special notes and give a few tips here. . .

I mentioned that I used Badger's black Stynylrez as my primer AND topcoat for the frame. Well, the only downside of that is that it dries flat - not idea for decal application. Frankly, I'd forgotten about the lettering on the end sills until I started decaling. Thankfully, there's an easy workaround: Apply Future floor polish with a brush to where you're going to apply the decal, let it dry, then decal as usual. You can see the difference in the sheen above, but the difference disappears with subsequent clear coats and weathering. Easy peasy.

The numbers on the side of the cab were relatively easy to locate since Mike used precisely the same rivet pattern as on the prototype. So, I'm literally a rivet counter - I counted the number of rivets down the side to figure the height of the number - and then I just centered the number below the split window. The "New Haven" on the side of the hood is located just ahead of the 2nd hood door and just covers the 2nd door from the right.

As for the proper height? Here's your first ProTip: Don't do as I did . . . The good news is that I was able to use enough MicroSol to finally get the decal to snug down over the door handles. The bad news is that the decal should have been placed just below the door handles - then they wouldn't have been a problem. Thankfully, it's not that noticeable. Of course, now that I told you, you'll notice it . . .%^)

The fireman's side is better, as you can see above. Since the 0967 is always pointed south on the Valley Line, you always see the fireman's side. So that's good. Of course, all the cool details (air whistle, cab signal box) are on the Engineer's side. Oh well. Pick your poison dessert. Now both sides have good & bad points. :^\


These are the number boards - and here's your next ProTip: If your number decals are clear numbers on a black background - and your numberboards aren't lit (mine aren't), you will never see the numbers(!) Thankfully, there's an easy fix: Paint the clear numberboards gloss white! "Gloss" to make decal application easy, "white" so that the numbers show up. I applied the paint with a toothpick.

The last decals I did were on the front of the hood and the back of the cab, positioned as you see here. And note the numberboards - taped to hold them in place for painting and decaling.

I'll end with something super cool - at least to me. In the pic above, you'll see that my masking of the gauges worked well. And before I go any further - NO! - the cab interior is NOT "too dark." I have it on indisputable authority (Jack Swanberg, if you must know, who literally wrote the book on "New Haven Power") that DEY-3 cab interiors (at least before the November, 1947 batch were delivered) were initially painted "dark green" (see Shoreliner Vol. 35, #1, p.5). Later deliveries were painted the gray (or light "institutional" green) we're more familiar with.

ANYway, back to the gauges . . . I wanted to paint green around the gauges themselves, and didn't want to try to do it by hand using a brush - even a teeny tiny one. Somebody on the Valley Local Facebook Group (if it's you, say so in the comments here :^) mentioned offhand using MicroMask to cover the gauges. I accepted the challenge - and in the photo above, you can barely make out the fact that the gauges are covered with a blue fluid. . . That's MicroMask, applied with a toothpick to each guage.

I shot another coat of green over the cab interior, and then used the tip of a toothpick to just start to peel off the MicroMask - and used a tweezer to peel it off. See the result above. In hindsight, I shouldn't have bothered masking that center area - which I suspect now should have an "Alco/GE" emblem. Ah well - "next time"

I've used MicroMask on headlight lenses before, but never on anything this small - and now that I've discovered it works, I think that's a pretty good tip!

Once I got the builder's plates on (you can just make them out on the lower left corner of the cab), I couldn't help dry-fitting everything together to see how it looked. Pretty good! Now we're ready for weathering - but that'll have to wait until next time . . .

Friday, June 14, 2024

Part 8 - New Haven DEY-3 (Alco S-1) #0967: Painting

I don't know about you, but painting - specifically airbrushing - is something I've always feared. In fact, I put it off for well over 30 years(!) Click here for THAT crazy story (it's a fun read, if I don't say so myself). Thanks to my friend Ralph, I've since become a convert of Badger's Patriot 105 airbrush. Now I almost look forward to painting. Almost all of the time. Especially since painting and lettering make all the difference in converting a nondescript/undec model into Your Very Own.

So here - if only to document it myself for future reference, and perhaps to give some of you the extra push you need to try - is the process I'm currently using, step-by-step:

First, I remove the truck sideframes. On the P2k model - as with most - the gearbox cover retains the sideframes, so remove the covers first.

Here's my prep setup: ultrasonic cleaner for the small parts, basin of soapy water (Dawn preferred), toothbrush & tray for larger parts, gloves for handling cleaned parts, towel for quick cleanup of spills.

Ralph encouraged me to get an ultrasonic cleaner (I got mine at the local Wal-Mart), and now I don't know how I did without it. Add a few teaspoons of Dawn to the water and run it for 3 cycles. Cleans all those little bits thoroughly and safely (though keep a VERY close watch on those tiny uncoupling levers!)

Cleaning the larger parts is more straight-forward - just use the toothbrush (gently!) and your sudsy water - and be sure to plug the sink when rinsing(!). Here's everything all cleaned and ready to go (once thoroughly dry)

I use a variety of homemade stands, reversed clothespins, tape and cardboard to secure items for painting.

And since my friend Randy gave me a version of the cab interior that had the gauges preprinted (apparently you get the gauges with a decorated model - the undec just comes plain), I masked those off so they wouldn't get painted over.

And now we're ready to actually paint!


For my DEY-5, I used Tru-Color Pullman Green. You can see in the photo above how it (top) differs from the Atlas S-2 that was custom done for the NHRHTA (bottom). And - to my colorblind eyes - the NHRHTA version looks closer to the color prototype photos I've seen. Or maybe the DEY-5 just looks faded... In any event, I decided to use Badger Pullman Green for the 0967.

I started by priming everything with Badger's Stynylrez primers - which I love. They go on VERY easy, right out of the bottle with no thinning required. I used black on the frame and railings, and gray on everything else. BONUS! The black Stynylrez primer can also act as the "top coat" color.

Next, I shot the green parts with the Badger paint thinned with just a few drops of water, building up the color slowly.

While I was waiting for all of that to dry, I remembered I needed to paint the sides of the wheels, so I took advantage of the fact that the mech was disassembled already to solder the truck pickup wires to the sideframe contacts. I know Colorado Bill will be proud I'm no longer relying on those little plastic retainers to keep the wires electrically connected to the sideframe contacts and wheels(!)

Now that the 0967 is painted (and you'd be hard pressed to find an easier paint scheme :^), the next step is decals! Then it'll REALLY start to look like a New Haven locomotive. . .

Till next time!

Sunday, December 11, 2022

Taking the Pain out of Painting

Painting is one of my least favorite things on the planet. Well, to be a little more specific - this kind of painting . . .


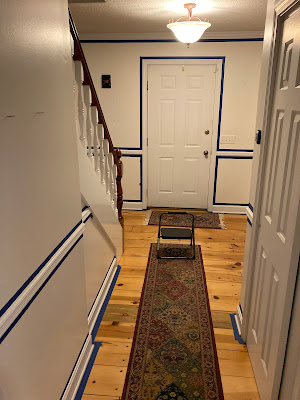
Painting about anything in the house is a pain, start to finish. My OCD goes into overdrive and I never feel like I do a great job. Yeah, all those blue lines? Painter's tape, to mask off all the trim. Painful.

For the longest time, the pain of painting extended to my hobby - to the extent that I let my first airbrush languish in its box for over 25 years, way too fearful of messing up to actually use it (click here for that story). Forget about ever actually enjoying it.

In fact, the only painting I've come to actually enjoy has been on the layout. Blue sky for the backdrop and dark green for the fascia is super easy with a roller and a huge boost of progress for the time spent. And no taping!


So early this morning, now that I'm finally done with filling in the screw holes and seams, I decided to get out the roller and prime the fascia in Essex. But later this afternoon, the fun really began . . .


I actually used my new(ish) airbrush! It's a lot more sophisticated than "The Choice of the 80s" and I figured using it to seal my foam-built Dickinson coal dump with a clear coat would be a good way to practice.

Fortunately, I also had some "training wheels" along for the ride in the form of some airbrushing notes derived from a number email conversations - not to mention virtual visits - with my friend Ralph Renzetti. In one handy place, I have crib sheets for thinning ratios, air pressures and cleanup tips for all different kinds of paint.


But after today's airbrushing session, I don't think I'm going to need that much info because after seeing how easy - and actually fun - Tamiya paint is to use, I may just decide to use it exclusively.


After sealing the coal dump, I figured I'd see if any of the Tamiya paint I had on-hand would match my go-to track paint - Rustoleum Earth Brown. I've been looking for a non (or at least less) toxic way to paint the track indoors during the winter and Ralph suggested I try some Tamiya colors. I'd used them to paint the coal dump track a few weeks back and it came out well, so painting a sample color swatch was a great way to practice double-action triggering.


And my new airbrush of choice? The Badger Patriot 105, another Ralph suggestion. I actually got it during a great sale last February and had fallen into my old rut of being afraid to actually use it.

But I have to say, much to my pleasant surprise, shooting Tamiya paint through it is just about as easy as using a rattle can. Sure, there's a little more involved than just taking off a cap and firing away, but you more than make up for that in additional control. Coupled with an in-line moisture trap (shown here - and another Ralph suggestion and sale acquisition), I daresay airbrushing is becoming almost easy.

It's certainly become a lot more fun. And if you have fun doing something, you'll tend to do it more often. And while practice may not result in perfection, you can't help but get better over time.

That's what I'm counting on - and I'm already looking forward to the next time I can fire up the 'brush and paint something!

<><><><><><><><><><><>
In case you're interested, here's my nascent go-to airbrushing combo:
  • Airbrush: Badger Patriot 105 dual-action, top feed, internal mix
  • Paint: Tamiya, thinned 1:1 with 91% isopropyl alcohol (IPA)
  • Air Pressure: 15-20 psi
  • Cleanup: IPA & Windex


Friday, April 15, 2022

DEY-5 #0604: Decals & Dullcote

After painting comes decaling. Since I wanted to be sure that the decals wouldn't "silver," I applied a gloss clear coat over the hood and cab parts and waited for that to cure.

While decaling isn't complicated, I find that documenting the steps I take keeps me from forgetting anything. Here's my process, taken from previous blog posts on the topic:

  1. Start with a glossy surface, adding a gloss coat if needed.
  2. Using a fresh x-acto blade, cut out the decal leaving as little decal film around it as possible and dip in distilled water.
  3. Place the decal on a paper towel to wick off excess water & allow the decal to loosen from the backing.
  4. Slide the decal off slightly to expose just enough paper backing to allow you to grab it with tweezers.
  5. I then brush some MicroSet onto the model where I will be putting the decal (some instructions say to brush on some water, but it beaded up on the glossy surface).
  6. "Lay the paper on the model while still holding with tweezers and slide the decal on to the model." (direct quote from the instructions I was referring to). Use something dull (I use a toothpick) to hold the decal as you pull/slide the paper backing out from under it.
  7. If necessary, use the toothpick to move the decal into final position. Be careful you don't damage the decal!
  8. Once in position, leave it alone until it dries completely. You can use a corner of a paper towel to wick away any excess fluid/water. But then, leave it alone.
  9. Next day, if there's any "silvering" or air bubbles, prick with a sharp pin and add a decal setting solution (I use MicroSol) at the edges of the decal and at the pricked parts. Capillary action will pull the solvent underneath the decal. Leave it alone and allow it to dry again completely.
  10. Repeat step 9 if necessary, using Walthers Solvaset if needed to get the decal to really settle in and snuggle down over detail and into crevices. But beware - Solvaset is very aggressive.

For the decals themselves, I used a set developed by my friend Bill and now made available by Highball Graphics at this link . . .


And for proper location/positioning, I used prototype photos (which are also now available on the Highball Graphics website).


While next time I plan to put the cab together before painting/decaling, you can see how nice it is to do it beforehand. You can do all sides at once without having to wait.

Speaking of waiting, while I was waiting for the hood & cab to cure, I decided to dullcote the frame and trucks. Not only would that dull down the semi-gloss black finish that the model comes with, but will also provide "tooth" for future weathering.

Since I didn't want to risk getting anything onto the wheels or into the gears, I removed the trucks and dullcoted them separately. Be careful - unlike the old days, you can't just pull the sideframes off since they're locked-in by the gearbox cover. So remove the gearbox cover first...


. . . and then you can easily slide the sideframes out. . .


Note the "slots" at the ends of the mounting pins. That's how the sideframes are locked in.


With the gearbox cover and sideframes removed, I decided this would be the perfect time to remove any excess grease (using a toothpick and small q-tip to just scrape it out) and inspect the gears for any burrs or flaws.


Thankfully, everything was in good shape - so I cleaned off the sideframes with 70% alcohol and an old toothbrush, waited for them to dry, and then took them to the booth to shoot them with some dullcote.


By this time, all the decals were cured and so I dullcoted the hood and cab at the same time in order to protect them, cover the glossy finish with a matte finish, and provide some weathering tooth...


Finally, I masked off the trucks and mechanism and dullcoted the frame and ends as well (also protecting the decals on the ends).


With the painting and lettering done, and everything sealed with dullcote, we've reached a major milestone. The only major thing left to do is assemble the cab, and the only (minor-ly) difficult things left to do are scratchbuild a whistle mount and detail a cab control box.

But before that - and to give me a chance to do something a little different - I decided to add an ESU PowerPack (aka "keep alive) capacitor to the OEM ESU Select decoder.

We'll get to that and to building the cab in the next post!

In the meantime, (if you observe it) here's hoping you and yours are having a blessed Easter weekend!

Monday, April 11, 2022

Modeling Monday: DEY-5 #0604 - Painting

Given this week's Wordless Wednesday post, and the fact that I haven't posted about my DEY-5 build since March 22, I guess I'm not very good at build logs. As you saw on Wednesday, the 0604 is all done, except for some painting touchup and weathering (and some final dialing-in of the decoder programming). But rest assured 1) I will continue to document the build here, if for no other reason than 2) I'll be starting on DEY-3 #0967 next - and it'll be good to jot down what I did on this build so that I can remember it for the next build.

And I'm hoping the DEY-3 project will be documented much more contemporaneously with the actual build, and will include more detail.

At least that's the plan.

But for now, for my own reference, and for those of you that are interested in how the DEY-5 came together, read on and stay tuned...

* * * * * *

After adding the grabs to the hood (see the end of the last post for where I left off), I used the cast-on NBWs on the back of the resin cab as a guide for where to drill the holes for the little grab iron next to the rear headlight, as well as the long, vertical handrails on either side of the cab door.

With the "robust" details done (I decided for the moment to hold off on the special whistle assembly and cab signal box, both of which I learned later would be robust enough), I decided the next step would be to paint.


As you see in the photo above, I decided to paint the cab before assembly, figuring it would be too difficult to paint the inside or to add windows once the cab was put together - and much easier to decal/letter. But this ended up making final assembly more stressful than it needed to be, and it turned out I still needed to do some additional touch up anyway. For the DEY-3, I'll assemble the cab first.

The first step in painting is to prep the parts. I used isopropyl alcohol (70%, I think) and gently brushed the parts with an old toothbrush. After that, I only handle parts with gloves on.


Once everything was nice and dry (I think I left everything overnight, though didn't really have to since the alcohol dries quickly), I gave everything a coat of Tamiya Fine Surface Primer to even things out (especially the 3D printed resin cab, which still had some very faint striations from the printing process) and give everything, especially the metal grabs and slippery plastic handrails, some good "tooth" for the paint to hold on to.

According to the research, the DEY-5s were all delivered in Pullman Green, with black railings, frame, and trucks, and lettered with Dulux Gold (yellow) lettering. Now, there is MUCH debate over what model paint best replicates the New Haven's Pullman Green - and I've seen models painted in shades so dark they're almost black to lighter shades that are closer to the NH's Hunter Green. Tru-Color Pullman Green was recommended to me, so that's what I used. I think it looks great - especially under my lighting and on my layout - but it's noticeably lighter than the NHRHTA's special run of Atlas S-2s (which used paint based on an actual prototype color chip from the NHRHTA's Color Guide).


For the railings, I used Tru-Color Black - a much easier choice. And don't forget to shoot the bell and coupler box covers with the black as well.


This is only the second locomotive I've ever painted - and the first was way back around 1986. Heh - it was also an Atlas S-2, IIRC. I even used the same airbrush - a Badger 200 (the Choice of the 80s). This 'brush is super easy to use - it's basically a glorified spray can. The trigger is only on/off, but at least you can adjust the spray pattern. I thinned the paint 3:1 (paint to Tru-Color thinner), adjusted the pattern to about 3" diameter at 6" away, and remembered to trigger on/trigger off past the piece.

Results below:


Not bad for my first attempt, although the finish wasn't quite as smooth as I'd hoped. I learned that this "orange peel" effect can happen if you spray from too far away. The paint dries a bit before it actually hits the model. I really didn't want to strip it though, so I decided to try and even it out with an additional coat of paint.


I don't know if I just got lucky, or if this is a typical way to save an orange peel finish, but it worked! It's admittedly not as perfectly smooth as a factory-painted model, but I'm happy with it - especially considering how bad it could have been. Heh - and I'll be weathering the loco eventually anyway, so there's always that. As long as it's smooth enough for decaling, that's good enough for me.

With the painting done, I set everything aside to dry thoroughly before continuing. Given my work schedule, I think this ended up being about a week. At least I knew the paint was adequately cured!

That's it for now - As always, please be sure to chime in with guidance, advice, and anything you'd have done differently.

Next time - Applying the new, custom-made (and now available to you) decals!

.