Here are some pics from my Christmas layout to put you in the holiday mood. Hope you enjoy them and hope, even more, that you and yours are having a wonderful holiday season!!


Here are some pics from my Christmas layout to put you in the holiday mood. Hope you enjoy them and hope, even more, that you and yours are having a wonderful holiday season!!
One of the lessons I'm learning (and RE-learning, over and over again) is that persistent progress in this hobby is the result of doing what you're most in the mood to do - pivoting from one project to another and not allowing yourself to get bogged down. If you always - or at least often - #DoOneThing, you'll be surprised at how much you get done.
I was able to spend a good amount of time in the basement this past weekend working on setting the scene for the Camp Bethel Cottages I've been working on, but weeknights are much better for working at the bench. So I pivoted from working on scenery to finishing up the Sunset Diner in Cromwell. (Be sure to click here for a really cool story about how this diner figures in the history of big band music . . .)
To set the scene, literally, here's a period view looking north on the Middlesex Turnpike into Cromwell. . .

 |
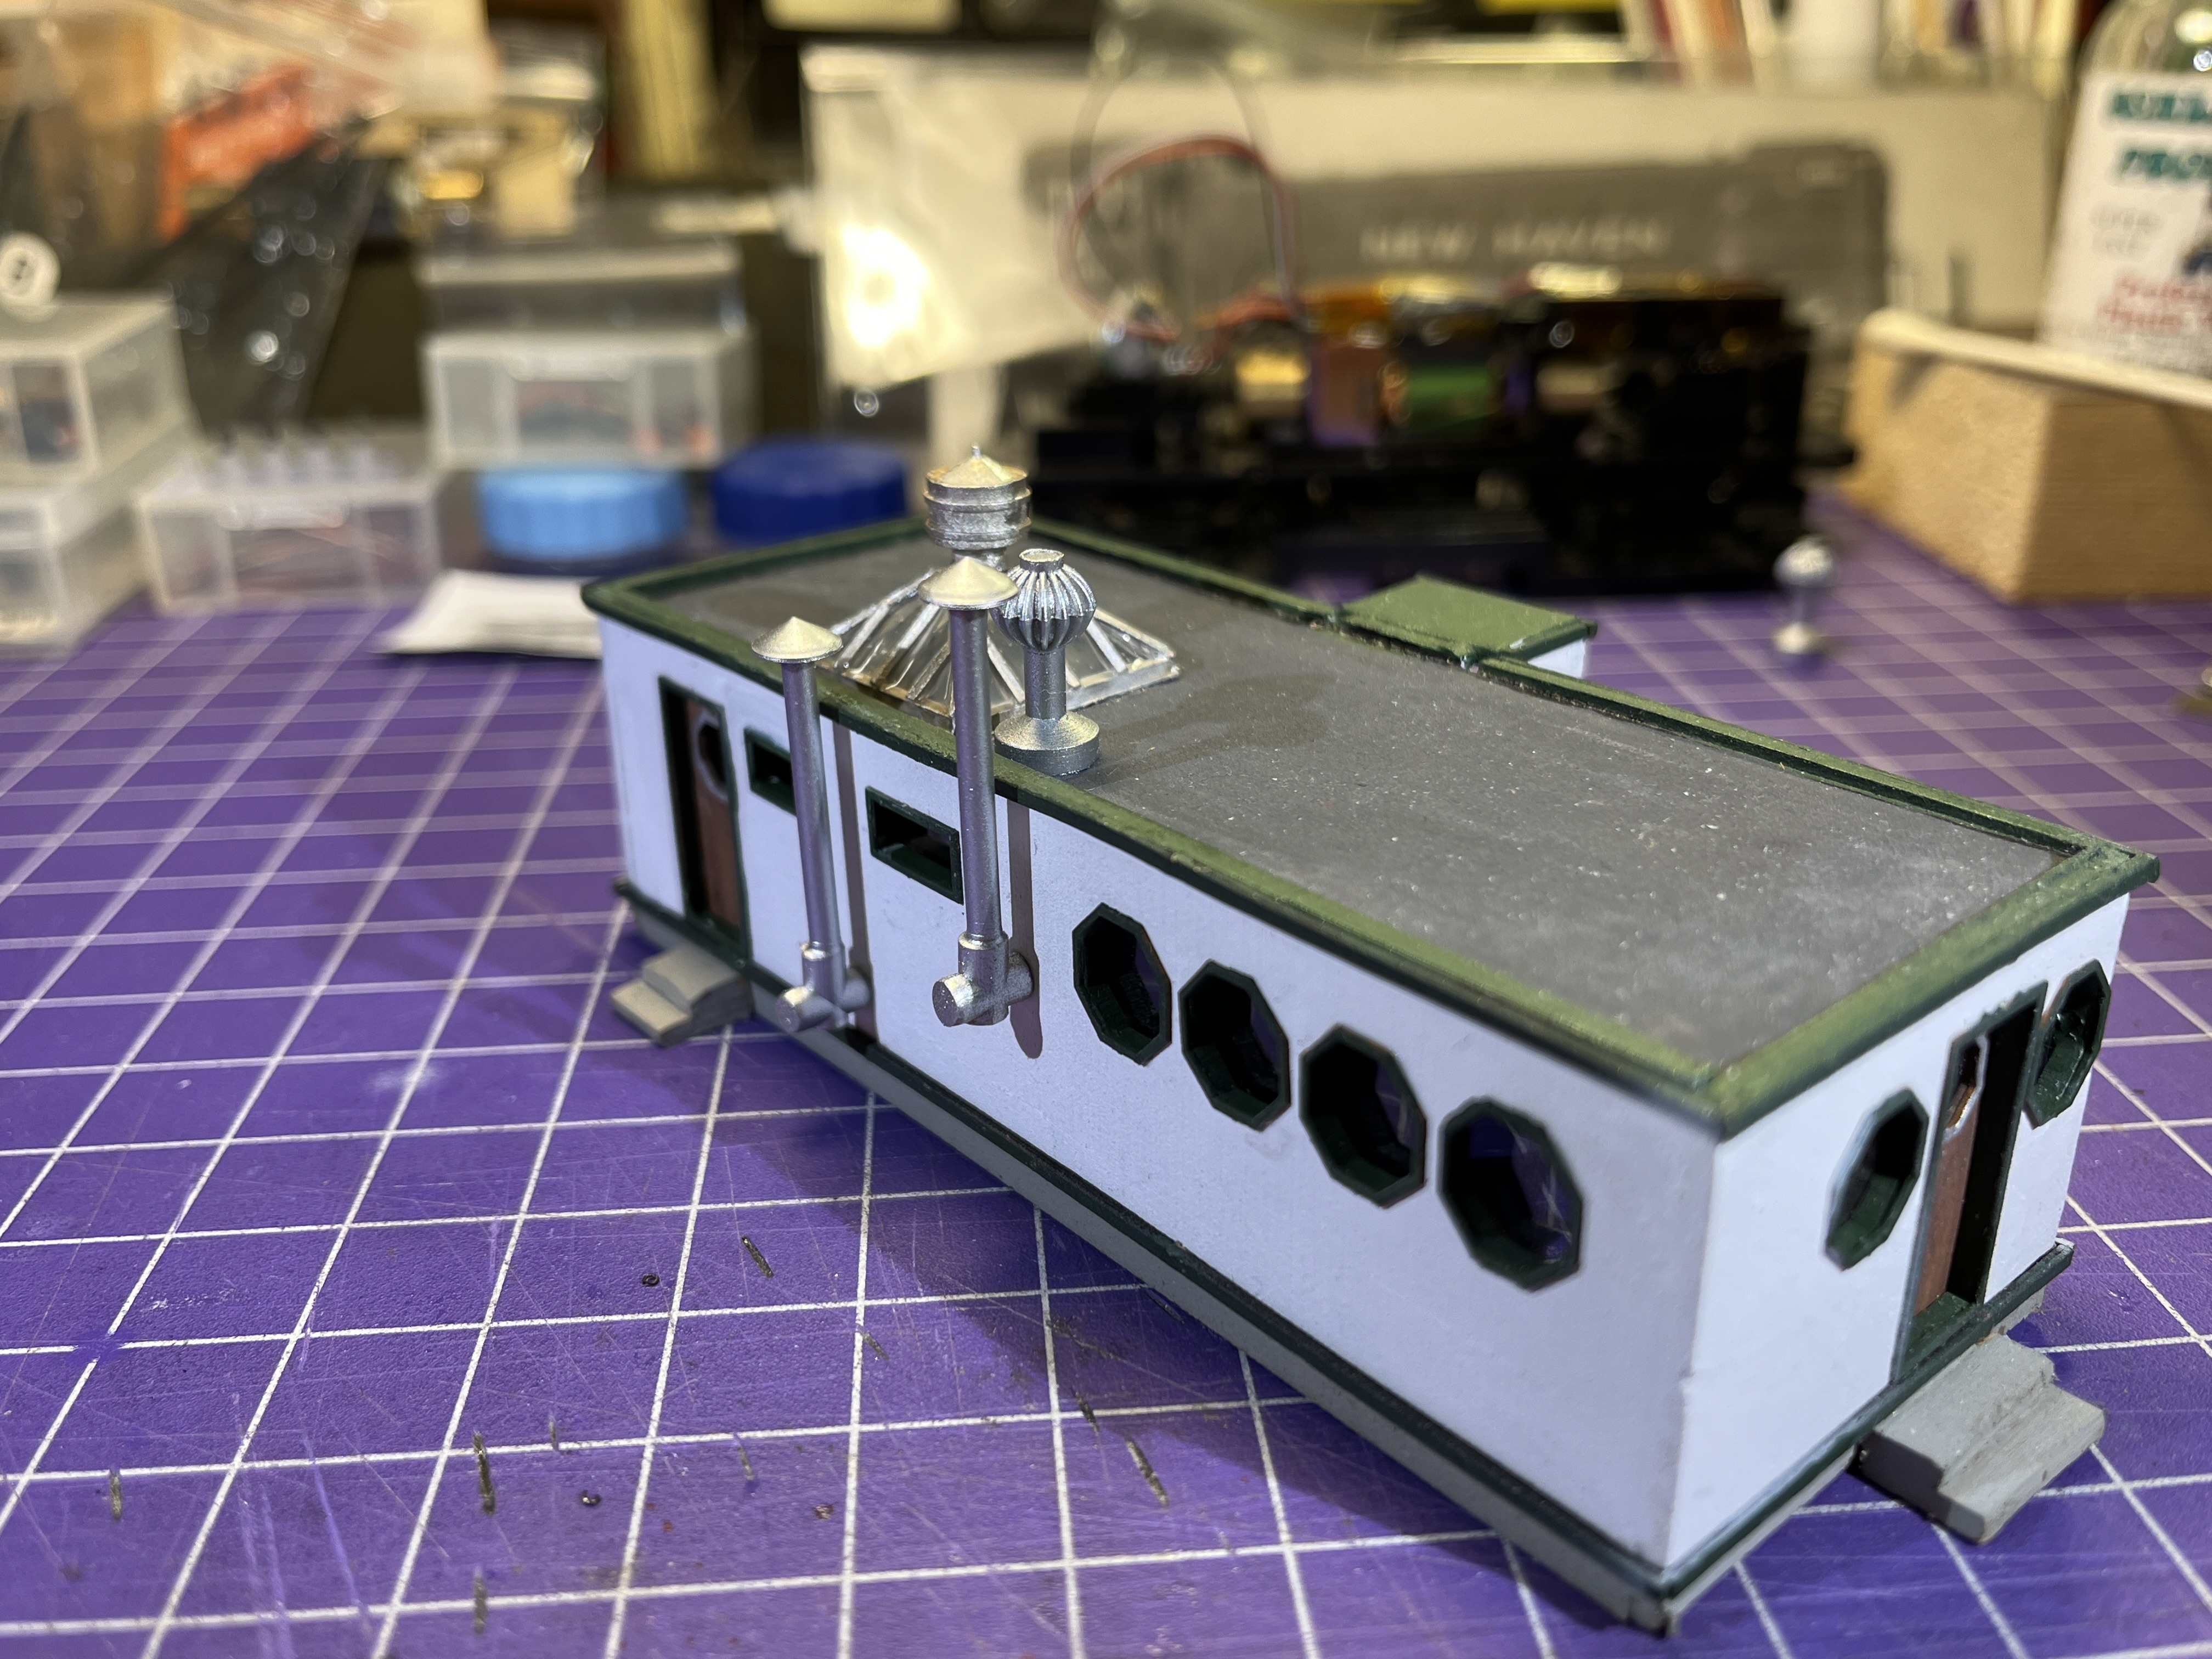
| The stacks & ventilators came from a Walthers rooftop details assortment. I used some scrap styrene to make bases and cleanouts. |
 |
| The skylight is an old Scale Structures Ltd. kit. The little tracing/template on the right was to help me cut out clear styrene for the windows. |
 |
| But figuring it would be much easier, I ended up using some Micro Kristal Klear instead. |
 |
| I made the signpost from 1/16" tube, 3/64" and .015" wire all soldered together. The eyebolts are DA #2206 and the chain is Campbell #256. |
 |
| The lack of sign in the first/main prototype photo I had ended up holding up this project for a while since I didn't even know the name of the diner for the longest time. Then I found this photo. |
 |
| Bill used his computer skills to recreate the sign and I printed it out and mounted it to .020" styrene and used .008" wire to create hooks to hang the sign from the chain. |
 |
| The sign post and the stacks/vents were all airbrushed with Tamiya paints, thinned 50:50 with 90% alcohol. |
 |
| I didn't like the vent on the skylight that came with the Scale Structures kit, so I used one from my scrapbox, securing it with some CA gel. You can also see how well the "glass" came out. |
 |
| And this is the back, which you don't really see from normal viewing, but at least I know what it looks like :^) All these parts were attached to the main structure with CA gel. |
 |
| And here it is on the layout. Still need to do some weathering, but I think it'll sit here like this for a bit until I can muster up some courage. |

So there you have it! I think it came out really well, especially when you compare the photo above to the prototype pic at the beginning of this post. I really enjoy recreating the past in miniature, especially when there's a cool story involved. Thanks for following along and let me know what you think!
As we continue building the "Bethel Camp Cottages" (click here for part 1, here for part 2, and here for part 3), it occurred to me . . .

. . . Other than its overall proportions, the other thing I liked about the house I borrowed from Somerset as my temporary stand-in (pictured above) was the little porch.
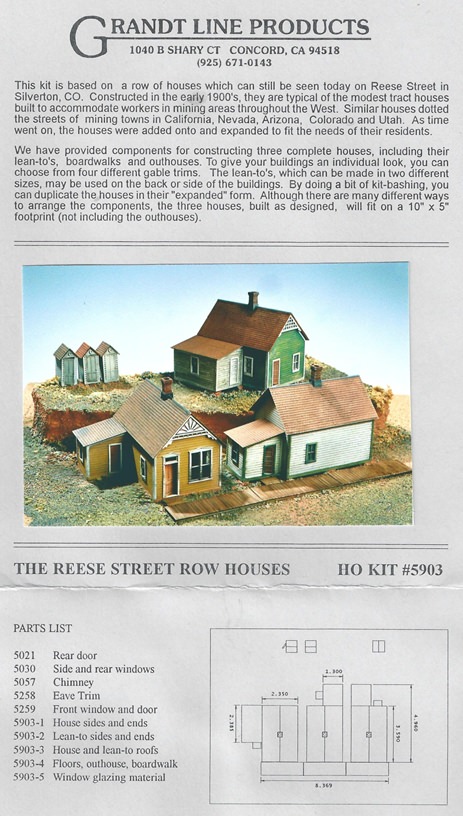 |
| FYI, these kits are now available from San Juan Details, who acquired the former Grandt Line kits. |
Unfortunately, while the gable trim on the house kits I'm using is great and really evokes the "camp cottage" look I'm going for, they don't have any sort of porch. So I got the bright idea of using the floor and roof parts from the lean-to addition provided in the kits to build some back porches. Having a back porch rather than a front porch may seem a bit odd, but since the cottages face away from the Connecticut River, I figured a rear porch would give my little camp denizens a nice place to have a cup of coffee and enjoy the view.


 |
| Here are all the parts, ready for assembly (including a porch roof section that still has to be narrowed). |
 |
| And here it is added to the cottage. |


Getting back to building the "Bethel Camp Cottages" (click here for part 1, and here for part 2), it's a matter of preference when you do your painting. Some folks paint everything and then assemble. I've always thought that a bit more difficult since it requires you to plan WAY ahead in choosing your colors - and you may mess things up a bit with glue while you're assembling. But if you assemble everything first and then paint, it's tougher to paint windows/trim/etc.
So it's usually best to consider the order project-by-project and do what will be easiest and most effective for that particular project. In this case, I thought it best to paint early in the process.
Of course, that meant I had to figure out what colors I wanted to use . . .


Most folks would probably consider these structures just about done - and I almost did. Then it occurred to me that it'd be nice to provide a nice place to look out over the river . . . So be sure to check in next time to see how that turned out...