Taking a cue from my "accomplishments & goals" post at the beginning of the month - and figuring this will be a great way to hold myself accountable & give me a huge dose of motivation - here's what I have to report as progress during this most modeling season of modeling season months . . .
In short, I:
- Painted my first HO scale figure
- Painted the foundations at Hartford Rayon
- Airbrushed/painted my 2nd-ever locomotive (1st since 1987(!) - and first loco decal job
- Scratchbuilt a concrete loading dock
- Fixed the foreground to background transition in East Berlin
- Started - and finished! - the backdrop in Rocky Hill
- Made significant progress on the Wethersfield backdrop (though some feedback would be welcome)
All but the figure painting were/are on my "2022 goals" list, so I'm starting the new year with a LOT of wind in my sails (and with the added motivation that Busy Time at Work starts Feb. 9 . . .)
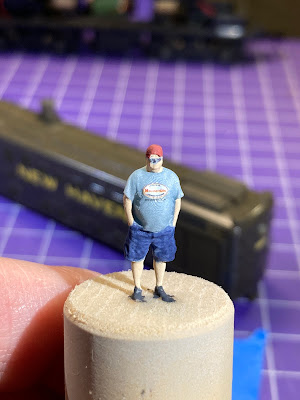
Li'l Lionel
Folks over at the
Valley Local Facebook Group (if you're on FB, be sure to join!) know about Lionel Strang's
A Modeler's Life Podcast and his support of the Princess Margaret Hospital. This year, in addition to his fundraising walk, Bernard Hellen over at
MiniPrints decided to offer this 3D scan of Lionel as an additional incentive to donors. Mike Budde even provided "Modeler's Life" decals to go on his shirt! The figure comes unpainted, and this was my first-ever attempt at figure painting. I think it came out pretty good - even the decal! By the way, this is 1/87th scale. He's glued to a wine cork for ease of handling - and that's my finger on the left. Talk about teeny tiny!
As soon as I shoot him with some Dullcoat to seal him, he'll come unglued and start riding the Valley Line!
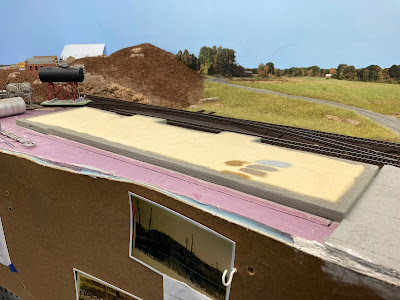
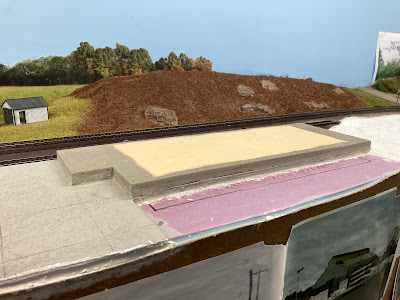
Hartford Rayon Foundations
 |
| You may recall that this foundation needed to be raised on the aisle-side and leveled - and this resulted. |
 |
| So I troweled on some spackle prior to painting it . . . |
 |
| . . . and then chose a craft paint that would look the most like concrete - you can see the different sample swatches. |
 |
| Since this foam soaked up paint like a sponge, I decided to paint only around the bottom of the structure. |
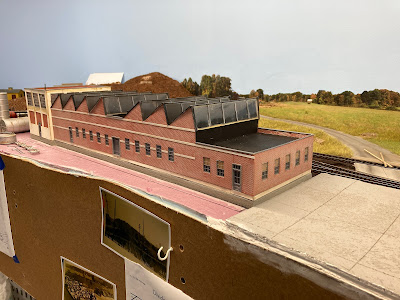 |
| And here's the result! Still need to add stairways and such . . . |
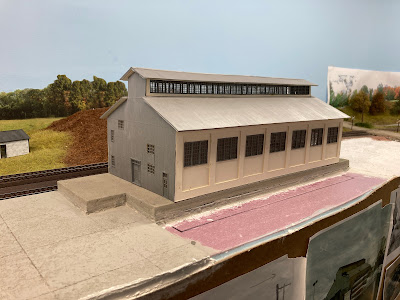 |
| . . . but I'm happy with how it came out. Turns out, this scrap foam insulation board from James Mayo has been a revelation! It has great texture for making concrete structures (as you'll see below) and it's super cheap! For more info, check out my original post on doing these foundations. |
Airbrushing DEY-5 #0604
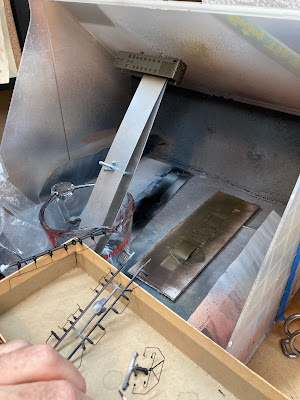 |
| The first time I airbrushed a locomotive was about 35 years ago(!), and back then it was an Atlas S-2 (for more on that story, click here). What you see above is my second ever attempt at airbrushing a locomotive. And guess what? It's an Atlas S-2. Talk about coming full circle! |
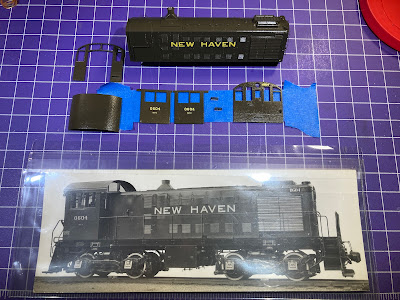 |
I'm pretty happy with how it's coming out though - especially with a custom NHRR-specific cab from NE Model Works. This will be DEY-5 #0604 - the power on PDX-2 which operates on the south end of the Valley Line.
(click here decaling details) |
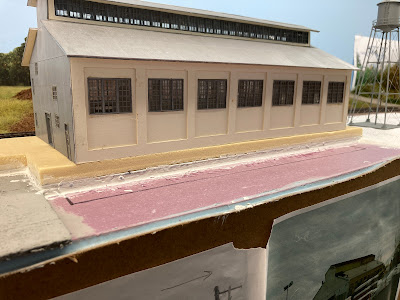
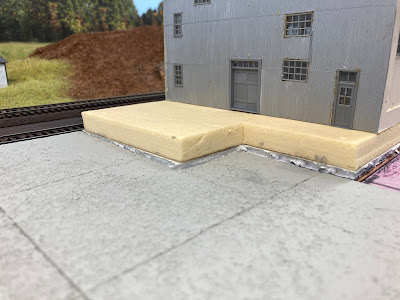
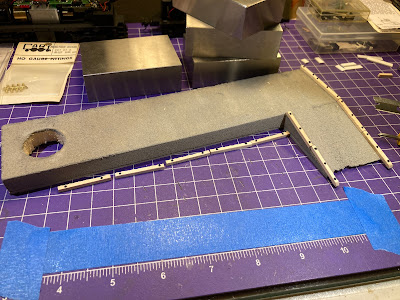
Concrete Loading Dock
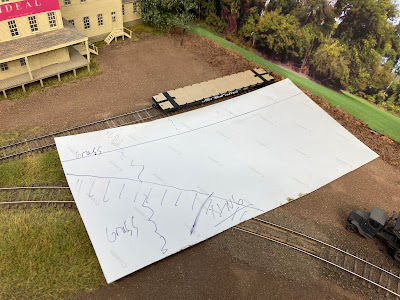 |
| To get the right size - and to avoid having to go back & forth so often between site and workbench - I made a quick template of the area. |
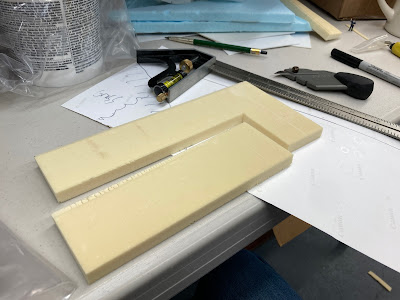 |
| I started with more foam board scrap and rough dimensions from the site and other loading docks. |
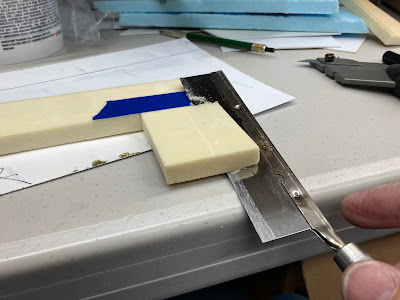 |
| To cut the ramp, I marked the top edge with tape and used a razor saw at an angle. |
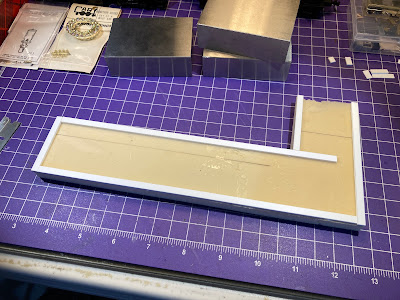 |
| The dock was a little lower than a freight car floor, so I used some strip styrene to raise it up a bit. Aleen's Quick Grab Tacky Glue worked great for this. |
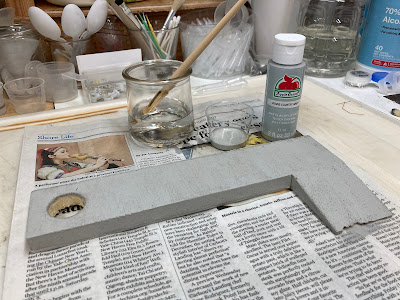 |
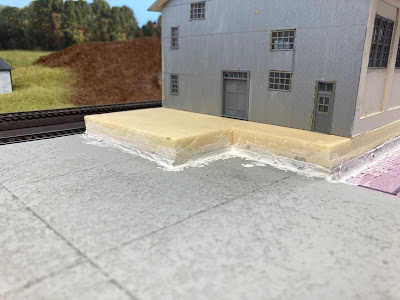
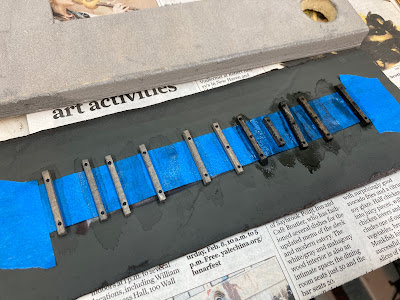
| Next, I painted it with my go-to color of craft paint for concrete color. The hole on the left will accommodate a crane I got from Dave Messer. |
 |
| Making the dock itself was really easy, but it looked pretty plain. So I added some "RR ties" and nut-bolt-washer castings for guard rails and bumping posts. |
 |
| I "creosoted" the ties with, I think, 4-5 washes of India ink and alcohol. |
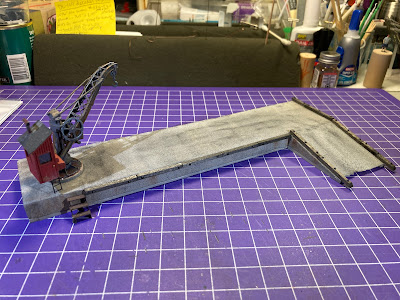 |
| And weathered the dock with a variety of powders & chalks - black, rust, brown. |
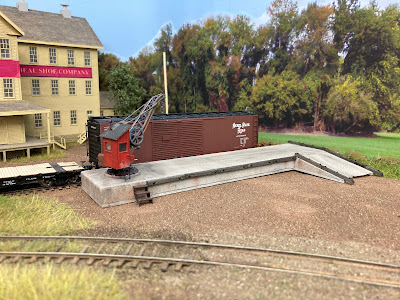 |
| And here it is in place at East Berlin. I still need to "plant" it with some ground goop, weeds, and grass. Its primary purpose is to provide a way to load pallets of bricks from local brickyards, but as a team track ("bulk track" on the New Haven) I can ship/receive just about anything - especially with that cool crane! |
East Berlin Scenery Fix
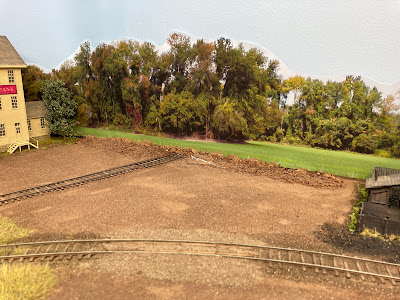 |
| Before planting the dock though, I wanted to fix something that's been bugging me for a while here - namely, that "berm" of ground up leaves & twigs at the bottom of the backdrop. I think the thinking here was that that would be a forest floor and I'd have lots of trees planted there. But that's not how the scene has evolved. |
 |
| So I decided to try and "bring the backdrop grass forward" and do my best to disguise the transition from foreground to backdrop. First though, I needed to protect the backdrop . . . |
 |
| . . . then I spread on some glue . . . |
 |
| . . . added a paper towel "mask" - purposefully staggering the edge . . . |
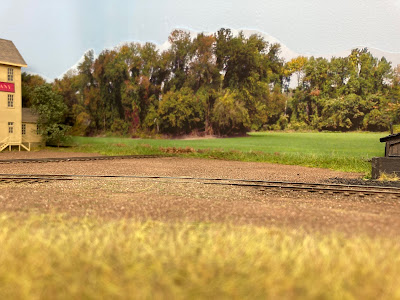 |
| . . . . and added static grass, trying my best to match the backdrop color. It's not perfect, but I think you'll agree it's an improvement! |
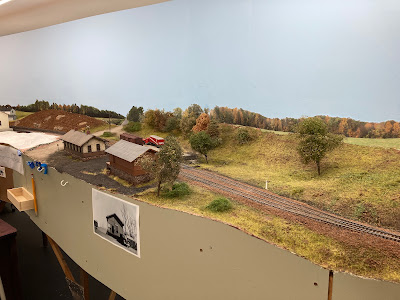
Rocky Hill Backdrop
Long time readers know that I have a love/hate relationship when it comes to backdrops. I love the fact that they're "instant scenery" - but hate the work that they require. I take all my own backdrop photos in the area I'm modeling (being lucky to live near my prototype) and stitch them together using Photoshop Elements. It seems I can never quite get the photo(s) I want/need and even my stripped-down version of Photoshop has a bit of a learning curve. But I for some reason this month I really got the bit in my teeth to tackle the backdrops in Rocky Hill and even (gasp!) Wethersfield . . .
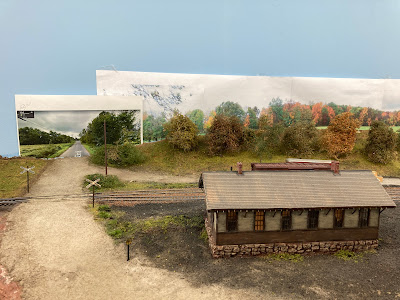 |
| The Rocky Hill backdrop had stalled at the road. I just couldn't figure out how to do it - especially since I didn't have a suitable photo (despite having literally dozens of photos of roads-going-off-into-the-distance). Fortunately, Google Street View came to the rescue here. It's not the actual prototype road, but the view isn't TOO far off from what I imagine that road to have looked like in the late 1940s. So I printed it out and mocked it up. |
 |
| My photo backdrop mockups are just printed out on copy paper - I'm only interested in size/scale & positioning at this point. I haven't found a way to print a banner in PSE, so I save the file as a PDF and print it using Adobe Acrobat. It's easy to align all the sheets of paper using a floorboard as a straightedge. |
 |
| My final step before final printing at Staples (click here for more details of my process), is to select the sky and change it to the color of blue I use to paint my masonite. That ensures that any border above the tree tops/limbs isn't as noticeable. Above, you can see the mockup and the final print (which I've started to trim). |
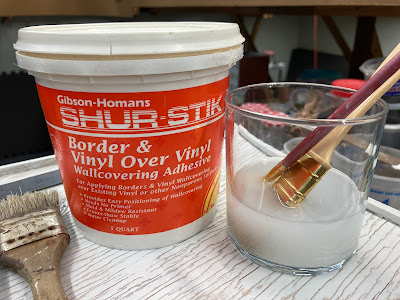 |
To attach the photo backdrop to the masonite, I first make sure I can slide it down between the scenery and the masonite - even cutting a slot in the scenery if necessary. Alternatively, you could trim the bottom of the photo to fit, but that doesn't allow you to move the print up/down for final positioning. Once the backdrop is in final position, I tape it to hold it in place, then - starting at one end - I peel it back from the top and brush on some wallpaper adhesive using a 1" brush. I smooth it out, being careful not to squeeze glue out the top of the print (if you do, just use a damp cloth to wipe it off). Once I've gone down the whole length of the photo, I go back and touch up any small areas at the top of the print with another application of adhesive, this time using a 1/4" brush.
(more details here) |
 |
| And here it is in place. . . |
 |
| I still have road blending to do, as well as scenery. but it sure looks better than the plain blue masonite. And it's done! |
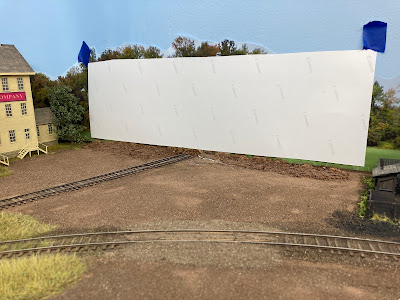
Wethersfield Backdrop
Ah yes - the notorious "Wethersfield backdrop" - the bane of the Valley Line's north end for years. I've mentioned before what a mental roadblock it's been since I know how the area is "supposed" to look during my era, and there's no way I can figure out how to replicate that. Well, not and have any time to do anything else in the hobby . . .
So I've finally decided to avoid making the perfect the enemy of the good and take an "impressionist" approach. No,
not that - but just doing a backdrop that gives the impression of what I want to convey: Fairly flat former farmland, with a bit of autumn trees. Bonus if the terrain tilts up a bit toward the west (away from you & the aisle). Bigger bonus if the roads-into-the-backdrop look at least plausible for the area - and era. So I decided to experiment in earnest. . .
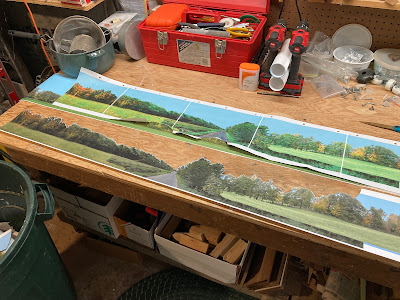
 |
| I went through a comprehensive process of trying different photos/panoramas, printing them out, and mocking them up. It's an iterative process of importing photos into PSE, stitching them together, using various tools to resize & blend them together, then doing a test print & fit on the layout. |
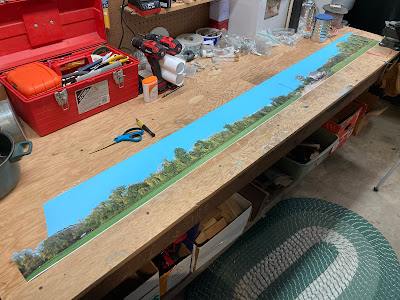 |
Once you have something that works, you print it as a banner & start the painstaking process of trimming the sky. This photo is 7.25 feet long and took me over an hour and a half to trim.
|
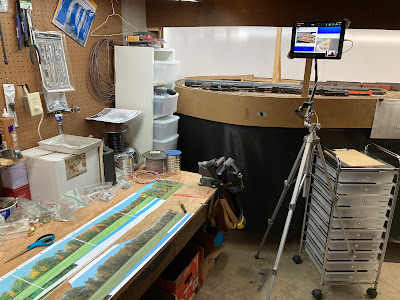 |
This is the longest print I've trimmed so far. Thankfully, on this particular day, I had the AML crew to keep me company (via Zoom on the iPad/tripod)
|
 |
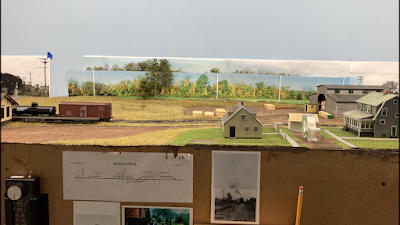
| One thing that looked great in the photos - but I'm not sure it's going to work on the backdrop - is this telephone pole. In hindsight, I think I would photoshop it out. But I'll live with it and see . . . |
The last thing I did today was tape up the Wethersfield backdrop. It's quite a milestone to have gotten this far with it - finally. But it's not giving up without a fight . . . there's still a bit of obsessing left to do . . .
I can't figure out exactly where to place the backdrop vertically. To compare, I've taken 4 photos from the viewpoint of an HO scale figure. What do you think? (as always, you can click on the image to enlarge it)
While I can make persuasive arguments for/against any one of these positions (heh - welcome to the inner world of the obsessive. And I'm a lawyer on top of that. Pity me), I haven't decided which looks best and/or which one would provide the best basis for further blending/disguising with bushes, trees, and colors. For reference, the truck in the photo is the tiniest bit undersized from HO (an HO scale truck is in front of it).
I'm not too worried about the difference in color between the foreground & background roads - I'm confident I can deal with that. Also, with regard to the shoulders: if needed, I can either disguise/blend them with
shrubbery or modify the existing scenery to "pull them forward" into the 3D scene.
I guess the main thing is to figure out what looks best from this perspective (considering future model photography) - while freely acknowledging that that might not look the best to viewers standing in the aisle (and over 100 scale feet above the scene).
Heh - unlike Rocky Hill, it's clear I can't call the Wethersfield backdrop done yet, but I sure have made some significant progress on it! And once I figure out final positioning, it's just a matter of gluing it to the masonite . . . and creating the REST of the backdrop south (left) to Goff Brook.
Thankfully, I'm still in "backdrop mode" - and I don't want to forget (again) all the Photoshop tools I've learned - so I'll keep at it until it's DONE!
<><><><><><><><><><><><><><><>
If you've made it this far, thanks for hanging in there! Like I said, I'm going to try and do at least weekly updates so I (and you) don't have to suffer through marathon posts. But I like to keep track of my progress - if nothing else, doing so reminds me not only that I have actually accomplished something on the layout but also spurs me on to accomplish even more.
Here's hoping you're able to take advantage of these winter weeks and make some progress on your projects as well. And if you do, be sure to let us know in the comments below!