Friday, May 27, 2022

Friday Fun: Boston & Maine SW-1 #1109

As I alluded to in my Wordless Wednesday post this week, I've recently become enamored of B&M SW-1 #1109. But my love of the SW-1 actually goes back to my earliest days in the hobby . . .

Why the SW-1?
Shortly after "adopting" my younger brother's train set that he got for Christmas, 1982, my dad and I went to the hobby shop to get some more track - and I also got my first-ever issue of Model Railroader (January, 1983) and my first track planning book - "Blueprints for Atlas Snap-Track HO Layouts."


While there were a number of cool railroad "empires" that you could build using the plans in this little booklet, there was one that for some reason caught my eye and fired my imagination...

For some reason, still unknown to me to this day, I was drawn to the idea of operating a lowly, local way-freight, switching the various industries along a branchline, and interacting with the folks along the way. Longtime readers of The Valley Local will attest to the fact that - almost 40 years later - I'm still enamored of this type of operation and my current layout focuses on the interaction of no less than four local freight jobs.

But check out the silhouette of the train. I didn't know it at the time, but that's an EMD SW-1 on the front. I think this image must've been subconsciously etched on my brain, since I've had a soft spot for EMD end-cab switchers ever since.

Like most of us in the hobby, my modeling preferences evolved - sometimes in unanticipated directions - and, after flirting with freelancing, and a serious infatuation with the Rutland (once Atlas came out with its excellent RS-3 model), I settled hard into modeling my "local" railroad - The New York New Haven & Hartford - and the era that most excited me was the late 1940s - right at the height of the NH's steam/diesel transition.

While the New Haven bought its first end-cab switchers in the 1930s, and had dozens of them by the late 40s, they were all Alco products. The railroad didn't get an EMD end-cab switcher until their fleet of SW-1200s (class DEY-7) in 1956 and, as cool as the SW-1200 looks (even cooler than the ubiquitous Alco S-1s and S-2s, IMO), it's not an SW-1. And it's way past my chosen era (though I did end up getting one, just for kicks). The SW-1 was first produced in the late 1930s.

Hmmmmmm.....

Why B&M #1109?

Last fall on our way out of state on a RR road trip, my friend Pete and I stopped by Thomaston, CT and the Railroad Museum of New England. We knew it'd be closed, but it was on our way so worth a look around. And what to my wondering eyes should appear out in the yard but an SW-1(!).


Seeing an actual prototype SW-1, up close and personal, fired my imagination just like it had almost 4 decades earlier. And since it was a Boston & Maine engine, at least it was close in proximity to the New Haven. . .

I later remembered that the RMNE, way back in 1986 when it was the Connecticut Valley Railroad Museum (CVRM), had purchased the 1109 from the Pioneer Valley RR. The PVRR had acquired it in 1982 from the Montpelier & Barre (coincidentally, right before I entered the hobby) who'd bought it from the B&M in 1959. Having been built in November 1939 as the first unit of the B&M's first batch of SW-1s, the 1109 is actually pretty notable as the first diesel to have EMD's famous 567 prime mover and is currently the oldest diesel locomotive still in existence that was used by a New England railroad.

That, along with my affinity for the SW-1, might be enough to model it. But there's more(!)

It turns out, the 1109 is the only SW-1 to have ever turned a wheel on the Valley Line!

I'd totally forgotten not only that the CVRM had purchased the 1109 and stored it at the Valley RR in Essex, CT for years, but it had also been stored in the yard at Bokum Road in Old Saybrook. In fact, it was literally 1/4 mile away from my house for the first 8 months we lived here and actually rolled past my backyard when it was towed away to its new home in Thomaston.

Yeah - I either wasn't aware of, or had totally forgotten, all of that.

So, when I saw the 1109 last fall, the brain matter started kicking in - I had to model it! Thankfully for my prototype sensibilities, the New Haven and the B&M often leased power from each other. And - while I have no direct evidence (yet) of the New Haven leasing an SW-1, much less evidence of one actually operating on the Valley or Airline, I think an HO scale version of the 1109 can be at least plausibly used on my layout.

At least that's my story and I'm sticking to it :^)

Modeling

Pete will remember all during that trip that I was on the lookout for an SW-1 model in HO scale. A quick internet search showed that Walthers had done one back in the 90s, but I'm kind of glad I missed out since I also read that that first run wasn't very good. Toward the end of our trip, I actually found an undec at Hobby World in North Adams, MA - but it was from that first run, so I passed.

After the holidays and a busy legislative session, I started looking again - even going so far as to mention it on the Valley Local Facebook page. While I preferred an undec, friend Lou P found a Norfolk Southern one at Tom's Trains in Wethersfield. But Philip Taylor came to the ultimate rescue when he offered to donate a PRR version to the cause. Bonus: it's the later run (Walthers Mainline).


So after almost 40 years, I'm finally the proud owner of an EMD SW-1. While the eventual plan is to repaint it as the B&M's 1109, that Pennsy livery will certainly do for now. And even though it'll ultimately be converted to DCC, I couldn't wait to run it on the Airline (which, fortunately, can be converted from DCC to straight DC power at the flick of two toggles) . . .

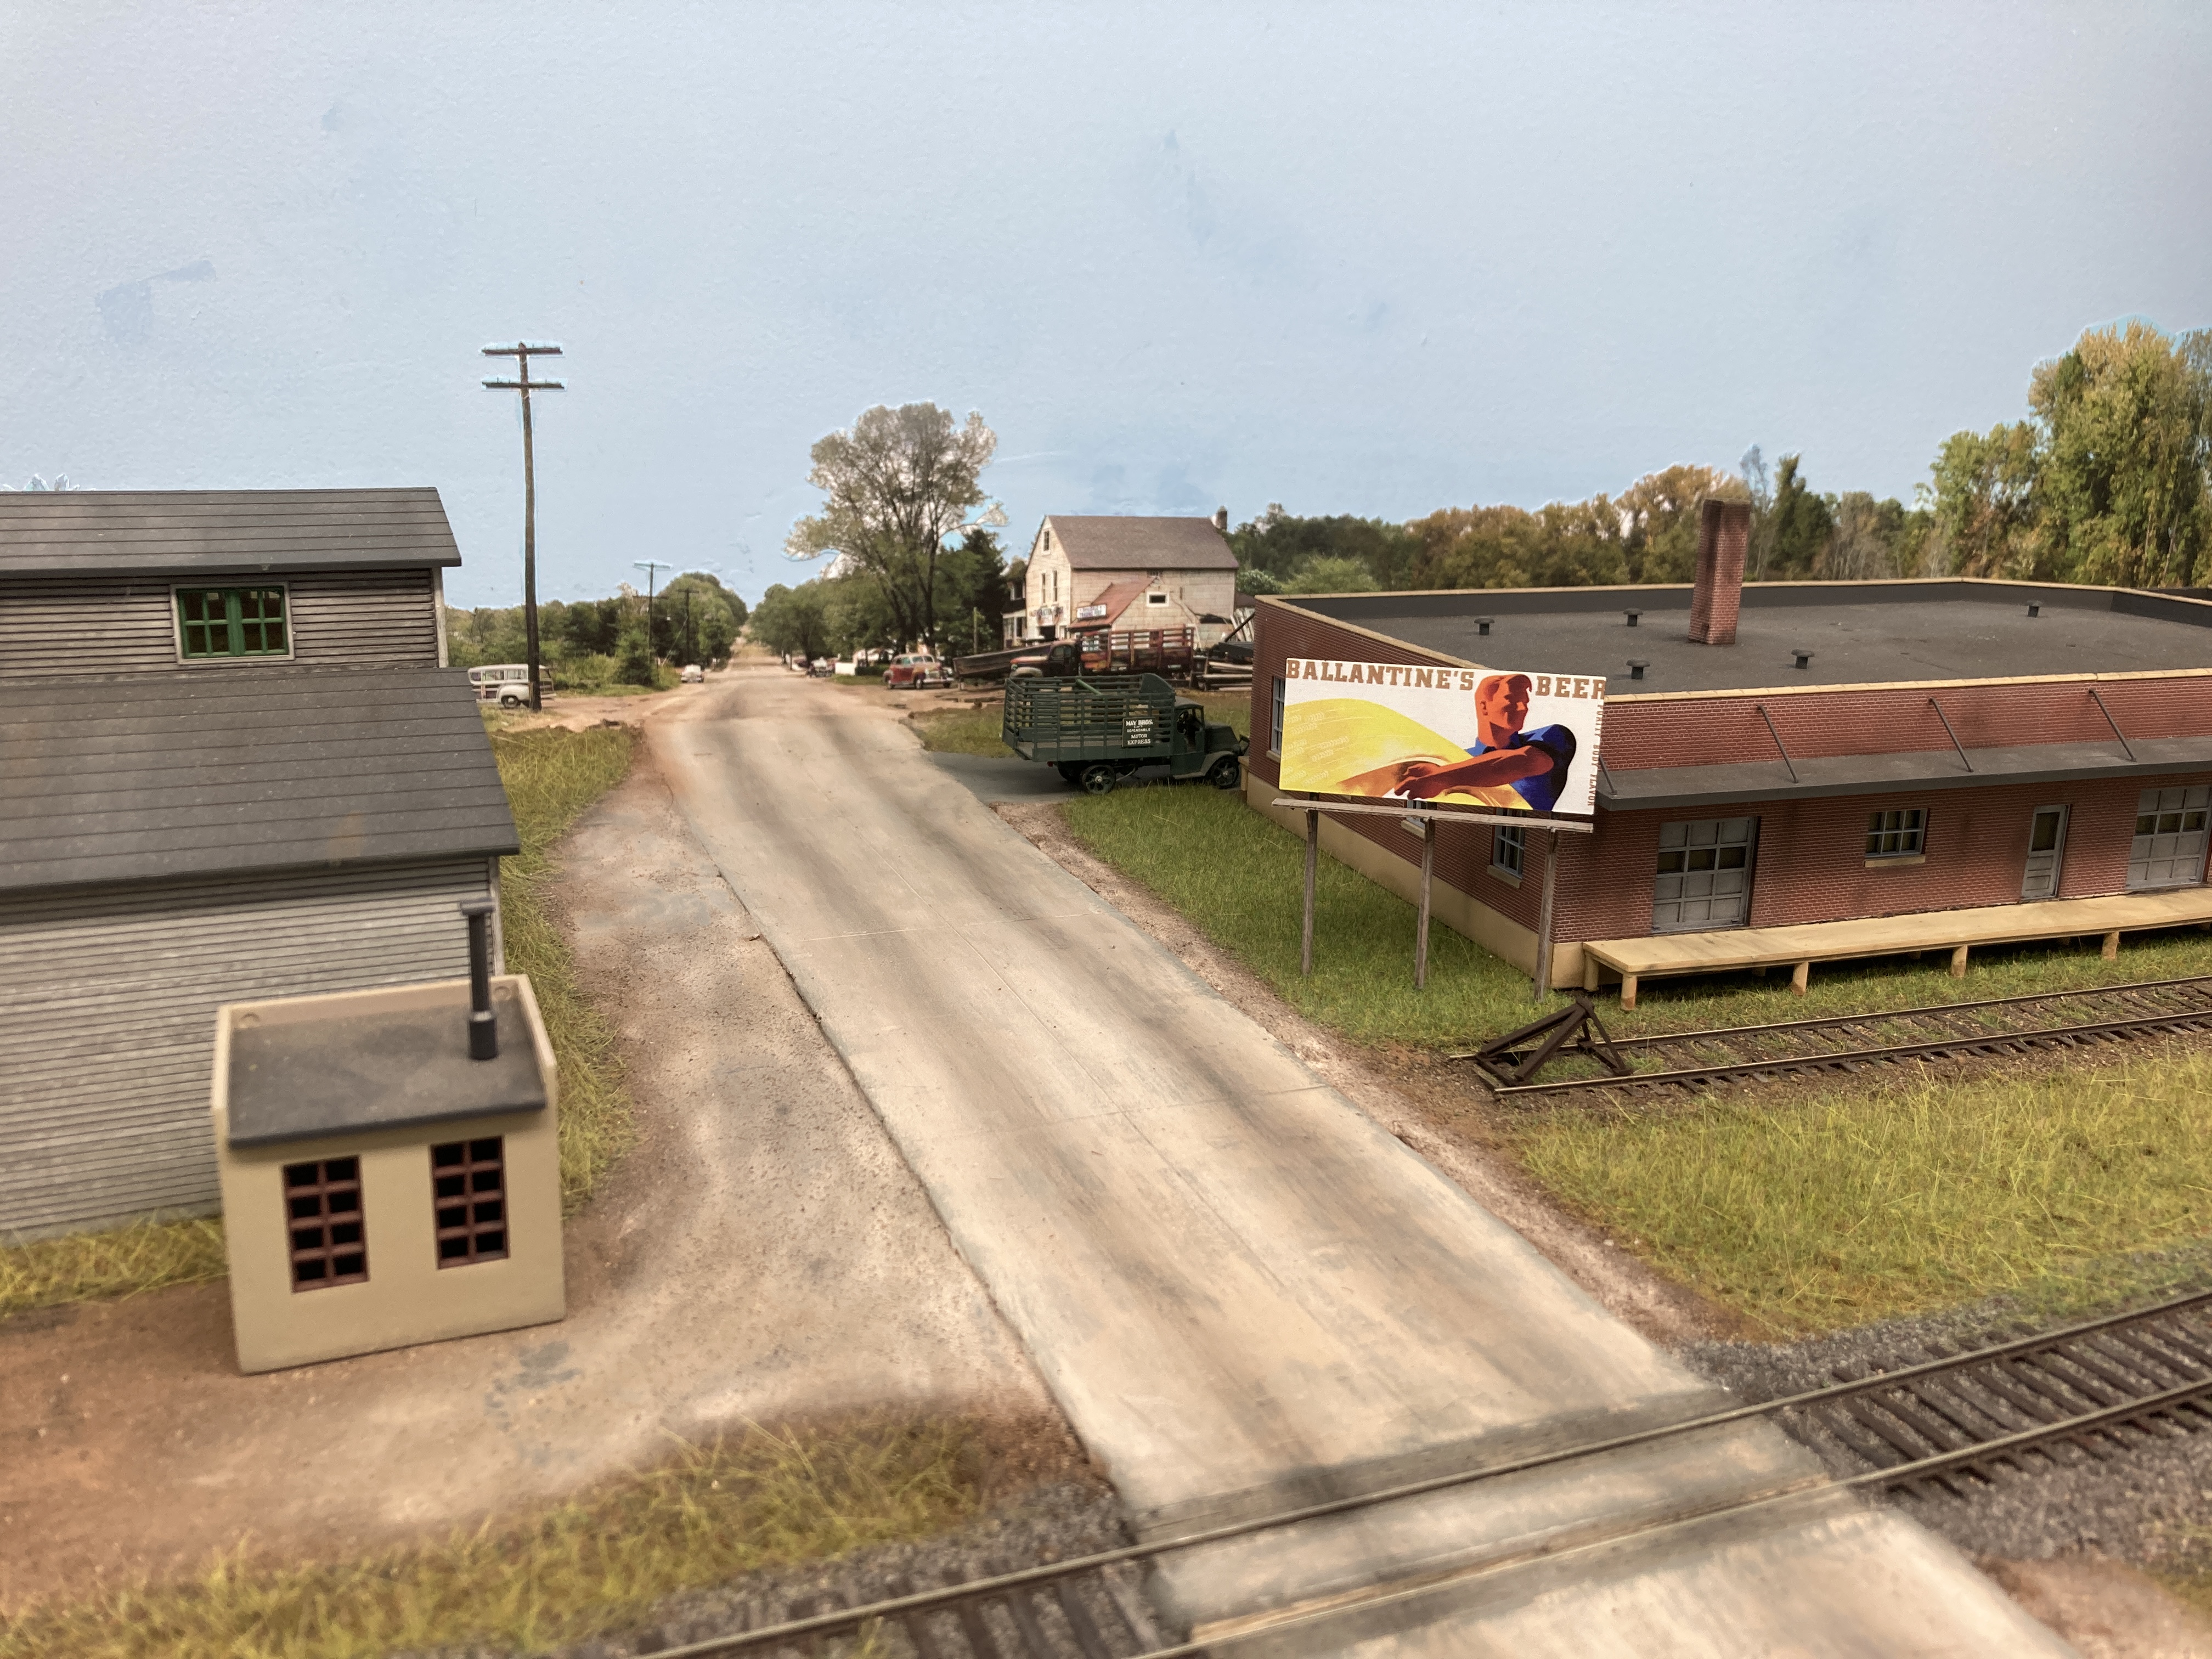
Northbound arriving in Somerset
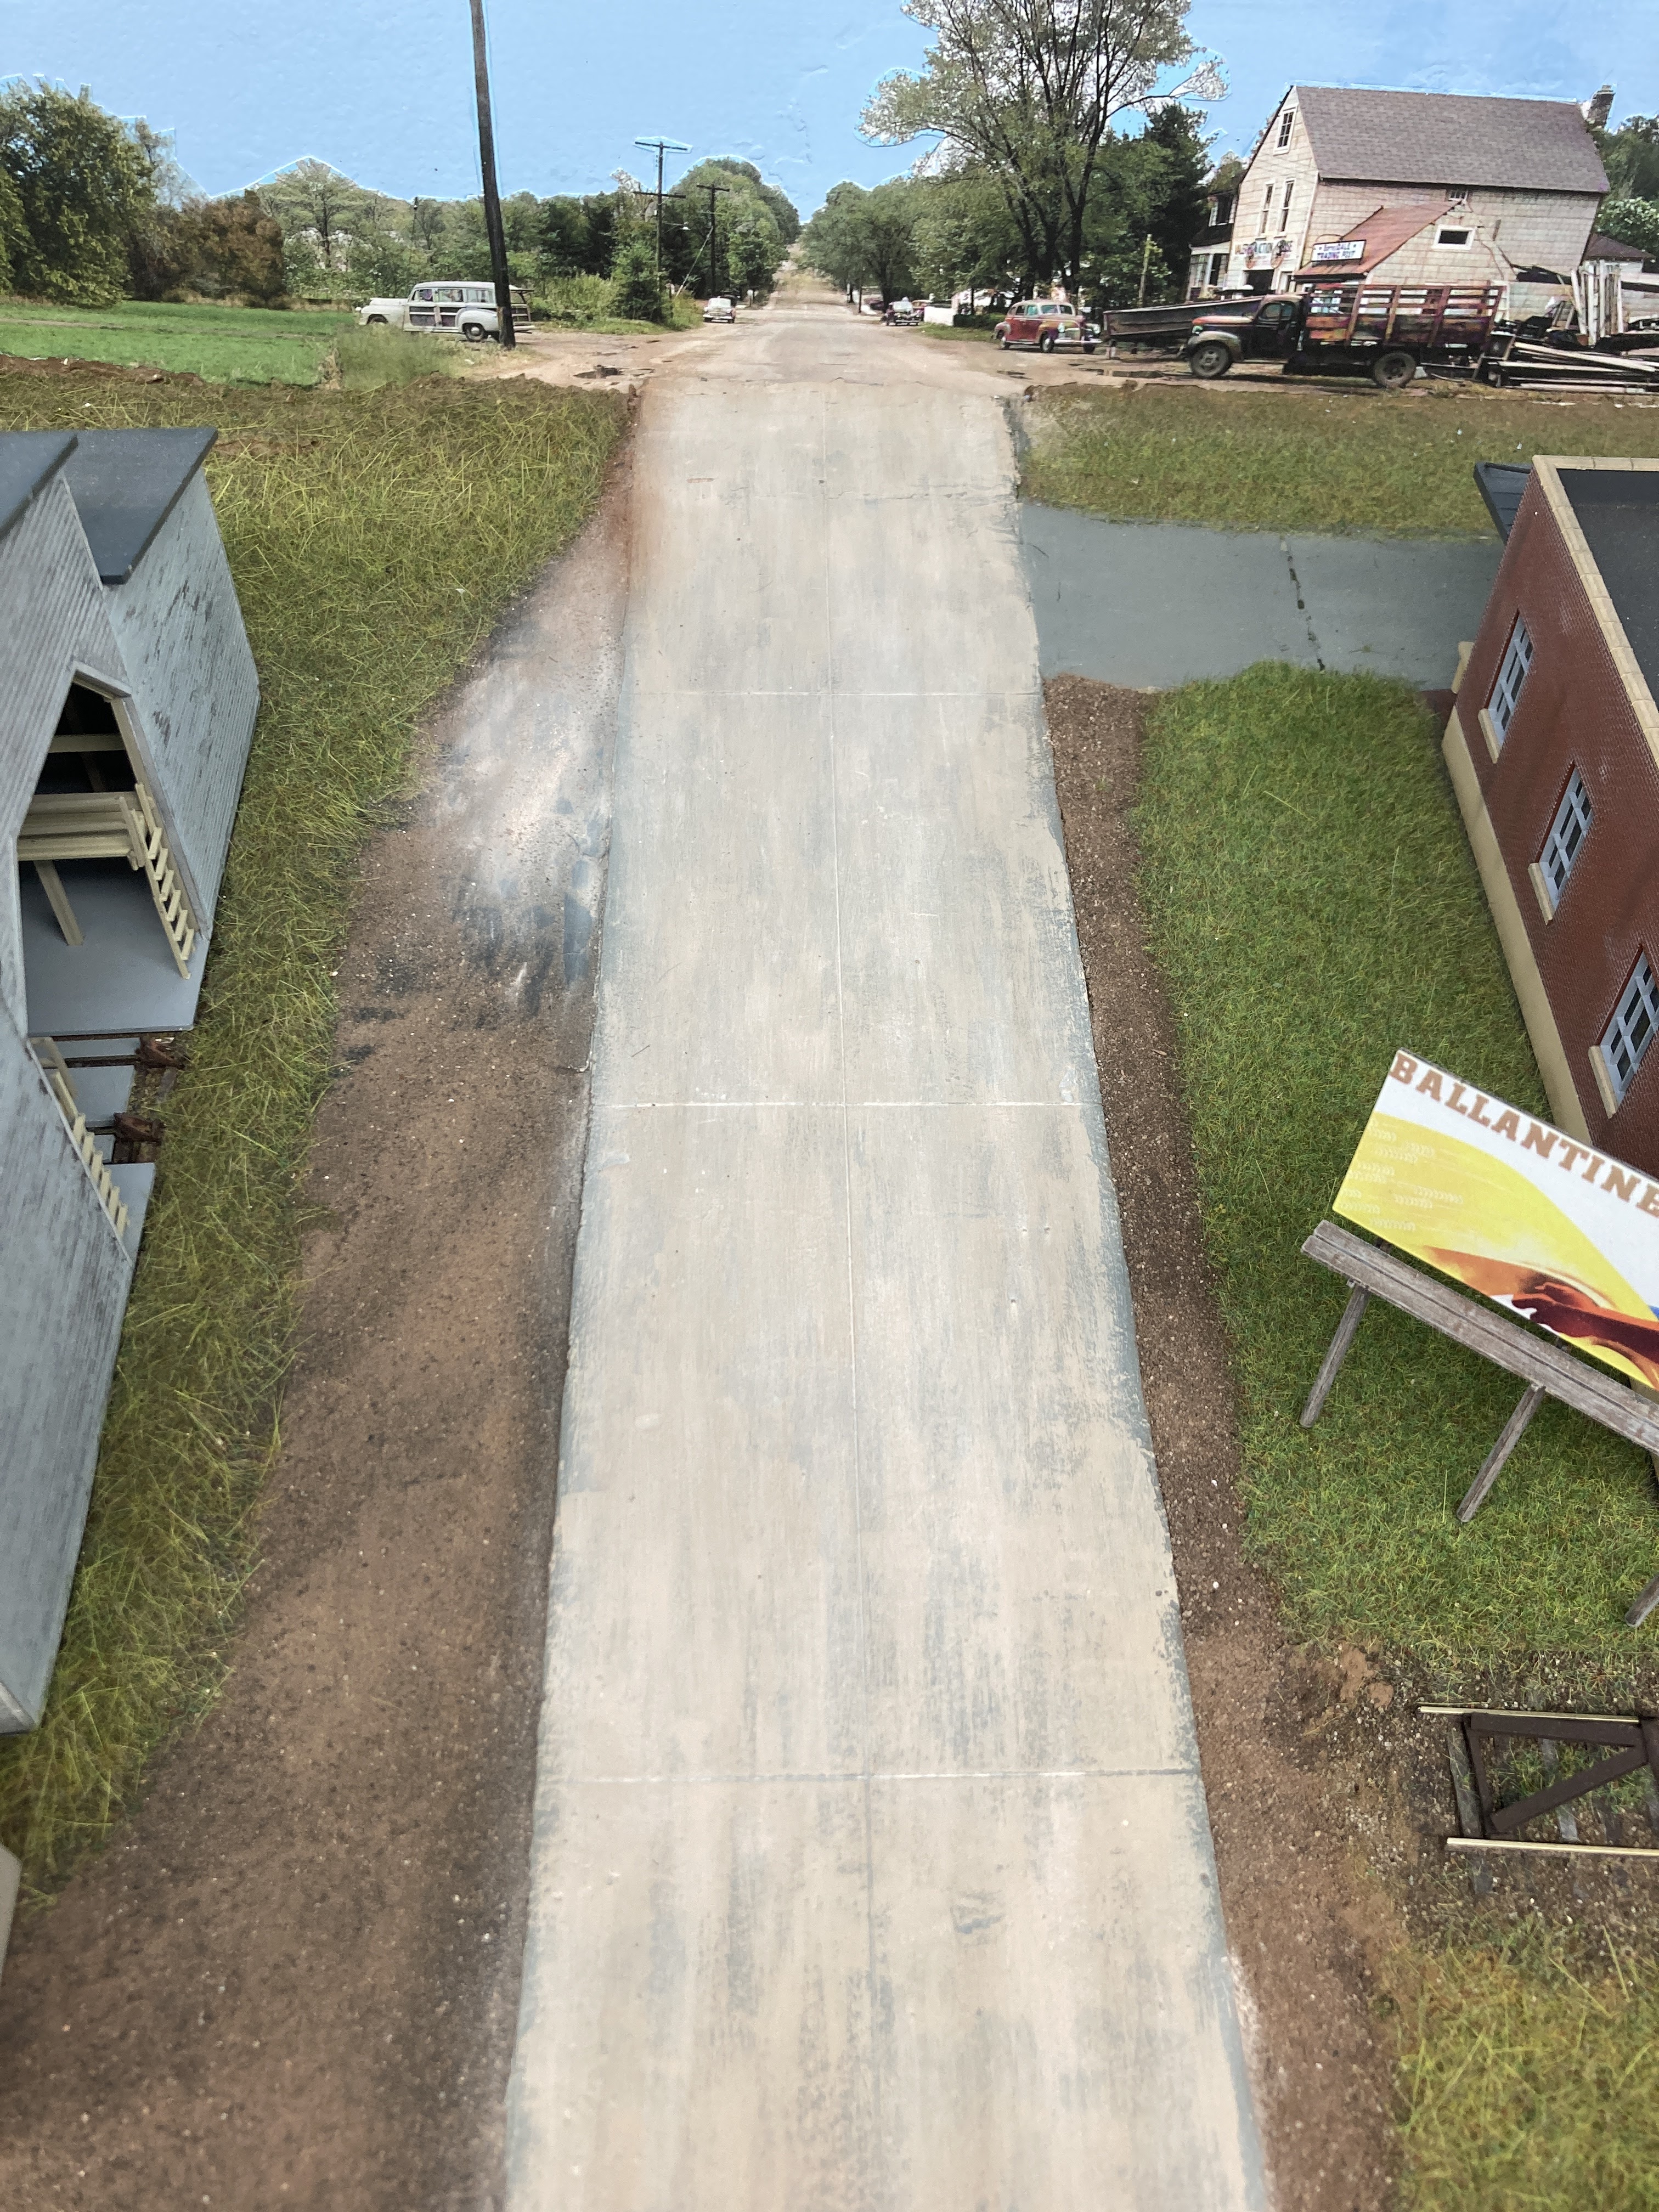
Along the Airline

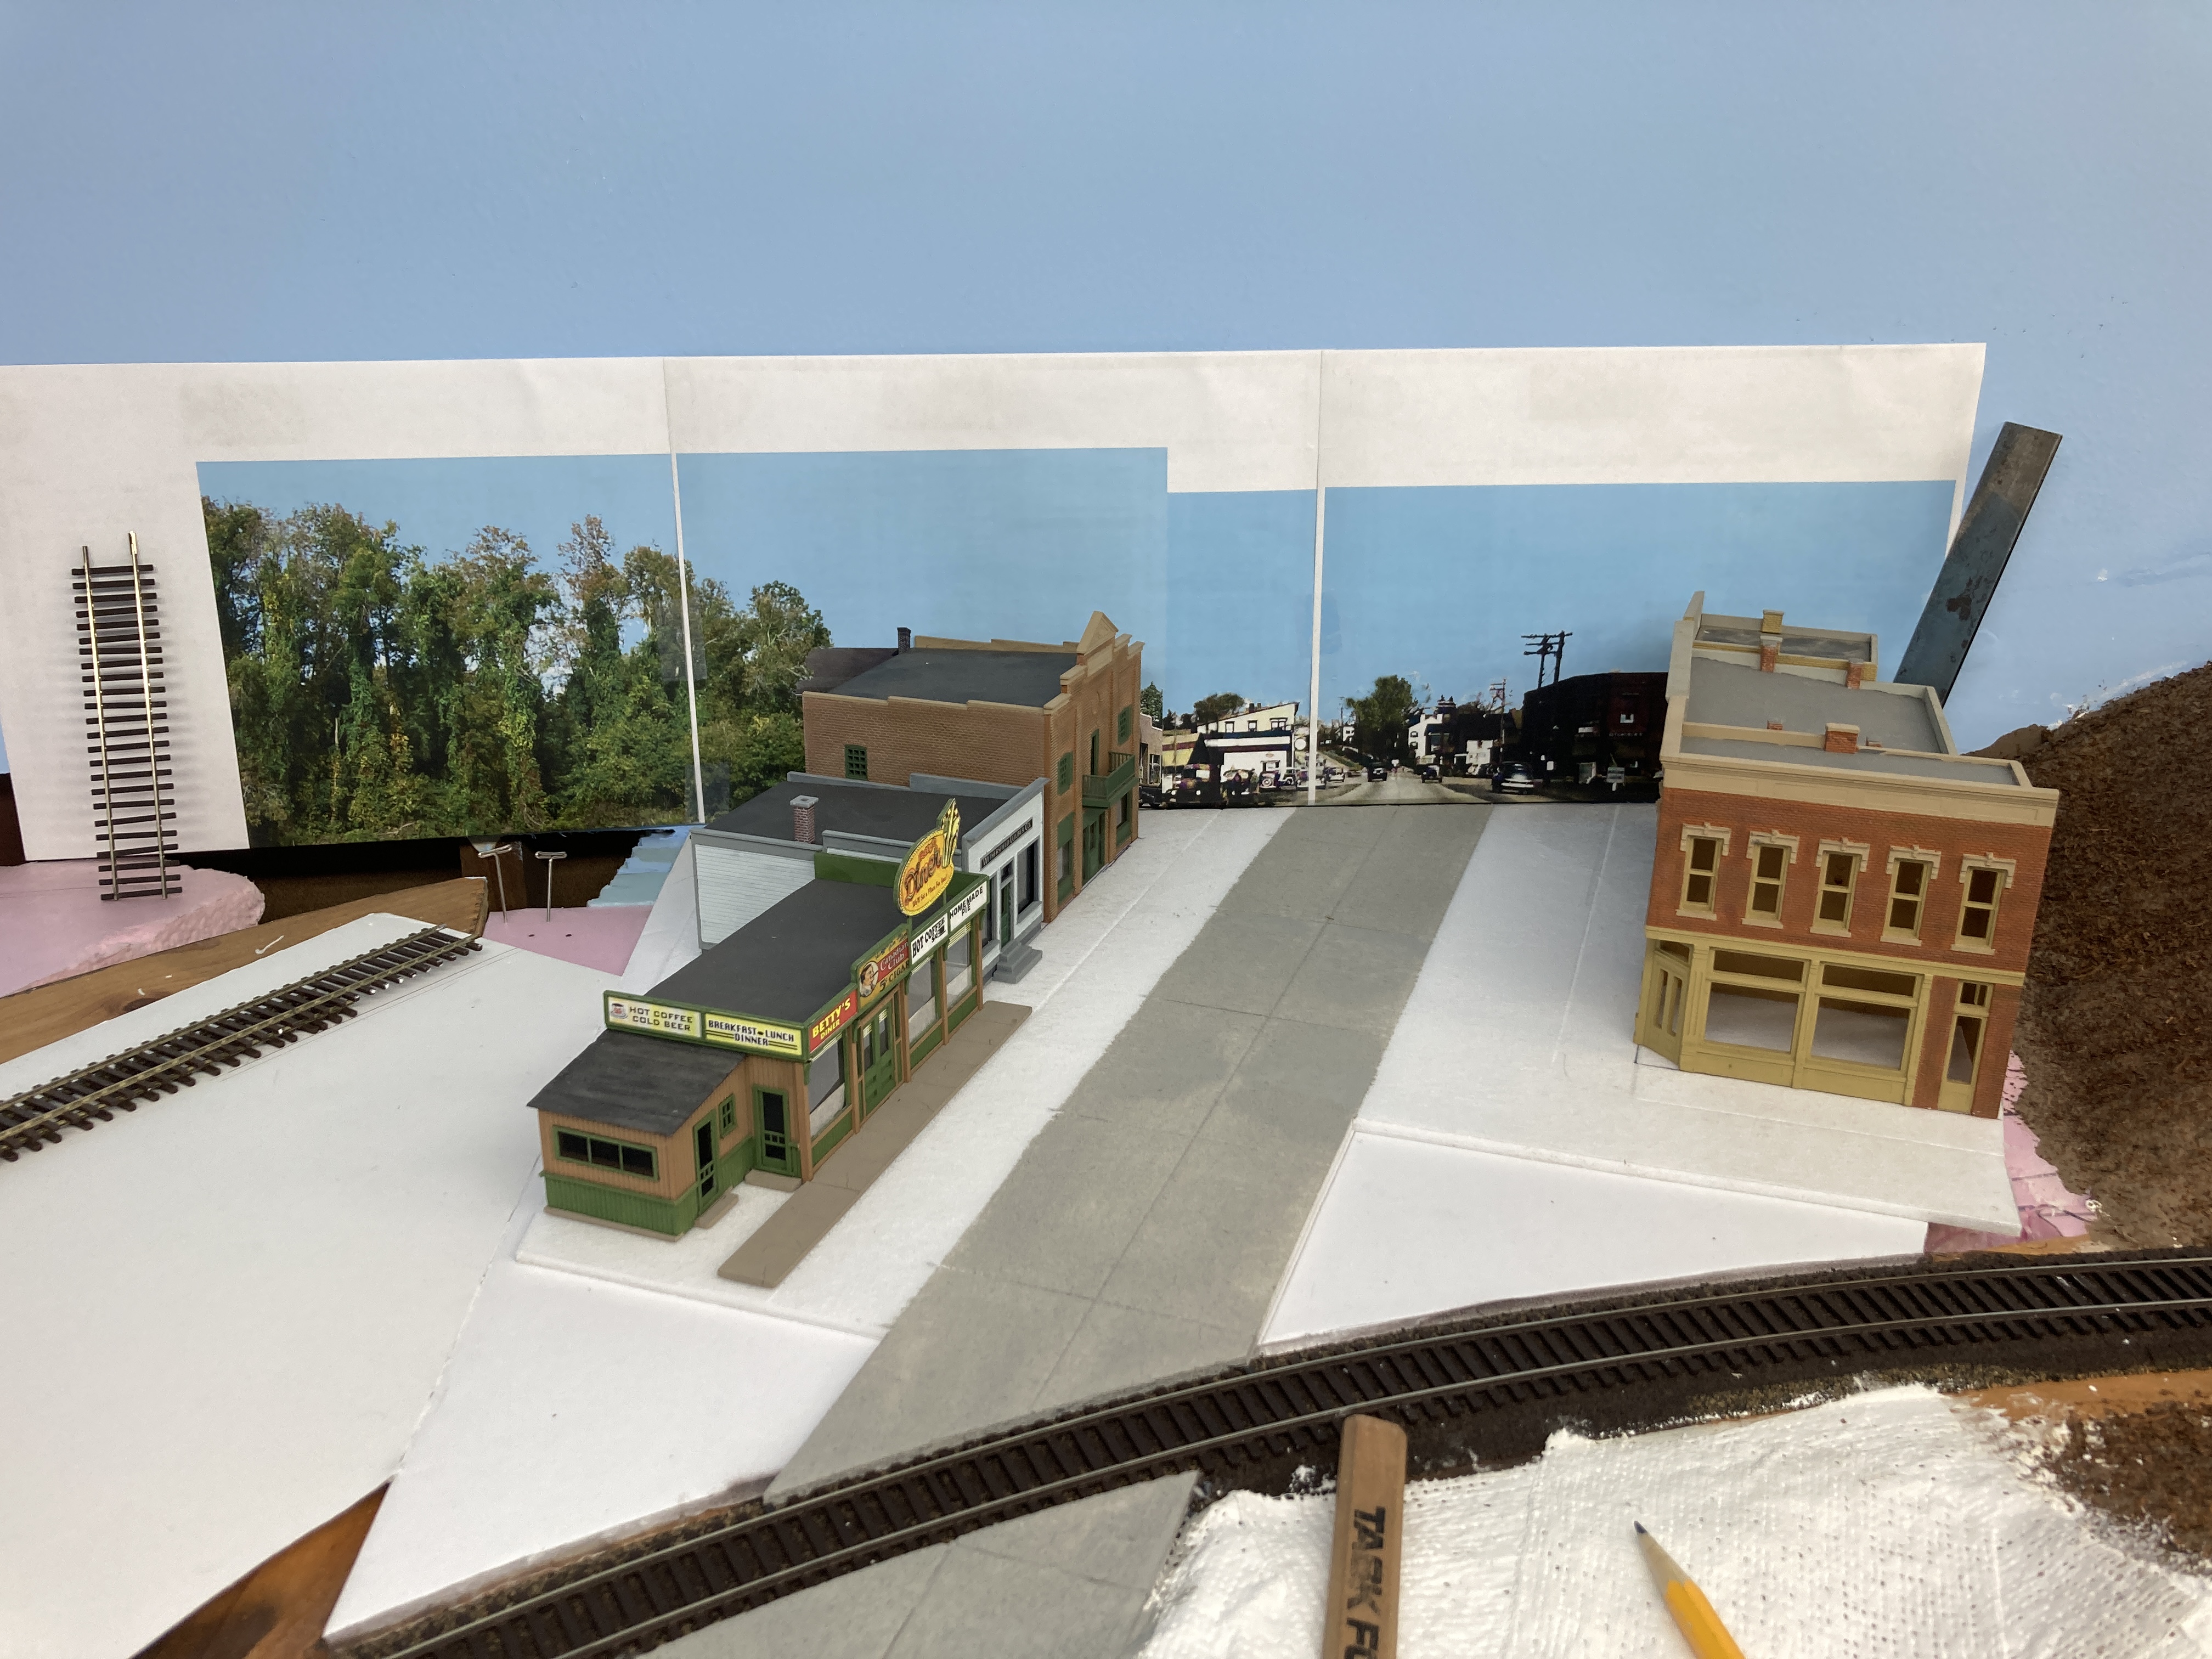
Arriving in Mill Hollow

While waiting for the engine to arrive, I got a custom speaker from JT Burke over at Scale Sound Systems, as well as an ESU v5 micro decoder and TCS KA1 capacitor from my friend Kaylee Z. So all I need to convert to DCC & sound is to find a couple of resistors (1KΩ) to keep from blowing out the LED headlight bulbs.

Once that's done, don't mind me if I stretch plausibility a bit further and have the New Haven lease a loco from the mighty PRR for a while. After all these years, seeing & hearing an SW-1 at the point of a way-freight special on my own layout will be pretty awesome.


Wednesday, May 25, 2022

Wordless Wednesday #397


Railroad Museum of New England, Thomaston, CT - September 17, 2021


Boston North Station, August 1947 - Norman Granz photo.
(pic courtesy David Hutchinson from The Model Railroader's guide to B&M/MEC Diesel paint schemes)
Boston North Station, May 1951 - D.S. Hutchinson coll.
(pic courtesy David Hutchinson from The Model Railroader's guide to B&M/MEC Diesel paint schemes)


Wednesday, May 18, 2022

Wordy Wednesday: (Lots of) Progress Report

There's definitely an inverse proportion of layout progress to blog posts. You wouldn't think that would be so, but it's certainly true in my case. The more progress I'm making, the less time I have (or want to take) to blog about it. Facebook actually makes it easier to put off blogging, since I can post quick updates to my Valley Local group page (and get pretty instant feedback too).

So the lack of posts doesn't necessary mean lack of progress - and in this case, it's been just the opposite. Here's a (hopefully) brief rundown of activity since my last progress report:

Wethersfield Backdrop @Jordan Lane
I mentioned in passing that Deb (aka The Missus) had helped me with some color choice for blending the foreground road with the background road at Jordan Lane. Here's how I went about it...

I should have taken a "before" photo, but here it is in progress... The foreground is what the entire road looked like (and as documented in this post - included a *fail* for using actual concrete). It was WAY too different from the color of the background road. So I got a craft paint color that matched the "overall" color of the background road and applied it with a 1/4" wide brush, not worrying about (and actually embracing) the variation that resulted.


I then blended it all in with a slightly lighter color of Pan Pastel.

Lastly, I used black PanPastel to add "oil marks" down the middle of the lanes, even carrying them up slightly onto the backdrop. I think you'll agree the road looks MUCH better now than how it started out!

Continuing Cromwell
I realize now that I never did a post starting Cromwell, so just by way of a quick overview...

I used foamcore (with the paper peeled off) for Main Street (aka Middlesex Turnpike), and a combo of cardboard strip lattice and plaster cloth for the subterrain. Then I started playing with structure placement, guided by my embryonic Cromwell backdrop.

For the sidewalks, I decided to try these laser-cut MDF ones that I got for Christmas.

I laid the structures out on top of chip board that was the same thickness as the sidewalks (about 1/16"). These cutouts would form the base/foundation for the structures and raise them up even with the walks.

Alternately, I made a sidewalk/structure base combo out of foamcore (again, with the paper removed) for the station. After scribing in the lines, I painted this "concrete" with Apple Barrel Country Grey.

The road "north" of the tracks, as well as the subbase for the town structures, was cut from one large piece of foamcore. Like with all my foamcore, I remove the paper to reveal nice texture for concrete roads - it's also impervious to water (no warping) and is easy to scribe. Here, after scribing in the expansion joints, I've masked off the road for painting.

Main Street and town subbase in place, with structure base outlines marked in.

Mine is a very slow, iterative process - especially when it comes to structure placement and backdrop positioning.

But all this time pays off when you get the result that looks "right" to your eye - like this.

One of my biggest challenges is actually committing - whether it's gluing down structures, or sending a photo-shopped background image to be printed. But at some point, you have to "Just Do It" or be paralyzed by over-analysis. Here's the final Cromwell backdrop. It won't stand the scrutiny of eagle-eyes, but should work fine as a background for the main activity up front.

Once I got the final background print, I realized that the road color was a little off. So I repainted it to better match and I glued down the foam core (brushed on full strength white glue), glued on the structure bases, and weighed everything down. 

Once that was all dry, I masked off where the sidewalks would go, applied some craft paint for color and adhesion, and sifted on fine dirt in the parking areas (per prototype photos).

The paint I used as a base for the dirt was Apple Barrel Pewter Gray, to match the undertone in the shoulders/parking areas of the background photo. I sifted the dirt on using a tea strainer.

While that was all drying, I used Folk Art "Barn Wood" to paint the sidewalks.

Taping them down kept them still while I used a 1/4" brush to paint the top and curbs. I didn't worry too much about brush strokes - you won't see them from the aisle and whatever your eye happens to pick up will perceive them as texture. At least that's true to my eye. YMMV.

And here's where things stand in Cromwell at the moment. I used the rest of my old Ground Goop to fill in behind the structures and fill the "triangle" between the road and tracks, and added fine ground foam (WS Burnt Grass and Green Blend) as a base for future static grass. I even used my new WS Static King for the first time to apply some grass between the buildings and the backdrop. But as you can see, I still haven't committed to gluing the backdrop in place (I really don't know what I'm waiting for). Ditto the sidewalks. BTW - note the track, how uniform it looks (shot with rattle-can Rustoleum Camo Earth Brown).

For a little diversion, I decided to finish off the grade crossing in Dividend. The gray you see is all foam core (without paper). I've filled in with DAP Vinyl Spackle.

Turns out, the spackle is really smooth and has none of the "concrete" looking texture of the foam core. But colored right it doesn't look too obvious (though I'll be looking for an alternative patching material - may try plaster). The spackle was first painted with the same base color as the road, then weathered with PanPastels. Did the same with the large parking/truck area (including oil/grease drips under where the engines of the loading trucks would be).

Remember the uniform-looking ties? Well, I spent a fun evening (truly!) listening to a couple of podcasts and drybrushing ties. Click here & scroll down for details on the process I use. IMO, the results are VERY much worth it!

So there you have it - progress over the course of a few weeknights and a weekend. It's still glacially slow, IMO, but at least I continue to move forward.

But now, I have some "honey-do" items that The Missus has been kind enough to let me postpone while I recover from legislative session. It's getting warmer though, and those projects can't be put off any longer. They're all outdoor projects, so don't be surprised if I pray for a little rain now and then! >:^)

Until next time - hope to see you back in Cromwell soon!


Monday, May 9, 2022

Modeling Monday: RMC Article & Cromwell Backdrop

With all the hubbub at work and end of session (finally!), I totally forgot to post here that I have an article in this month's Railroad Model Craftsman! (though, admittedly, I did post about it over at the Valley Local Facebook Group last week)


And this weekend - with some color help from the Missus - I finally got around to finishing that transition between road and backdrop.


Also this weekend, in addition to starting work in Cromwell (roads, sidewalks, building placement, and such), I used this article as a guide to starting the backdrop . . . 

Long time readers will recognize the photo I started with: 
Source: Dodd Research Center, University of Connecticut, via Robert J. Belletzkie. Max Miller Collection.

This is the Middlesex Turnpike in Cromwell, looking north across the Valley Line. Though the quality/resolution of the photo itself isn't great, it's shot from the perfect vantage point for use on my layout - and it even has the proper-era vehicles.

The main problem is - it's a black & white photo.

No problem though (see RMC article above - and go here if you need a copy :^), I used an online colorizer (in this case, MyHeritage) to make it suitable for photo backdrop use:

These colorizers are super quick and easy to use. Now for the real work. . .

First step was to bring the photo into PhotoShop Elements and crop it (can't have the Valley Line in the background and foreground both!


Cropping was easy enough, but I had a LOT of photo editing to do. Here's a short list of what I wanted to do, from left to right:
  • Remove right edge of diner
  • Remove sparse trees, and fill in others
  • Remove light pole
  • Remove power lines
  • Remove white flag pole
  • Remove black sign and reconstruct rear fender of white car
  • Remove crossing sign pole & sign
  • Fill sky with "sky color" to match paint color on my masonite backdrop
Here's the result (as always, you can click on the image for a larger view:


Using the hill on the right (view block between Cromwell and Dividend) and the buildings on the left as the "bookends", I determined I'd need this section of backdrop to be 24" wide and 6" high. You can barely make out two people in the Cromwell photo, so I scaled the photo so that they'd be about 5/8" tall (instead of a typical HO scale height of 3/4", to account for the fact that the scene is in the distance).

So here's where things currently stand... the "canvas" is 6"x24" & filled with my "sky color" and the rescaled photo is in place. I determined its exact location by noting where my foreground road centerline hit the backdrop and then locating the road centerline of the photo at that same location.

After obsessing for, literally, years over the backdrop at Wethersfield (that's Jordan Lane in Wethersfield in the RMC article), I'm psyched that I'm not getting bogged down with the Cromwell backdrop. In fact, once I fill in to the right and left of the main photo (likely with trees), it'll be ready for printing and installation (click here the process I use).

In the meantime, I have plenty to keep me busy in Cromwell - including getting back to the roads, sidewalks, and structures... and of course, scenery. I'll be sure and post my progress here - and hope that you'll provide some helpful feedback/suggestions in the comments below. . .

Until next time!

Sunday, May 8, 2022

The "Pre-Quel"

Watching Rapido's latest video visit to the Valley Line reminded me of the last time Bill was here with the camera crew - almost exactly 3(?!) years ago. It took a little digging, but in case you're interested in the "rest of the story" here it is... Enjoy!

(and try not to point out that my ballast samples are still in the same place 3 years later - and in that same time Bill has not only finished his basement, but constructed an entire double-deck layout, with scenery, and will be hosting his second full ops session next week...)


Friday, May 6, 2022

Friday Fun: Rapido's New New Haven PA and County Cars

So this just posted . . .  

Rapido's new New Haven PA and County Cars visit the Valley Line - Enjoy!


And if this is your first time visiting, be sure also to check out the Valley Local group over on Facebook.


Sunday, May 1, 2022

Preparing for Post-Session: Hartford Rayon Tank Farm

Now that DEY-5 #0604 is (almost) done*, I thought I'd turn my sights to something different. . .


Hartord Rayon receives chemicals by tank car - and those chemicals need to be stored in tanks where they're held for later use in the manufacturing process. For more about Hartford Rayon, click here and here.

I considered a number of different tank configurations . . .

Large Tichy tank, split into two smaller tanks

One of the Tichy halves, with another two smaller-diameter vertical tanks

Same as before, but with another horizontal tank


Based on feedback from the Valley Local FB Group (be sure to check it out & consider joining if you haven't already!), I decided not to use the large Tichy tank here at all and started playing around with different configurations of scrap tanks. By the time I got to the point of the above pic, I figured "all" I needed was some additional piping.

But while looking for piping at the always-fantastic (and often overwhelming) AA Hobbies, I came across these Walthers kits and figured they'd have everything I needed, all conveniently together in one (well, two) package(s).

Of course, it wasn't until I got home that it occurred to me that - if I couldn't rearrange the stock configuration of the kit components - everything may not fit.


So I did a quick mockup of the footprint dimensions on the box - whew! It'll all actually fit VERY nicely! 

And since a quick poll of folks over at the group concluded that I should assemble before painting, it looks like I can dive right in! It's been a LONG time since I've built a kit, having been driven to distraction by the DEY-5 project, but I'm really looking forward to this change of pace.

I'll have to wait a bit though - the 2022 legislative session doesn't adjourn until midnight this Wednesday and it's 18-20 hr days until then. But at least now I have a fun project to look forward to! Hope you do too!

*Apparently, locomotives - like layouts - are never really done. In addition to weathering, I have a few minor things left to do on the 0604. I'll cover those, as well as share some lessons learned, in a future post.