
After finishing the initial weathering, I decided to go ahead and add some B&M-specific details: lunchbox/cooler, rerailers, a hook for a lantern, and a poling pole.
 |
| You can make out the rerailer beneath the cab (and there's one on the other side as well) and the poling pole under the walkway above the engineer's side front truck. |
 |
| The cooler/lunchbox is located on the back of the cab to the left of the cab door. |
 |
| Though not the 1109, this photo shows where the B&M had some hooks to hang lanterns. |
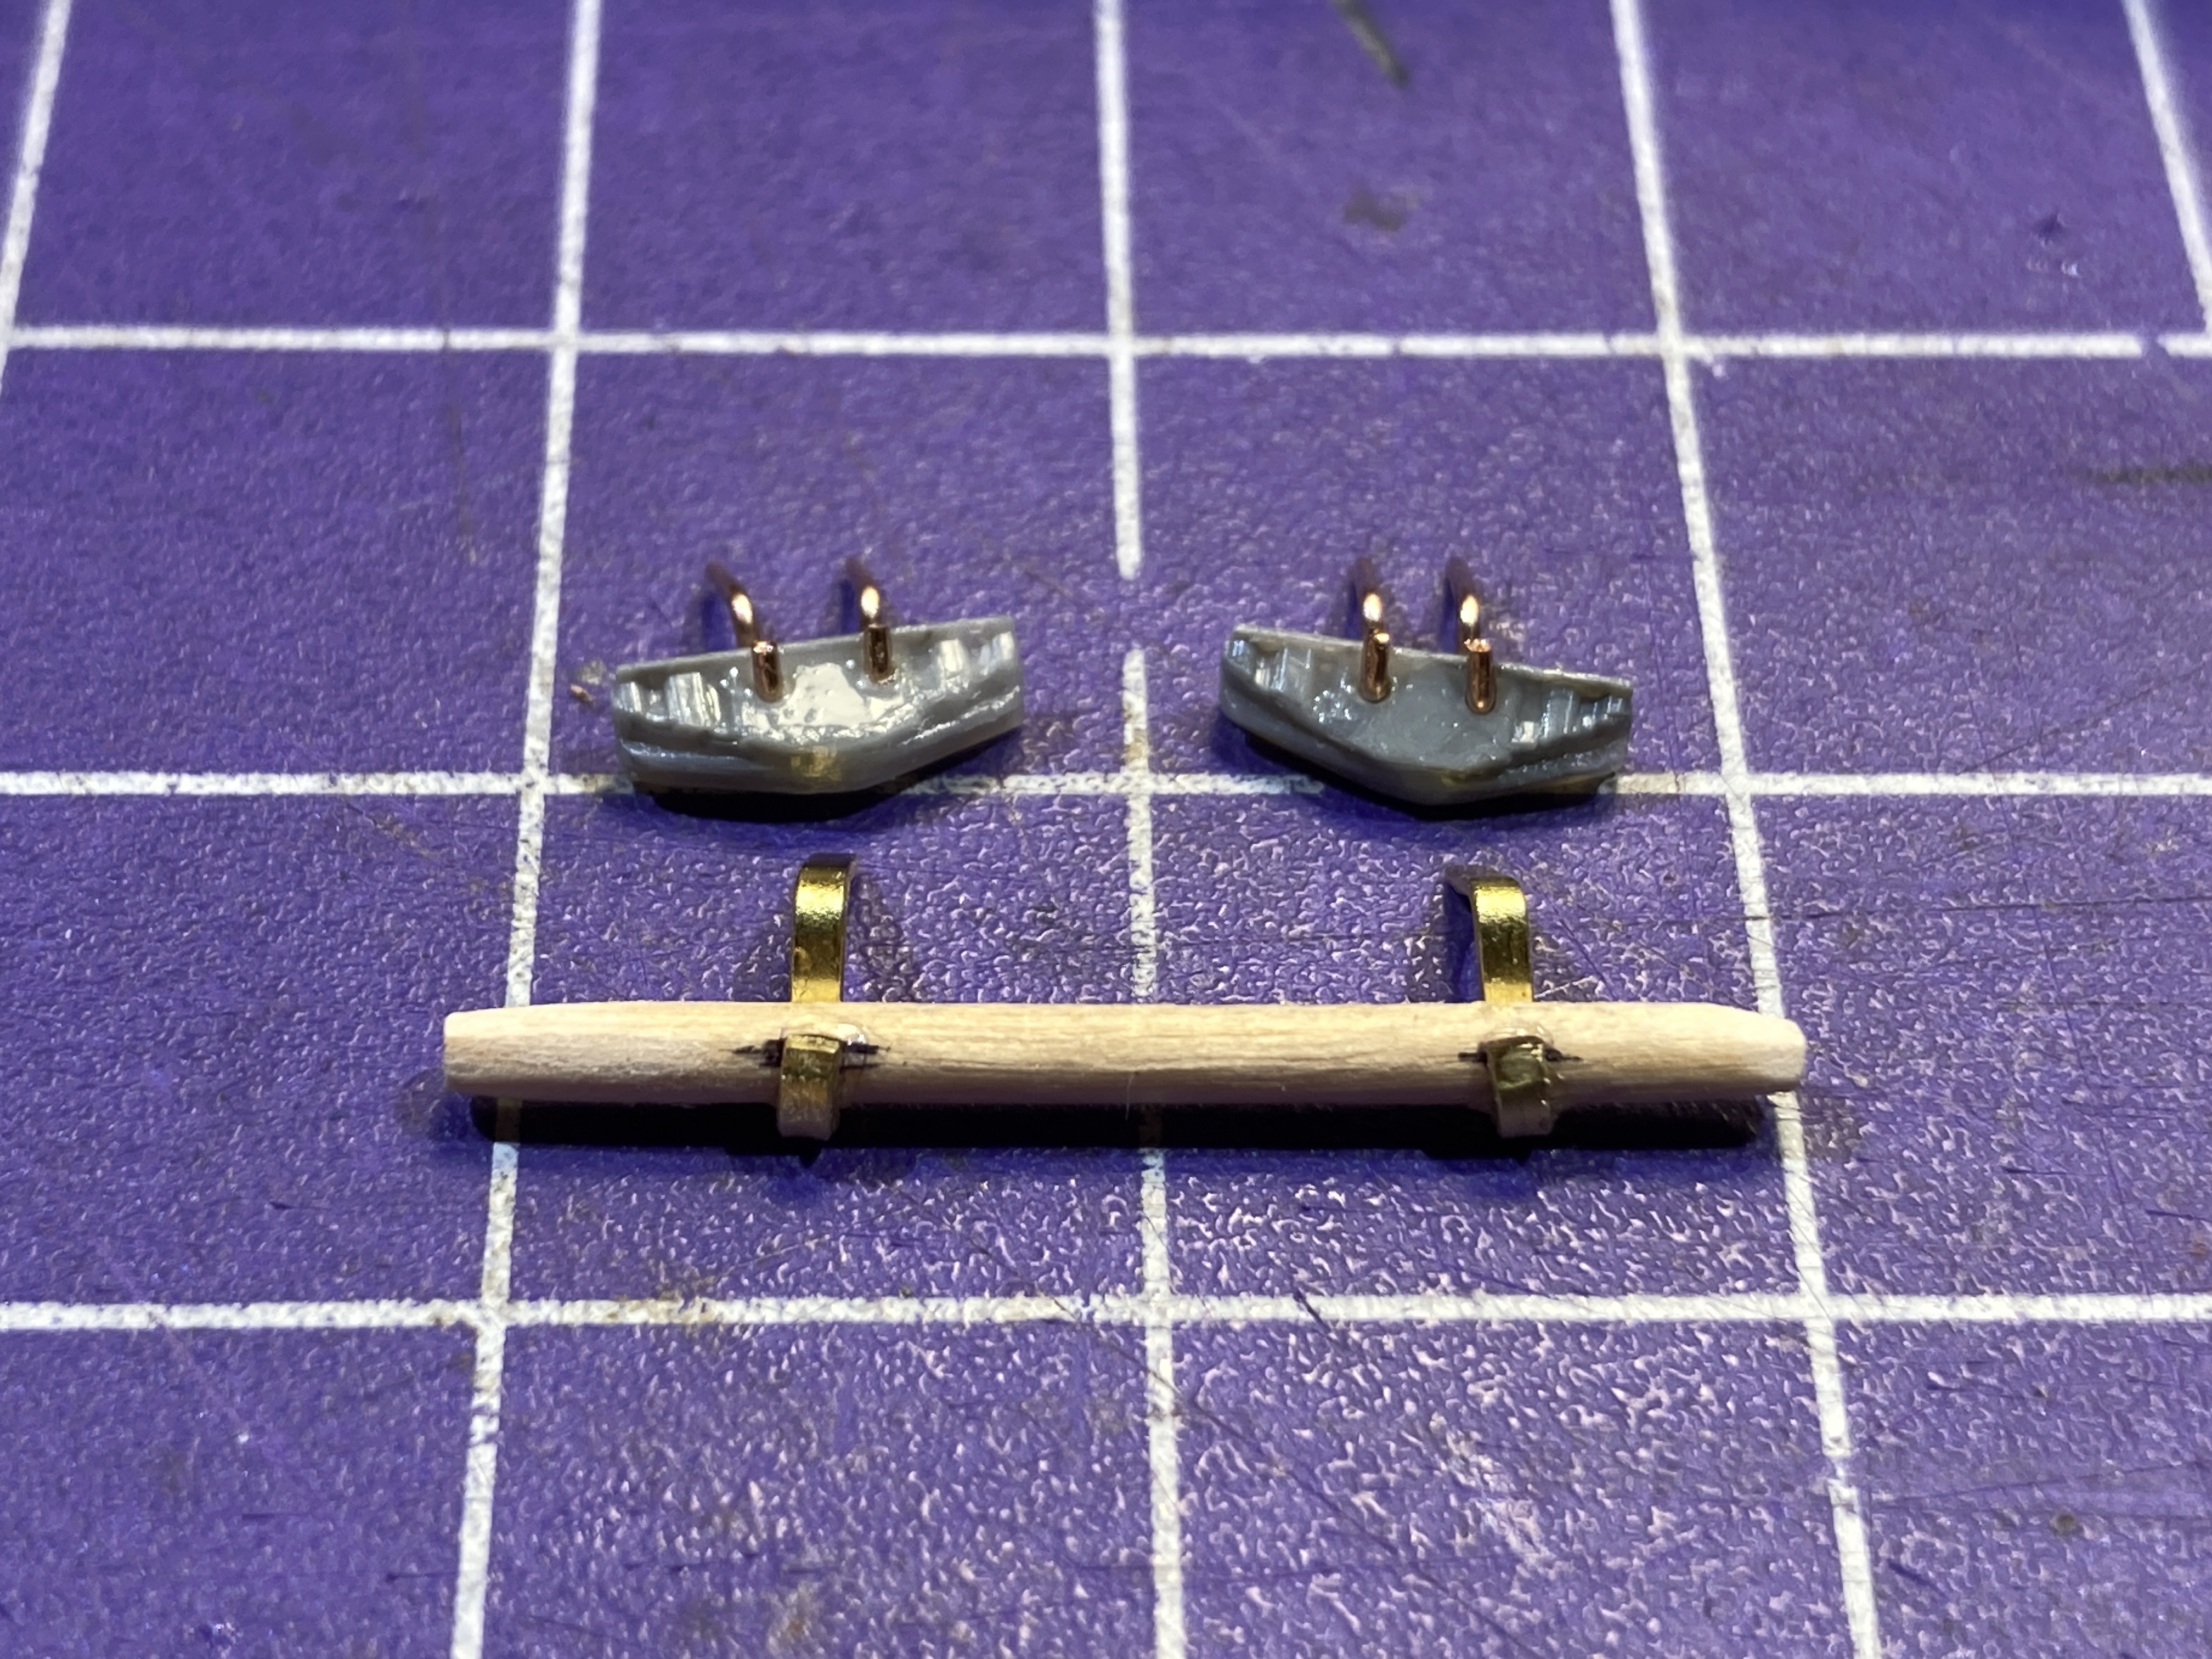
First I got some rerailers (Precision Scale 31644) and drilled some holes for the hooks to go into...

I made the poling pole from a toothpick, and used some flat brass strip to make mounting hooks. . .

I found it easier to glue the hooks to the rerailers and poles beforehand (using CA), basically making them into parts I could then glue to the underside of the frame (also using some thick CA).
After painting, I installed them using the prototype photos as reference.

One of the things I was initially worried about was whether these parts would interfere with the trucks when negotiating curves. After eyeballing the engine on an 18" radius curve (the sharpest I'll ever allow the loco to negotiate), I was pleased to discover that the details would work just fine - though the poling pole is just a little farther outboard than the prototype, just to be sure.
Here are some additional closeup photos of the finished parts installed . . .


With the under-frame details done, I turned my attention to the lunch box, which needed to be scratchbuilt using the prototype photos as a guide . . .

I just eyeballed/guesstimated the dimensions, making it up from three separate parts. The box was made from .125x.250 styrene strip (Evergreen 189), the lid is a piece of .010x.125 strip (Evergreen 106), and the "latch" was, honestly, just a little bit of styrene scrap that I found laying on my cutting pad.

I painted it black and weathered it to match the back of the cab.

I'm prone to allow lack of information to become a brick wall that stops all progress, and in this case I didn't have any dimensions of the lunchbox - but I think you'll agree that just eyeballing it worked out just fine.

The last detail was a hook used to hang a lantern (I actually have an HO scale Adlake lantern on the way from my friend Bernard over at Miniprints). For the hook itself, I used an eyebolt/lift ring and snipped part of the circle away. That saved me having to try and bend such a small hook.

I "painted" it with a black sharpie, but it'll be further weathered later (it's only dry fit in the photo above).
With the addition of these details, there's literally nothing else to add - except more weathering! Stay tuned next time for that . . .
Nice-enjoyed progress with this. Remember though -'better is the enemy of good enough'
ReplyDeleteI know it was a couple of posts back, but I really like the idea of making the builder's plate an actual plate.
ReplyDelete