 |
| Dad |

Tuesday, January 30, 2018
Friday, January 26, 2018
Flat Car Friday - Finishing the P-11 Decals (RTM)
After decaling the first side of the B&O P-11 flatcar, using Future floor wax on a satin-finished side (as described here), I decided - before doing the second side - to actually read the manual. The "manual" in this case was the instruction sheet that came with the Speedwitch decals:
Not bad - though I did mess up a little by trying to wick fluid & position after applying setting solution. Big mistake, but it turned out ok.
And here's a photo of the other side that I did over a glossy surface as I described above:

I think this turned out better - the edges of the decals are just about invisible and everything is snuggled down nicely. I also didn't mess anything up by disturbing the decal as it was setting.
Conclusion:
Actually, both processes yield good/great results. Having done them both, I will try and add a gloss coat first and decal the recommended way described in this post. However, it's nice to know that if I have a model that has a less-than-glossy surface and I can't add any gloss for some reason, using Future as a base rather than MicroSet will be ok. Heck, I've even used Future to add decals to a car that had a flat finish - but I wouldn't recommend it.
Either way, after I add a dull coat and do some weathering, I bet anyone would be hard-pressed to tell the difference between the two sides. And that's a win in my book!
(Happy Friday and Happy Springfield Eve to all coming to the BigE Train Show this weekend! If you do, please say "Hi" if you happen to see me - hope to see many of you there!)
- Start with a glossy surface, adding a gloss coat if needed.
- Using a fresh x-acto blade, cut out the decal leaving as little decal film around it as possible and dip in distilled water.
- Place the decal on a paper towel to wick off excess water & allow the decal to loosen from the backing.
- Slide the decal off slightly to expose just enough paper backing to allow you to grab it with tweezers.
- I then brush some MicroSet onto the model where I will be putting the decal (the instructions say to brush on some water, but it beaded up on the glossy surface).
- "Lay the paper on the model while still holding with tweezers and slide the decal on to the model." (direct quote from the instructions). Use something dull (I use a toothpick) to hold the decal as you pull/slide the paper backing out from under it.
- If necessary, use the toothpick to move the decal into final position. Be careful you don't damage the decal!
- Once in position, leave it alone until it dries completely. You can use a corner of a paper towel to wick away any excess fluid/water. But then, leave it alone.
- Next day, if there's any "silvering" or air bubbles, prick with a sharp pin and add a decal setting solution (I use MicroSol) at the edges of the decal and at the pricked parts. Capillary action will pull the solvent underneath the decal. Leave it alone and allow it to dry again completely.
- Repeat step 9 if necessary, using Walthers Solvaset if needed to get the decal to really settle in and snuggle down over detail and into crevices. But beware - Solvaset is very aggressive.
Here's a photo of the first side, done with Future over a satin finish:
 |
| You can always click on an image to enlarge it. |
And here's a photo of the other side that I did over a glossy surface as I described above:

I think this turned out better - the edges of the decals are just about invisible and everything is snuggled down nicely. I also didn't mess anything up by disturbing the decal as it was setting.
Conclusion:
Actually, both processes yield good/great results. Having done them both, I will try and add a gloss coat first and decal the recommended way described in this post. However, it's nice to know that if I have a model that has a less-than-glossy surface and I can't add any gloss for some reason, using Future as a base rather than MicroSet will be ok. Heck, I've even used Future to add decals to a car that had a flat finish - but I wouldn't recommend it.
Either way, after I add a dull coat and do some weathering, I bet anyone would be hard-pressed to tell the difference between the two sides. And that's a win in my book!
(Happy Friday and Happy Springfield Eve to all coming to the BigE Train Show this weekend! If you do, please say "Hi" if you happen to see me - hope to see many of you there!)
Thursday, January 25, 2018
Prototype-Based Ballast Choices
I think yesterday's Wordless Wednesday got more comments than any other WW before - and not just because there were some actual words in the title. I subtly solicited opinions and was very glad to see them start coming in.
So now, "here's the rest of the story."
Actually, I guess it's pretty obvious: I'm approaching the point where I need to make some decisions on what ballast to use and, being a "prototype modeler" I'd like it to be as close to the prototype as possible. While the list of considerations is short - availability, size, and color - it gets a little complicated, as you'll see.
Availability


And above is WS "Fine" ballast. Offhand, it looks a little too small to me - but that may be because most of the HO model railroads I've seen use the larger "HO" ballast. Comparing this size to prototype photos, though, tends to show that smaller is better.
Color
Speaking of prototype photos, let's segue to the toughest consideration - and not just for someone who's a bit colorblind. Here's what I mean . . .


The shots above are at Chester during the filming of It Happened to Jane c. 1957. Looks like I'm going to have to develop some sort of custom superfine brown/black mix . . .

According to John Wallace (the source of most of these photos, including the ones above), the Air Line had traprock ballast due to heavier traffic on the line (including documented use of the New Haven's big 3500s - likely wending their way back from Readville Shops, not in revenue service). This ballast appears to be a dark grey.
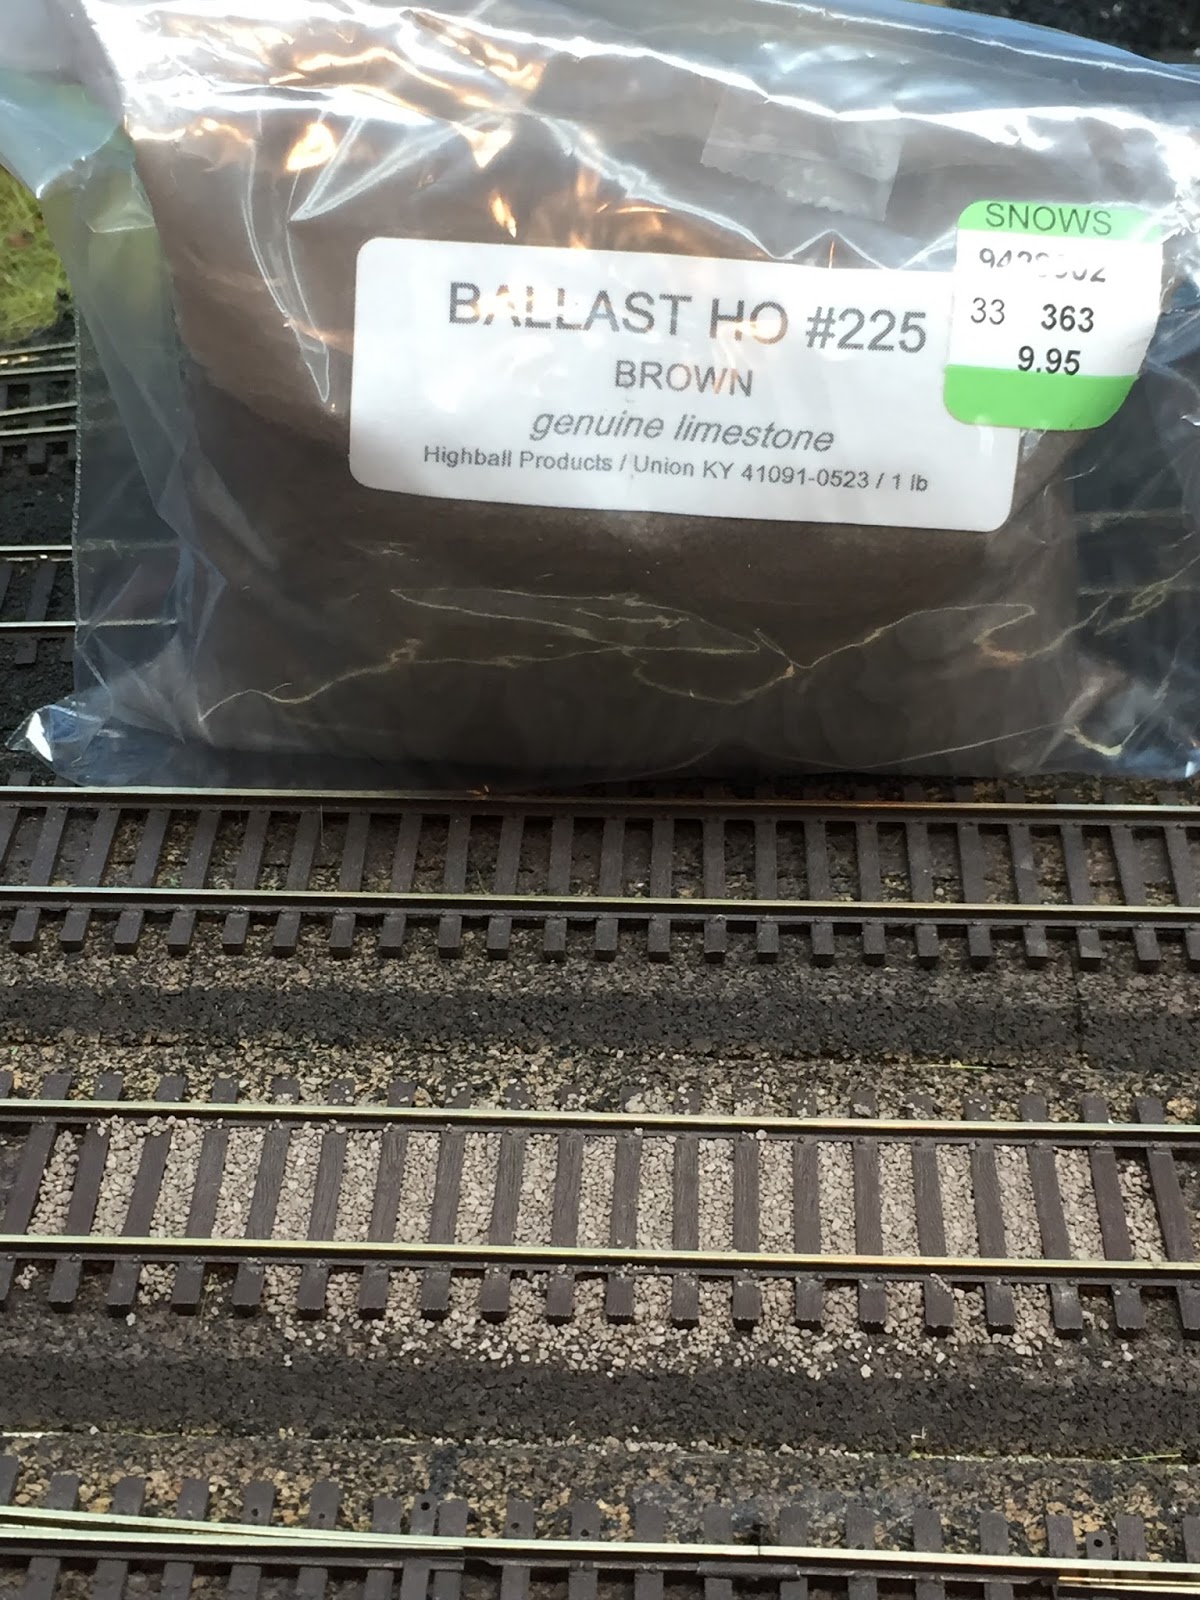
And what of the Shore Line? One of the commenters on the previous post were asking about my use of brown ballast - not what you'd expect on a New England railroad, right?
Well, behold...

Ok - I admit my colorblindness, and it could be that that's actually a dark grey - and an almost-70-year-old photo is bound to have some color shift, but that looks brown(ish) to me. And is consistent with the color of traprock mined in Branford and Wallingford, CT - major sources of ballast for the New Haven.
But consider this . . .


So now, "here's the rest of the story."
Actually, I guess it's pretty obvious: I'm approaching the point where I need to make some decisions on what ballast to use and, being a "prototype modeler" I'd like it to be as close to the prototype as possible. While the list of considerations is short - availability, size, and color - it gets a little complicated, as you'll see.
Availability
One of the most important considerations for a layout this size is that the ballast product continues to be available for a while. I'd rather buy as I go, willing to accept minor color variations (what the Missus - a knitter - calls "dye lot") and don't want to have to buy a 50 gallon drum of the stuff all at once. Unfortunately, one of my early choices - Highball Products - is no longer in business (anybody have an alternative?). So I plan to check out additional options at the Big Springfield Show this weekend.
Size
This should be relatively straightforward, but . . .

The photo above is Woodland Scenics "Medium" ballast, supposedly for HO scale.

And above is WS "Fine" ballast. Offhand, it looks a little too small to me - but that may be because most of the HO model railroads I've seen use the larger "HO" ballast. Comparing this size to prototype photos, though, tends to show that smaller is better.
Color
Speaking of prototype photos, let's segue to the toughest consideration - and not just for someone who's a bit colorblind. Here's what I mean . . .
 |
| circa 1947-1948 |
 |
| circa 1949-1952 |
Above shots are at Wethersfield, showing the Valley Line. But only the north end of the Valley Line. The Hartford-Middletown portion of the line was reballasted with white gravel (not traprock) during the summer of 1945. But the remainder of the line south of Middletown to Old Saybrook was a mix of sand and cinders . . .


So at least 2-3 different colors (and 2 sizes) for the Valley Line. What about the Air Line?

According to John Wallace (the source of most of these photos, including the ones above), the Air Line had traprock ballast due to heavier traffic on the line (including documented use of the New Haven's big 3500s - likely wending their way back from Readville Shops, not in revenue service). This ballast appears to be a dark grey.
And what of the Shore Line? One of the commenters on the previous post were asking about my use of brown ballast - not what you'd expect on a New England railroad, right?
Well, behold...

Ok - I admit my colorblindness, and it could be that that's actually a dark grey - and an almost-70-year-old photo is bound to have some color shift, but that looks brown(ish) to me. And is consistent with the color of traprock mined in Branford and Wallingford, CT - major sources of ballast for the New Haven.
But consider this . . .

Also on the Shore Line, and a much-more-typical gray traprock ballast we're all familiar with.
But modeling the New Haven is often, um, complicated . . .

I don't know about you, but I count THREE colors here - gray traprock, on top of brown traprock, on top of cinders (heh - presumably on top of dirt/sand....)
So that's a little sampling of the prototype photos I'm looking to for guidance in choosing which size and color ballast to use on my layout (which, remember, depicts the Valley Line north AND south of Middletown, the Airline, and the Shore Line).
However, just as important as the photos are all of YOU that can lend a little guidance on color/size and advice for what products to use. So please weigh in!
Wednesday, January 24, 2018


Monday, January 22, 2018
Last of the Pop-Up Track (hopefully)
So first, some cool news: My "Track Popping Up - Fixes" thread on the Model Railroad Hobbyist Forum got mentioned on the MRH Weekly Email!


And just in time too, in case I get any additional tips on fixing track that's popped up due to wood subroadbed shrinkage. As I mentioned in an earlier post, I discovered yet another place where the track had lifted up - this time a turnout in a scenicked area!
 |
| Switch off the siding in Mill Hollow - that tilt on the bullseye bubble level is real. So is that rail kink. Pay no attention to that - the trains run fine over it (it's an industrial siding after all). |
 |
| You can just about make out the bubble at 11-o'clock. |
 |
| Bubble at 12-o'clock or thereabouts. Most definitely tilted. |
 |
| I used a shop vac to suck up all loose material/ballast then put some Aleene's Tacky Glue between the ties and spread it under the ties using a brush. |
 |
| Then weighted down overnight, using blocks of wood over the rail joints to make sure there'd be no vertical kinks. |
 |
| The next day - all better. |
 |
| Bubble near center. Bliss! |
 |
| One long-time problem I decided to fix was the large ballast-eating hole required by a frog feeder (you can just make out the floor through the hole). Turned out a simple fix - just a little bit of black foam stuffed in the hole. . . |
 |
| And - Presto! - the hole disappears! |
 |
| Added ballast to cover the Aleenes (which dries a bit glossy) and the rest - placed the ballast, sprayed with 70% alcohol til soaked, dripped on dilute white glue. |
 |
| And all back to normal - well, as "normal" as a siding can be. |
So that is hopefully the last of the raised-track saga. Heh - if I'd wanted humps in my track, I would have modeled a hump yard(!) Hope your layouts are faring well, despite the season - and if you have any additional suggestions on how to avoid/fix this problem, I hope you'll let us know in the comments!
Friday, January 19, 2018
Freight Car Friday: Decaling the P-11 Flatcar
The next step on the B&O P-11 flatcar build is lettering/numbering (click here for all the other posts on this project). First, you have to choose your decals, if you have a choice. The F&C kit I'm using comes with the appropriate decals, but Speedwitch Media makes the correct decals too. Fortunately, the company's owner is a good friend and when he saw I was doing this car, he sent along a set to try.

I'm definitely glad he did. The F&C decals are ok, but I think you can tell the difference when directly comparing them to the Speedwitch decals - the fidelity is much better.
Next, you need to consult prototype photos for the proper location of the lettering. Unfortunately, the P-11 is a fairly rare flatcar and photos are elusive (in fact, even a query to the Steam Era Freight Car list hasn't turned up any pics as of this writing). I do have a couple of prototype photos, but for lettering I relied on the two photos that came with the Speedwitch decal instruction sheet (the F&C instructions do contain one photocopy of one of the photos that Speedwitch also uses).

Once I decided what lettering I wanted to use, I cut it out of the sheet with a scalpel and a fresh blade. You can see what parts I took out of the sheet in the photo above.
FINALLY it was time to actually do the decaling itself. I should have checked to see what I did the last time I did decaling to refresh my memory, but I was too eager and plunged head-long into it. Here's the process I used this time (for the first side anyway):

And shot the side with my handy-dandy rattle can of Testors Glosscote . . .

I'm having my First Ops Session of 2018 tomorrow, so this'll have plenty of time to cure before I add any lettering - hopefully Sunday evening. And just so I don't forget, here's the process I plan to use (copied and pasted from my GTW post):

I'm definitely glad he did. The F&C decals are ok, but I think you can tell the difference when directly comparing them to the Speedwitch decals - the fidelity is much better.
Next, you need to consult prototype photos for the proper location of the lettering. Unfortunately, the P-11 is a fairly rare flatcar and photos are elusive (in fact, even a query to the Steam Era Freight Car list hasn't turned up any pics as of this writing). I do have a couple of prototype photos, but for lettering I relied on the two photos that came with the Speedwitch decal instruction sheet (the F&C instructions do contain one photocopy of one of the photos that Speedwitch also uses).

Once I decided what lettering I wanted to use, I cut it out of the sheet with a scalpel and a fresh blade. You can see what parts I took out of the sheet in the photo above.
FINALLY it was time to actually do the decaling itself. I should have checked to see what I did the last time I did decaling to refresh my memory, but I was too eager and plunged head-long into it. Here's the process I used this time (for the first side anyway):
- Place the decal in distilled water
- Since the paint/finish is satin/eggshell and not really glossy, I used a microbrush to brush on some Future floor polish (a gloss acrylic) to where the decal would go
- Remove the decal from the water and place on a paper towel to wick the water away
- Slide the decal off just enough to allow you to grab just the decal backing paper with a tweezers (I used self-closing tweezers as a handle)
- Bring the decal to where you put the Future and, while holding onto the paper with the tweezers, hold the decal down with a dull toothpick (something not sharp) and pull the paper, sliding the decal off the paper onto the model
- Use the toothpick to move the decal into final position
- Use a corner of a paper towel to wick up any extra water/fluid
- LEAVE THE DECAL ALONE
- Repeat for the rest of the decals
- After they've dried (preferably overnight - or while you're at work), prick any air bubbles with a sharp pin and lightly brush some setting solution like Micro Sol onto the decal - allowing it to wick in under the edges and into the pricked holes - so the decal will really snuggle down and set.
- Repeat step 10 as necessary, using Solvaset for really stubborn decals.
The pic below shows the result:
 |
| Click on image to enlarge if desired |
Now, there are a couple of things I plan on doing differently for the OTHER side. Numero Uno is to take my own advice and NOT, REPEAT NOT touch the decal or try to reposition it when I'm adding the setting solution. And DO NOT under ANY circumstances use a sponge makeup brush to blot any excess fluid while using setting solution. If you can't see the gotchas on this side that resulted from me not following my own advice, well, I'm certainly not going to point'em out to you...
Secondly, I plan to use a more traditional, non-Future (heh - see what I did there?), approach for the other side (in fact, the same process I used for the Grand Trunk Western boxcar - a post I found only after I'd already done side one of the flatcar...). And Step One in that process is to add a gloss coat to the carbody where you'll be adding decals. So tonight I masked off the side of the car yet-to-be-decaled (notice the eggshell/non-glossy finish) . . .


I'm having my First Ops Session of 2018 tomorrow, so this'll have plenty of time to cure before I add any lettering - hopefully Sunday evening. And just so I don't forget, here's the process I plan to use (copied and pasted from my GTW post):
- Cut out the decal leaving as little decal film around it as possible and place in distilled water.
- Apply MicroSet to the area where the decal will be applied.
- Remove the decal from the water and "float" onto the setting solution (I'll actually put it on a paper towel first). Use a toothpick or something else that's not sharp to position.
- Wick away any excess fluid with the corner of a paper towel, or a makeup sponge (I'm a little leery of the sponge now...). Let dry.
- If there's any "silvering" (evidence that there's air trapped behind the decal), prick the areas and add MicroSol and let dry. If that doesn't cause the decal to really settle down into any nooks/crannies (or - in the case of a wood-sided car, between the boards) just add additional applications of MicroSol until it does (and/or use Walthers Solvaset, which is even more aggressive)
Stay tuned and I'll let you know (and you'll be able to see) which process yields the better result . . .
Thursday, January 18, 2018
Throwback Thursday: Last Weekend's Work - Climate Change & Scenery
Ok - so not that far of a "throwback"... but I did get a fairly eclectic variety of tasks done last weekend, ranging from the ridiculous to the sublime...
First - the ridiculous: This is what confronted me when I got to the bottom of the basement stairs Saturday morning...

Yup - that's New London/Boston/East End staging under there. Apparently, the dry air dried out what little adhesive I had keeping these spare foam boards upright. And down they came - right on top of my staging yard.

Fortunately, they rested on top of a very robust and sturdy Atlas S-2 (the old one, without easily breakable details...). Going forward, I relied, not on tape and such, but an actual mechanical clamp to hold things up.

The dry environment didn't only wreak havoc with track at Goff Brook and my erstwhile faux sky/foam backdrop, but even with one of my trees at the Saybrook wye! Yup, this poor soul had its top half literally dry out and come crashing down. Well, as much "crashing down" as a fraction-of-an-ounce SuperTree can "crash"...

Worst of all though was a discovery I made in Mill Hollow. I noticed this turnout off the passing track, leading into a siding, looked a little "off" - well, it was off, and by more than a little. Despite being glued and ballasted, it had lifted right up. And the bubble level shows by how much(!)
So, enough of what all I discovered - here's what I actually did about it all. . .
Despite my success with using a humidifer to settle the track down in Goff Brook, I decided to do a little "belt-&-suspenders" and cut some expansion gaps as well.

I first used a Dremel with a cut-off disc. Then I used a razor saw. Let me know which method you think I'll use next time - and from now on . . .
Yup, you can barely see the razor saw cut - and it literally disappears when the rails expand. It's certainly not as easy or as quick as using the Dremel, but that quick ease too often translates into quick trouble. The sides of the cut off disc are abrasive as well as the cutting edge, and make it very difficult not to cut a slot too wide...

Unfortunately, I spent a big part of one afternoon plasticizing the basement windows. Working so much in the Goff Brook area (left edge of the photo above) I realized how much cold air was coming through those windows. And that couldn't be good for the layout. So I justified the time spent as "layout time" (though indirectly) and hope that the energy savings will translate into an extra freight car - or at least less track movement...

And now for the Sublime - Actual Model Railroad Work - and SCENERY to boot! Last time I was at the "south" end of Somerset, I did the static grass. This time, I did a little more to disguise the hole in the backdrop, including adding a couple of foreground trees, as well as (and most effectively) adding a bit of backdrop behind the hole.

Here's a better, over-all shot of that area. It's certainly not perfect, but much better than what was there before. Which was, um, nothing. But fairly effective for the 10 minutes it took to do.


Speaking of trees, I also added some trees and bushes (old lichen) to the area between the box factory and the station. Adding 3D trees to complement the trees on the photo backdrop really ties the scene together.

And some bushes to the right of the station softens the transition between the horizontal and vertical scenes.

Lastly, I opened up a bunch of boxes of old (and I mean really old - like "from the 1970s" old) Life-Like trees to see if I could use any of them on the modules as practice. Well, I'll definitely have to modify them to make them look less fake, but I thought the trees in the photo above would work as-is as an orchard for the farm. You can see them there back on the hillside in the corner.
The Missus says they still look too fake - the color is all wrong/too bright. One of the pitfalls of my doing scenery - and one of the main reasons I procrastinate on doing it at all - is that I'm partially color blind. So without meaning to, the Missus may have just signed up as Color Consultant on the Valley Line >:^)
But before I do any more scenery, I need to clean up the mess and prepare for my first ops session of 2018. All in all, not too bad a weekend!
First - the ridiculous: This is what confronted me when I got to the bottom of the basement stairs Saturday morning...

Yup - that's New London/Boston/East End staging under there. Apparently, the dry air dried out what little adhesive I had keeping these spare foam boards upright. And down they came - right on top of my staging yard.

Fortunately, they rested on top of a very robust and sturdy Atlas S-2 (the old one, without easily breakable details...). Going forward, I relied, not on tape and such, but an actual mechanical clamp to hold things up.

The dry environment didn't only wreak havoc with track at Goff Brook and my erstwhile faux sky/foam backdrop, but even with one of my trees at the Saybrook wye! Yup, this poor soul had its top half literally dry out and come crashing down. Well, as much "crashing down" as a fraction-of-an-ounce SuperTree can "crash"...

Worst of all though was a discovery I made in Mill Hollow. I noticed this turnout off the passing track, leading into a siding, looked a little "off" - well, it was off, and by more than a little. Despite being glued and ballasted, it had lifted right up. And the bubble level shows by how much(!)
So, enough of what all I discovered - here's what I actually did about it all. . .
Despite my success with using a humidifer to settle the track down in Goff Brook, I decided to do a little "belt-&-suspenders" and cut some expansion gaps as well.
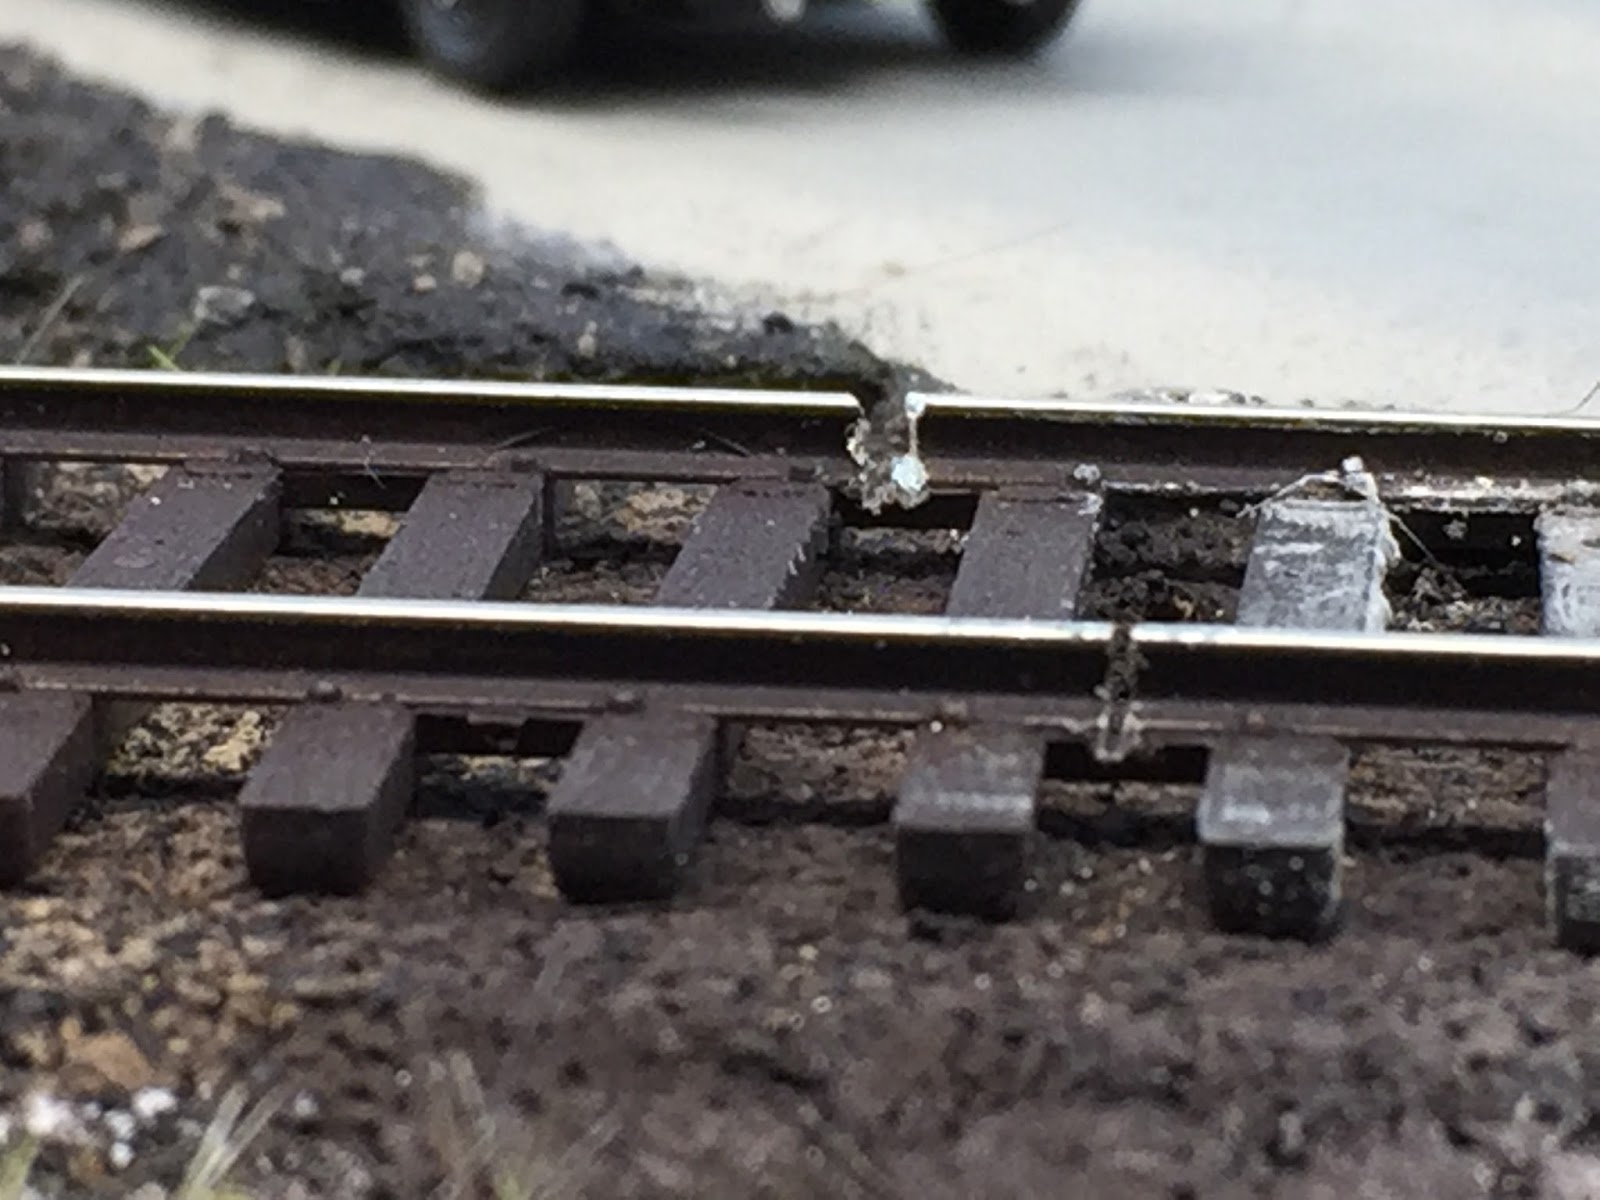
I first used a Dremel with a cut-off disc. Then I used a razor saw. Let me know which method you think I'll use next time - and from now on . . .
Yup, you can barely see the razor saw cut - and it literally disappears when the rails expand. It's certainly not as easy or as quick as using the Dremel, but that quick ease too often translates into quick trouble. The sides of the cut off disc are abrasive as well as the cutting edge, and make it very difficult not to cut a slot too wide...

Unfortunately, I spent a big part of one afternoon plasticizing the basement windows. Working so much in the Goff Brook area (left edge of the photo above) I realized how much cold air was coming through those windows. And that couldn't be good for the layout. So I justified the time spent as "layout time" (though indirectly) and hope that the energy savings will translate into an extra freight car - or at least less track movement...

And now for the Sublime - Actual Model Railroad Work - and SCENERY to boot! Last time I was at the "south" end of Somerset, I did the static grass. This time, I did a little more to disguise the hole in the backdrop, including adding a couple of foreground trees, as well as (and most effectively) adding a bit of backdrop behind the hole.

Here's a better, over-all shot of that area. It's certainly not perfect, but much better than what was there before. Which was, um, nothing. But fairly effective for the 10 minutes it took to do.

Speaking of trees, I also added some trees and bushes (old lichen) to the area between the box factory and the station. Adding 3D trees to complement the trees on the photo backdrop really ties the scene together.

And some bushes to the right of the station softens the transition between the horizontal and vertical scenes.

Lastly, I opened up a bunch of boxes of old (and I mean really old - like "from the 1970s" old) Life-Like trees to see if I could use any of them on the modules as practice. Well, I'll definitely have to modify them to make them look less fake, but I thought the trees in the photo above would work as-is as an orchard for the farm. You can see them there back on the hillside in the corner.
The Missus says they still look too fake - the color is all wrong/too bright. One of the pitfalls of my doing scenery - and one of the main reasons I procrastinate on doing it at all - is that I'm partially color blind. So without meaning to, the Missus may have just signed up as Color Consultant on the Valley Line >:^)
But before I do any more scenery, I need to clean up the mess and prepare for my first ops session of 2018. All in all, not too bad a weekend!
Subscribe to:
Posts (Atom)