Tuesday, March 31, 2020

Tuesday Tip: Making Styrene Look Like Wood

I know there are a lot of different techniques out there for making styrene look like wood, but this is one I got from a video by Brett Wiley over at HO Scale Customs. I came across the video by accident, but the end product looked good and at under 9 minutes it was worth the time to watch.

I had a plastic station house base that had simulated wood walkways, so once The Missus confirmed that I had paints on-hand that were "close enough" to what Brett used (being a little colorblind, I often rely on her eyes), I decided to give this technique a try.

I'm glad I did - it took some time, but the technique was quick to learn and, best of all, the walkways looked like weathered wood when I was done.

You can follow along in the photos:

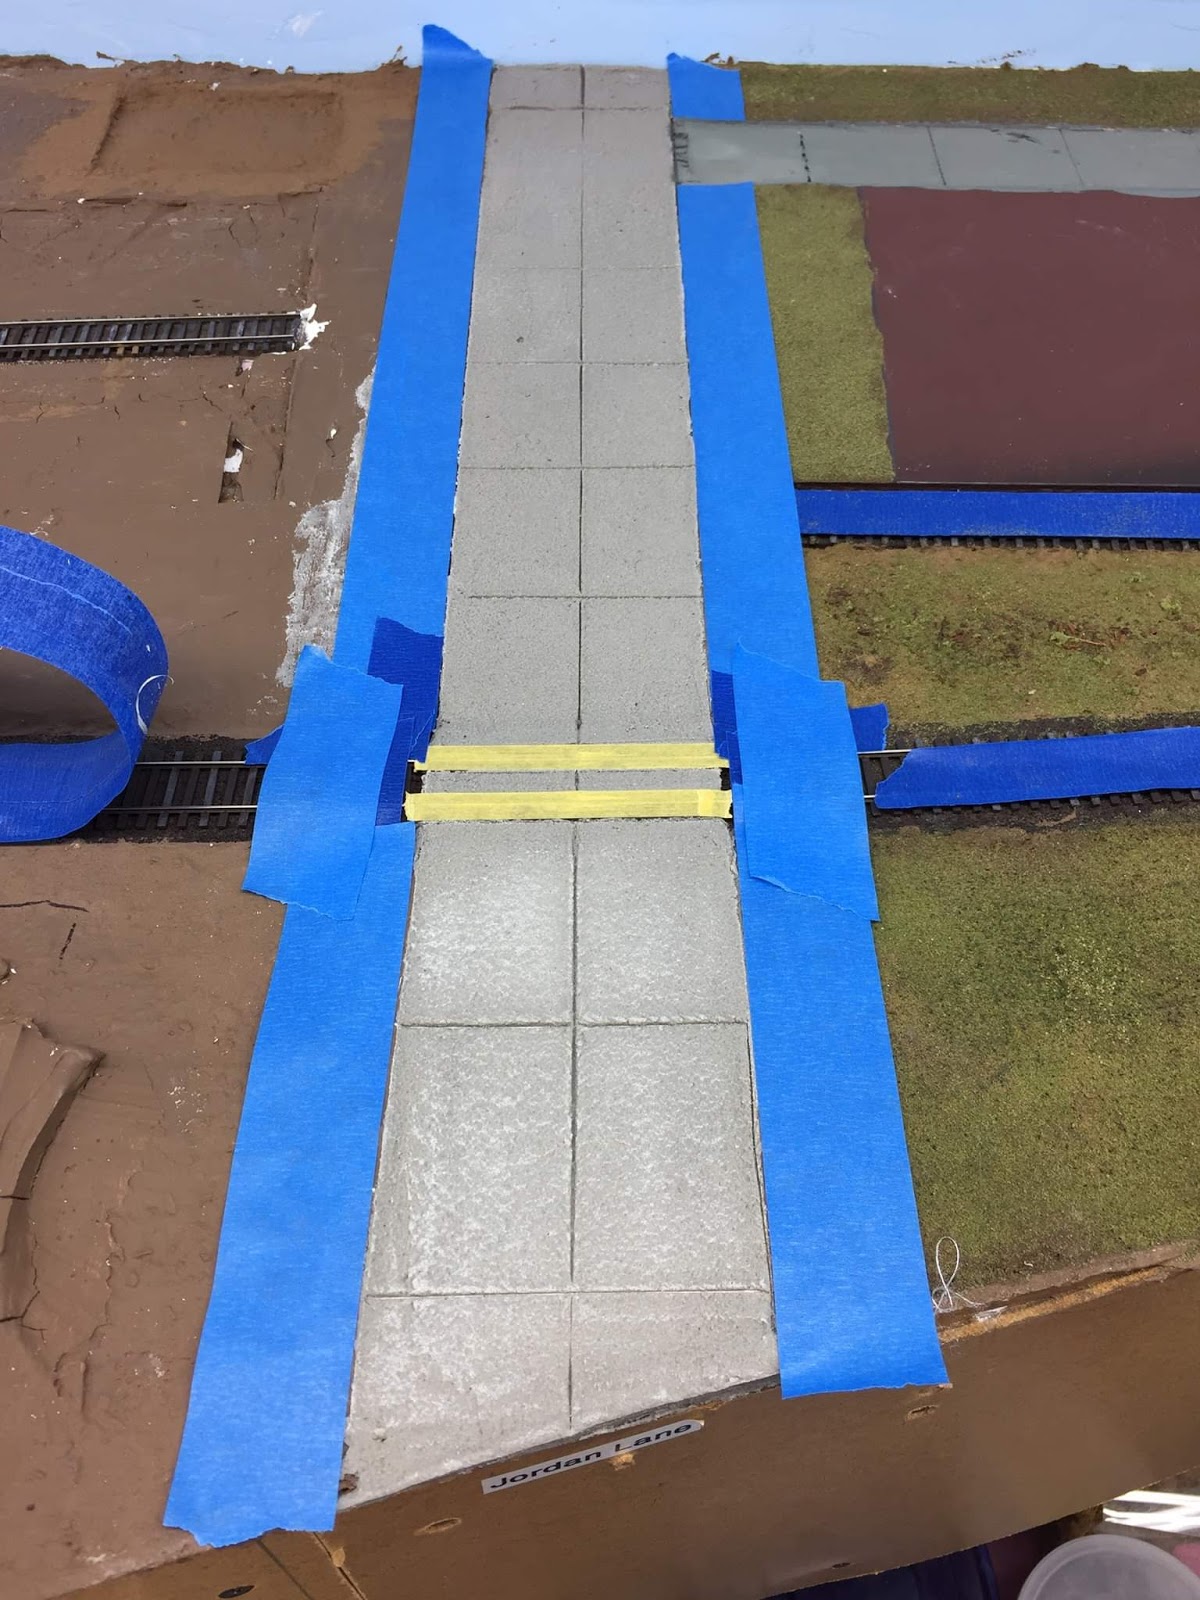
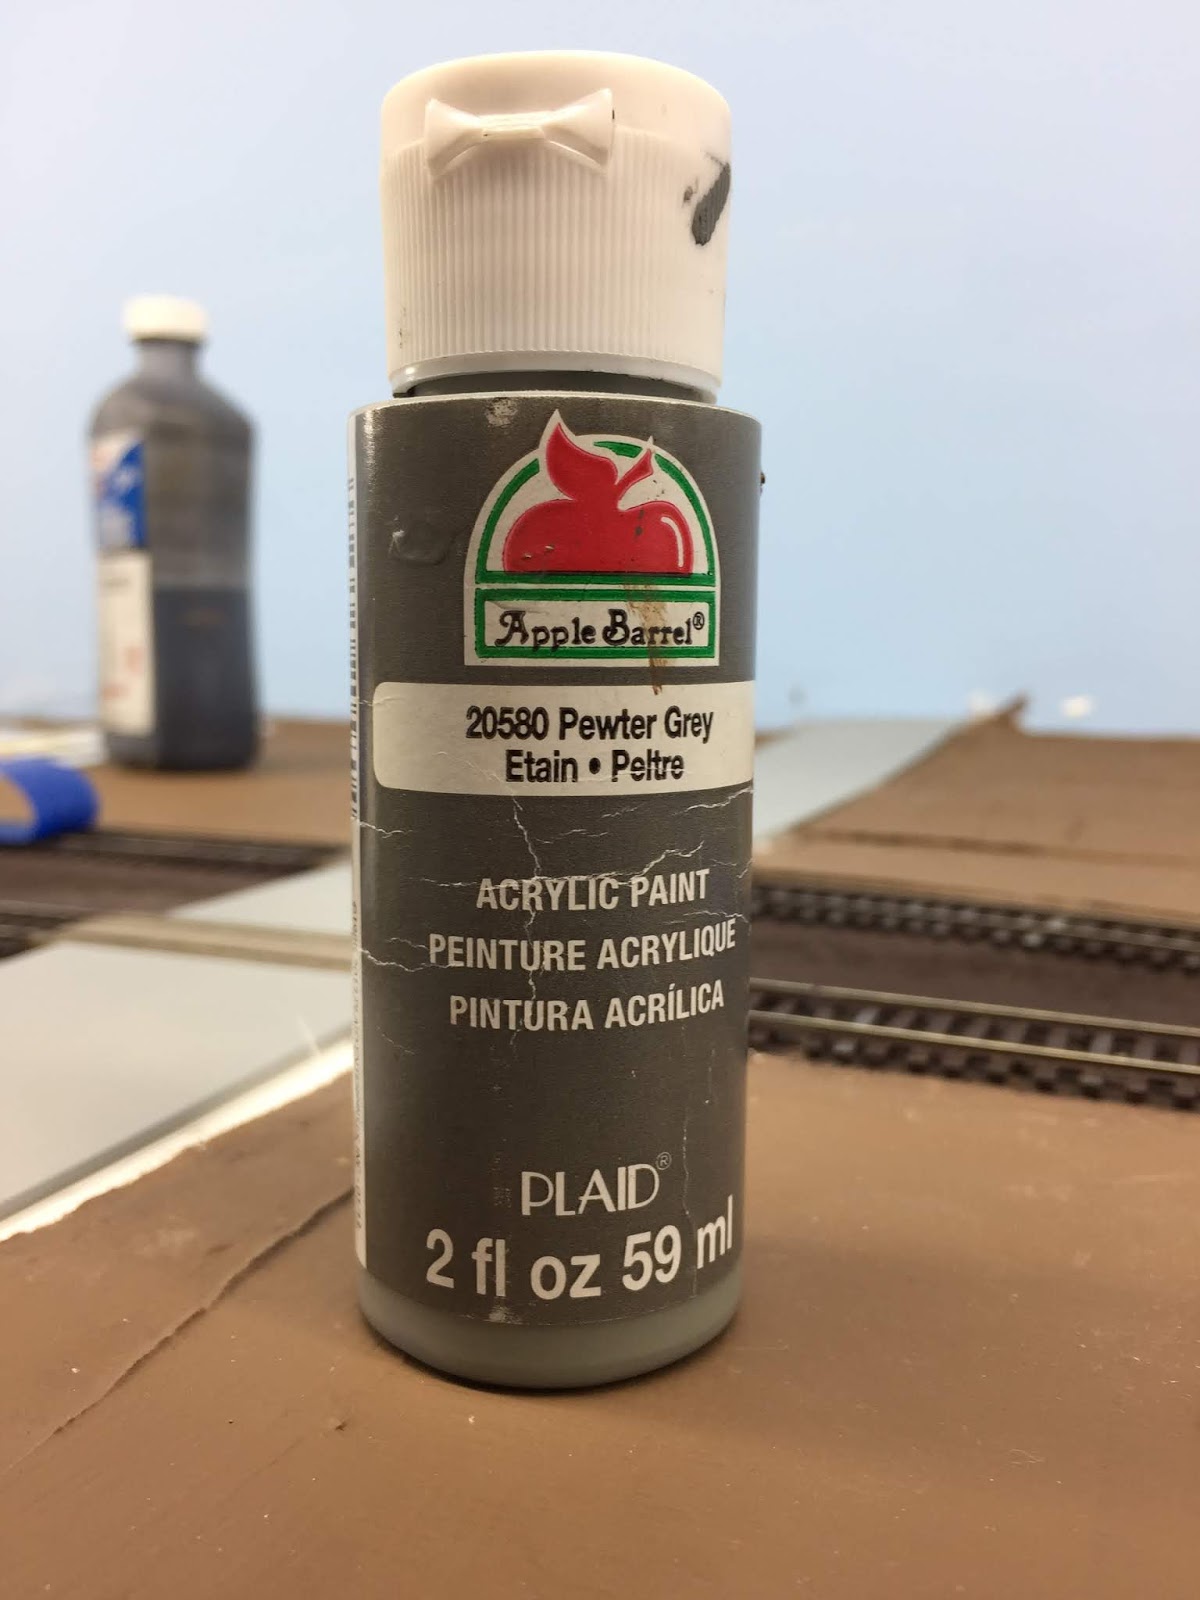
I started by spray painting a flat black base coat, then masked off the walkways. I used 6(!) different colors to get the effect. As always, you can click on the photos to get a larger view - and, in this case, the names of the colors. I used all Apple Barrel craft paints that cost $.50/2oz bottle at Wal-Mart & arranged them here left to right in order of use.
The colors Brett Wiley used are listed at the end of this post.

The first color - "Melted Chocolate" - gets brushed on pretty evenly, though you should let some of the black show through. This is one time when brush streaks are ok.

***Important: When you're done with a color, be sure it's dry before you apply the next color or else you risk just blending colors together rather than having them look distinct. I used The Missus' blow dryer between each color. YMMV (Your Missus May Vary)

For the rest of the colors, you use a drybrush technique. Dip your brush in the paint, then wipe it off on a paper towel so that only a tiny bit of paint remains on the brush. To make sure I don't have too much paint on the brush, I'll sometimes do a stroke or two on the masking tape to be sure. I drybrushed the second color - "Chestnut" - in the pic above.
(and in the background, you can see the well-used paper towel)

The next color was drybrushed "Khaki". At this point, with a lighter color, the walkways started to look a bit more like wood.

The next color - again, drybrushed - was "Territorial Beige"

Then I drybrushed "Elephant Gray" (the grays really started making the wood look weathered)

Finally, I applied "Country Gray" - again with the drybrush.

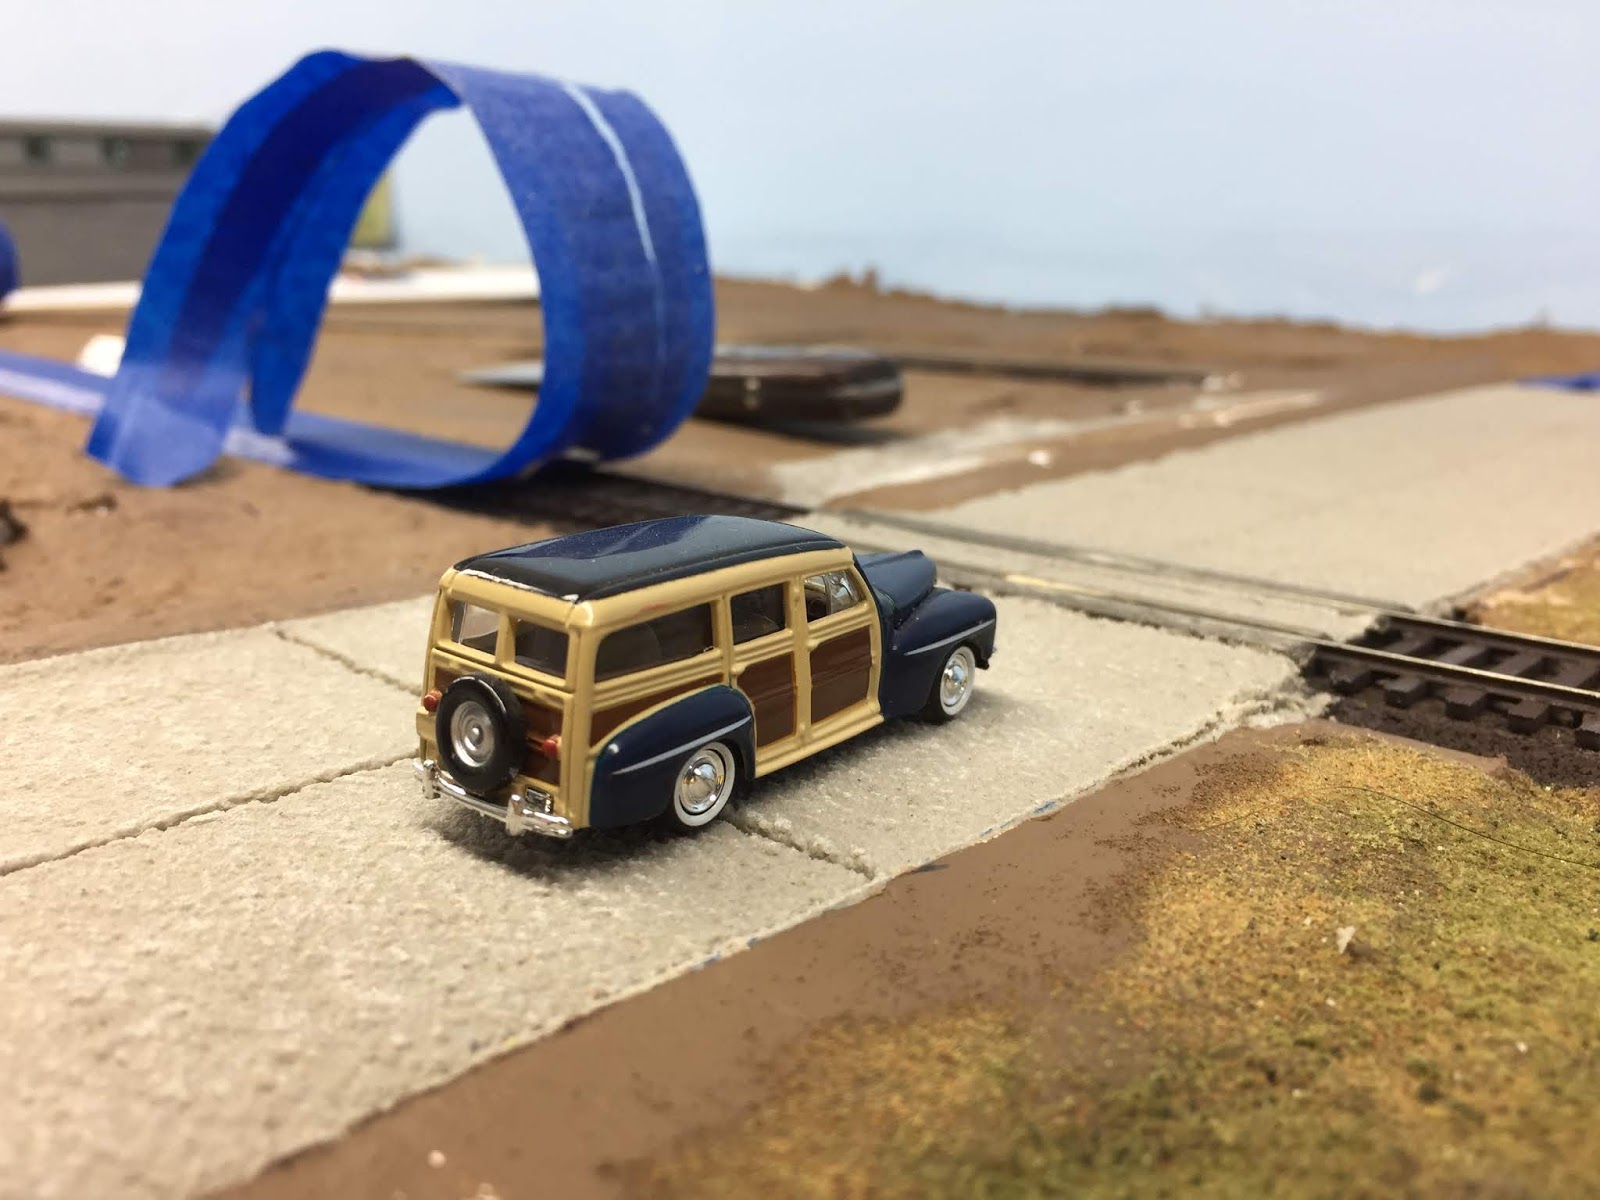
And here's the final result! Whattaya think?
It was nice to have a "practice" piece to work on - especially one that already had "wood grain" cast in. Of course, if you're using plain styrene you'll need to scribe your own boards and grain. There are other videos out there that show you how to do that.

And, speaking of videos, if you want to see how Brett did it - as well as the different colors he used, but sure to click here to check out his video. And if you do, tell him The Valley Local blog sent you :^)

I hope you'll try out this technique and that it works as well for you as it did for me. I look forward to using it on a bunch of Central Valley wood fences I have to do (which, in fact, was what Brett used in his video).

I also used this technique to make the wood in a barn craftsman kit look like old weathered wood. But since it was my first time doing it, I'd forgotten to use the blow dryer between colors and ended up blending a few. It still came out ok (I'll post the build soon), but I won't make that mistake again.

So that's your Tuesday Tip! If you do try this out and find it helpful, I hope you'll let us know in the comments.
* * * 
Just for reference, here are the paints that Brett Wiley used in his video:
  • Americana Bittersweet Chocolate
  • Folk Art Honeycomb 942
  • Folk Art Steel Gray 2561E
  • Craftsmart Dark Taupe
  • Craftsmart Light Taupe
  • Folk Art Boulder 4624
He also used a #5 round course brush

Monday, March 30, 2020

Throwback, um, Monday? - Ops Session Nov. 23, 2019

For some of us, among the many things missed during this time is not being able to host operating sessions on our layouts. The last ops session I had on The Valley Line was way back during Springfield weekend at the end of January. That seems like a lifetime ago at this point.

Me, KayleeZ, BobM, AndrewP at James Mayo's ops session
Turns out, the last session I attended was at James Mayo's - back on March 10, just as the crazy times were beginning to ramp up.

Of course, it's fun to try and recreate a day in the life of a railroad - it's fun to run the trains, pick up & deliver the cars, and try to do it all without running a signal - or worse. But I'm sure even the most dedicated operators would agree that the best thing about ops sessions are being able to get together with other like-minded folks. We miss being able to get together during this time of self or mandated quarantine. We miss the community.

So imagine my pleasant surprise (matched only by my embarrassment) when I found some photos from an ops session I had last fall - and that I'd forgotten to post about. This blog plays many roles, but one of the main reasons for doing it is to have some place to document such events.

The session took place the Saturday before Thanksgiving last year - and the only reason I can think of for why it fell off the radar was that the holiday season ramped up quickly, including a trip to see my family in South Carolina, and then work started ramping up, and then....and then.... well, you get the idea.

Being on a Saturday, it was an especially nice session since some folks that can't usually attend were able to. And though it seems like it happened a million years ago, I hope we're able to get together again soon.

TedC operating PDX-2 - the Haddam Local - and trying to figure out the work in Essex.

The aforementioned James Mayo operating the West End Staging and giving radio instructions to his counterpart in East End Staging.

Speaking of East End Staging, here's the guy in charge - JimF - who came all the way down from New Hampshire to attend.

Looks like the Air Line local and Valley Local crews are conversing in Middletown - PeteL on the right.

The Valley Local was ably operated by DonM and GregL. Don returned a K class mogul he'd been working on (#343) and I gave him the honor (heh - and the responsibility) of operating it for the first time on the local.

The main innovation of this session was the addition of a "window" in the Saybrook Tower. When sitting at his desk, the tower operator has his back to the layout (and any view of the trains passing through). Adding this mirror gives him an easy way to glance up and watch the action.

In the spirit of keeping legacies alive, I gifted Jim with a structure off Chet's layout that I wouldn't be able to use. But Jim will be able to give it a good home - and Chet's structure building prowess will live on in New Hampshire as well as Connecticut. Looks like Jim's happy he made the trip.
Though quite a bit tardy, I hope you enjoyed these pics of this session-from-the-past.
And here's to more ops sessions once we're all on the other side of the current craziness.

Friday, March 27, 2020

Friday Fun: Hanging Out

I talked a lot yesterday about how participating in the model railroad community is a great way to maintain our mental health as well as improve our modeling skills. Well, the chat I mentioned happened to be with Lionel Strang of the A Modeler's Life podcast and he recorded it.


If you like, you can listen to it by clicking here. But whether you listen in or not, I hope you'll check out some podcasts, get on some forums, and generally get involved in this community.

Crisis-induced isolation or not, I think you'll be glad you did.

Thursday, March 26, 2020

Thoughtful Thursday: Community is Key


With many of us now staying home, by choice or necessity, and operating sessions, club functions, and events being cancelled far into the future, it seems just like that we're all "Lone Wolf" modelers now.

That self-isolation is typically a personal choice - not a mandated one. Internet memes that say something to the effect of: "Model Railroaders - Social Distancing Since the Dawn of Time" resonate because they ring true. But you never miss something more than when it's gone.

And now more than ever we need NOT to be Lone Wolf modelers. We need community. We need to leverage online social networks, get involved in virtual clubs, participate in internet RPMs and connect with others. Whether we want to admit it or not - and no matter how true those memes are - we humans are relational beings and need to connect with others.

But community is not only important for our mental health, it's also the key to learning new skills and gaining more experience in the hobby, whether you're self-quarantined or not.

Case in point:

I posted a quick poll for feedback on different types of ballast and received a variety of responses within a couple of hours, from folks from - literally - all around the world.

Back in the "old" days, whenever I was confronted with a problem - say with how to do a bit of scenery - I'd have to go through all my back issues of MR or spend time reviewing Frary. And I still might not get the answer I need - and certainly not very quickly.

But now, thanks to having started a Facebook group for my layout - not to mention having this here blog and a website going on over 6(!) years now (you do know there's a website, don't you?) - I can reach out to a model railroading community in the thousands almost as easily as yelling to them from the other side of the basement. It's been a great way of getting through some roadblocks, getting advice and another perspective, getting the benefit of another's experience, and just generally getting some quick feedback on the best approaches to solving a variety of problems.

All in all, connecting with and participating in a community can be a great antidote to analysis paralysis. Heh - just beware that you can sometimes have too much of a good thing. Everyone has an opinion and most are glad to share their views. YMMV, but I've found that the best approaches, advice, and information tend to percolate toward the top.

That risk though is, IMO, well worth the benefit of feeling like you're - and in fact being - part of a community. And I think that's especially important during these times of self-imposed, and sometimes mandated, isolation.

I'll close on another quick case in point:

After a particularly stressful day at work (I had no idea working from home could actually be even more stressful than being in the office. Go figure.), I went down to the basement and had only enough mental energy to pick the low-hanging fruit of removing masking tape from my track while listening to a model railroad podcast. It was so nice to have some welcome and familiar company in the room "with" me. But it was nicer still to be able to send a quick email to the producer to tell him how much I appreciated the show.

A few minutes later, he replied and we had a nice chat over IM. When that got to be too cumbersome, we just decided to chat over VoIP - and did so for a bit over an hour.

It was just like he was there in the basement with me, and we were just hanging out while working on the layout - except I'm in Connecticut and he's in Canada.

Same thing's happened with a cyclist friend who also happens to be a model railroader. And he's in Hawaii. Another guy I've met is a Mustang restoration expert, as well as a conductor for Amtrak. He's in Oregon. Met another guy IRL first when visiting his layout - but the visit was set up by that guy in Canada. The layout was in North Carolina. A New Haven RR fan contacted me through my blog and we've become regular correspondents as well. He's in Montana.

You get the idea.

I think one consolation of this time of crisis in our world is that it's given us time - not only to do more modeling, but to reassess a lot of things, review our priorities, maybe even rethink how we do the hobby and connect with others. Maybe even develop some new relationships & cultivate existing ones in new ways, despite being so isolated.

You may prefer to be a "Lone Wolf" modeler, but we're not only in this crisis together, we're all in this hobby together too. Hopefully, we'll come out of this with a better understanding of ourselves and each other. Participating in community is the key. I can't think of a better way to maintain mental health and develop modeling skills at the same time.

Tuesday, March 24, 2020

Tuesday Tip - Ground Goop FAIL & recover....

During my recent scenery blitz, I've been using something I first saw on an Alan Keller video on Lou Sassi's layout: "Ground Goop"

The idea is to have something you can apply to the scenery form that will provide additional undulation to the scenery and, perhaps most importantly, provide something thicker than paint to stick things into. Some even use this directly on the scenic form instead of paint, thereby eliminating a step in the scenery process.

It's particularly effective at making little landforms like small bumps/hills, eroding hillsides, and riverbanks. You can also push your structures down into it before it hardens, thereby eliminating that "sitting on top of the scenery" look.

The original formula called for 1 part each of ground color paint, vermiculite, and Celluclay, 1/2 part white glue, and a jigger of Lysol if you want to keep it from going bad in storage. I've seen other formulas, including one that just mixes Sculptamold with ground color paint (I think Mike Confalone uses this recipe).

My formula is a bit different:

  • 2 parts Sculptamold
  • 1 part paint
  • 1 part glue
  • Just enough water to make it peanut butter/oatmeal consistency.

I eliminated the vermiculite early on since it looked too shiny and coarse to me.

Things worked pretty well, though I always had a problem with the mix being a bit lumpy. So I decided to check out the Sculptamold mixing instructions. Apparently, I'd been doing it wrong. Instead of dumping in the Sculptamold first and then adding the liquids, you're supposed to put in the water first, then add the Sculptamold in slowly, mixing it in as you go.

Well, after doing that and adding the paint and glue, it was MUCH too watery. So I just kept adding more Sculptamold. And more. Until it was that oatmeal/peanut butter consistency.

By then, it was time to retire for the evening.

This is what I had the next morning:


Yup - hard as a rock!  Yes, I sealed it. No, I couldn't salvage it.

Thinking I'd followed the directions wrong somehow, I tried again. UGH! Same result - but this time I caught it before it had totally hardened, added some water, and with a LOT of stirring effort was able to salvage it.

What's going on??

As with a lot of questions lately, I get the quickest response from The Valley Local FB Group. Apparently, the main reason the goop reacted so differently this time is that Sculptamold has hydrocal in it and adding it to water (rather than vice-versa) causes a chemical reaction which solidifies it much more quickly. At least that's what I remember being the gist of the responses.

Suffice it to say, I've gone back to my original process: 2 parts Sculptamold in a bowl, add 1 part paint, add 1 part glue, mix thoroughly, then add just enough water to make it like thick oatmeal. I may try adding less glue (not really sure I need to use that much).

Oh - and I just mix it more thoroughly (and dip my trowel in water occasionally) to smooth it out.

Here's how it looks when troweled on:

The change in color is the result of, um, a change in color. I decided to try and lighten things up a bit. Don't worry - I'll blend it in.

For the front of the layout, I protect the fascia (and the floor), by adding a dam/barrier of masking tape.

Then just trowel it on and smooth it. The thinner the application, the quicker it'll dry. But with this batch I've troweled on as much as 1" thick and it was dry within 24 hrs (but that's during winter - it may take longer during a humid summer).

Another view - all smoothed out.
While the goop is still wet, I sprinkle on my base ground cover - a mixture of different colors of "fine" ground foam. Between the paint and the glue, there's a lot to stick to. But I still mist the ground cover with 70% isopropyl alcohol (IPA) as a wetting agent, then apply diluted white glue to fix it all in place. For now, I'm applying the glue with either an old saline solution bottle or a pipette - but I'm trying to find a way to mist on the glue as well so I can cover a wider area more quickly.


I think most folks paint right over the scenery shell and either add their base ground cover to the wet paint, or brush on glue after the paint has dried. That may work well with foam-based scenery, but I'm using the cardboard strip/plaster cloth scenery base and want to cover the "lattice" look. I could try doing the lattice in a tighter "weave" - but I still like creating a thicker layer for adding trees and such.

Let me know in the comments your thoughts on using ground goop - and if a different method works for you, I hope you'll let us know!

Sunday, March 22, 2020

Concrete Roads from Styrene

The final of the four different ways I've tried to model concrete roads is using styrene (foamcore, real concrete, and joint compound are the other three).


I used .060" thick styrene sheet since that thickness is just under the height of Code 70 rail, so perfect for just gluing to the top of the ties. The first step was to cut sheets 21 scale feet wide in lengths to match my need. After dry fitting (see pic above), I put in the expansion joints: centerline and then cross joints every 33 scale feet. Click here for for how I arrived at these measurements.


After making sure everything fits right and you've scribed in your joints, spray the styrene with your favorite "concrete" color. In this case, I'm using an inexpensive rattle can of gray primer.


Since in this particular case (Church Street) I have a double grade crossing, I glued some scrap stripwood, equal in thickness to the thickness of my ties, in the area between the tracks in order to help support the short piece of styrene road.


I glued the styrene to the scenery base using Elmer's wood glue and glued the ends to the ties using Aleene's Tacky Glue.


And here's the finished product, along with some in-process scenery in the area. Shoulders still need to be added.

After trying these different techniques, I'd rank them as follows for ease-of-construction and authentic look:
  1. Foamcore Board
  2. Styrene*
  3. Joint Compound
  4. Concrete patch
*Just wanted to mention a few bits of info from friends Bill and Dean regarding using styrene:
  • Bill - being a civil engineer - is very hot on adding a crown to the road. This is especially easy to do with styrene if you add a 4-6" (scale) strip underneath the road's center. Keep in mind though - that may make it more difficult to keep the edges of the road glued down (there will be some small amount of tension, unless you precurve or - worse - score the styrene). That leads me to the next point . . .
  • Dean offers a warning: He knows of a number of folks that used styrene extensively for roads +/-10yrs ago and now they are shrinking, pulling free, and curling up. Not sure why that would be, but YMMV. I was sure to use plenty of glue to glue down my styrene and the ground goop I use (right up to the road edge) has glue in it as well.
So that does it - for now - on concrete roads. If you have a different technique - or have some additional tips for how I could do these techniques better - I hope you'll share them in the comments.

But now, since I mentioned "ground goop," stay tuned and I'll show you what it is and how I mix mine (and - perhaps more importantly - what not to do...)

Hope you and yours are safe and well - and that you're finding some time to immerse yourself in this wonderful hobby and turn the world off for a little while.

Friday, March 20, 2020

Concrete Road - FAIL! & redo

My first full week of telecommuting has been much busier than I expected, with Executive Orders coming out literally every day. Consequently, I haven't been able to work on the layout even as much as I did during "regular" times (which are fast fading into distant memory). But I have been able to get to the basement here & there from time to time - even if just for a "coffee break". . .

So progress continues, just at an even slower pace than I'd before. But at least it's progress - even if it means a couple steps back every once in a while. Like with my "real concrete" road . . .

Here's where we left off last time (for how I did this grade crossing - as well as others - click here):


This road was made with DAP's concrete patch mix - and it doesn't look too bad. From a distance.


And that's the problem - as soon as you get down to "HO scale person level," the illusion is much less effective.


Now, admittedly, you're seldom looking at things this closely - especially when operating. But I plan to photograph this railroad pretty regularly when it's done and the camera doesn't lie. That concrete might be just fine for Sassi's O scale layout, but it looks pretty coarse and rough in HO scale - at least to my eye.

So, after consulting the experienced modelers over at The Valley Local Facebook Group (shameless plug), I decided to redo the road.

I'm gradually coming to the conclusion that I prefer foamcore board to make concrete roads, but I didn't want to try and rip out this road (did I mention it's actual concrete?!), especially if that meant having to redo the grade crossing - or, worse, replace the track. 

My FB friends suggested I try a skim coat of joint compound over the existing concrete. I was dubious about my ability to carry this off, but I figured it would at least cover the roughness & too-wide expansion joints.


First thing I did was sand down as much of the roughness as possible. Then I masked off the road, again using the masking tape as a form but this time using only a few layers of tape since I didn't want to build the road up too high.


Then it was a matter of troweling on the topping and skreeing it as I did with the concrete. In the photo above, I'd just started to remove the tape.


Most of the tape is removed and the expansion joints are put in. MUCH less wide - actually, so faint you hardly notice them!


After all the tape is removed, I painted (though I suppose you could paint before removing the tape).


I used a dark-ish gray to match the driveway & parking lot around Ballantine's. Unfortunately, it had to be brushed on & it took two coats to get rid of the brushstrokes.


Be careful that you don't apply it too heavily and fill in all your expansion joints - which you can actually see now in the photo above.


Here I've started to add the shoulder on the right and the lot for Wethersfield Lumber on the left.


Now just to let it dry . . .

This experience has pretty much put me off using the concrete patch mix for HO scale roads. Again, it'd probably look amazing in O scale but I'm glad I redid it. Others may love and prefer using joint compound for roads, but I'm fairly ambivalent given the skill needed to skree them just right. But at least the texture is right. Just be careful you don't bump them - or be sure to add coloring to the compound before you apply it.

The paint job looks ok, but it's way too even. Definitely need to do some weathering, but for now it's a huge improvement over what I had originally. Let me know if you agree!

Next time, I try one more material for making concrete roads - and probably the most common approach: using styrene sheet. Stay tuned!

Wednesday, March 18, 2020

Modeling Concrete Roads

Before getting into scenery, and around the same time you do grade crossings, you should put in the roads. Like with the grade crossings, I'm using Wethersfield as a test bed and over the next few posts I'll describe the different methods I tried for modeling concrete roads.

Like with most things, I try first to consult the prototype and I've been fortunate to have collected a couple of appropriate photos of what I'm trying to model: 
Middlesex Turnpike (old Rt. 9, today's Rt. 99), looking north, Cromwell, CT
The above shot is my go-to for roads since it's shot from such a perfect (and rare) vantage point, is actually in one of the towns I'm modeling, and - bonus! - is even from around my modeling era.

Southbound train on the Berkshire Line at Kent, CT
This shot on the Berkshire Line, while nowhere near my layout in space or time, is priceless for being a color shot from at least near my era (late '40s/early '50s) and area (Connecticut).

After collecting some prototype photos, I then consult a "standard" if there is one.


I found the above diagram in one of the Kalmbach scenery books and it provides a common, albeit very general (and probably product-specific) standard for doing roads. However, one of the perils of have such smart friends is getting additional feedback. Bill Chapin - a civil engineer by trade - couldn't help but provide exhausting (though appreciated) detail on how concrete roads were built. The short version is that concrete roads typically have lanes 10' wide, with crosswise joints every 33'.  Shoulders are typically 3-4' wide on each side.

So, armed with my photos and guidelines, I first tried Lou Sassi's method of using DAP Concrete Patch to make concrete roads ("nothing says 'concrete' like actual concrete").

My "subroad" is foamcore, which I got covered with some scenery material. So my first step was to sand that down.

Next, I masked off the road - 21' wide total - and masked off the grade crossing, leaving the center clear to fill.
 
Sassi's method uses multiple layers of masking tape as a form. I think I used 8 layers of tape. Be careful that you make the inner edges even for easier removal later.

The second most harrowing part of this process is troweling on the concrete.

The MOST harrowing step is skreeing the concrete, especially over a grade crossing, keeping it even without getting it everywhere.

After allowing it to set up for about an hour, I put in the expansion joints. Believe it or not, I used an X-Acto blade, which should have been plenty thin enough, but the concrete must've still been too wet since the blade made pretty wide lines.

Also, be careful when you pull up the tape from wood grade crossings - or else you may have part of the wood pull up as happened here.


Here's the completed, real concrete road. Not bad, from a distance . . .

Stay tuned for why this may not actually work - at least in HO scale.