Showing posts with label Ballantine. Show all posts

Monday, March 9, 2020

Modeling Monday: Railings, Posts, & Painting

Work in Wethersfield continues, with a focus on structures. First, I added some details (railings and porch light) for the Ballantine's beer distributor office.

The railings are from Central Valley and Plastruct. The porch lights are Tichy #8170). Just took a quick shot of flat black rattle can paint.

I drilled holes to accommodate the railings and glued the lamp to the bracket.

I glued the light over the door and carefully added the partial railings onto the top landing. All that's left to do on this structure is a bit of weathering on the roof and the foundation/stairs.

Next, I started to paint the Wethersfield Lumber Co office. The base color is dark gray rattle can primer, then Apple Barrel Granite Gray on the walls, purposely painted lightly to simulate worn & peeling paint. The trim color comes next and will "dress up" the relatively messy walls.

While I was at it, I drybrushed the same "granite gray" paint over the outhouse. I was pleasantly surprised to see how much it looks like weathered wood.

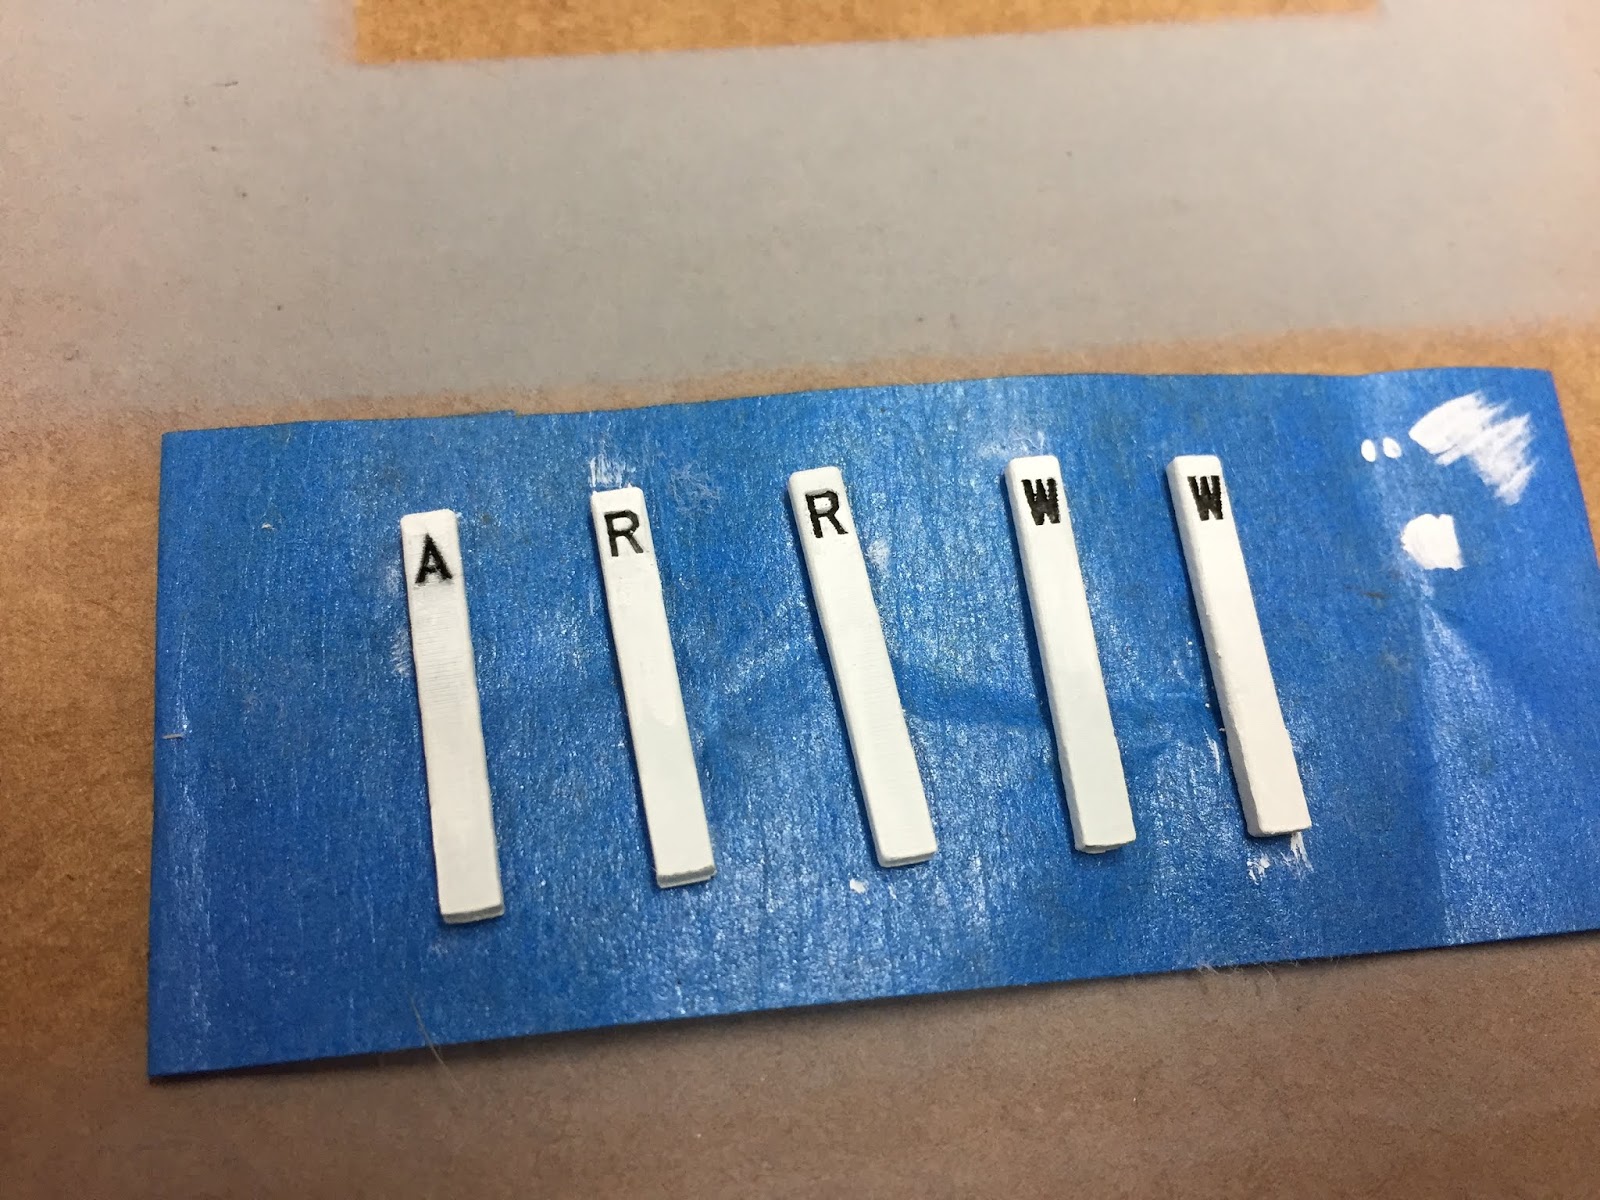
While I was in the paint room, I grabbed the lineside details I'd spray painted last week (yes, that's actually white - the color in the camera is off a bit).

ChrisZ made these from actual New Haven RR prototypes, including beveled base and top, and - most impressively - recessed letters!

The recessed letter isn't only prototypical, it makes it pretty easy to paint. The base color is, of course, white but I used a 000 brush to add black acrylic craft paint to the recess. Of course, even if you're extra careful, you're going to get black onto the face of the post. No worries - just drybrush some more white over the letter.

It wasn't that hard to do, but it is fairly fussy work and does take some time. But it's an enjoyable way to spend a bit of time for some really cool details, especially with a cup of coffee and podcasts playing.
I spent a LONG time Saturday on Wethersfield. The good news is that I had a nice long block of time to spend. The bad news is that I don't have lots of progress to show for the amount of time used.

However, I did plow through some mental roadblocks and tried my hand at making a few different grade crossings - and roads. Stay tuned & maybe you'll pick up a few tips!

Friday, January 16, 2015

Building Ballantine's Beer Distributor, Part 2

After continuing the walls around the perimeter of the base, the next step was to install the roof. All that entailed was pressing it in, down to the locating ridge/lip, and applying liquid cement to the joint from inside.

Next up were the loading dock roofs, which turned out to be more complicated than I thought. Be careful to leave as much material as possible on the bracing rods. Even being careful, mine were just a little short, which meant I had to lift the roof more up toward level than slanted. If I were to build this kit again, I'd probably use wire cut to fit.

There's no great way to do all this - ideally, you'd attach the 7 braces and roof to the building simultaneously. But going one step at a time, and waiting for the glue to set before moving to the next piece helps a lot. I applied the more viscous glue from the needlepoint applicator (ModelMaster) to the back edge of the dock roof and held it against the building until is set up. Then, one by one,  I dipped the top end of each brace into a pool of that same, thicker glue, stuck it in the hole on the building, let it set, then pulled the roof up to meet the bottom of the brace and applied Tenax with a microbrush to the underside of the roof where the brace entered.

Doing all this methodically takes time, but if you go too fast you risk things falling apart - literally. As it was, each loading dock roof took an evening's worth of work. But after two nights, they were done.


I took these photos once the "back" side of the building was done. This is the truck loading dock (as opposed to the trackside loading dock) and will face the backdrop. I figured this would be the side to "practice" on, but it actually came out pretty good. You can also see on the roof, toward the back on the knee wall, where the rooftop office would have been located. This gap won't be visible from the front of the building, but I'll probably fill it anyway.

Next steps are to paint the vents silver (should have done that before) and figure out what other details to add to the roof.

That's were you come in. I need some help/advice on what to add. It's October 1947, so no rooftop air conditioning units. So far, I expect to add some sort of rooftop stairway, to provide roof access from below, and some bathroom vents. The kit comes with a brick chimney, which I'll add as well. What else? It's pretty barren up there. . .

After the details are up there - including the sign - I'll add some fine-grain sand to provide roof texture. Of course, let me know if there's anything I'm forgetting - I'll be sure to keep you posted!

Sunday, January 11, 2015

Building Ballantine's Beer Distributor, Part 1

As the Valley Local heads south into Wethersfield, the first industry it encounters is the Ballantine's Beer Distributor.  Click here for an introduction to this industry on my layout, and click here for all the posts I've done about it so far (you can also click "Ballantine" on the Topics list).

I don't know of ANY photos of this building before it was demolished, and have only a sketch John Wallace did from memory:


And, thanks to Bill Shanaman, I also have a photo of one wall as it was being demolished:


Given these bits of information, I finally decided to use Walther's Grocery Warehouse (aka Miranda's Bananas) as a starting point. Here it is as it comes:

Actually, this photo shows it much more finished and painted nicely. It doesn't look like this right out of the box.
Strangely, the Walthers photo shows the truck loading dock side of the building (which will face the backdrop on my layout, but the track side is similar). If you imagine this building without the office on the roof, and red brick instead of stucco, and squint a bit while comparing to the sketch and prototype photo, you may agree it's a pretty good start. So let's get going!

First, I had to decide on colors and paint:
  • Brick would be red (Floquil Southern Freight Car Red)
  • Concrete would be Floquil Foundation
  • Windows/Doors - rattlecan gray
  • Roofs - PollyS Grimy Black
  • Base - rattlecan brown 
After painting the lower walls, but before painting the brick, I used a straight edge and X-Acto to remove the office "appendage" from the trackside wall.

Then I had to mask to paint the brick.

This was my First Ever masking job, so I did some research and many folks recommended Tamiya tape. I took my time lining things up, and it worked VERY well. I just used the (relatively) expensive Tamiya right where the paint separation would be - for any additional masking I just used regular inexpensive masking tape.

I was REALLY pleased with the results of the masking! No bleed or anything. Here I am just painting the concrete sills by hand.
I discovered very quickly that even an easy-to-build kit will take a LONG time if you do it right - and by "right" I mean painting and preparing the parts as much as possible before assembly. Sure, if I'd just put this structure together - believing "all parts molded in appropriate colors" - it'd just look like a plastic building. Investing extra time and effort before assembly makes a huge difference.

Next up - brick mortar lines:

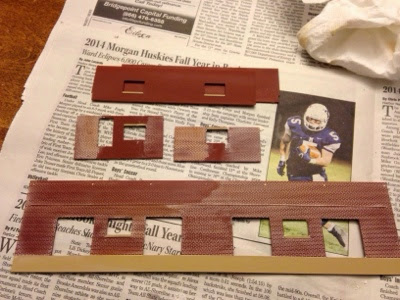
In a previous post I asked for advice on how to do the brick mortar lines - and I really appreciate everybody who weighed in both in the comments and by email. As you can see above, I tried a number of techniques (using - primarily - the "extra" office walls for practice), but finally settled on a wash of PollyS MILW Gray, thinned 5:1. Of course, after I did this John mentioned that Ballantine's likely would have painted its brick walls red - including mortar - to comply with Wethersfield historical sensibilities(!)

But I'm pretty happy with how my gray wash worked and will likely use it in the future. (translation: I'm not undoing these cool mortar lines).
Like most of you, I do my hobby in fits and starts - all too often life hijacks modeling plans. So it was a while before I was able to get back to this project after the mortar lines were done. But, thankfully, today all the parts FINALLY got on the workbench for assembly ...
FINALLY starting construction!

I painted all the small parts on their sprues for easy handling, but to save construction time, I used my sprue nippers (which I highly recommend, btw) to remove them all and divide them up in separate compartments.

I wanted to remove the wall caps but they're similar enough I didn't want to confuse them - so I labeled them with a sharpie.
Windows & doors go in first. I used Tenax most of the time - applied with a microbrush - but used the thicker glue (in the needlepoint applicator) for the loading doors (the microbrush had a hard time getting to the joint)

Next is glass, applied with canopy glue- works like Elmer's white glue, dries totally clear.

While waiting for the windows to dry (recommended handling time is 3 hrs) I decided to assemble whatever else I could. Here's the sign. Clamp parts in place, then flow Tenax along the joints.

Although I didn't need the "roof-top office" I figured it might make a nice building in its own right - and I didn't need the spare parts for anything else - so I set it up in my gluing jig and, again, flowed Tenax along the joints. Here it is upside-down with the roof being attached.

FINALLY! Walls are going up!
From this point on, things go pretty quickly. Just be careful you make tight corners (make sure at least one of the gluing surfaces are paint-free and that all gluing surfaces are free of burrs). The kit comes with a base that helps line things up. Since I knew what side would face the backdrop, I planned to put that wall on last. That way any fudge-factor would be hidden from view. In between allowing joints/corners to dry, I added the roof-top vents and put together the chimney (note to self: paint vents gray/silver in the future).

Next up - finishing the walls, and adding the roof and loading docks, I'm not sure yet how I want to go about adding the loading dock roofs (they're at an angle and can't be clamped in place), and I discovered that removing that roof-top office wall may require some finessing (there's a gap in the wall top covers where it used to be).

But all in good time. Once the painting & wall prep was done, things went more quickly - but it still took me part of an afternoon & evening to get to this point. I'm really glad how it's turning out though. Hopefully I'll have it ready to go on the layout by next weekend - provided life doesn't get too much in the way...

Wintertime is the best time for modeling - so I hope you're able to get to your workbench too!

Sunday, January 4, 2015

Brick Mortar Lines

The last time I did mortar lines on a brick building was c.1983. I'd just built my first structure kit (a Plasticville brick city building, IIRC). It was already molded in red, so "No Painting Necessary." But I'd read somewhere that you could get a neat mortar effect by applying white paint to the walls and immediately wiping it off. It worked great.

Fast forward over almost 32 years later, and I'm ready to try again on my Ballantine's beer warehouse. But things have changed - I've become a more "sophisticated" modeler. I actually paint the brick walls on my kit (heh - it helped that the brick was molded a "stucco" color and I wanted my bricks to be red).

But therein lies the problem - adding mortar lines isn't as easy this time around.

I'd heard of a technique using joint compound, and I tried that first. My efforts are in the photo below:


As you can see, the effect is underwhelming. I think the problem may be that the brick red paint I used was Floquil - flat flat flat. And I suspect the reason the compound isn't coming off the face of the bricks as nicely (as it would if the bricks were unpainted styrene) is that the flat brick paint has taken in some of the compound (it hasn't absorbed anything - the walls have been drying for almost two months(!)). Fortunately, that long wall is the wall that will be facing the backdrop. And the other walls won't be used in the final build, so I have some more chances to practice.

The next technique I tried was a wash of light gray PollyS (water based) paint, thinned 3:1 with acrylic thinner. That came out better, but still heavy (too light in color).

Finally, I'm trying thinning 5:1 with 91% isopropyl alcohol. Apply with a brush, then wipe off. That seems to be working ok, though I'm not sure about using alcohol rather than water (or acrylic thinner) to thin PollyS paint. But I thought the alcohol would evaporate more quickly and leave the color in the lines more easily.

What technique do you use for adding mortar lines to your brick walls? Do you paint the walls a brick color first? Does it matter whether it's a glossy or flat finish? Do you ever use alcohol to thin acrylic/waterbased paints?

Let me know - as always, any thoughts/suggestions/guidance are MOST welcome!

Wednesday, June 25, 2014

Tuesday, December 17, 2013

Prototype Modeling with No Photos: Ballantine Beer Distributors

Possible basis of a sign - John Wallace Collection
Prototype modelers by definition model buildings, scenes & equipment that actually exist - or existed.  Problem is, the further back in history you go the harder it is to find information/photos/etc.

Now that I have a couple successful operating sessions under my belt, I thought I'd turn my attention to creating some authentic scenes for the trains to travel through.  Starting at the north end of the railroad, the first stop is P. Ballantine & Sons beer distributors & Wethersfield Lumber Company, both in the vicinity of Jordan Lane in Wethersfield.

Problem is, there are ABSOLUTELY NO photos of either Ballantine's or Wethersfield Lumber. I'm still looking, but I don't have much hope. So what's a prototype modeler to do?  Just freelance (in a limited way, admittedly, but still...)?  Well, maybe that won't be necessary.  This post will introduce how I'm handling the problem...

First stop, check out the Sanborn map of the area.  If you're a prototype modeler, you probably already have maps of the area that you used to help plan your track.  These cool maps not only show track arrangements though, they show at least the footprint of the buildings too.

Here's the Sanborn map of the Jordan Lane area of Wethersfield:

North is to your right.  Ballantines is northwest of the Jordan Lane grade crossing.  Wethersfield Lumber Co. is to the southwest.  I've penciled in a few prototype dimensions.  Click to see the small print.
I'm not sure why there is no siding shown at Ballantine's - maybe it wasn't put in yet when the map was produced; maybe it had just been removed; maybe it's just an oversight.  But I know from multiple sources that Ballantine's was, in fact, served by the railroad in 1947 - and the loading dock that's shown on the east side of the building shows the likely location of the siding (despite a fuzzy aerial photo that seemed to indicate the siding curved to the west side of the bulding).

In addition to the Sanborn map, I also have the benefit of John Wallace's personal recollections of the area during the era I'm modeling.  And also fortunately, John's memory is as sharp as a tempered steel blade...  So when I asked him if he remembered at all what Ballantine's looked like, here's what he emailed me:


Ballantine's Beer Distributors - Sketch by John Wallace
Notice where the siding is - right where expected, along the loading dock on the east side of the building.  Followup questions elicited some additional information:  It was of brick construction, the loading platform was covered and the freight doors were spaced to match boxcar doors.  The platform and building were 3 cars long and the siding was a total of 5 cars long.  There was also a track bumper at the end of the siding.  All the windows were on the south side (Jordan Ln), where the office was.  There were no windows on the east or north side (the west side will face the backdrop).

Ok, with a rough idea of how the prototype building looked, how large was it?  Again, the Sanborn map helps, providing the building's footprint.  You first have to figure out the scale of the drawing, which - due to zooming/enlarging - may actually be different than what the scale rule on the drawing itself.  Once you determine a dimension in prototype feet, it's then fairly easy to convert to model (actual) inches using a standard scale ruler alongside a regular ruler (or, for HO scale, you divide the prototype measurement by 87 and convert the resulting decimal to inches)

If you zoom into the Sanborn map image above, you'll see that the prototype Ballantine building measured 58.3' x 83.3' and the loading platform was 116.6' long.  So modeled full-size, without selective compression, the model would measure 8" x 11.5" and the loading platform would be 16" long.

Incidentally, a 40' boxcar is a good standard of measurement - especially in HO scale, where a 40' boxcar is about 6 actual inches long.  So the Ballantine siding, if modeled full size, would be about 30" long (5 cars).  The siding I have is 3 cars long (about 18").


When I went to measure my space, I got a few nasty surprises:

1) Since the prototype terrain here is relatively flat, my backdrop is WAY (about 3") too high, which will require including an unprototypical slope unless it's fixed.  Lesson: Unless you're modeling mountainous terrain, the bottom of the backdrop should always be at least even with subroadbed level. Not sure yet what - if anything - I'm going to do about this.

2) To save material, I tailored my plywood subroadbed to support track only & should have extended it to support anticipated buildings as well.  Lesson: You may not know ahead of time where buildings will be, but your plan should at least show where "signature" buildings/towns are and you should provide nice flat support for such areas.  I figured I could create a flat area at the scenery stage with my cardboard webbing.  That may not be as easy as I thought - especially in this case when I'm trying hard to avoid too much of a slope.

3) According to the measurement above, there may not be enough room for Silas Deane Hwy between the building and the backdrop, especially if the building is modeled full-size.

Since the building might end up against the backdrop anyway, I tried a mock-up that curved the siding from the main in order to gain more seperation, with the result below:

 
Initially, I liked the look of this, so grabbed an old building to enhance the mock-up:


It's starting to look like an actual scene now (and that's pretty exciting). Unfortunatley, with the high backdrop (and resulting steep slope imagined behind the building), it doesn't look much like Wethersfield. Concern about such facts is one of the things that seperates a prototype modeler from a freelancer. A freelancer would be fine keeping such a nice scene as-is. Me? I've got to make it look as close to my prototype as I can.

So, setting the "slope problem" aside for the moment, I remeasured to see how the prototype building might fit with the more-curved siding:
 
The prototype building would be too deep, even if placed right against the backdrop.

The loading platform would fit, even if modeled full size.
While I was measuring building footprints, I figured I'd get a quick view of how Wethersfield Lumber Co. (WLCo) might fit.  Looking at the Sanborn map, there were a number of buildings associated with Wethersfield Lumber, but the largest was the lumber shed at the end of the siding.  In HO scale, it would be 21" long...
 
Uh oh.
Um, yeah.  Not going to model the lumber shed full-size then.  Selective compression by like 70%?  Looks like it.

Once I got over my initial shock & depression re WLCo., I decided to see if I had a more-appropriate building on-hand for Ballantine's.  Here's what I found:

2 stories, brick, roof overhang over loading doors.
Looks pretty good to me.  Seeing how it would fit was only a matter of taping the inside corners of the walls and setting it up:


Notice I've moved the siding back toward the main to provide some space for Silas Deane Hwy. (and a hopefully more-gradual slope) between the building and the backdrop.  The above shot shows the building mocked-up, unmodified.

Here's the same building with two walls butted end-to-end along the Jordan Lane (south) side to make a more-imposing industry:


Cool loading docks too!  Incidentally, another lesson (or thing for me to keep in mind for the future): Have as many of your buildings/bridges/loading docks/etc built beforehand as possible. This certainly makes it easier to mockup things and see what you really have to work with.  It's not always practical, but if you don't have a layout yet, your hobby time would be well spent building stuff ahead of time.
 
So, this is where the Ballantine's Beer Distributors scene is currently.  It's clear I'm going to have to compress things.  Is the building (especially the unmodified/smaller version) large enough to justify rail service (two cars' worth)?  And if I decide to move the turnout north and thereby lengthen the siding for more cars, I'd have to make the building even larger.  Any recommendations?  I look forward to hearing/reading what you think.
 
Next, I think I'll try my hand at some scenery - at least some scenery support (cardboard webbing) - and see whether that slope/backdrop problem is as bad as I fear it may be...