


As I mentioned in my last post, I was a little surprised to realize I haven't done a substantive post on the layout/projects since the end of August. And if you don't follow the Valley Local Group on Facebook (and, let's be honest, why would you want to get on FB during an election season anyway), you may not realize that I've actually made some decent progress these past couple of months.
So by way of catching you up - and by way of my documenting that progress - here's what I've been up to:
If I'm a devoted New Haven prototype modeler, why am I doing a Boston & Maine SW1? If you don't know - and are curious - click here for the story.
The last time I posted about the 1109, I'd just finished disassembling and stripping it. Since then, I chiseled off all the door handles & lift rings, and added some additional detail - including my first-ever foray into stainless steel details.

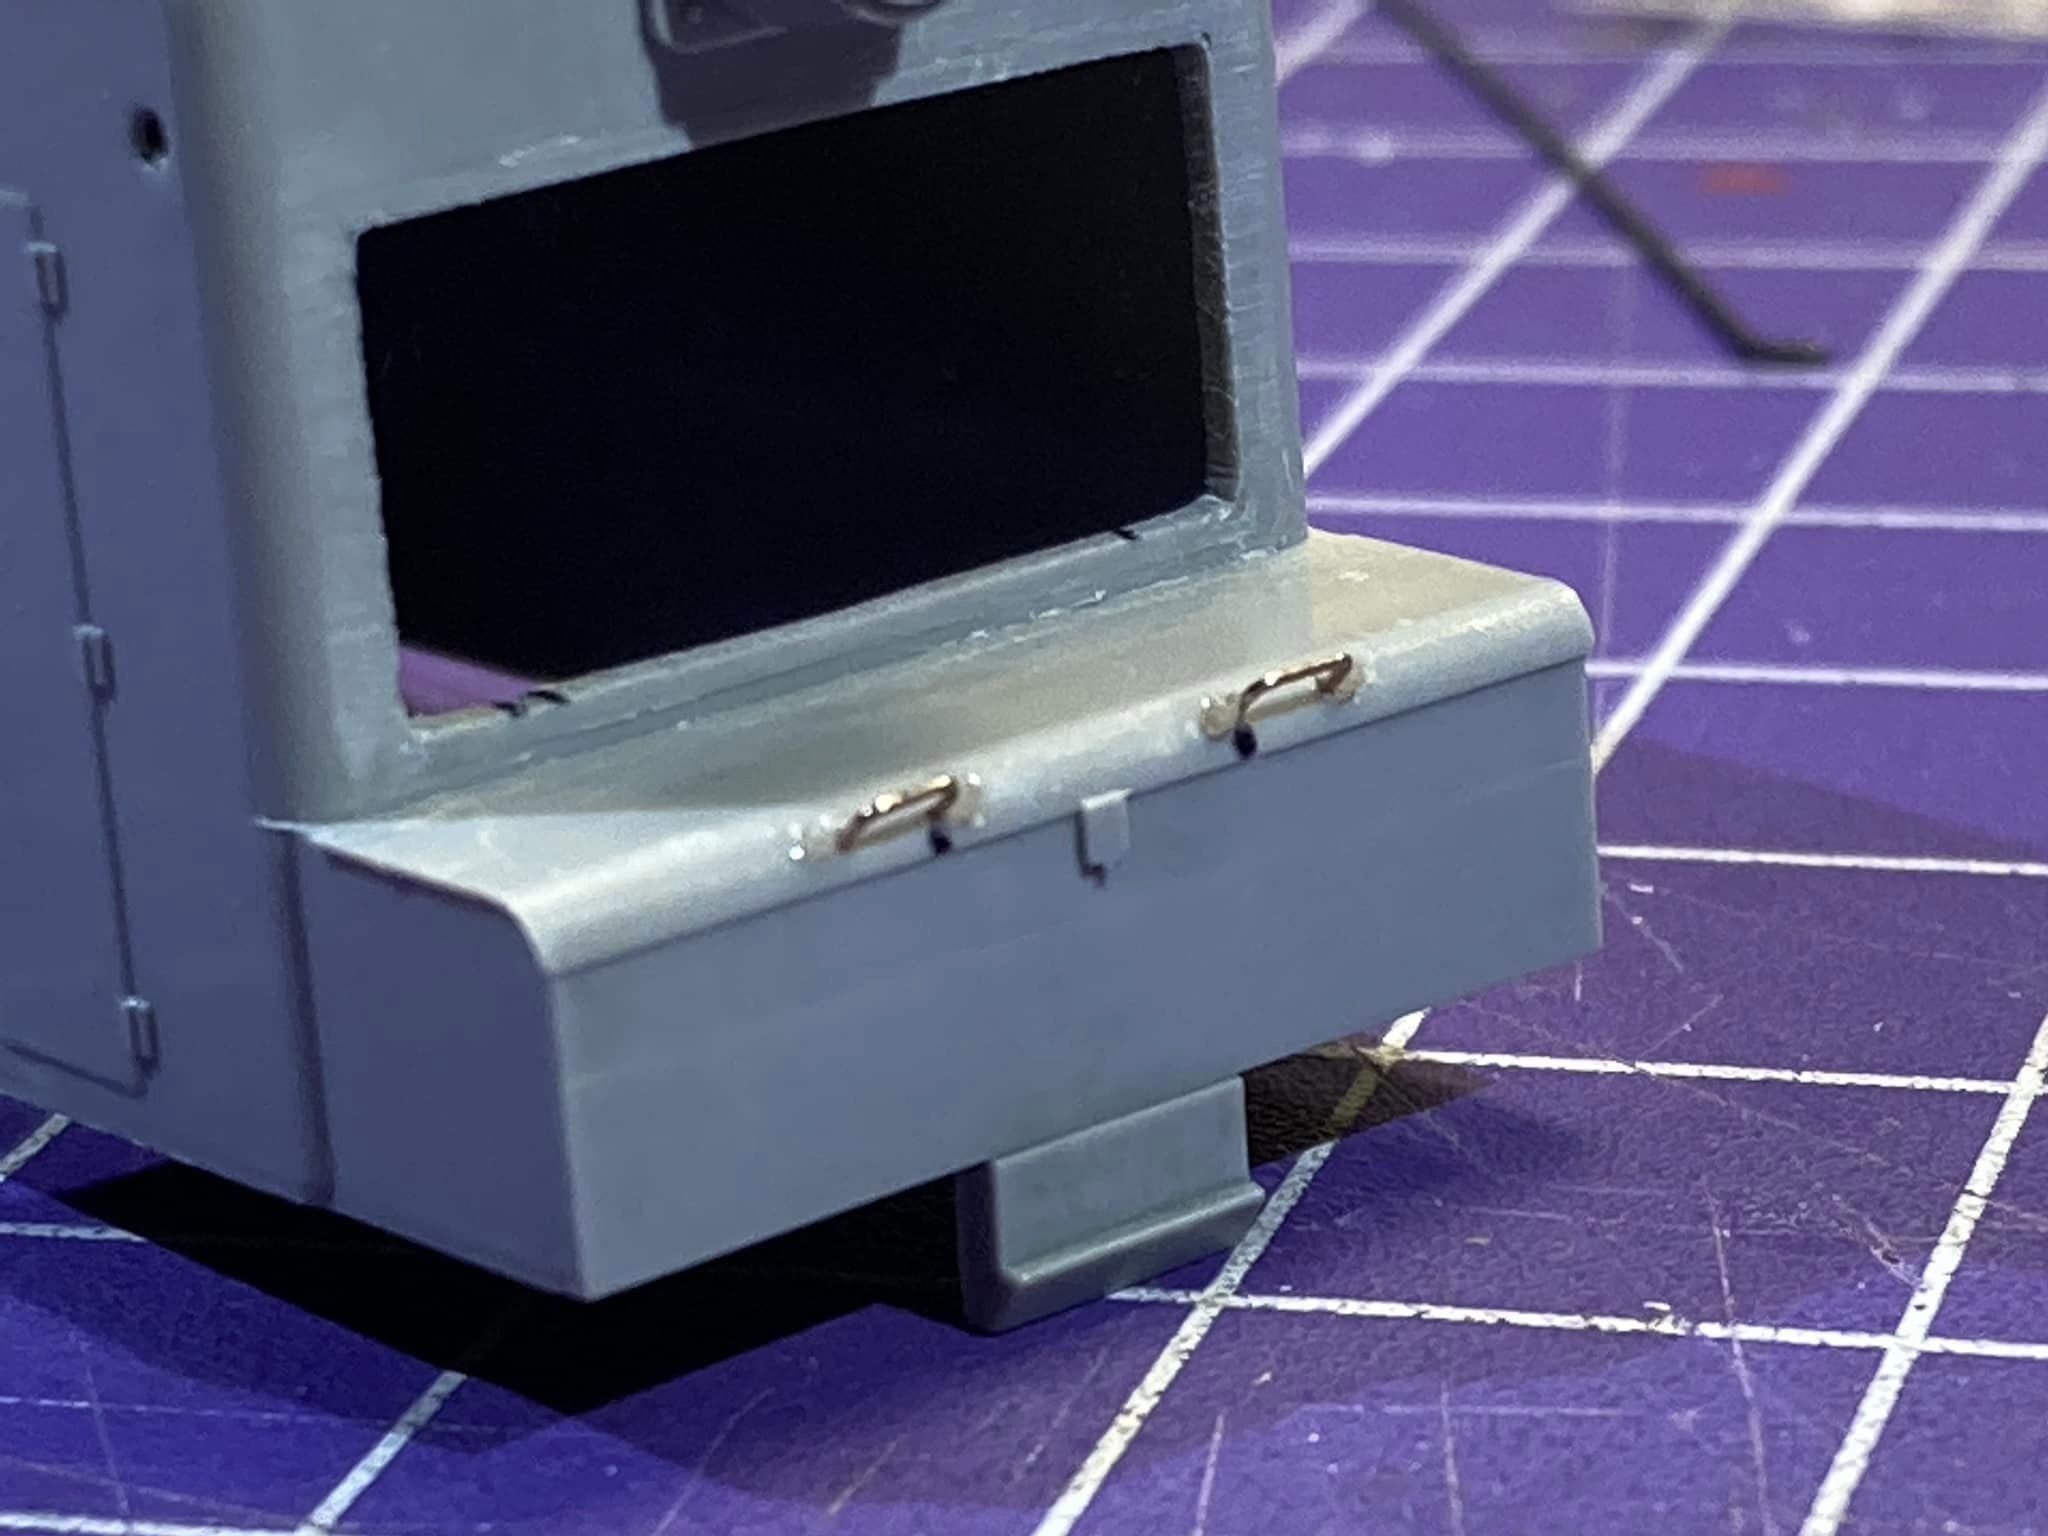


Next step will likely be to install the radiator screen (which has three separate parts to laminate(!)) and then primer. Oh! And I have to add pilot detail as well (coupler lift bars, air & signal hoses). Also want to see what ChrisZ has cooked up for a suitable replacement horn (there's no Leslie A-125 in HO scale that I know of).
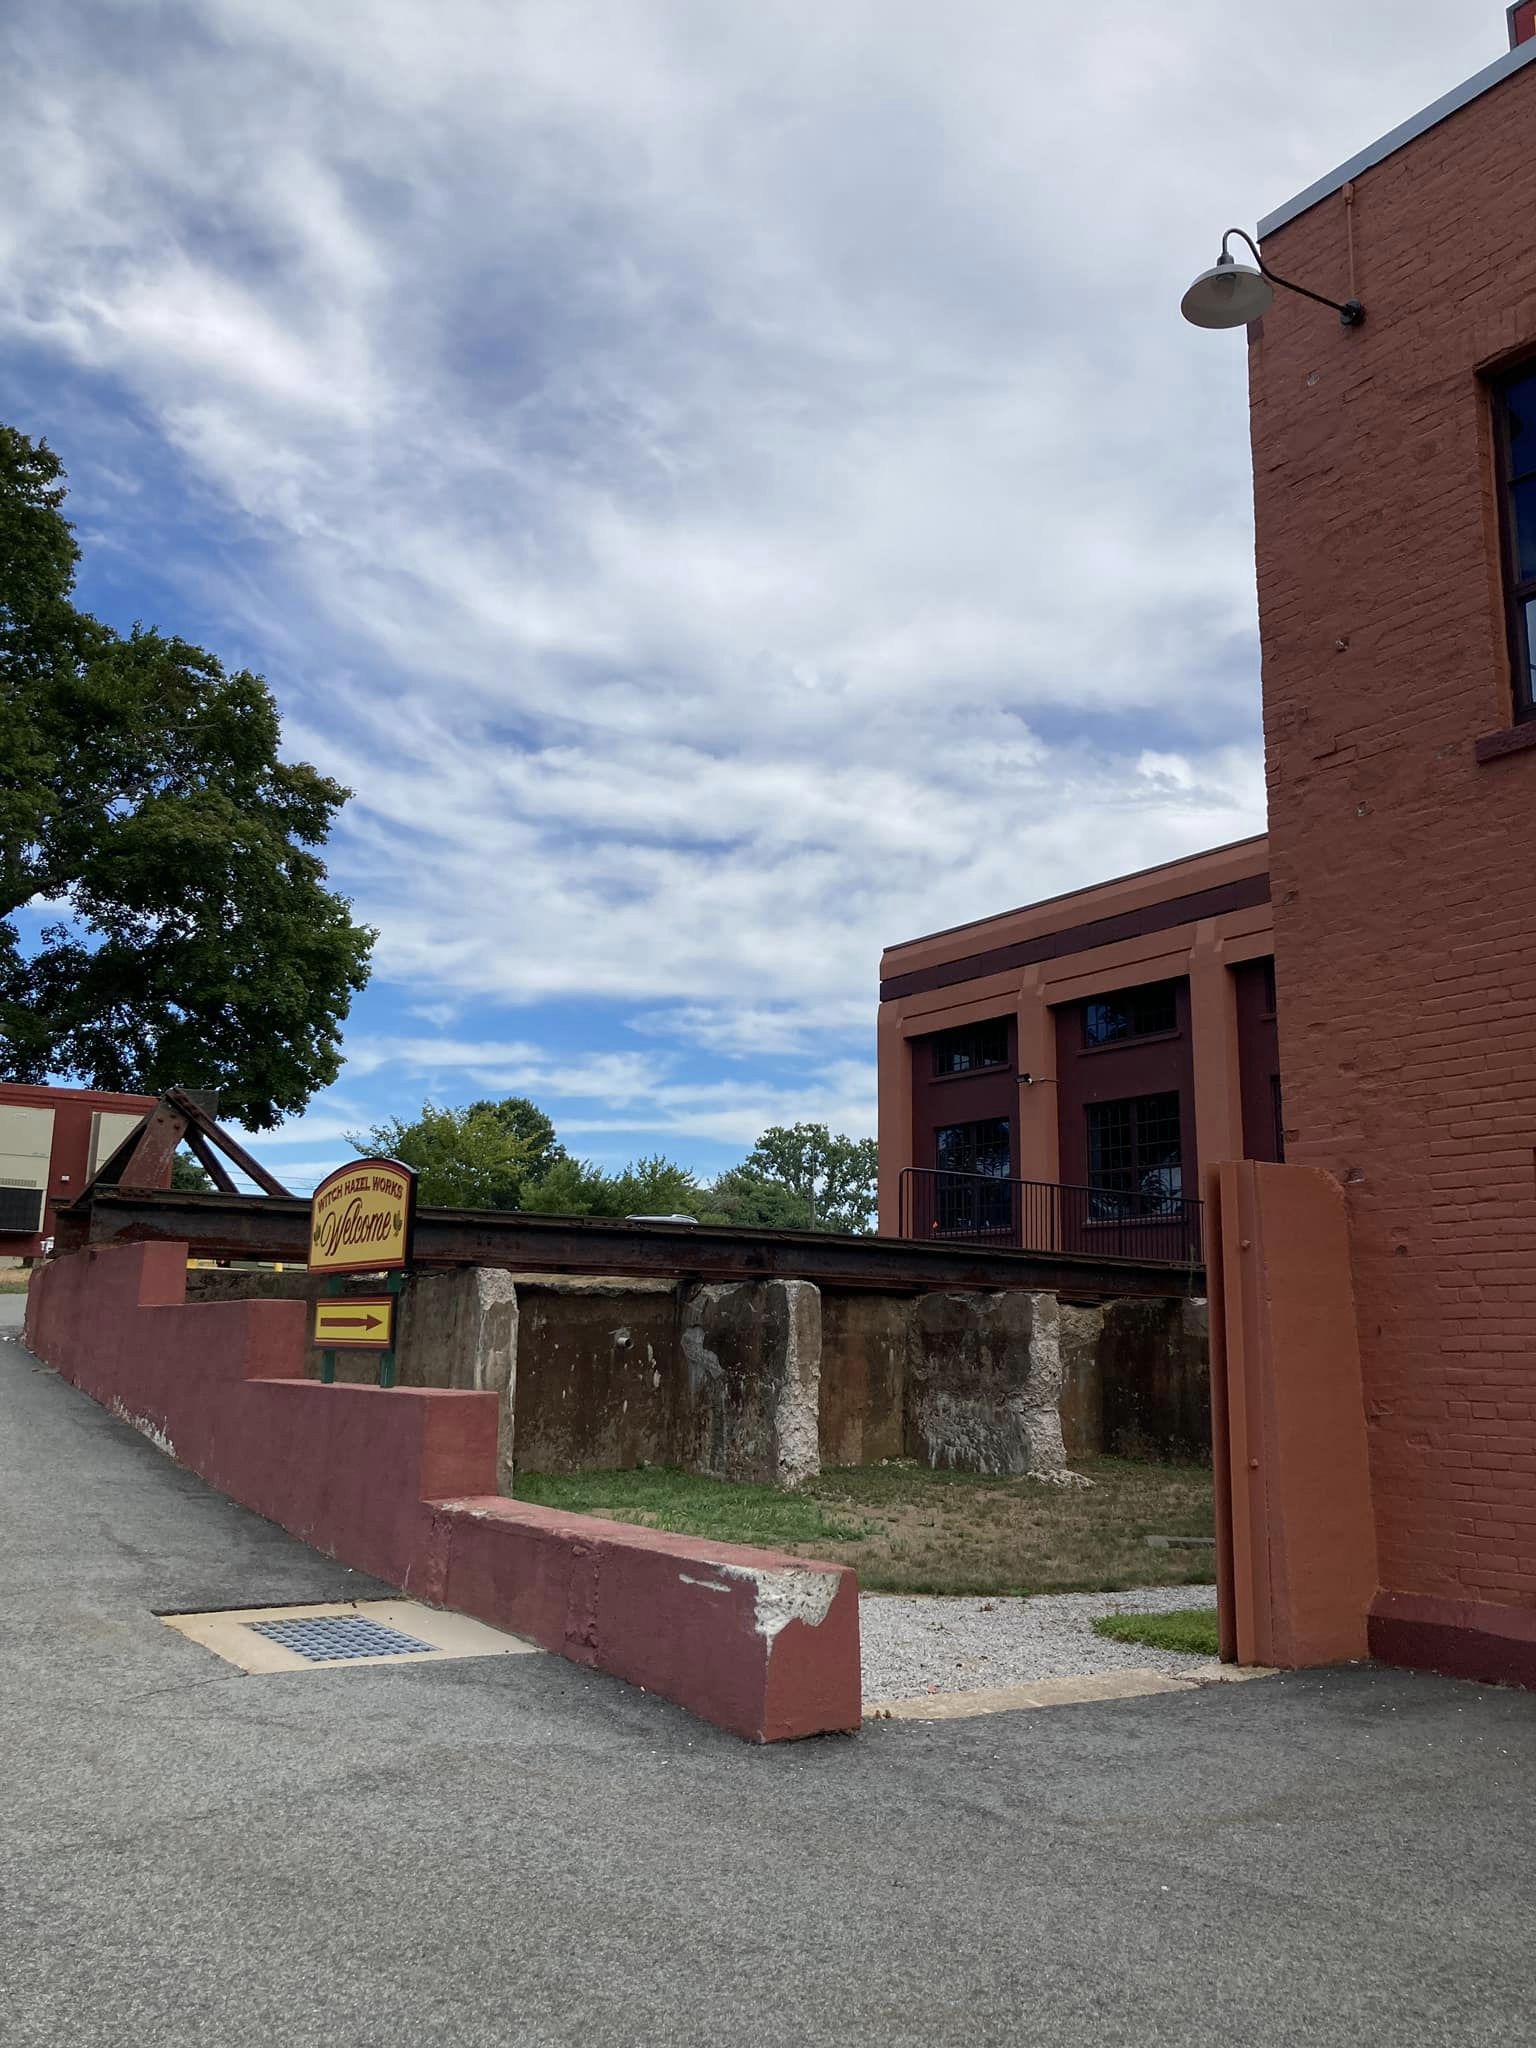
Dickinson Witch Hazel Power Plant Coal Dump
Sometimes the best thing for keeping up your layout motivation is to work on what you're actually in the mood to work on. I'd been getting pretty intense at the bench with the SW1, so as I was driving home from work one day, I decided to make a quick stop in Essex for some inspiration. I got it in the form of the old coal dump at Dickinson's. . .


.jpg)


SCENERY!
Yes, with a little help from my friends, I've even had the temerity to dive into a bit of scenery over the past bunch of weeks.
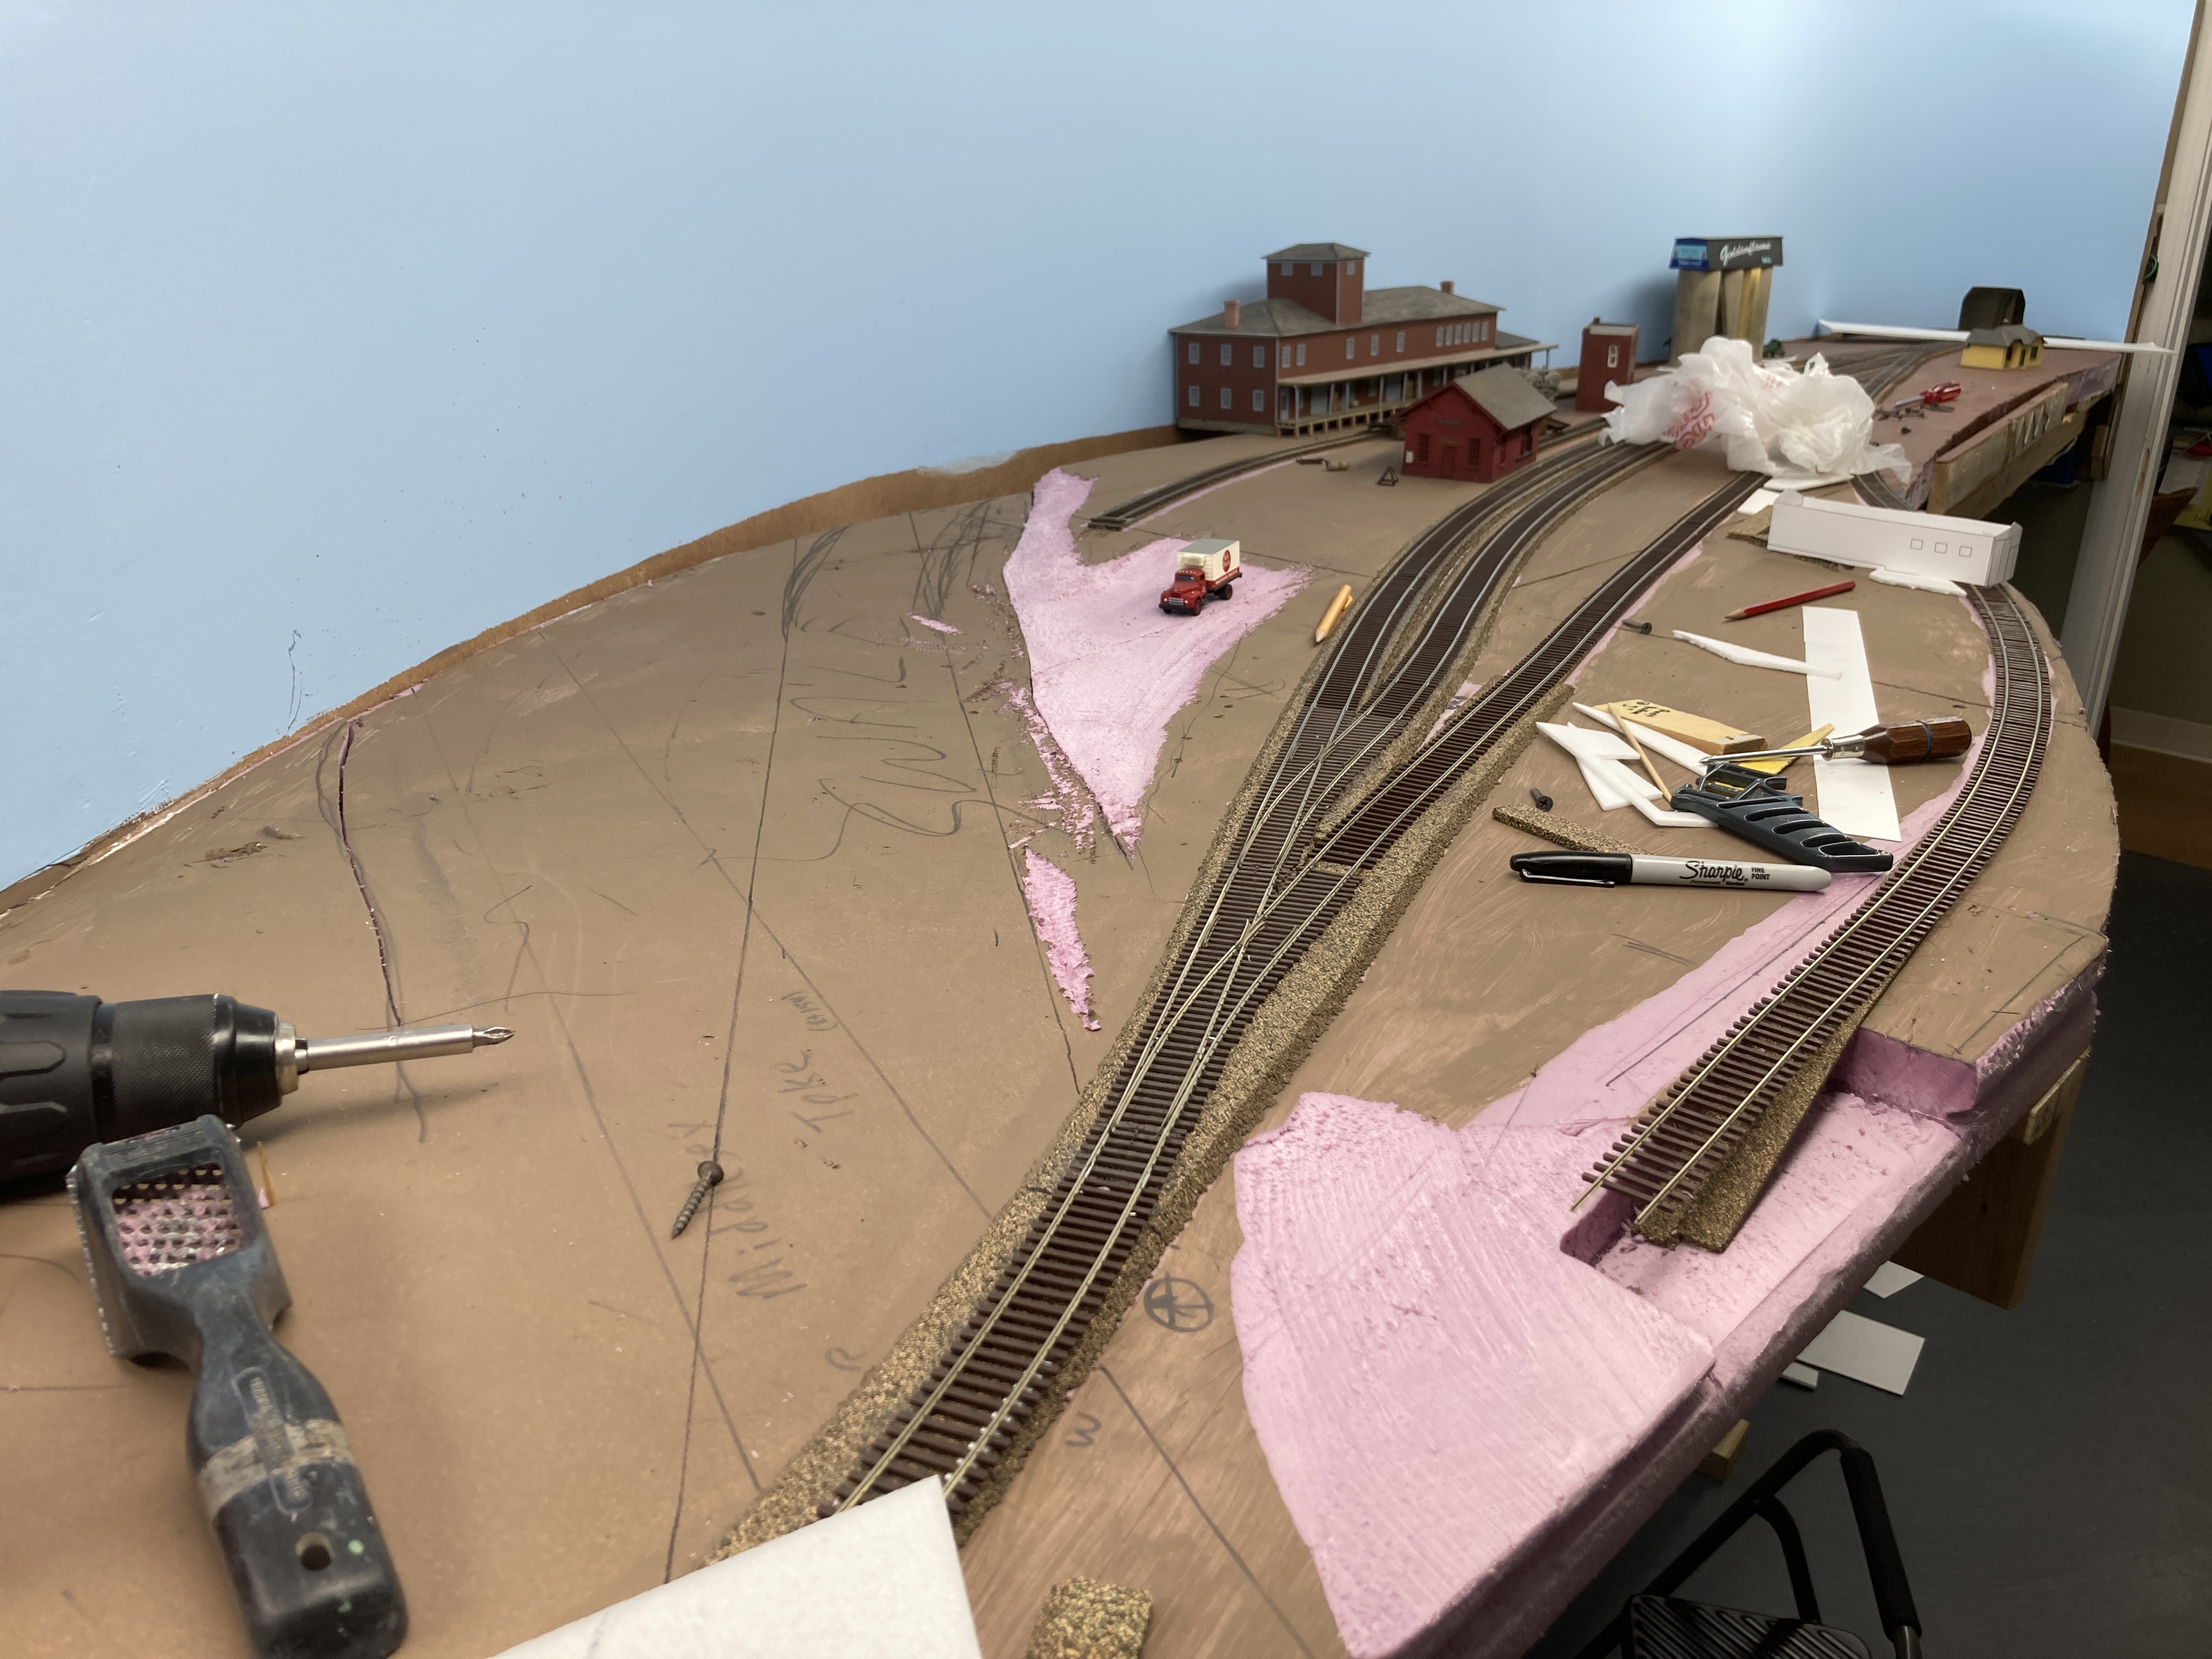
Believe it or not, the photo above is of "scenery." Well, the foamboard version of it anyway. Long-time readers may remember that I'm not much of a fan of foam base for scenery, preferring the naturally-occurring contours that result from traditional cardboard lattice & plaster cloth. But Essex is fairly flat, so it made sense to use foamboard here - but I needed help figuring out how to add the undulations. Thankfully, Bill (who, IIRC, uses foam board exclusively) agreed to come over and help me create the mess that is foamboard terraforming.
What you see above was "all" that was needed - lower the board where the road will go and rasp down the contours to match.

I'm still not sold on foamboard construction, especially when stuff like the above is necessary. Yup - that's one of the joists (actually, they're more like slats under a bedspring) that had to be cut in order to allow the board to be lowered enough. Everything went back together fine with wood glue, screws, and some PL300, but I'm glad this was the only area needing such surgery.


Now, if I can just remember how I achieved this effect, I can replicate it at the south end of Dividend - along the hillside & cut that provides the scenic divide between Dividend and Cromwell.
And that, my friends, is a great reminder of why I'm going to double-down on maintaining this blog. How else am I going to be able to archive what's worked - and what hasn't - and be able to refer back to it and jog my memory? Hopefully you'll weigh in if you see me headed for disaster - or have some advice/guidance on how to do something better, or even a new technique to try.
In the meantime, I hope you've enjoyed this update as much as I've had fun putting it together. It's neat to see that, despite how I sometimes feel about the pace, I *am* making progress. Thanks for following along!
Now that DEY-5 #0604 is (almost) done*, I thought I'd turn my sights to something different. . .

.JPG) |
| Large Tichy tank, split into two smaller tanks |
.JPG) |
| One of the Tichy halves, with another two smaller-diameter vertical tanks |
 |
| Same as before, but with another horizontal tank |


And since a quick poll of folks over at the group concluded that I should assemble before painting, it looks like I can dive right in! It's been a LONG time since I've built a kit, having been driven to distraction by the DEY-5 project, but I'm really looking forward to this change of pace.
I'll have to wait a bit though - the 2022 legislative session doesn't adjourn until midnight this Wednesday and it's 18-20 hr days until then. But at least now I have a fun project to look forward to! Hope you do too!
*Apparently, locomotives - like layouts - are never really done. In addition to weathering, I have a few minor things left to do on the 0604. I'll cover those, as well as share some lessons learned, in a future post.
(just a heads up - this is a LONG post, but there are lots of pictures and I think you'll enjoy catching up, especially if you make it all the way to the end...)
I've often said it - when you have enough time to blog, you seldom have enough to blog about. And the corollary is even more true: when you have a TON you could blog about, you don't have the time to write!
Thankfully, I've been more in the latter camp than the former - though the posts here have suffered as a result. But I've tried to keep y'all up to date a bit with the "Wordless Wednesday"s - letting pictures do the work of thousands of words. And I tend to post small, very quick, items on the Valley Local FB group, But as Randy reminded me last night, sometimes it's not enough to just post pictures and a few words - sometimes you have to provide a bit more...
The skinny is - October has been a VERY busy month!
Right after my last ops session at the end of September, we started a MAJOR home improvement project . . .


If you've been following the blog regularly, you've seen the pics. If you haven't, click here. :^) Suffice it to say, this project was a bit scary (which is why I'd put it off for so long) since any mistake would risk totally screwing up the board I'd worked so hard on. Thankfully, it all came out alright - though inelegantly - at the end. . .

Even the prototype has to make such changes from time to time, so I'm just gonna accept how it looks.
I've also been efforting some engines - trying to make a DEY-3 and a DEY-5 out of a P2k S-2 and an Atlas S-2 - and finishing some freight cars (I've been sessions have been strangely short of cars since Bill needed his returned) . . .

Speaking of locomotives, my first-ever product review came out partway through the month:
 |
| Model Railroad News, November, 2021 |


Just a few days later, Pete and I attended the NMRA's annual Northeast Regional Convention in Lowell, MA:


Back to some model railroading though, I found some time to decal a freight car:


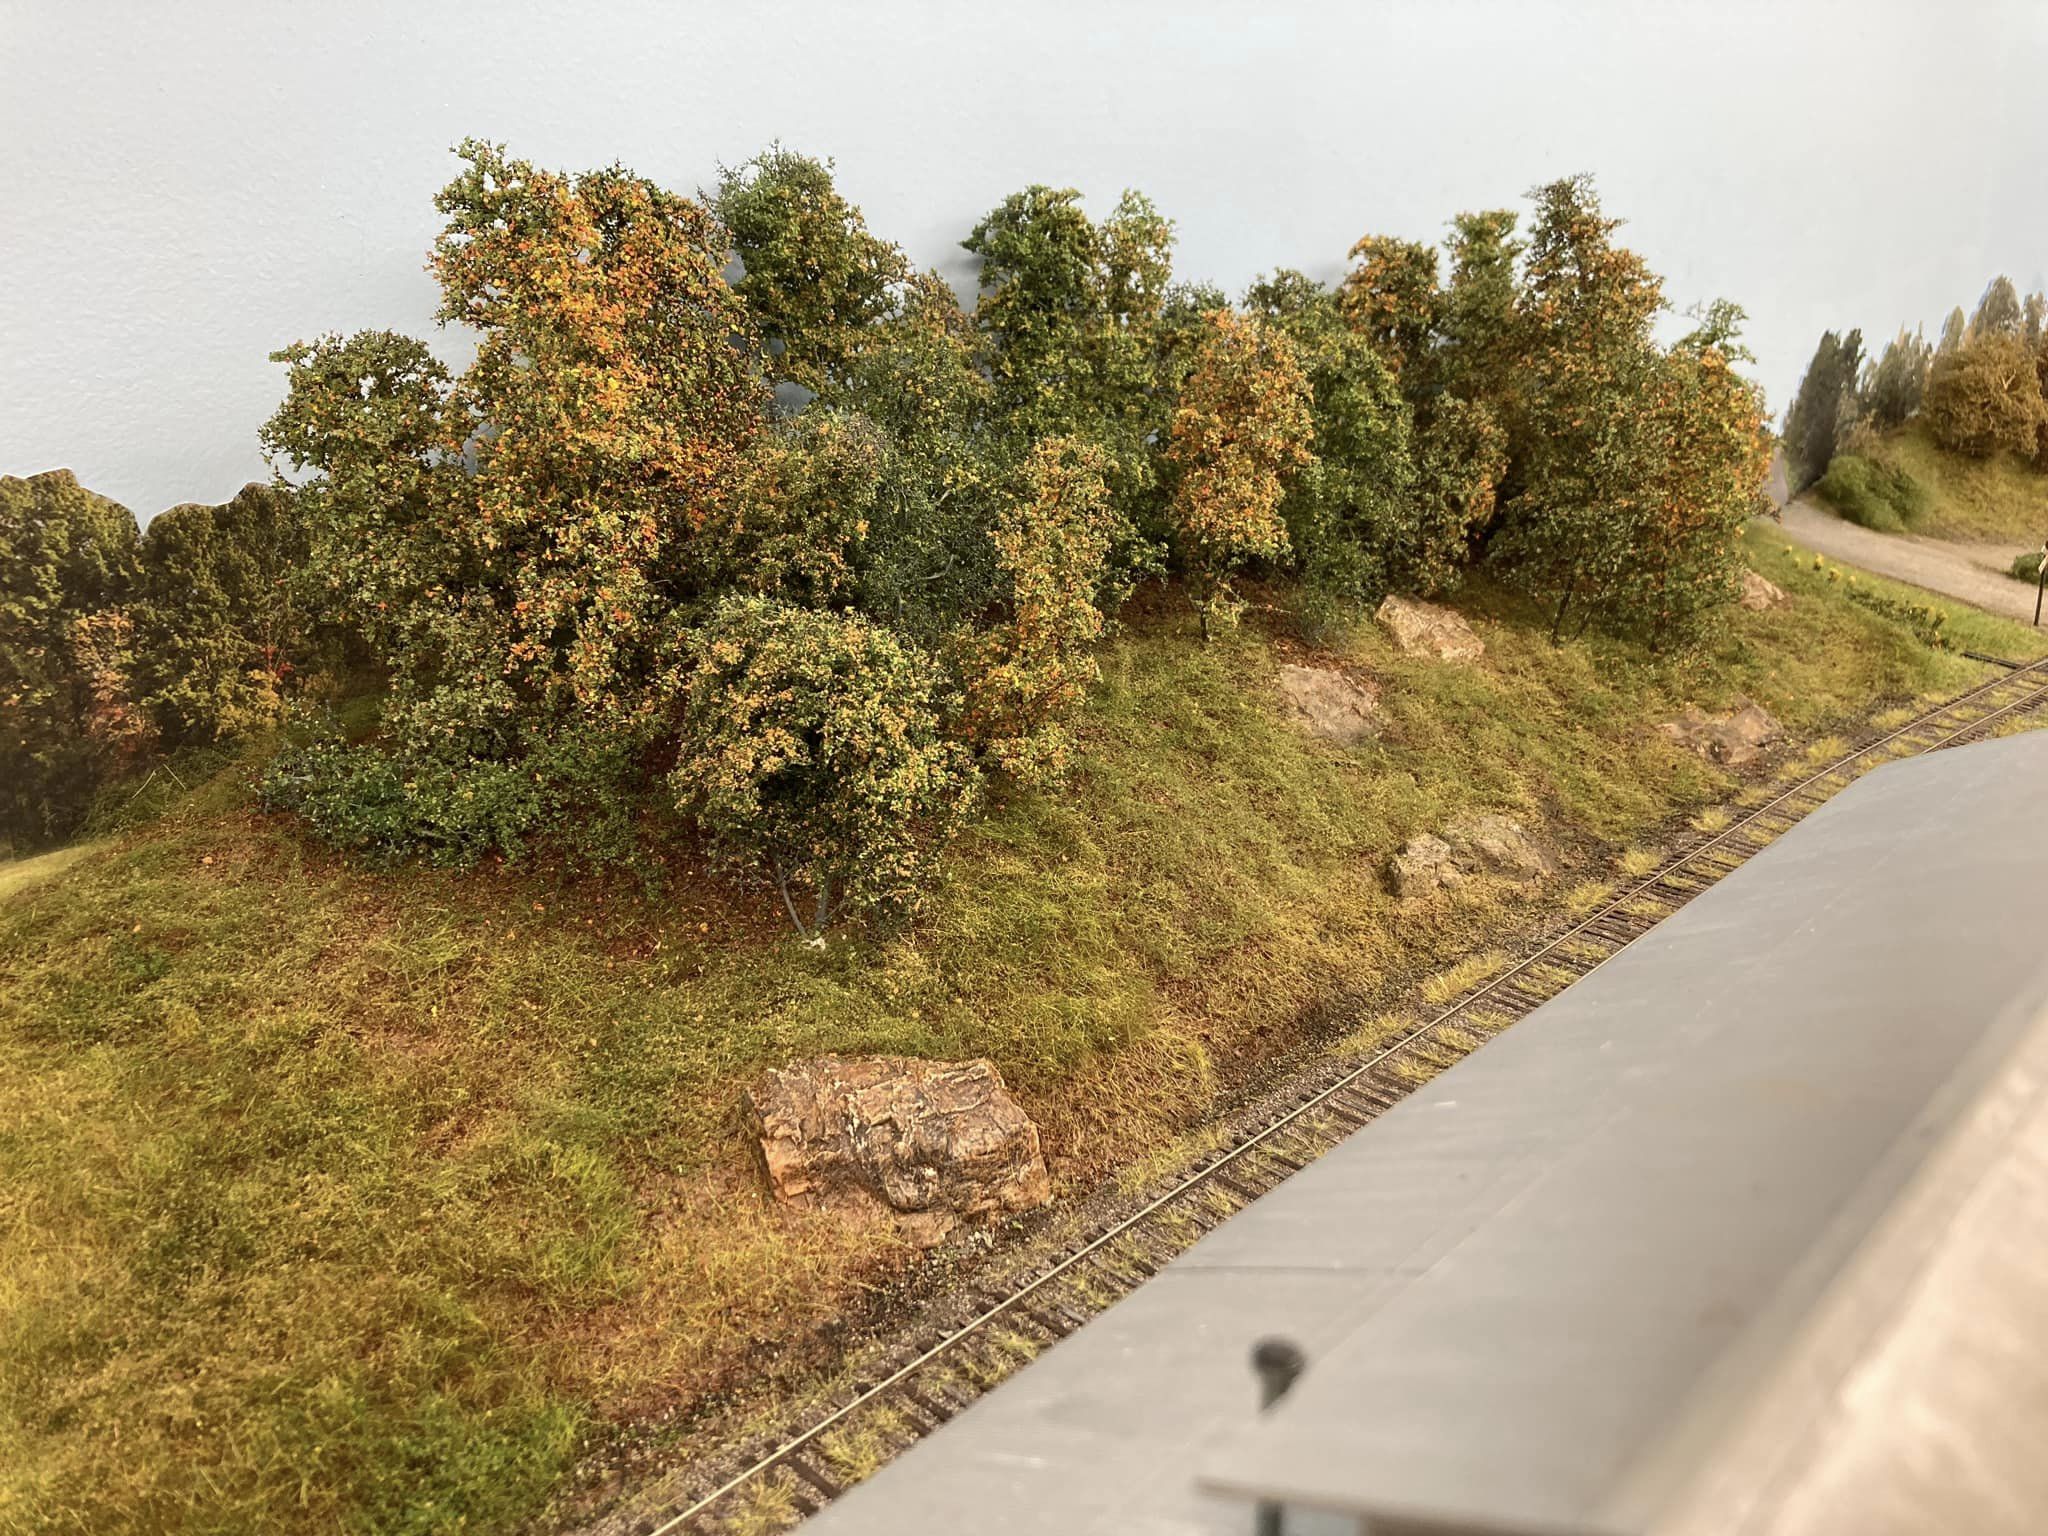
It's been since January that I started (re)working on the scenery in Dividend, including my first-ever rock cut. And now that my ops session electrical issues have (hopefully!) cleared up - and since I'm staring down ANOTHER ops session, this time with some first-timers - I thought it'd be good to have some actual progress to show...
Here's where I'd left off:

 |
| Here's an overall view for comparison to the photo above... I stippled a heavy coat of white glue over the groundfoam where I wanted the static grass, and applied the grass liberally. I let it set for a few minutes, then went over it with a vacuum to "pull up" the fibers nice and straight - as many of them as possible anyway (a stocking over the nozzle helps you retain the excess grass). The Missus helped me modify the color of my "field grass" mix to more closely match the backdrop photo. |
 |
| A closeup of the area with Harford Rayon temporarily placed for the time being. |
 |
| Closer view of the house & garage. The backdrop is actually only 2" away from the house (which is HO scale, despite how the camera makes it look). |
 |
| I used a variety of chalks to color the road, which started out as a light gray. This end needs more work, but as you go up the hill you see where I'm headed color-wise. |
 |
| Closer view of the foreground field and how it blends into the backdrop. PRO (& admittedly accidental) TIP: This area originally had the subterrain (cardboard lattice & plaster cloth) glued to the masonite backdrop. When I later needed to add a photo backdrop, I discovered - OOPS! - that I needed to cut the subterrain away from the masonite to create a slot to slide the photo backdrop down into. This was a blessing in disguise since the resulting gap created a bit of a "lip" between the horizonal foreground scenery and the vertical photo backdrop. As you can see, that little "mistake" really helps fool the eye into blending everything together. |
 |
| Speaking of blending, I tried the same trick here I did over in East Berlin... had The Missus help me with color matching (remember I'm somewhat colorblind) and just kept working those different colors of chalks into the road until it matched the road on the photo backdrop. Be sure to click on the image to enlarge - I think it came out pretty nice (I've since patched, smoothed, and painted the gotchas on the masonite). |
I'm certainly no Tom Johnson or Marty McGuirk, and setting them as my standard more often frustrates me into doing nothing rather than make even incremental progress. All too often, my reach exceeds my grasp. But if there's one lesson I'm learning this month - and RElearning over and over again - it's that you have to at least do SOMETHING in order to get better at it. The road to skill & progress is paved with practice. And you'll never get to where you want to go if you don't get moving.
So that's what I've been doing this month - moving, though in a LOT of different directions at once. The house project continues, my locos are improving, I'm adding more freight cars to my fleet, and I'm even - surprisingly - making some progress with my scenery. I'm in one of those rare modes/moods where I'm seeing opportunities everywhere I look and have enough variety of things to do that I can Always Do Something.
Long-time readers know my natural bent is to work only linearly - one project at a time. And, unfortunately, like a malfunctioning Roomba, if I hit a wall, I'll just keep banging against that wall - trying to get through it, wasting time. Thankfully, I've discovered with all these project that I can always pivot to something different. If I hit a wall, I just take a step back and go at something else. Roombas work better that way, and model railroaders make more progress that way too.
But it certainly makes life busy - I'm always doing something rather than just sitting around. Right now though, after going over everything that's happened these past few weeks, I just want a nap. And if you've made it this far, you probably need one too.
Till next time...