Friday, June 30, 2017

Friday Fun - Cardstock Modeling/Mockups

I'm taking a two-pronged approach to attacking Wethersfield and trying to get it done before the big NER convention this November. At the south end, I put up some temporary mockups for Valley Coal and at the north end, I'm trying to work out the Rt. 15 overpass. In both cases, I could benefit from some more sophisticated mockups. Fortunately, "there's an app for that" - and I got it a couple of Christmases ago: Model Builder Software.

Unfortunately, as is too often the case with some Christmas presents (I have a MicroMark resin casting set I got a couple years ago that I still haven't ginned up the courage to use), I hadn't yet tried the Model Builder software, but this new demand for mockups gave me the incentive I needed. But the Modeling Gods were against me - when I went to get the disc, I remembered I'd loaned it out. Ooops!

But that was ok - I at least noodled around the Model Builder website and learned a bit about the process of designing and building mockups from cardstock/chipboard/foamcore (see instructions here and a great article here). And - BONUS! - the site has a free, already designed, building "kit" you can download and print to practice.

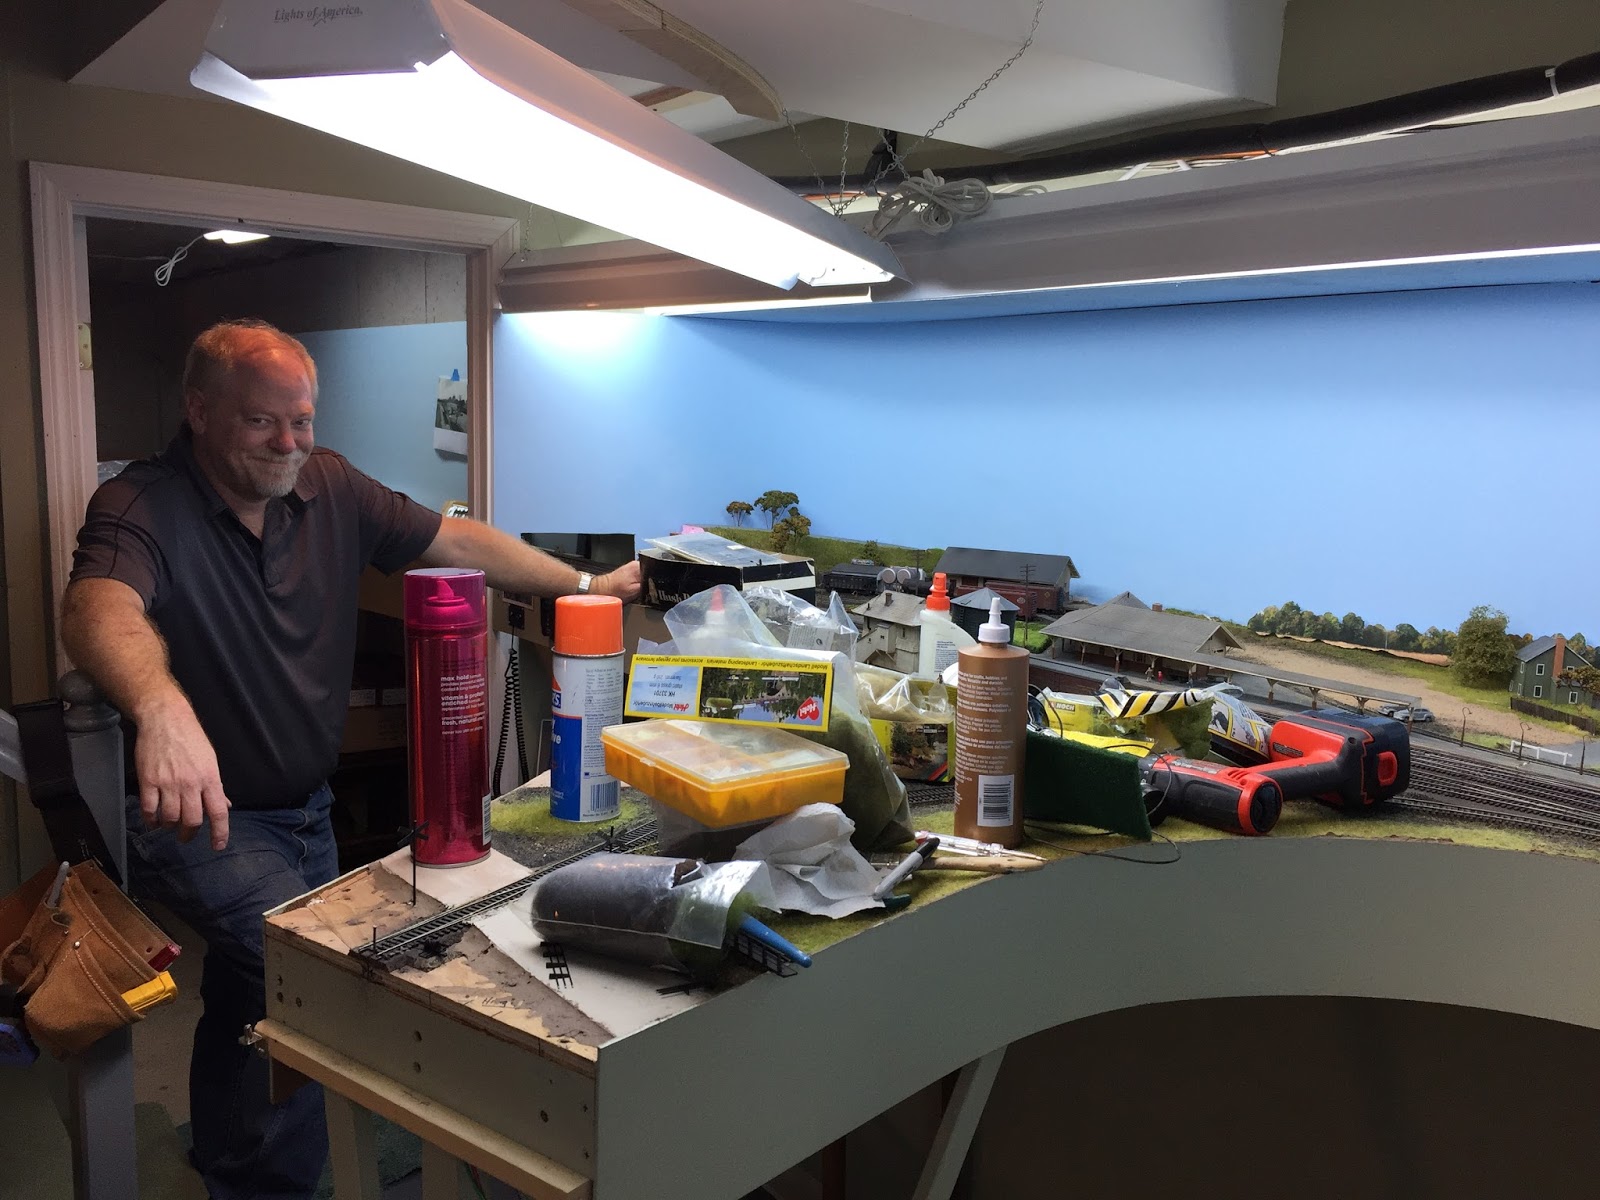
So that's what I did:


It took a little bit of trial-and-error to figure out how best to go about doing the assembly, but the materials are dirt cheap/free so all you have to really spend is time. And the tools are probably ones you already have:

  • Xacto knife (but see below)
  • Steel straightedge
  • Marking pencil
  • Hot glue gun
  • Glue stick
  • Color printer
And as for materials:
  • Foamcore and/or cardstock
  • Stripwood

While you can certainly use a regular Xacto knife to cut out the images and the material (be it foamcore or cardstock), I found an Xacto mat cutter very useful in making perfectly vertical and 45 degree angle cuts in the foamcore.

There's no real rocket science here - again, it's mostly just becoming familiar with the materials and the process - and following the helpful instructions.

And here's the result:


I used stained stripwood for the porch roof supports, glued in place with Aileen's Tacky Glue (everything else is put together with hot glue). And while the walls are 1/8" black foamcore, the roofs and porch are cardstock for a thinner profile. In retrospect, I should probably have used cardstock for the front/false wall as well - the foamcore is way too thick for that.

And that led to a problem - when I first attached the roof (and, yes, I'd hot glued it), it was offset far too far back. It was hitting the thick false front and had WAY too long an overhang at the rear. So, I carefully pried the roof off, and cut in a long notch to allow the roof to "wrap around" the sides of the false front, as you see above. Not a perfect solution, but it looks a lot better than it did.

A couple other tips: I used masking tape to attach the two main roof halves together and to attach the porch to the base of the building. The porch and porch roof are held together by the glued-in wood supports.

All in all, I'm very happy with how this building came out. Since it prints out already "painted and weathered," all you have to focus on is cutting it out and assembling it. Even with all my trial/error/mistakes/fixes, it only took an (very enjoyable!) evening to do. And it makes a very credible background building - and a MUCH better mockup than a plain box or block of wood. . .

So I'm looking forward to getting the software back and trying it out. It includes a WEALTH of different "materials" (brick, wood siding, clapboard, etc) - as well as doors, windows etc - that you can try out. I figure it'll be a great way not only to create some nice stand-in models, but will give me a great guide for what actual 3D scratchbuilding supplies I need for a particular structure.

Now, I just hope they include steel girder materials so I can mock up the Rt 15 bridge...

Thursday, June 29, 2017

A Few Words About Wordless Wednesday #176 - PDX-2 in Old Saybrook


When you first start out as a prototype modeler, every little discovery is new and exciting. But as you get more and more into your area/era, it becomes harder and harder to find new stuff. That's just the way it is with research - additional new discoveries are the first victim of success. So any time you can find an image of the area you're modeling that you've never seen before, it's HUGE!

Such is the case with the photo above. TomD was going through images from a collection recently donated to the Photo Library when he discovered this gem. So let's have some fun unpacking it . . .

First off, it's likely the westbound Shore Line local - aka Providence Division Extra No. 2 (PDX-2), aka "The Haddam Local" - that ran between New London (Fort Yard) and New Haven (Cedar Hill Yard). I'm not sure of the date, but the other shots I've seen of this train have K-1d mogul  #363 on the point (at least until J-class mikados took over the Shore Line locals, shortly before they were dieselized with DEY-5s (Alco S-2s). This train has K-1d #423. According to John Wallace, the 423 was "spare" at the East Hartford roundhouse during the late 40s and - even more interestingly - it was the first engine he ever operated. So either this image dates from before the late 1940s (since it's unlikely E.Hfd. would have supplied power to New London), or it's actually a shot of the Valley Local making a rare (but not unheard of) trip all the way down to Saybrook.

As for the month, given the condition of the trees and the volume of steam condensate, I'm guessing November to March - it certainly appears to be cold - but not a hint of snow. So my best guess is a November/December photo of PDX-2 from the early/mid 1940s - but until I can get an Engine Assignment book from before 1948, I'm at a loss to know for sure. Maybe the freight cars will help date it...

And for that, BillS weighs in:

  • PRR X31A double door "auto car" on the front. I wonder if it's going back empty, or if it's a load for delivery to Saybrook Ford (as in this photo);
  • 105W tank car, probably propane or possibly chemical;
  • B&O quad hopper and twin(?) hopper (could be for Burdick's in Essex or even Chapman's in Saybrook);
  • Two boxcars of uncertain road/design;
  • Another, smaller, tank car (possibly oil for Chapman's?).

Too bad we can't get any reweigh dates off the cars - heck, we can't even get the roadnames off most of them!

Other things to note:

  • It's clear(er) from this photo than most others I have that main tracks 1 & 2 (closer to the photographer) are a bit higher than side tracks 5 & 7. Note in the distance how the wooden walkway slants down between tracks 1 and 5. The difference between the main & side tracks is even more apparent in this photo of the area from 1939.
  • Tower is in the "cream/brown" scheme, rather than the later all-brown (supports an early/mid 40s date).
Wow - that's a lot to get out of one photo, but as you can tell, it's quite a treasure trove of information. Thanks VERY much to Tom for finding it and bringing it to my attention. Looks like we have some additional detailing (and a few minor changes) to make to the Saybrook scene. . .

Monday, June 26, 2017

A Plug for Fast Clocks - Given the Right Circumstances

(This was a response I posted to a question over at the Model Railroad Hobbyist Forums. Since it addresses some of my operating philosophy - especially with regard to using a fast clock - I figured I'd post it here too for reference. Thoughts & comments welcome, as always!)

I'm still relatively new to operations, but am trying to follow my prototype (New Haven RR in the late 1940s) as closely as possible. I've modeled a one-town segment of double-track mainline (with loops and staging off each end) and two branchlines. The branches are operated by three local freights (one of the branches is split between north and south halves), one of which also operates through the mainline town. There's one other local that works the mainline and does the bulk of the switching in the mainline town.

That's all by way of background. The locals are all operated by TT/TO and the two that are out totally by themselves on the branches are pretty straightforward (don't even really need TT/TO since there's nobody to look out for - except the occasional speeder or work train). However, the mainline local, and the local that operates partially on the main have to consult the timetable to keep out of the way of the mainline trains that come through the one mainline town I model. And that's where I get to this statement...
"Taking a prototype timetable and pasting onto to a fast-clocked layout is an almost certain recipe for problems."
 .... with which, as a general rule, I absolutely agree. However, it's only "almost certain" :) and actually depends. I took the New Haven's prototype TT and pasted a 4:1 fast clock onto it and it works wonderfully - but I suspect this is because of two very important circumstances:
  1. I'm only modeling one mainline town;
  2. The locals on the branchlines can take as much time as they need to do their work.
The town I'm modeling - Old Saybrook, CT - had 71 trains per day during my era. I'm "only" modeling a 12 hour period, so "only" 33 trains. But I'm still running 33 trains through town - according to the times from the actual prototype timetable. Using a 4:1 fast clock, that gives me a 3 hour session. See the schedule below (times on the left are from the actual Sept. 1948 prototype timetable):


Now, the actual amount of time between trains is much less than it was on the prototype (naturally, since I'm using a fast clock), but during the entire 3 hour session, there are only three times where there's only 1 actual minute between trains (7 times there's 2min & 7 times 3min); otherwise, there's 4 to 21 actual minutes between trains. I typically have 2 guys running the mainline trains - one in staging at each end - and they "launch" trains across the Old Saybrook scene according to the prototype TT schedule. It's actually pretty cool to just sit there and watch the parade of trains go by, just like they did in 1948. And it's especially cool that I could use the actual prototype timetable times. (now I just need to figure out and model all the proper consists... but that's for another time).

Now, that's just the mainline trains - and so far, no problem using a fast clock. It does admittedly get a little more complicated when the locals are in town - they have VERY small windows within which to work. However, that's again where following the prototype closely saved my bacon. In Old Saybrook, there were "local" tracks on each side of the double-track main, so - for the most part - the locals can do what they need to do without interfering with the mainline trains. But when they have to cross over the main, they have only a few sufficient time windows within which to do that. 

And here's where I did make one compromise: On the prototype, the locals are both in town at the same time around mid-day. Given that I'm using the fast clock, the windows of actual time available mid-day are pretty short. But since the locals are extras, I could plausibly have them in town during a time when they have better opportunities to get across the main. So - though a compromise - certainly in my mind worthwhile to get everything else I'm getting. 

As for the locals out on the branchlines - admittedly, no fast clock needed there. But it's still cool to have. Others have pointed out that one benefit of the fast clock is that it makes your run seem longer. Well, the fast clock really shines for me on the branchlines since I can only model a handful of towns on each line. Using the fast clock, the locals finish their work and get back to their home terminal about "12 hours" after they start (3 actual hours). That passage of time, to me, makes for a real day's work. 

Now, of course, YMMV - and I've said all along that my situation may be unique since my mainline town is operated in "British" fashion (one scene with staging off each end). And not everybody is willing to limit themselves to modeling one town (heh - I'm glad I have all the towns on the branchlines too!). But I think that circumstance at least would allow you to use the actual times your prototype used in its timetable. I for one find that to be pretty cool - but I'm admittedly a bit biased. :)

Thursday, June 22, 2017

Friday (Eve) Fun: Reminiscing over Progress

If you ever fret over what you haven't gotten around to yet (whether it be scenery, structures, freight car kits, etc), take some time to review what you have accomplished. I did that recently, going through my "Layout Construction" folder of photos. And I'm not gonna lie - I was pretty impressed with all the progress that's been made over the last few years, with a LOT of help from my friends.

Sometimes, extreme lengths (heights?) are gone to . . .
Bill surveying the, um, "progress" in Old Saybrook. Looks much better these days...

One of my favorites - Tom, Dick, and Pete (I really need a friend named "Harry") in the middle of moving a door to make way for the Shore Line.

And then, laying down on the job...

Bill working in the Goff Brook area, right at the Rocky Hill/Wethersfield town line.
Starting New London staging

Even dad was able to help install the girders in New London when he came to visit.


Randy & Joseph adding feeders on the New London/East End loop.

Tom working under the West End loop - New Haven staging not even in yet.
Bill & Pete working on the north end of Rocky Hill

Roman & Joseph adding more feeders in New London.

Dick & Randy modifying DCC UN-friendly turnouts.

Tom, Pieter & Dick wiring toggles.

Roman & Joseph at New London again, doing feeders.

Randy surveying something (maybe where to install switch machines?)

Rosie, supervising

Working on the approach into Shailerville from Middletown (in the other room) - and some added motivation to keep my cookie consumption in check...

Roman & Dick working on the lift out

The Great SawzAll-ing of New Year's Eve Eve, 2013 - preparing to install Goff Brook Bridge.

Randy installing track at - believe it or not - Wethersfield (including the infamous passing siding)

Rosie reviewing my track planning

One of the first "Layout Construction" progress photos I took - showing "proof of concept" - that I'd actually be able to fit Middletown, with the quadrant track, and a prototype-length train. October 29, 2011

Wednesday, June 21, 2017

More Website Additions!

For a "wordless" Wednesday, a whole lot of words (and pictures, and files) got added to the Valley Local website today...

  • Divided & reorganized the "Operations" section into "Prototype Info" and "Modeling Info & Ideas"
  • Added "Deja Vu" under the "Trains of Thought" section
  • Added a whole new "Clinics & Presentations" section
  • The "Modeling" section really got a workout:
    • "Photos" section got filled in a bit lot
    • "Projects" section now includes some of my modeling, including articles on:
      • Building the Saybrook Tower Control Panel
      • Modeling the New Haven's DERS-2b (RS-2) #0510
      • Modeling the New Haven's DERS-1b (RS-1) #0669
      • ProtoFreelancing the coal tower/conveyor at Valley Coal in Wethersfield
      • Modeling the Mattabessett river bridge on the Berlin Branch
I'm trying to add content as much as I can, but it's a pretty daunting task. In a lot of ways, it's just a duplication of what's already on the blog - but it is more organized and user-friendly, and represents the "best of the best" from the blog. So even if you've been following the blog from Day One, you should be able to find the most important info without having to dig around too much (that's my main reason for maintaining the 'site, after all). And, assuming you haven't been following the blog from the beginning, you'll see some stuff at the website you probably haven't seen before.

So check it out when you get a chance and let me know what you think, what you'd like to see added, and whatever other suggestions for improvement you might have.

Wordless Wednesday #175 - Hart Seed Co., Wethersfield

Need to know what kind of truck this is - and whether there's an HO scale version. Then "all I have to do is" figure out how to do the decals/lettering.... This wonderful image came from the Hart Seed Co. website. Too bad it's not in color - even if I had a truck I'd have no idea how to paint it.

Tuesday, June 20, 2017

Adding to the Website

I expect many of you come directly here to the blog. But did you know that I have a website as well?

All along, my goal in doing the blog was to be able to update frequently and easily - keeping track of my progress for my own records and enjoyment, and hopefully for your information and enjoyment as well. But the blog has always been intended to be "fleeting" - which is to say, it's organized chronologically rather than thematically (though the "Topics" links on the right hand side do a fair job).

The website, on the other hand, is where I archive/organize/store the real meat of my research and the most favorite of my blog posts - all organized and laid out for ready reference. The only problem is, it's more of a pain to update and change.

So lately, I've been trying to remedy that. To wit - if you haven't been there in a while, you'll see recent changes to the "Layout Tour" section (I added pages on Old Saybrook and Shailerville Bridge), the "Operations" section (added "Crew Call"), the "Choosing an Era" section (how I settled - at least temporarily - on the Fall of 1948), and added a brand new section called "Trains of Thought" (with apologies to Tony Koester and Kalmbach Publishing) where I hope to collect some of my more wandering/wondering ruminations.

And if you've never been to the website, hopefully you'll be pleasantly surprised by all that's there - including a track plan (which, given my recent expansion, really needs to be updated), particulars of the layout, and all the other topics I mentioned above.

Whether you've been to the website before or not, be sure to stay tuned. I plan to add content there much more regularly (and before I forget, again, how to go about updating it!).

So go on over to http://www.thevalleylocal.net and check it out!

Monday, June 19, 2017

Monday Mail Call: Mockup, Mini-Scene, 1948 Calendar

Turned out to be a fun day in Valley Local land today, but first, a quick progress photo of mocking -up Valley Coal in Wethersfield:


PeteL graciously loaned back to me the mockups that BillS made for Chapman's in Old Saybrook and they turned out to be nice stand-ins for the bins, shed and tanks at Valley Coal. Unlike Chapman's, though, these mockups are nowhere close to or as extensive as what was actually at Valley Coal, but something along these lines may be all I have room for. And I don't even have the rear of the Webb Theater in the scene yet (it'll be right behind the office/scale house).

Since I've been working in Wethersfield (and the progress is, admittedly, painfully slow...), DaveM has been encouraging me and firing my motivation by supplying exactly the sort of detail I want to be sure to include as the scene finally finishes...


This crew - along with their truck - came in today's mail and will be placed near the Gra-Rock siding just south of the Wethersfield station (freight house). They're unloading onion seeds for Hart Seed Co. Just need to get an appropriate reefer (or boxcar?) from a RR that serves onion producers and spot it at the bulk track just south of Church Street in Wethersfield. Thanks Dave!!

Also in today's mail, my latest "prototype" acquisition arrived - an authentic, complete 1948 calendar!


Since I won't be all-steam any time soon (brass locos still need to be painted and decoder-ized), my "official" era of the moment is October, 1948 - right after the PAs arrived on the Shore Line, RS-1 0669 is on the Haddam Local (PDX-2), and RS-2 0510 is brand-new (and plausibly being tested on the Air Line). So, of course, I needed an era-appropriate calendar! The graphic actually has a story as well. I've often mentioned to the Missus that my dream house is a Cape on the Cape (Cape Cod) coast with a picket fence and rose trellises (don't tell anyone). Well, when I found this on eBay - and saw that the caption was "My Dream Cottage" (really! zoom in to see), I just HAD to get it.

And, let's just say, it's a just a bit less - ahem - risque than all the other 1948 calendars I saw and considered purchasing. Suffice it to say, while what I have now is an authentic 1948 calendar, an Esquire calendar would probably be more era-appropriate in a RR Agent/Operator's office!

ANYway.... speaking of the RS-1 and RS-2, here they are in Saybrook going through some testing yesterday (Chapman's Coal & Oil is there back left)....


I've been trying to dial-in the Loksound decoders and have the RS-1 pretty well there. But the Proto 1000 RS-2 still has a pretty low top speed, no matter where I set the trim and momentum. The DL-109s in the background need no adjustments at all - they're dialed in pretty nicely already (though I do plan to change the pitch of each of the prime movers slightly so that they don't sound exactly alike).

There's just So Much To Do - but all good and all fun. I guess that's why it's called The World's Greatest Hobby!

Friday, June 16, 2017

Friday Fun: The Valley Local on Model Rail Radio

I mentioned a couple months ago how big a fan I've become of model railroad podcasts. They're a great way to pass the time when you're doing something you'd rather not be doing (long commute, mowing the yard, etc.).

Well, as it turned out, the day after I posted that post I ended up being on one of my favorites - Model Rail Radio ("The Internet's Only Live Recorded Radio Show Where the Topic is the Hobby of Model Railroading"). I'd first called-into MRR on our way home from vacation back in August, 2014, but being in the car at the time wasn't ideal. I've been enjoying listing to this podcast for a while and - after going through an 18 month expansion of the layout - I figured I had some new news to share. So I called in again this past April and the show was just recently posted.

You can check it out by clicking here (my report starts at 39:00 - and even Dave Ramos chimes in at 50:00).

And, for the contrast and to keep these 'casts together, the one from 2014 is here (starts at 40:10 and the connection drops - heh, or Tom just got tired of hearing me ramble - after 6 minutes or so).

So if you're looking for a distraction from cleaning your pool or unloading mulch this weekend, check'em out. And be sure to look at the list of other model railroad podcasts and listen in. I think you'll be pleasantly surprised at how enjoyable and informative they can be.

Happy Weekend!

Thursday, June 15, 2017

New Fast Clock & Foam Core Project Box

Life on the Valley Local involves running a meandering wayfreight, serving the industries along a scenic branchline along the Connecticut river. When you're on the Local, you pretty much own the railroad - you may, occasionally and rarely, have to look out for a speeder or a work train. But you get done when you get done. No need for a fast clock with this kind of layout (though I played around with an app, just for kicks). In fact, until recently I didn't even realize that my NCE DCC system had a fast clock built in.

But since I started incorporating the Shore Line trains into my operating sessions, and especially since Randy developed a cool train register for the Agent/Operator to use - it's become obvious that I needed a clock at the A/O's desk. I researched a number of options, preferring an "analog looking" clock (for you millennials, that's the one with the hands and numbers :^) in keeping with my era. And I really liked the system that Jim Dufour uses on his layout. But they all involved more work and money than I was willing to do/spend - especially since I already had a fast clock system with NCE.

Unfortunately, the NCE fast clock only reads out on the hammerhead throttles. That's great for the two mainline operators, but for the A/O I needed a desk clock that would tie-into and synchronize with the NCE system.  Fortunately, Logic Rail Technologies makes just what I was looking for - provided I didn't mind a digital readout. I figured that was a small compromise to make for the convenience and ease of installation. "All I had to do was" extend a branch of my cab bus to come out behind the A/O desk for the clock to plug in. And besides - the mainline operators are using digital too.

Conveniently, my wedding anniversary was coming up about the same time and the Missus was looking for gift suggestions . . . so she ordered the LRT fast clock and some decoder install supplies from Litchfield Station and had them sent to work (she worried later what the Capitol police would think when they scanned the package and saw a digital clock and wires.... but I digress).

When I opened the package (after security finally released it), I was a little surprised to discover that there wasn't much to it - basically a PCB with a cover plate.

What you see is what you get - the PCB is, of course, behind the cover plate
Now, this makes sense if you're mounting it to your fascia, but I wanted it as a desk clock. I could jsut prop it up, but that wouldn't look very finished.

Mounting instructions
Fortunately, LRT designed the clock to be mounted inside a Radio Shack project box. Unfortunately, Radio Shacks are dropping like flies around here - hard to find one still open, and those didn't have the project box I needed. Even my new favorite store didn't have anything suitable.

And then I remembered the cool NCE PowerCab Mount/Box I built from black foamcore a few months ago. I figured I could do the same here - and so I did.


It's really just a matter of marking out the board, using the mounting instructions that come with the clock, figuring the overall dimensions you want, cutting the board, and gluing it all together with hot glue. The photo above shows the tools I used (the glue gun is just out of the pic), with a couple additions since last time: I found my XActo foam board cutter (better than the freehand #11 I used before), and I used the Micro-Mark magnetic tray to hold the board pieces at right angles while the glue cooled. And, yeah, cuz I have OCD, I used my dial calipers to measure everything out (actually, those points are pretty handy for marking the board for cutting...)

And here's the result:

I angled the bottoms of the side pieces a bit to provide a stable backward lean - and mounted with #4 screws right into the board, secured at the back with hot glue.

The PCB, showing the screws secured with hot glue.

At the desk - and much more attractive than just propping up the raw/unboxed unit there, IMO.

An overall view of the Agent/Operator's "office" - now complete with NCE-synchronized fast clock to help with Shore Line train movements
Since the clock plugs directly into the NCE cab bus, an unexpected - but very welcome - benefit of having this clock on the desk is that I'll know immediately as I go up the stairs if I forgot to turn off the DCC system. If the clock is on, so is the DCC.

It took me more time agonizing over how to go about boxing this clock in than it did to finally do it. Once I gathered the tools and materials, it just took one evening of listening to Philip Marlowe on the "radio" with the Missus knitting on the other side of the room. And now I have a handy-dandy clock to use for the next operating session!


Wednesday, June 14, 2017

Wordless Wednesday #174

This is how the engines of the Valley Local got from the East Hartford roundhouse across the Connecticut river to the Hartford Yard to pick up cars for points south - taken today during my lunch time run.

Tuesday, June 13, 2017

Tuesday Trailer

Movie trailer, that is. . .

I was honored to be part of an ops session at Jim Dufour's beautiful Cheshire Branch layout this past April (click here to read more about the spiritual dilemma this creates for me) and Jim & David Haney put together a fun little trailer for the video they're producing of that session.

Check it out below:


And click here for more of Mr. Haney's great video work. Trust me - watching his channel is a great way to spend an enjoyable evening!

Monday, June 12, 2017

More Monday Motivation: NER Convention & the Rt.15 Overpass

A few weeks ago, I posed a question about hosting ops sessions for folks previously unknown to me (aka "strangers) which had been prompted by an invitation to host a session for the NMRA/New England Regional Convention this November. Well, after much thought - and not a little discussion (both here and on the Model Railroad Hobbyist Forum) - I've decided to take the plunge and accept. Though I've hosted a number of sessions over the past few years, having so many new folks at once will be a new experience. But I'm only dipping a toe/foot in - I still plan to have my regulars "pilot" the newbies-to-me over the RR. Not only is that prototypical (you don't send unqualified operators out on the line by themselves), it's more helpful (a number of folks are on-hand to answer questions), and a bit safer (many eyes can help make sure the equipment makes it through relatively unscathed %^)

Consequently, I have a New Goal: Get Wethersfield done by November 9. Now, that may not seem like that ambitious a goal - we're only talking 18-19' of layout, 18-24" deep. But this area has been hanging around in various stages of UNfinish ever since I started the layout in the Fall of 2011. I've worked on this area in fits and starts over the years, but getting it to at least a level of "done-ness" will be quite an accomplishment indeed.

The south end of Wethersfield is defined by Goff Brook and the bridges there. Bill had been working in that area and it's a little complicated there anyway. So I decided to make some progress at the north end of the scene, which is defined by the Route 15 overpass.

This is the view looking north - "into the backdrop" on my layout

Panning left, to show the girder detail, and especially the concrete abutment

View from the other side, looking southeast, to give an overall view that's impossible from the south side (due to the trees)
In addition to the backdrop challenges at this location (which may be on the way to a solution), modeling this overpass has been a major roadblock. I can see (in my mind's eye at least) how I'd go about doing it, but the skills - not to mention the materials - have been elusive. So this area has laid dormant - literally for years.

However, that's all about to change. Along with my new-found motivation, I'm deciding more and more that I should not make the perfect the enemy of the good. While I have high personal standards for my modeling (and do pretty well, provided I have enough time), I'm confronting the fact that I simply can't maintain that standard throughout the entire layout - at least not initially. Allowing myself to do "good enough for now" gets me a step above mock-ups, and a step WAY above plywood alone. And instead of plowing through doing the "perfect" scene (which in reality almost never gets done), I'm becoming more comfortable with doing things in "passes." Not only does that relieve a lot (or all) of the perfection pressure (and its cousin, analysis paralysis), it gives me the freedom and comfort to try things I might not have otherwise - and I've discovered that's where a lot of the learning happens.

So, despite knowing how the prototype Rt. 15 bridge actually looks, I'm doing a "mid-level mockup" for now - something that's truly a model, but only a stand-in which hopefully conveys the impression of what's supposed to be there until I get the time/skills to model it perfectly prototypically.


The scene above is pretty much the same as it's been for years - just a lowly Rix old time concrete overpass on blocks (with the Hartford skyline postcard tacked up for a temporary backdrop).


Unless/until I scratchbuild the steelwork/piers, that Rix bridge will suffice for now - supported by foam blocks carved to look like a reasonable facsimile of the concrete bridge abutments in the prototype photos (lines still need to be carved in and paint still needs to be applied).


Certainly not perfect, but getting there. I plan to glue sections of sheet styrene at the ends of the bridge and on top of the foam to form the rest of the road.


Tools of the trade - 2 different hot glue guns, a Woodland Scenics wire foam cutter, and steak knives (off scene). LOTS of trial and error (and glue) was needed - not to mention time - but at least the Rt. 15 overpass is further along now than it was before, and I've taken the first step on what I hope isn't quite a thousand mile journey!

Sunday, June 11, 2017

Back to the Basement - Messer Motivation

Well, I finally made it through another legislative session. We adjourned this past Wednesday at midnight, per our state constitution, but we failed to accomplish the one thing we were supposed to during this long/odd-numbered year: setting a state budget. So we'll be in (")special(") session for the foreseeable future. That's the bad news. The good news is that special session shouldn't have nearly the amount of nonsense work as the last couple of months,

So, I'm able to get Back to the Basement. It's been a solid month since I was able to post any progress, but in the meantime, I have been able to get the odd thing done here and there. I finally finished the cab bus, having moved a couple of plug-in panels to what I hope are the final locations. And I installed one final "branch" plug-in, made from a telco jack (as here). Lastly, I branched off the cab bus one last time to run a line to behind the Agent/Operator's desk for a fast clock(!) The Missus got me one for our anniversary this past weekend and I have only to make a little box/mount for it before putting it on the desk. It'll come in super handy when trying to keep track of all the Shore Line trains...

Despite being distracted by the Shore Line & DCC stuff whenever I've had a few moments these past couple of months, it's time to get back to working on Wethersfield. And my friend Dave Messer sent me the perfect motivation to do so:


There's a scene both he and John Wallace recall from their youth in Wethersfield - I'll let Dave tell it from the note he sent with the truck and figures above:
"Coal for the prison was unloaded at the Church Street siding directly opposite the Kel-Strom Tool Company [across the tracks from the station] by prisoners called "trustees" who were allowed outside the prison with only one guard without a gun."
The coal was for the power plant at the state prison in Wethersfield, about 3/4 mile away. And it was unloaded from the freight cars by hand. When I first heard this story, I'd planned on replicating this scene with "typical" prisoners in striped garb. But John remembers them being in all denim - and Dave has the "trustees" appropriately dressed. I've placed them where they'll eventually end up - right at the north end of the bulk track (Kell-Strom wasn't built until after my era - 1952?). The truck is carrying era-appropriate "stop" signs, another gift from Dave.

With these cool details on-hand, not to mention that it's been almost three months since I was last in Wethersfield, it's high time I get back to it.

But first, I have to confront and clean up the mess I left from last time...

The state of affairs - Wethersfield, looking north

Southward view