Wednesday, July 30, 2014

Vacation Building


Just because I'm on vacation, that doesn't mean progress on The Valley Local has to go into the Big Hole. No sir! Just pack up the tools, OptiVisor, lamp, foam cradle, and cutting mat (all the more to protect B&B desktops), and have at it!

And, in case you're wondering, the last couple of ops sessions indicated a need for more boxcars. So...I brought boxcars to build. Naturally. 

Who needs the beach? All that sun is bad for your skin anyway ;^)

Happy Summer!

Sunday, July 27, 2014

Ops Session, 7/26/2014: What Have the Romans Ever Done for Us?

Sometimes you're so deeply involved in what you're doing that you don't realize how much you've accomplished until you raise your head up and look around. Operating sessions are certainly great motivators for getting things done, but they're also great opportunities to see what you've done already.

Last night's session was a good example of this phenomenon. My buddy Randy wasn't going to be able to attend as planned so, in an attempt to make him feel better, I said - "Don't worry - there's really nothing new or different, so you won't miss anything." I sincerely believed this to be true. But as the session got closer I had a better chance to take stock. Turns out, there was actually quite a bit different (reminded Pieter of a Monty Python skit):
  • Middletown Yard, double-ended
  • Frog Juicers, acquired and installed
  • New uncoupling tools developed
  • K-1b steam locomotive replaced diesel on the Valley Local
  • New Agent's position & associated paperwork applied to "typical day" operating scheme
  • New paperwork instituted: Crew Register & Registey of Trains
  • Many more mockups & temporary scenic details added for visual interest, including temporarily tacking up the Goff Brook railroad bridge
  • A new procedure for noting BO cars
  • Fast clock (there's no real "schedule" for these locals, but seeing the passing of time during the day makes things more realistic)
Except for all that, there was "nothing new" (sorry Randy)

Once all the guys showed up, I had them sign in (great way to keep a record of your visitors), we did a job briefing, reviewing the latest Bulletin Order (note to self: be sure your Bulletin Order actually goes into effect before your operating session starts.  You might be called on it. Ask me how I know :^), pointed out anything new, and issued paperwork, uncoupling tools and throttles.

I was also going to point out where the snacks were - but they'd already been discovered.

In addition to our crews (Roman/Joseph on the AirLine Local, Pieter & Bill on the Valley Local), we also had two surprise guests: John Wallace and Bill Chapin.  John's familiar to regular readers as the inspiration and primary resource of information & photos on the Valley Line.  Bill Chapin is from New Jersey and models the New Haven Railroad's Berkshire Line (and Highland Line too I think).  In a very rare example of serendipity, Bill called earlier in the day to say he was in the area for a school reunion and could he "just stop by for a few minutes" on his way home in the evening.  I told him that of all nights this could not possibly be any more ideal a time to stop by.  Bill had gotten me started on my track plan a few years back, but hadn't been able to visit since I started construction - so I had a lot to show him and was thrilled he was able to "just stop by."

The session itself went very well, the Frog Juicers impressing all and sundry - especially the K-1b which performed just about flawlessly (in marked contrast to pre-Juicer days when it couldn't even get past a single turnout).  There were only a couple of BO cars - interestingly, both CN boxcars which lost coupler springs. Even the new uncoupling tools were a hit.

The crews appreciated the newly-double ended M'town yard - though I still need to do some shimming of the trackwork there. And for some reason, the reverse loop started acting up a bit.  Short "short" story: My reverse loop is controlled by two bays on a Frog Juicer. It's worked flawlessly in the past, but last night when the K-1 entered it, it would sometimes short out.  Not consistently, of course. So the wiring on that Juicer is going to have to be reexamined.

One of the highlights of the evening for me though (other than BillC's surprise visit), was John's being able to follow the Valley Local and recognize all the moves that it made going down the line. This wasn't an accident, of course. I'd consciously set up this session to duplicate the operations on the "typical day" John described in his Shoreliner articles.  Every move was included, thanks to my being able to include all the industries & sidings he remembered. It was so neat to imagine his being able to relive his experience firing the Valley Local in the late 1940s, even if only in HO scale in my basement.  Frankly, and hopefully without being too corny, that sort of time travel is the primary reason for the layout in the first place.

And, thankfully, I had my clipboard and pen ready to record any new memories this trip would trigger. Suffice it to say, I have a lot of notes...

I'd planned doing a double session again - Day 1, break for dinner, Day 2 - but we'd gotten a late start and enjoyed dinner for a little longer than planned.  But enjoying each other's company is another reason for doing these sessions, so we didn't let schedules dictate our time.  The fast clock had been paused anyway...

All in all, an especially good - and memorable - operating session. Stay tuned for more details about the new uncoupling tools I developed, the fast clock I "installed," and the somewhat-novel way I generate my operations paperwork.  Enjoy the photos as I do a little railfanning....

Air Line Local Engineer Joseph enjoys "remotely" operating his engine under the hands-on direction of Conductor Roman.

I'd hoped to catch the Valley Local switching in Wethersfield, but by the time I got there with my camera, they'd already left town.

Goff Brook railroad bridge, temporarily mocked up.  Click here for the story of how it was built.

I caught up with the Valley Local as it worked Rocky Hill.  Bill & Pieter are doing the switching under the watchful eye of John Wallace (who's probably wondering when the Rocky Hill station will ever be built) 

Once again, the two locals meet in Middletown.  I'd always hoped the operating scheme would work out that way since that's how the prototype worked, but I never knew how to actually plan for it. Luckily, it just so happens that the two modules which constitute the Air Line provide about the same amount of work (time) as the Valley Local.

The Air Line Local's engine - R-1 #3304 - having dropped off its interchange cars, waits on the quadrant track while the Valley Local switches out its cars to hand off.

I caught a VERY long Valley Local making its way northbound through Wethersfield, heading for Hartford. I'm pleasantly surprised that the little New England Rail Service mogul can pull so many cars (anywhere from 17-22 during this session - Good thing the railroad is level!)

Here's a shorter Valley Local heading home at the end of the second session. Interestingly, the spreadsheet generated much different traffic than the first session.
Hope you enjoyed the pics!

Saturday, July 26, 2014

A Quick Pre-Ops Session Tour

The Valley Line - RAW AND UNPLUGGED!!

Well, at least unrehearsed and unedited.

If a picture is worth a thousand words, how much would 6 minutes of video be worth?  I hope you like it, but don't answer until you see it . . .

Just a quick video tour of the layout set up for tonight's operating session.  Enjoy!


Making a list, checking it (off) twice...


I think I might be about ready for tonight's operating session...

Thursday, July 24, 2014

On the Valley Line Today - Ghosts of the Fenwick Branch


I shot this photo today while out on my morning run.  It's fairly typical of the landscape around Old Saybrook but looked nice with the boats in the distance, so I thought I'd capture it.

But I didn't realize until I got home and looked at it more closely that I'd captured a ghost.  Can you see it?

How about now?


Those two little spits of land are just about all that's left of the Valley Line's branch to the tony resort borough of Fenwick.  The Connecticut Valley Railroad completed this extension from Saybrook Junction (where the line crossed the Shore Line Railroad at grade) in 1872, but it wasn't easy - requiring not one, but two long causeways over North and South Coves in Old Saybrook.  The photo above shows what remains of the causeway over North Cove (the causeway over South Cove is currently occupied by state Rt. 154).

Way back in 1893, during the height of its popularity, there were a dozen passenger trains per day over this section.  But, like on so many other railroads, passenger service dwindled after World War I and by 1917 the line had already been cut back from Fenwick to Saybrook Point, on the shore of South Cove.  The causeway over North Cove continued to see 4 trains per day as late as 1919, but that wasn't enough to justify keeping this section running so the line was cut back to Saybrook Junction in 1922.  Saybrook Junction is the southern end of the Valley Line today and all evidence of the ROW between there and the causeway above has been obliterated.

All the activity over the Fenwick branch was long gone before 1947, so I won't be modeling it. But it's still nice to see little ghosts like this pop up from time to time.  When they do, be sure to pay extra attention - they may not always be around for you to enjoy.

Tuesday, July 22, 2014

Juice Straws (Frog Juicer Wiring)

I've been assuming - perhaps incorrectly - that everyone knows what Frog Juicers are.  For those that don't know, the skinny is that they route power from your track bus to your turnout frogs, changing the polarity of the frogs automatically to match the polarity of the adjoining track to prevent stalling & shorting. Traditionally, frogs are powered automatically through contacts on a switch machine, or manually through a slide switch, or some such.  With a Frog Juicer, frog power/polarity is done automatically with a minimum of wiring - and done so quickly that even sound-equipped locos don't notice.  If you throw your turnouts manually, the amount of wiring is ridiculously minimal and simple - and with a little looking you can find Juicers for as low as $10/frog.

The most difficult part of installing Frog Juicers is soldering a feeder wire to the frog. Folks that are great at planning ahead will do this at the workbench. I'm not that sort of folk. My turnouts were already installed (to get things up-and-running quickly, natch'), so I was going to have to drill a hole next to the frog, polish the side of the frog with a wire brush (in a Dremel), add flux, tin the wire and frog, then solder.

Or ... get a wonderful, marvelous (and ever-so-slightly masochistic) friend that will do all this for you (thanks again D.O.!).  I know the feeder-attaching process primarily because I did end up having to do it on the new turnouts I installed at the north end of Middletown.  At least I know I can do it myself if I have to.  I'm just glad I didn't have to do it for 30(!) frogs.

But I did have to wire up the juicers themselves - but that's a snap.  Almost enjoyable even.  See below:


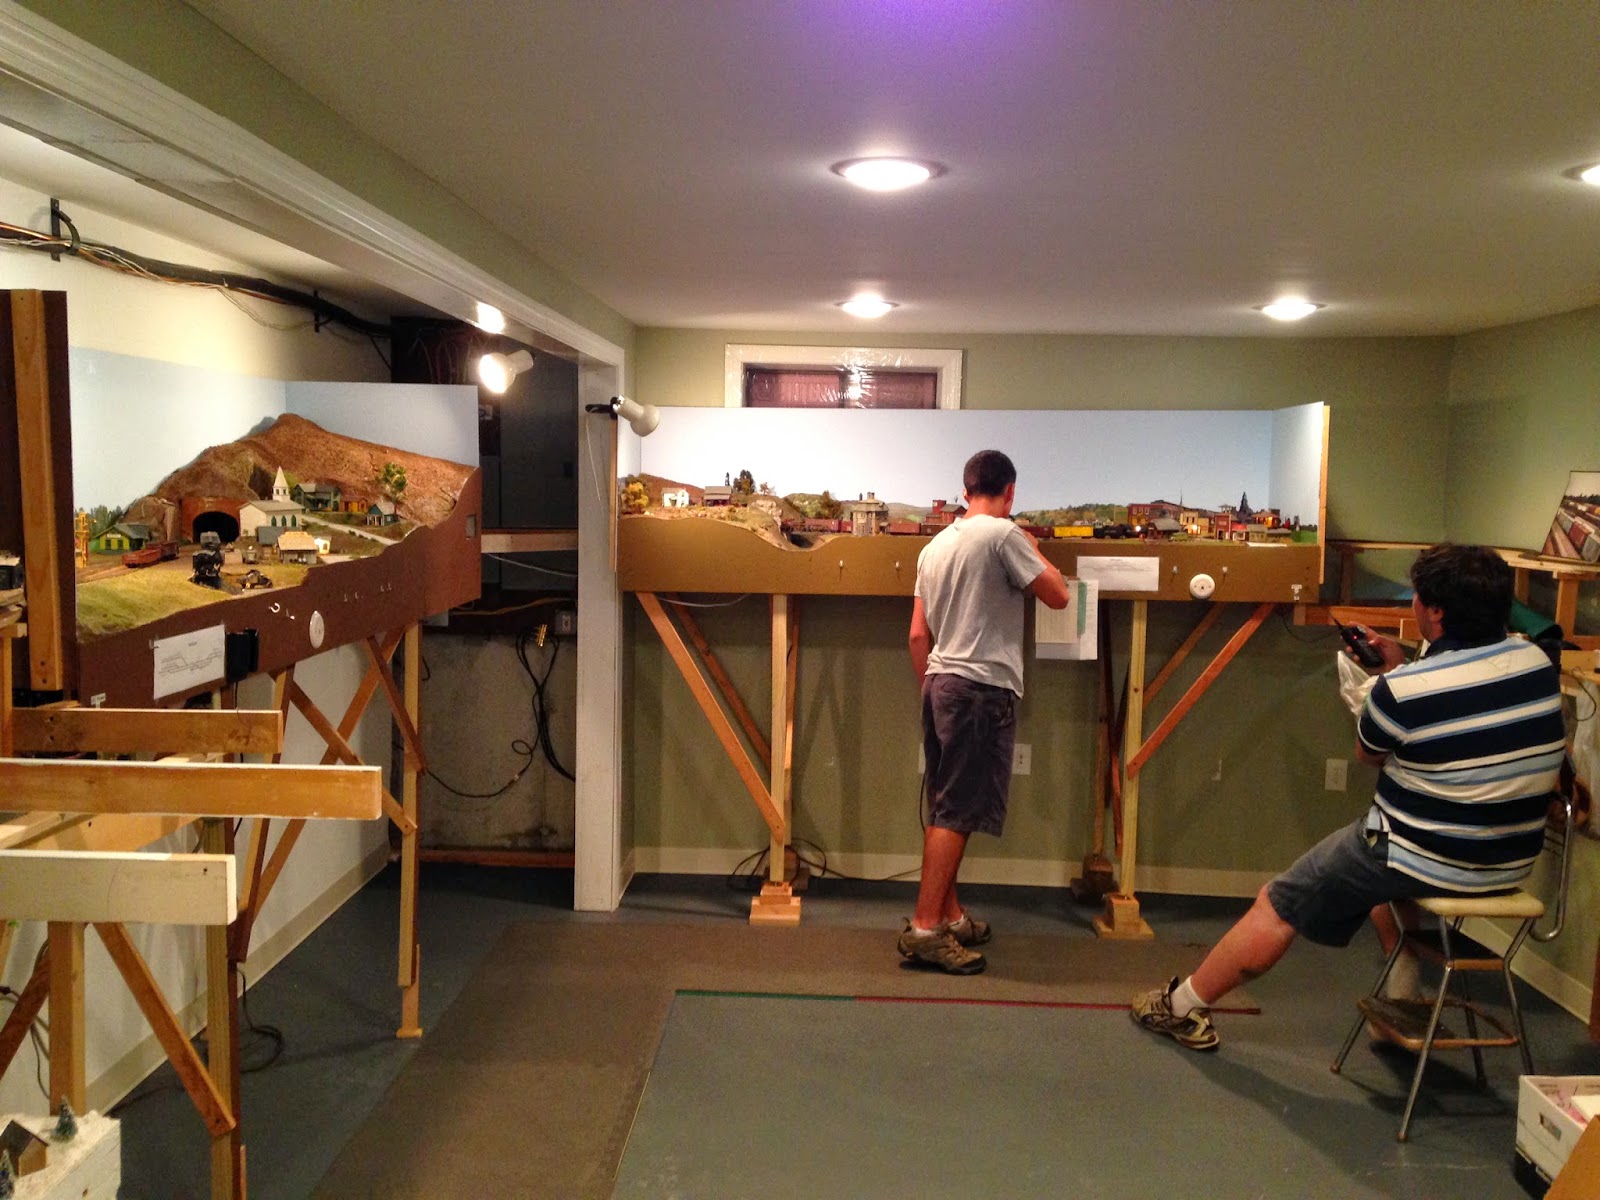
I use L-girder benchwork with girders made from 1x3 webs and 1x2 flanges.  Turns out (I didn't plan it this way - I was just lucky), the 1x3 web is the perfect size for mounting the juicers.  I used four #4 1/2" sheet metal screws in the mounting holes, just pressed/screwed in with a small screwdriver (the pine board makes this easy).  Power gets to the juicer through the wires coming in from above which are #18 stranded, suitcase-connected to the #14 solid track/power bus wires.

Then it's just a simple matter of bringing the (long) feeder wires from the frogs to the little bays at the bottom of the juicer. FYI - frog juicers come in single, double, and "hex" (6 bay) versions.  The most economical (and the ones I got) are the hex juicers - but your needs may vary.  The feeder wires themselves are #24(?) phone wire - very fine - and up to 12' long(!). Yes, that wire size/distance combination results in some resistance, but that's not only ok but preferred with the juicers (allows them to detect shorts more quickly).

And that's really all there is to it! Just don't forget to label the wires for future reference/troubleshooting (see above).

There was just one little glitch I discovered in my plan.  It so happens in the Rocky Hill/Dividend area there are two crossovers.  I figured I'd be clever and save a couple bays on one of my juicers by wiring two crossover frogs to one bay.  Ended up, I was only 50% right...


While my K-1b made it through the crossover in Rocky Hill with no problem, the DEY-5 (Alco S-2) kept shorting out.  I discovered the reason quickly enough - the trucks were the same distance apart as the frogs, so as the engine went through the crossover, the first frog changed polarity ok, but when the engine hit the second frog and the second frog tried to switch polarity, the first frog was still occupied and, being wired to the same bay as the first frog, resulted in a short.

So I had to use 1 bay per frog in Rocky Hill.


Fortunately, the crossover at Dividend worked as hoped & expected - the difference being the distance between frogs (see above). I haven't yet tried my longest loco (R-1 4-8-2) on this crossover to see whether I'd run into the same problem (I expect I would), but since it's unlikely I'll ever use that engine to switch that crossover, I'm happy to wire the frogs together for now.

And remember that I typically run only one train at a time on the Valley line.  I wouldn't recommend this approach for a crossover on a two-track mainline, for example.

So if you don't plan to add switch machines to your turnouts, and you want electrical continuity through said turnouts to be absolutely bulletproof, listen to your frogs.  That croaking that you think is coming from your cutting-out sound decoder may just be your frogs telling you they're thirsty and want some juice.

Feedin' Frogs


My K-1b doesn't like the fact that my frogs are powerless. Apparently, they need some nourishment - so I'm gonna give them some juice, courtesy Tam Valley Depot. Thanks Duncan, Craig & Bill (and special thanks to Dick Otto for soldering all those frog feeders) about 30 hungry frogs are gonna get fed thanks to you guys, and my K-1b will be much happier too!

Saturday, July 19, 2014

Double-Ending Middletown Yard

Having a guy like John Wallace around is a mixed blessing: all good, despite the extra work his usually-idle comments creates for me.  Long-time readers know that he rode the Valley Local during the era I model and his detailed memory of the line is a truly amazing historical resource.  For example, I thought doing my trackplan according to Sanborn maps would be perfectly prototypical.  "Not for the late '40s," said John.  "All those passing sidings were removed in the late '30s after passenger service ended."  Of course, as luck would have it, I'd already installed the passing sidings - so out they came. But, admittedly, I'm much happier with the even-more-prototypical result.

He had also mentioned that, unlike my model, Middletown yard was double-ended.  Actually, there were two double-ended yards in M'town - but even he admitted there was no way I could put two yards in the space available.  And he was pretty quiet about it until I mentioned my Bulletin Order limiting trains departing Middletown to only 10 cars, since that's the runaround limit.  "No way would there be a 10 car limit on the Valley Local - you really need to have a longer runaround if possible, and you should really double-end the one yard you have."  I continued to protest that I hadn't enough space, that it was "just supposed to be a representation/model" yadda yadda.

But it was apparent after my last operating session that it was high time I give John's comments some more consideration. One of the maxims of prototype modeling - especially re trackplans - is that if the prototype had it, there was probably a good reason and therefore, for good prototypical operations, you should have it too.

Which is all a long prelude to what you already know - I ended up double-ending Middletown Yard.  And - bonus! - I increased my runaround capacity by 50% to 15 cars(!).  Read on to see how I did it . . .

Schematic of Middletown Yard "before"  - Note 10 car runaround siding.

Rough sketch of my plan of action

View of the "north" end of the yard before reconstruction.  I've used a small piece of shingle and some spackle to create a ramp from the cork roadbed to the plywood base.  PLEASE! if somebody has a suggestion on how better to do this, let me know.

I used a couple of Micro-Engineering turnout templates to confirm that the new install would be relatively straightforward.  As you can see, it is (and now I'm wondering why it took me so long to decide to do this).

I glue my track down with Aleene's Tacky Glue, so my first step was to use a putty knife to carefully pry up the track.

Then I cut the rails.  In the future, I'll probably cut the rails first to avoid disturbing the adjoining track as much when I pry up the track to be removed.  Be sure the flush side of your nippers faces the rail you're leaving in.

I also solder my rail joints, so I needed to unsolder.  Note to Self (and warning to others): Don't solder rail joints at turnouts - leave the turnouts "floating."  Makes for much easier removal for repair, etc.

M-E turnouts have small sections of diverging rail. If you're careful, you can do a neat overlap when butting two turnouts together for crossovers, etc. as I do here.

But you'll have to trim a lot of ties to make this work.  See above.

Before installing the turnout, I remembered to sand the top of the roadbed to remove the Aleene's glue residue.  You want things to be as smooth as possible.


M-E rail joiners are notoriously difficult to slide onto rails, so to give them a fighting chance, I filed the bottoms of the rails, and the tops of the rail base, to a slight taper. (the white thing behind the file is a feeder wire)

The first turnout turns out to the be the hardest, but it's now installed.  Note how my diverging rails overlap, eliminating two rail gaps.

Second turnout installed much more quickly - but presented a problem of a different sort: Lack of support!

Splice plate clamped prior to screwing in from below (note tip of cleat on riser to the right)...

New plywood subroadbed/support added onto splice plate and tip of cleat.

From here on, it's a pretty straightforward task of fitting short sections of track to join to the rest of the yard.

Apologies for the blurry photo (what I get for holding the drill in one hand and the camera in the other), but wanted to show you a quick tip.  I needed to add feeders to the frogs and to a short section of rail that wasn't getting power due to the rail gaps.  To ensure I keep the drill bit from wandering and, more importantly, to keep the drill from hurting the track when it breaks through the wood, I use this small piece of masonite with a hole pre-drilled in it.
So I now have not only 50% more runaround capacity, but I've also doubled the number of yard tracks that are double-ended.  Operationally, this should make things MUCH better for both the Valley Local and Air Line Local - they can work the yard at the same time from opposite ends.  And of course they can runaround 15 cars at a time rather than just 10.

The true test will come during my next operating session, which will be next Saturday.  (what was that about ops sessions motivating progress?!)  These two new turnouts - along with the two that were already there - are all along the wall behind Cromwell and operators will have to reach over Cromwell to flip the points and uncouple cars.  It's not that far a reach (24-27") and the Cromwell station should be off to the right out of harm's way.  I also plan to station a stool there for my less-tall/less-long-armed operators.

But I won't be able to have much of a view block (tall trees) between the north end of M'town yard and Cromwell, and the new "north end yard lead" goes through the backdrop.  So it'll be very interesting to see whether my operators agree this is a good addition.  It's one thing to have to switch/uncouple at the north end just once or twice to runaround your train; it's another thing entirely to do most of your yard switching from that spot.

So stay tuned - I should have a verdict by this time next week.

Friday, July 18, 2014

Monday, July 14, 2014

Back to Middletown Tower: Cuttin' Up


I haven't done anything on the Middletown Tower project since I introduced it over a week ago. I did end up getting some clapboard styrene from The Time Machine a couple days later, but the "re-kitted" building has been languishing on the workbench waiting for me to get the nerve to actually cut it up. 

As I looked at the walls more closely to decide where best to cut them, Haksaw's comment made more and more sense: considering the work involved  in adapting this re-kitted building, why not just scratch build? Good point - but now that I finished with the razor saw, it looks like I'm on my way. See the photo above.

To determine where to cut, I counted the clapboards on the prototype from the bottom of the windows to the ground and cut the excess boards from the bottom of the back wall. I forgot to account for the trim board across the bottom, but I don't think that'll be too difficult to remedy.

The side and front walls on the kit had doors and windows, to I decided to cut & remove all the clapboard from below the "chair rail."  It would have been more prototypical to remove from just below the window sills, but as you can see on the left side wall, there's a door that goes down to that "chair rail" (wish I knew the proper term) and cutting through it or rebuilding that wall from scratch wouldn't have been worth the time.  Since this is supposed to be Middletown Tower Q&D, it needs to be Q (quick).

Next steps will be to cut the new styrene clapboard walls to add to the bottom of the front/side window sections, add trim, and paint to match.  At least that's the plan for now.  I'll let you know how it goes - though in addition to the Q, there could very well a good deal of D (dirty) in this particular build.

***
My day job has started to interfere with my blogging a bit (day jobs have a way of doing that), so after being able to post pretty regularly, I haven't been quite as regular lately.  Rest assured though, progress continues - although at a slower pace.  And it must continue - after all, I have my next ops session scheduled for July 26 and only one weekend between now and then to get through my growing punch list!

Saturday, July 12, 2014

Trains Through Old Saybrook, 1947

One of the best parts of prototype modeling, IMO, is the fun research projects that it presents.  And while research often highlights how much we have to compromise to fit the prototype into our space (and budget) - e.g. the more you know, the more you know you have to choose what to do without - sometimes research will help you be true to prototype with little, or no, compromise at all.*

Case in point: Modeling Old Saybrook at the south end of the Valley Line - and its dense traffic.  Follow along as I show you how I reduced a daily schedule of 71 trains down to just 4 - much easier to model, and all perfectly prototypical.
Data from Employee Timetable and Arranged Freight Service Book, entered into Excel and sorted by time-of-day.
I finally finished compiling a list of all the trains that would have gone through Old Saybrook on a typical day in 1947 (see above pic - that's just the first page).  As I mentioned in my last post, not counting the two Shoreline Locals I plan to model (PDX-2 New London-Cedar Hill, which serves the lower end of the Valley Line, and PDX-1 Cedar Hill-New London, which exchanges cars with PDX-2 in Old Saybrook), there are a staggering 23 through freight trains and 48 passenger trains during a typical day.

Yikes!

Now, unless I want to model a full 24-hour period (which, considering my main focus - local freights on the Valley Line - operated during the day, is unlikely) I can confine Saybrook traffic to the daylight hours only. 

How do I determine what the "daylight hours" were during October, 1947?  Google, as it often turns out, is your friend. I threw in a quick search and came up with this website which told me just what I needed to know.  During that month, daylight ranged from 5:54a-5:36p at the beginning of the month to 6:24a-4:55p at the end of the month.  So, as you can see from the pic above, I sectioned-off the trains that would have operated during the day.

That little exercise made things a LOT more manageable for freight traffic and a little more manageable for passenger trains.  Turns out, there are only 3 daytime through freights:
  • Boston-Cedar Hill train 9 (BN-9), westbound through Old Saybrook at 7:10 am
  • Boston-Cedar Hill train 3 (BN-3), westbound through Old Saybrook at 8:40 am
  • FGB-2, eastbound through Old Saybrook at 2:30 pm
The remaining 20(!) through freights operated at night.

But there are still 20 daytime passenger trains through Saybrook, from westbound train #401 at 6:40 am to the eastbound Puritan (train #20) at 5:10 pm.  Interestingly, the mid-afternoon features an especially impressive show of famous New Haven Railroad name trains during a short period:
  • 2:43 westbound Senator
  • 3:05 eastbound Yankee Clipper
  • 3:22 westbound Yankee Clipper
  • 4:17 eastbound Colonial
Check out the pic above for a full listing of daytime trains.  That's still a lot of trains.

From a practical standpoint, there's no way I have the space or the equipment (or time or money) to model all of these trains.  The three through freights would be great to have - they had either a DER-1s (DL-109s) or an R-3 4-8-2 on the point, and of course included any freight car you can imagine.  The Yankee Clipper, Senator and Colonial all have very distinct consists so should probably be modeled, but the other passenger trains could be represented more generically - maybe even with just a couple "typical" trains running around and around to simulate the high level of traffic.  

On the other hand, I could just concentrate on representing the trains that would be going by when the two Shoreline Locals are in town exchanging cars - that would still keep things hoppin'!  Assuming the locals met sometime in the early afternoon (based on PDX-2's 12:30 on-call time at New London), I'd only need to model the Pilgrim (1:17p), 42nd Street Express (1:32), and Bostonian (2:07).  Only downside is that I'd only get to see one through freight (FGB-2 at 2:30).

That's just 4 shoreline trains, in addition to the two Shoreline Locals - so much more manageable than trying to model 71 trains.  And I don't have to worry about "night" lighting!

We have to selectively compress so many things on a model railroad, from the Right of Way, to track layout, to structures.  But with the right research - and a little luck - you can model one of the busiest stretches of railroad in the country with just four trains.

Friday, July 11, 2014

You want trains? Old Saybrook's got trains!

So far, my model railroad depicts only the Valley Line from Hartford (staging) to Middletown and the Air Line from New Haven (staging) to Middletown.  Two local freights.

Eventually though, I plan to extend the Valley Line from Middletown to Old Saybrook.  If I do get to Saybrook, operations could get VERY intense.  I'd of course have to have staging on either side of the Saybrook station scene in order to simulate traffic on the New Haven Railroad's famous Shoreline, and the four(!) mainline tracks and the traffic they support would provide a very interesting (and prototypical) contrast to the meandering single track that heads north from the Saybrook wye to Middletown & Hartford up the Connecticut River Valley.

How intense, you ask?  Well, I plan to do a more formal compilation in a spreadsheet to get my arms around all the trains that passed through Old Saybrook in a typical day, but a quick review of the Employee Timetable and the Arranged Freight Train Service Symbol Book from c. 1946/1947 reveals the following:

  • Two local freights, one eastbound (PDX-1) & one westbound (PDX-2).  But you knew about these already.
  • Twenty-three (23!) through freight trains.
  • Forty-eight (48?!) passenger trains.
I think I'm going to need to beg/borrow/steal more equipment.  A lot more equipment . . .  And I may need to blow out the side of my basement to build all the staging I'm going to need . . .

Hmmmm..... maybe I won't be in such a hurry to get down to Old Saybrook - not for a while at least....


Thursday, July 10, 2014

The Best Job on the (model) Railroad: The Agent-Operator

Reading the model railroad literature lately, you discover that Timetable & Train Order (TT&TO) operations - long mainlines, long sidings where long trains can meet and get out of each other's way, reading & knowing all the Rules on train authority, etc. etc. - are all the rage.  It certainly sounds exciting and some of the hobby's most famous names swear by it.  But what about the lowly branchline that has only one lonely wayfreight per day (or, worse, "M-W-F" or "as needed")?  Can a model railroad based on such a line be exciting to run?

I think so, and one effective way is to add an Agent-Operator - the most realistic job on a model railroad.

On the prototype,* the A-O was responsible for proper billings and collection, checking the location of cars, investigating damage claims, etc.  He would also have maintained a station record of train movements on which he recorded train arrivals and departures and would issue train orders as needed.  Most importantly for our purposes, he'd give local freight train conductors their switchlists - information on what cars in the area needed to be pulled & where they needed to go.

I'll have to credit my friend Randy with turning me on to this position.  At an operating session (the best ideas always seem to come up for ops sessions) during the NE ProtoMeet, he asked me if I wanted to be the A-O for his session.  Figuring it'd either be really fun or I'd really screw up his railroad (a win either way in my book <g>), I tried it out and quickly discovered how easy it was to forget I was working on a "model" railroad and not the real thing. I was getting records of cars being dropped off by through trains, recording train movements, and issuing switchlists to crews - it didn't matter that the trains were 1/87th scale and that the cars were, in fact, empty models.  It really felt like I was doing bona fide railroad work.  Now I'm totally hooked.

First, some preliminaries.  You're still operating TT&TO so you still need paperwork to move your train.  I use a Clearance Card A and a Form 19 train order (see below).  You don't get to move without a clearance card and you don't know where to go without a train order.

Clearance Card & Swtichlist made up based on prototype forms, but the Form 19 is an actual New Haven RR flimsy from a pad of them I acquired a while back.
So that takes care of how your train moves and where it goes.  But what about what it does along the way? This is where having an Agent-Operator job on your railroad really makes a difference.  The A-O at the initial station/yard gives the conductor a listing of all the cars in his train and where each car must be delivered - see the form we use on the right in the photo above.  That's all the conductor gets with his clearance card and train order.

As the train arrives at each station, the conductor checks with the agent for the work to be performed in that town.  The agent gives him another switchlist for that town - a listing of the cars that need to be pulled, and where they're going.

And so on.

The cool thing is that - at least for now (or until I can train somebody to take it over) - I'm the A-O at my layout.  Both the Air Line Local and the Valley Local have to check with me each time they reach a station. And each time they check in with me, I give them the work that needs to be performed in that town - and also have an opportunity to issue any additional orders that govern the movement of their train.

The A-O position is typically simulated on a model railroad with bill boxes at each town.  But on a railroad with few trains, having an actual person perform this task provides another job for someone to do.

And all this work is done on a really cool desk - set up as much like the prototype as you're able.

Agent-Operator's Desk: Prototype or Model?
When you're sitting at the desk doing your work, you might as well be working on an actual railroad. Unlike being an engineer or conductor, when you're working directly with the 1/87th scale models, the A-O's job is really not all that different than the real thing and "scales" well too. And that's why I think this job is one of the best ones you can get on a model railroad.  Why not try instituting it on your railroad for your next ops session?  If you do, let me know what you think!

*Prototype information from an article by Richard K. Hurst & Edwin G. Motte, Jr. in the New Haven Railroad Historical & Technical Assn.'s Shoreliner magazine, Vol. 35, No. 3, pg. 22-23.

Wednesday, July 9, 2014

Skewed Bridge


Any ideas or suggestions on how best to modify a MicroEngineering thru girder bridge to be skewed 120 degrees?

On my model, the Air Line crosses the a road at a 120 degree angle and the abutments need to be parallel to the road. 

Any tips or guidance is much appreciated - and any links to examples of how someone else already tried this would be especially wonderful!

Wordless Wednesday #26


Tuesday, July 8, 2014

Attacking East Berlin: Benchwork Rework

I took advantage of the 4th of July holiday to attack East Berlin.  Well, not exactly - I mean I decided to add some additional benchwork to support the trackage I expect I'll need to be there.

I haven't really said too much about the Berlin Branch so far, but it began life in 1848 as the Middletown Branch of the Hartford & New Haven Railroad and ran from Berlin through East Berlin down to - you guessed it - Middletown.  Apparently, the Hartford & New Haven (built 1836-1844) was originally planned to go through Middletown.  When the builders chose an easier route through Berlin, Middletownites (Middletownies?) protested.  The branchline was the result.  It predated the Valley Line & Air Line by over twenty years, and originally went all the way down to a wharf by the river.  By 1947, the line had been cut between Berlin & East Berlin (c.1940) and on alternate days the Valley Local served the chemical/paint plant there and the brickyards along the way.

Naturally, I too have a (rough) representation of the Berlin Branch on my layout.  See the trackplan to orient yourself - you'll barely make out where the line comes off the north end of Middletown yard (top of the plan) and heads to East Berlin (upper right corner of the plan).  Since all I can manage are a couple of sidings - and there's a bridge over the Mattabessett River to cross before getting there - this area hasn't been a high priority.  In fact, I installed the fascia in this area before even putting down any track.

Since I want to keep my track layout options as open as possible, I decided I needed to lay more plywood subroadbed.  Only problem was - there was no support for it.  And there was already fascia in front of it. Follow along as I show how to attack this sort of problem - and you'll see another reason I really like the flexibility of L-girder benchwork.

First step was to unscrew the fascia from the corner of the wall and one intermediate support, then bend it back and secure it out of the way. You can see that I already had one L-girder running to the corner of the wall.  This proved fortuitous.

Next, I needed to add a new/additional joist to support the riser - screwed into an existing joist at the back and through the L-girder in the front.

The new joist actually serves two purposes: 1) to support the riser (to be installed later) and 2) to provide backing for the fascia so it doesn't "give" when pushed (and thus ruin any scenery attached to it).  Clamp and level vertically, then screw it in.

Next we add the riser.  I actually decided it'd be better in this case (i.e. more centered under the new subroadbed) to attach it to the L-girder rather than the joist.  To get the proper length, I temporarily clamped the new plywood/subroadbed to the adjoining subroadbed and clamped the riser in place.

Then it was just a matter of clamping a cleat to the riser - again, making sure everything is level both horizontally and vertically.

I made a splice out of scrap plywood and screwed it into the existing subroadbed and the new subroadbed, clamping it to hold everything together while I drilled & screwed.

Finished product - underside

Fascia screwed back in place at the corner and also at the new support.

Now my track has more area to play with....

. . . which is good since - with only two sidings, they're gonna have to be quite long in order to serve the industries I want.
While nothing here is particularly innovative or even all that complicated, I hope that you see how easy it is to change things if you have to.  The prototype railroads changed things all the time as their needs evolved and we can do the same thing. So don't let the prospect of getting something "wrong" deter you from ever getting started - or trying something new.

To paraphrase a famous general (considering I attacked East Berlin, it's fitting he was German) - no layout plan survives construction of the layout.  Yes, by all means plan - but don't expect you won't have to make adaptations along the way.  As I'm discovering more and more, realizing - and being (relatively) comfortable - with this reality is one of the keys to actually making progress.