

As you can see, I'm really getting a lot of use out of this magnetic gluing jig. Not only does it have nice right angles in all 3 planes and a nice flat surface, but it's a "tray" that allows you to move your secured parts safely off your bench for drying.

So,while the main walls and roof were drying off to the side, I started assembling the lean-to addition. First step - like with the mating edges of the other walls - was to use a tip from my friend Dean and make a very slight angle so that the ends of the clapboards will mate tightly against the other wall.

I glued the two sides of the addition to the addition's back wall, let that dry, then attached the addition assembly to the back of the main house, using one of the magnets to press the house and the addition together. I also added the roof on the addition, making sure that the angled edge pressed tight against the back wall of the main house. Note: you could just as easily add the addition to the (other) side of the house if you'd rather.

At this point, I glued the porch support legs to the porch deck. Two things to note here: 1) you will likely need to file/sand the left & right ends of the leg assembly a bit to get it to wedge into the porch deck frame; and 2) make sure that the legs attach to the front of the porch deck - the side that has the flooring overhanging slightly. And don't forget - whenever you can - to scrape/remove any paint from any surfaces that will be glued. That'll make for a much stronger joint.
While all that was drying, I remembered to make sure that the inside of the chimney was black. I find that often the easiest way to "paint" small black areas - right at the bench - is to use a black Sharpie.

The chimney parts are so small, no bracing is needed and the edges are milled at 45 degree angles for assembly. Just be sure that the sides are glued at true right angles. Again, the gluing jig makes this easy.

While waiting for other things to dry, I assembled the outhouse. By 1948, the main house would have indoor plumbing and electricity (I would hope - at least my version of it will), so the outhouse will be heavily weathered and probably placed a little off-kilter somewhere out in the backyard. The photo above shows an easy way to ensure that the roof is centered properly - just glue it upside down.
I next turned my attention to the two stair assemblies. The stairs in this kit are the weak spot, literally and figuratively. They're a real pain-in-the-butt to put together and they're always vulnerable to damage (as I found out later).
The stringers are supposed to be 1/2" apart and the instructions mention gluing a 1/2" long piece of the leftover 1/16" strip to the house and then adding the steps to it. I thought I'd be clever and glue the 1/2" piece to the stringers first as a spacer and then glue the whole assembly to the house at once.
To hold everything in place for gluing, I used a piece of masking tape - sticky side up, as shown above.

If you assemble your steps this way, be certain the spacer is flush along the backs of the stringers as well as along the tops of the stringers. You can see above that the left stringer is slightly higher. This plagued me later.

But ignorance is bliss, so I pressed on with assembly, figuring I'd just make sure the top step was level and let the spacer (which would be hidden) be at an angle. I used self-clamping tweezers to hold things while I used regular tweezers to apply the stair treads.

And here are the back steps, attached to the addition. My plan was easier in theory than execution. You can see that the top step is slightly angled, but as much of a pain as these steps were to put together, I decided I could live with that rather than redo them.

The porch roof frame was next. In my opinion, this kit relies too much on very small gluing surfaces. In the pic above, you can see what I mean. Next time, I may add little bits of square strip in the inside corners to strengthen these joints.

You can see I rely pretty heavily on this magnetic gluing jig. No less than four magnets holding everything square in the corner for gluing. Like the main walls of the house, I first glued two pieces together, making two 2-piece assemblies (2 "L"s), then I glued the 2 "L"s together.

Again, don't forget to remove any paint from gluing surfaces - especially critical here, where the mating surfaces are so tiny. Also be certain that the four pieces are flush on the bottom, otherwise your porch roof will be slightly off. Ask me how I know.

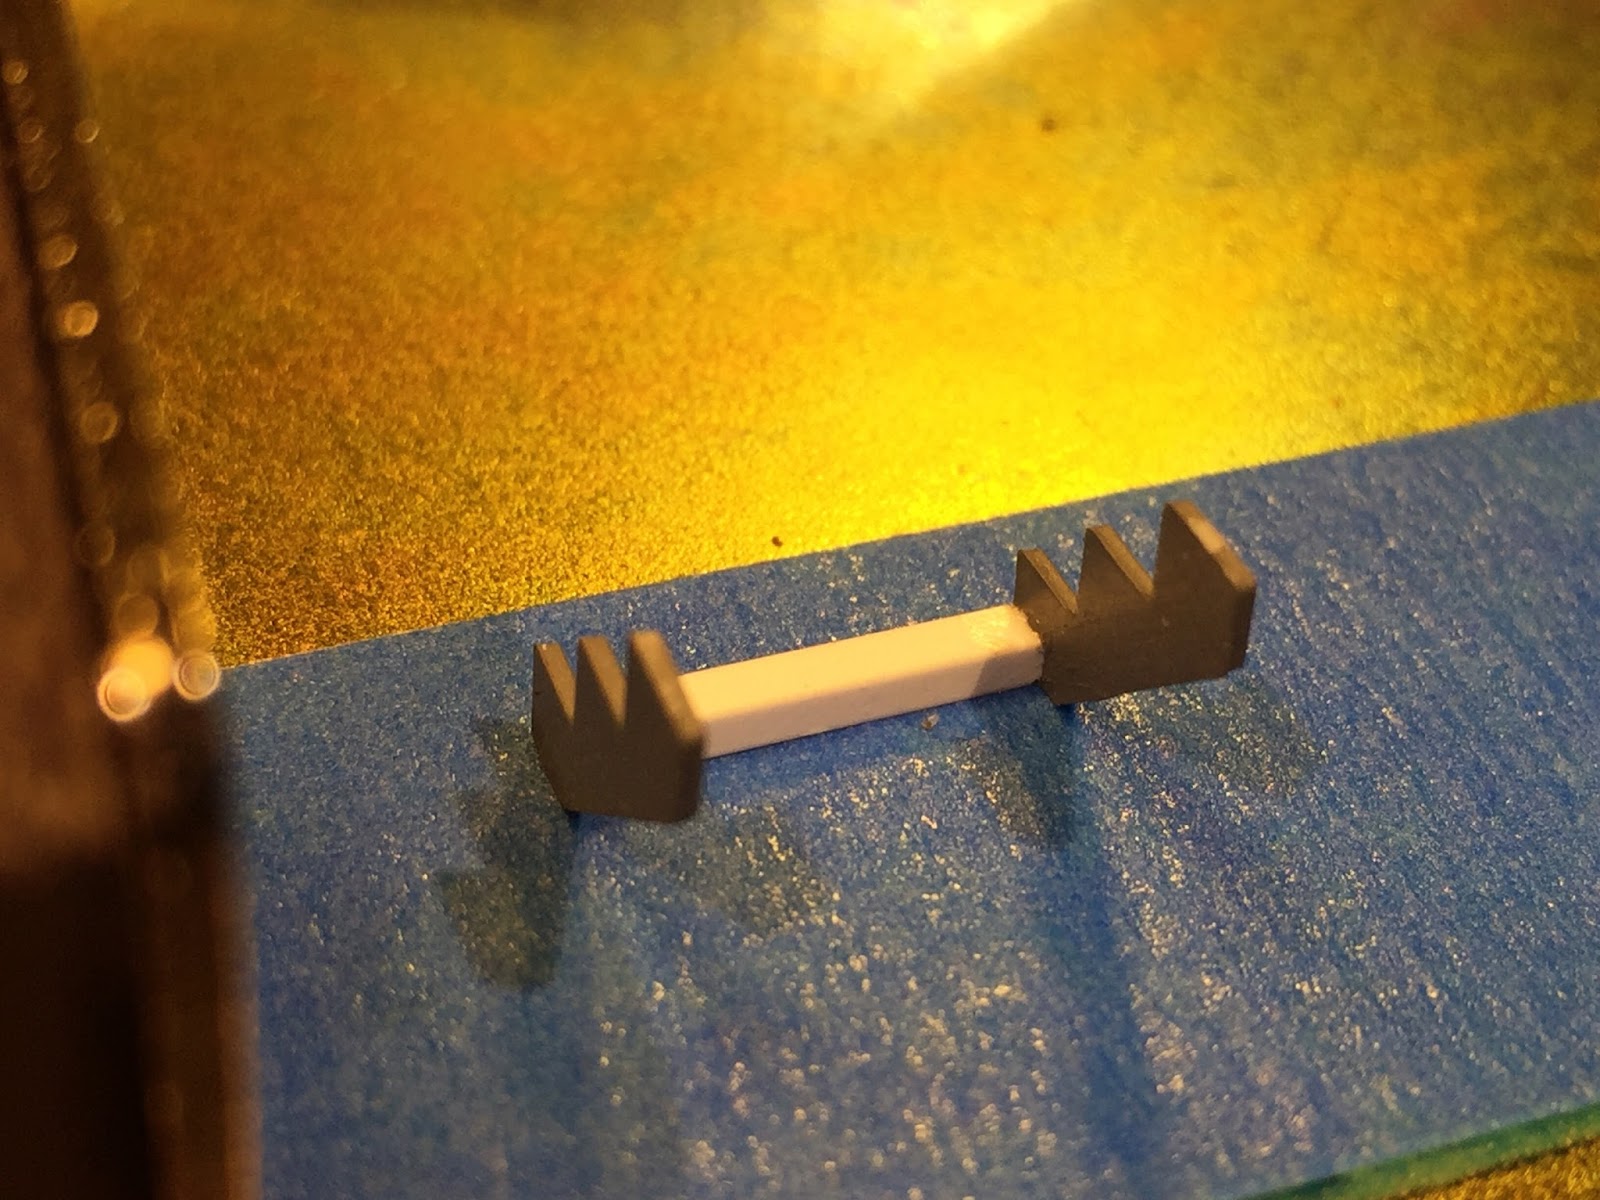
Continuing with the front porch, next step was to add the roof supports to the roof support frame. The photo above shows paint removal prior to gluing - just scrape with an x-acto.

Be sure not to force the supports at all when you insert them between the roof frame sides. File/sand to fit as needed, or else risk forcing the frame apart. It's also important that the supports be at a right angle to the frame, as shown above.

Once that all dries, it's time to add the porch itself to the house, as well as the porch roof support assembly. As you can see above, I used a scrap piece of balsa to support the back edge of the porch for gluing, and I used a magnet to press the porch against the house.
Adding the roof support was a bit tricky - you want to be certain the sides are level/parallel to the porch and that the frame is level from side to side. Lining up with the clapboards helps - and those same clapboards will make it obvious if your porch roof isn't perfectly level.
Turns out, despite my best efforts, my porch frame was just a wee bit torqued. You can just make out above that I'm using the end of my dial caliper to ever so slightly press down on the right side of the frame to keep it level while the glue dries.
* * *
This assembly session turned out to be pretty long since you can put some things together while you're waiting for other things to dry. So it goes fairly quickly, but it's still a lot to do.
But as you can see, it's starting to look like an Actual House! Not much left to do on the instruction sheet - just add main & porch roofs and chimney - but I want also to add that indoor plumbing (i.e. vent pipes) and some electricity (virtual/modeled only - I'm not planning at this point to actually light the building), all of which will require a little scratchbuilding. Stay tuned!
That's nice!
ReplyDeleteThanks Paul!
Delete