Friday, December 16, 2022

SW1 #1109 - Painting & Lettering (and some Fails/Saves)

The last time I did an actual, written update on the B&M SW1 way back on November 9, it was all ready for primer, paint, and lettering.  While there've been a few teaser posts documenting progress since then (and in one post, just dumping some progress pics), here's the MUCH longer detail on the process. . .
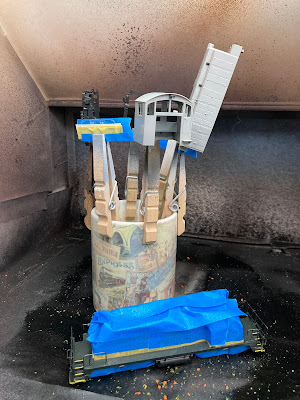
To prep for painting, the first step is to clean all the body parts and mask off the frame/chassis.


I also needed to mask off the rear light lens. For some reason, there was no way I could remove it so I figured this would be good time to try out some MicroMask. I just dipped a toothpick into the product and dropped a small drop in the center of the lens, allowing it to spread to the lens' full diameter.


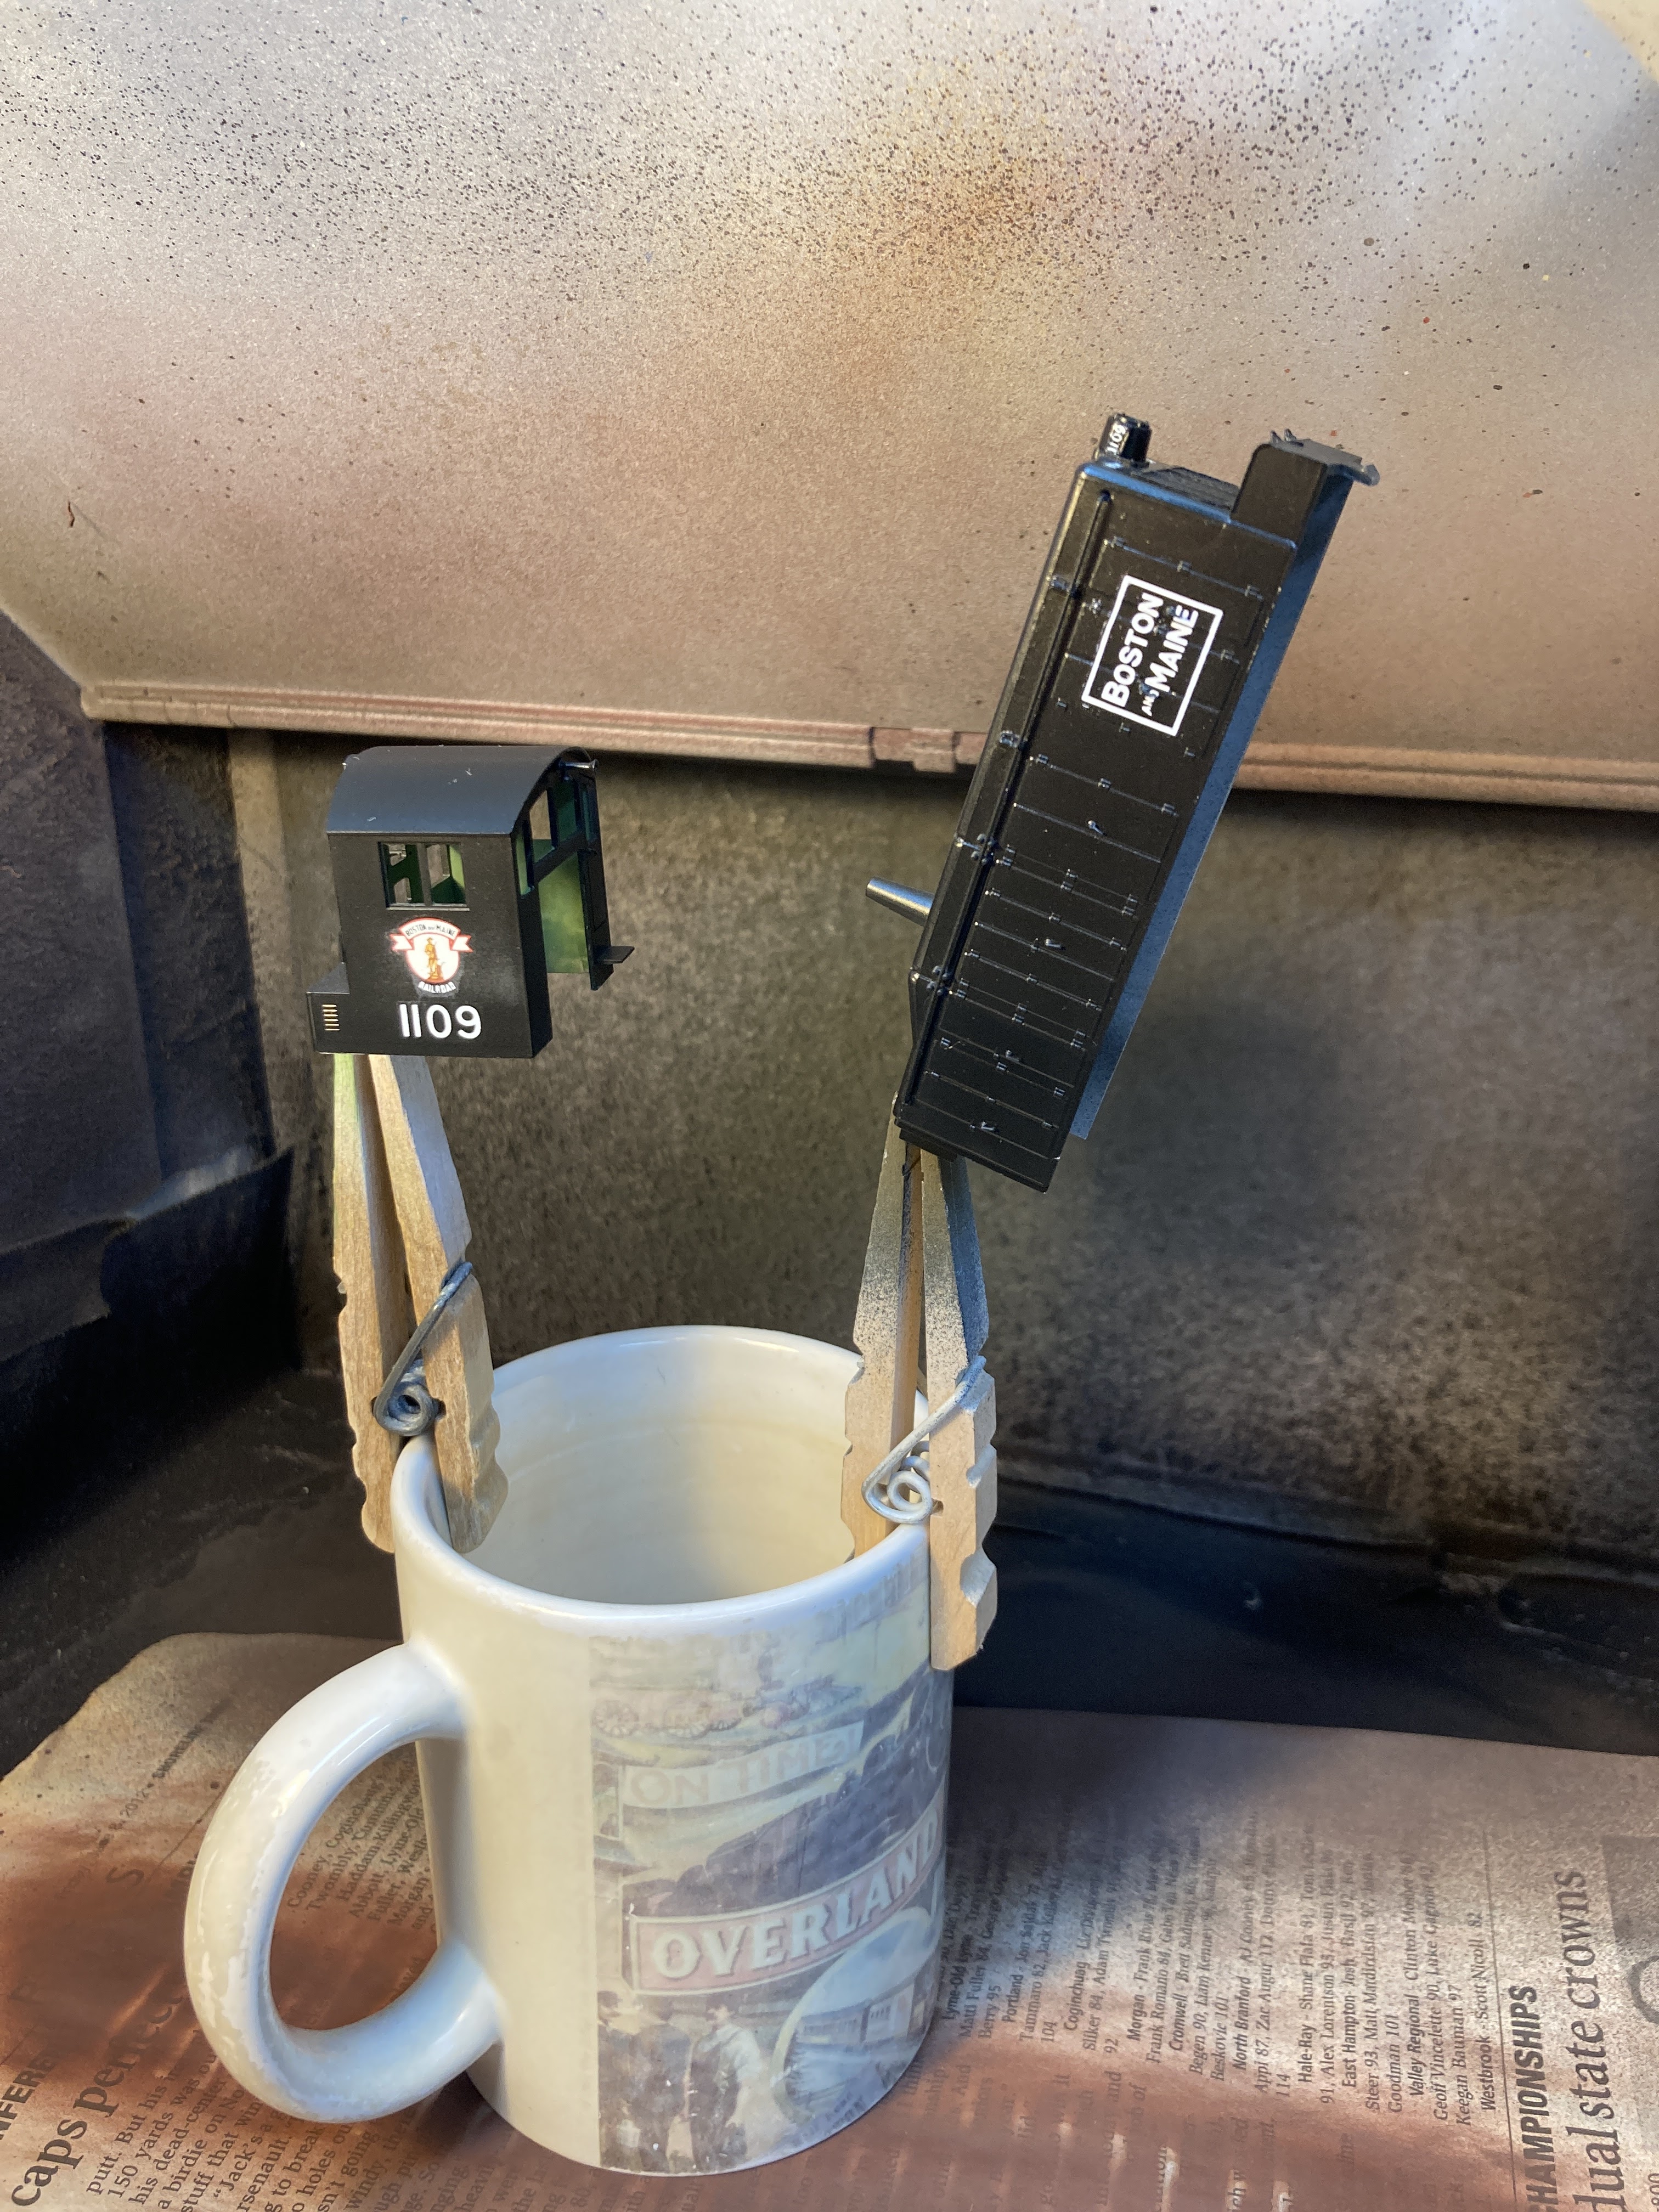
For the paint itself, I decided to airbrush black Stynylrez.

Since the loco is all black, my buddy Ralph suggested I use this primer for paint, knowing that I'd be putting on a gloss coat for decaling anyway. I was skeptical, but it airbrushed like a dream and covered beautifully.

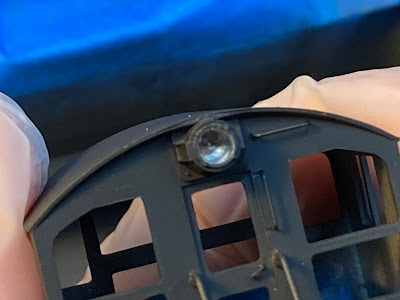
And the Micromask worked like a champ too. I just needed to use a toothpick to scrape a little bit so I could grab it with a tweezer and peel it off.

The next step was to apply a clear acrylic gloss to the body for decaling. Again, going on a suggestion from Ralph, I airbrushed Future floor polish for the gloss coat.


Things had been going so well up to this point, I supposed I was overdue for a fail. I'm still getting used to my double-action airbrush and applied a Bit Too Much Future to the front of the cab, and it began to run down the wall. ARGH!


Apparently, one of the reasons to use the Future is that it's self-leveling. So, after an SOS to Ralph, he suggested I actually add more Future(!) I'd actually planned to try and wick up the excess to remove it - but come to find out, that would certainly have ruined things. So I added more Future - and it fogged as you see in the above pic.

But I let it dry flat so it could have a chance of leveling out. . . and here's the result:


It's admittedly not perfect, but it looks a darn sight better than it did - and, in fact, looks a bit like a dent/bulge in the metal. Not a bad effect for a workaday switcher...

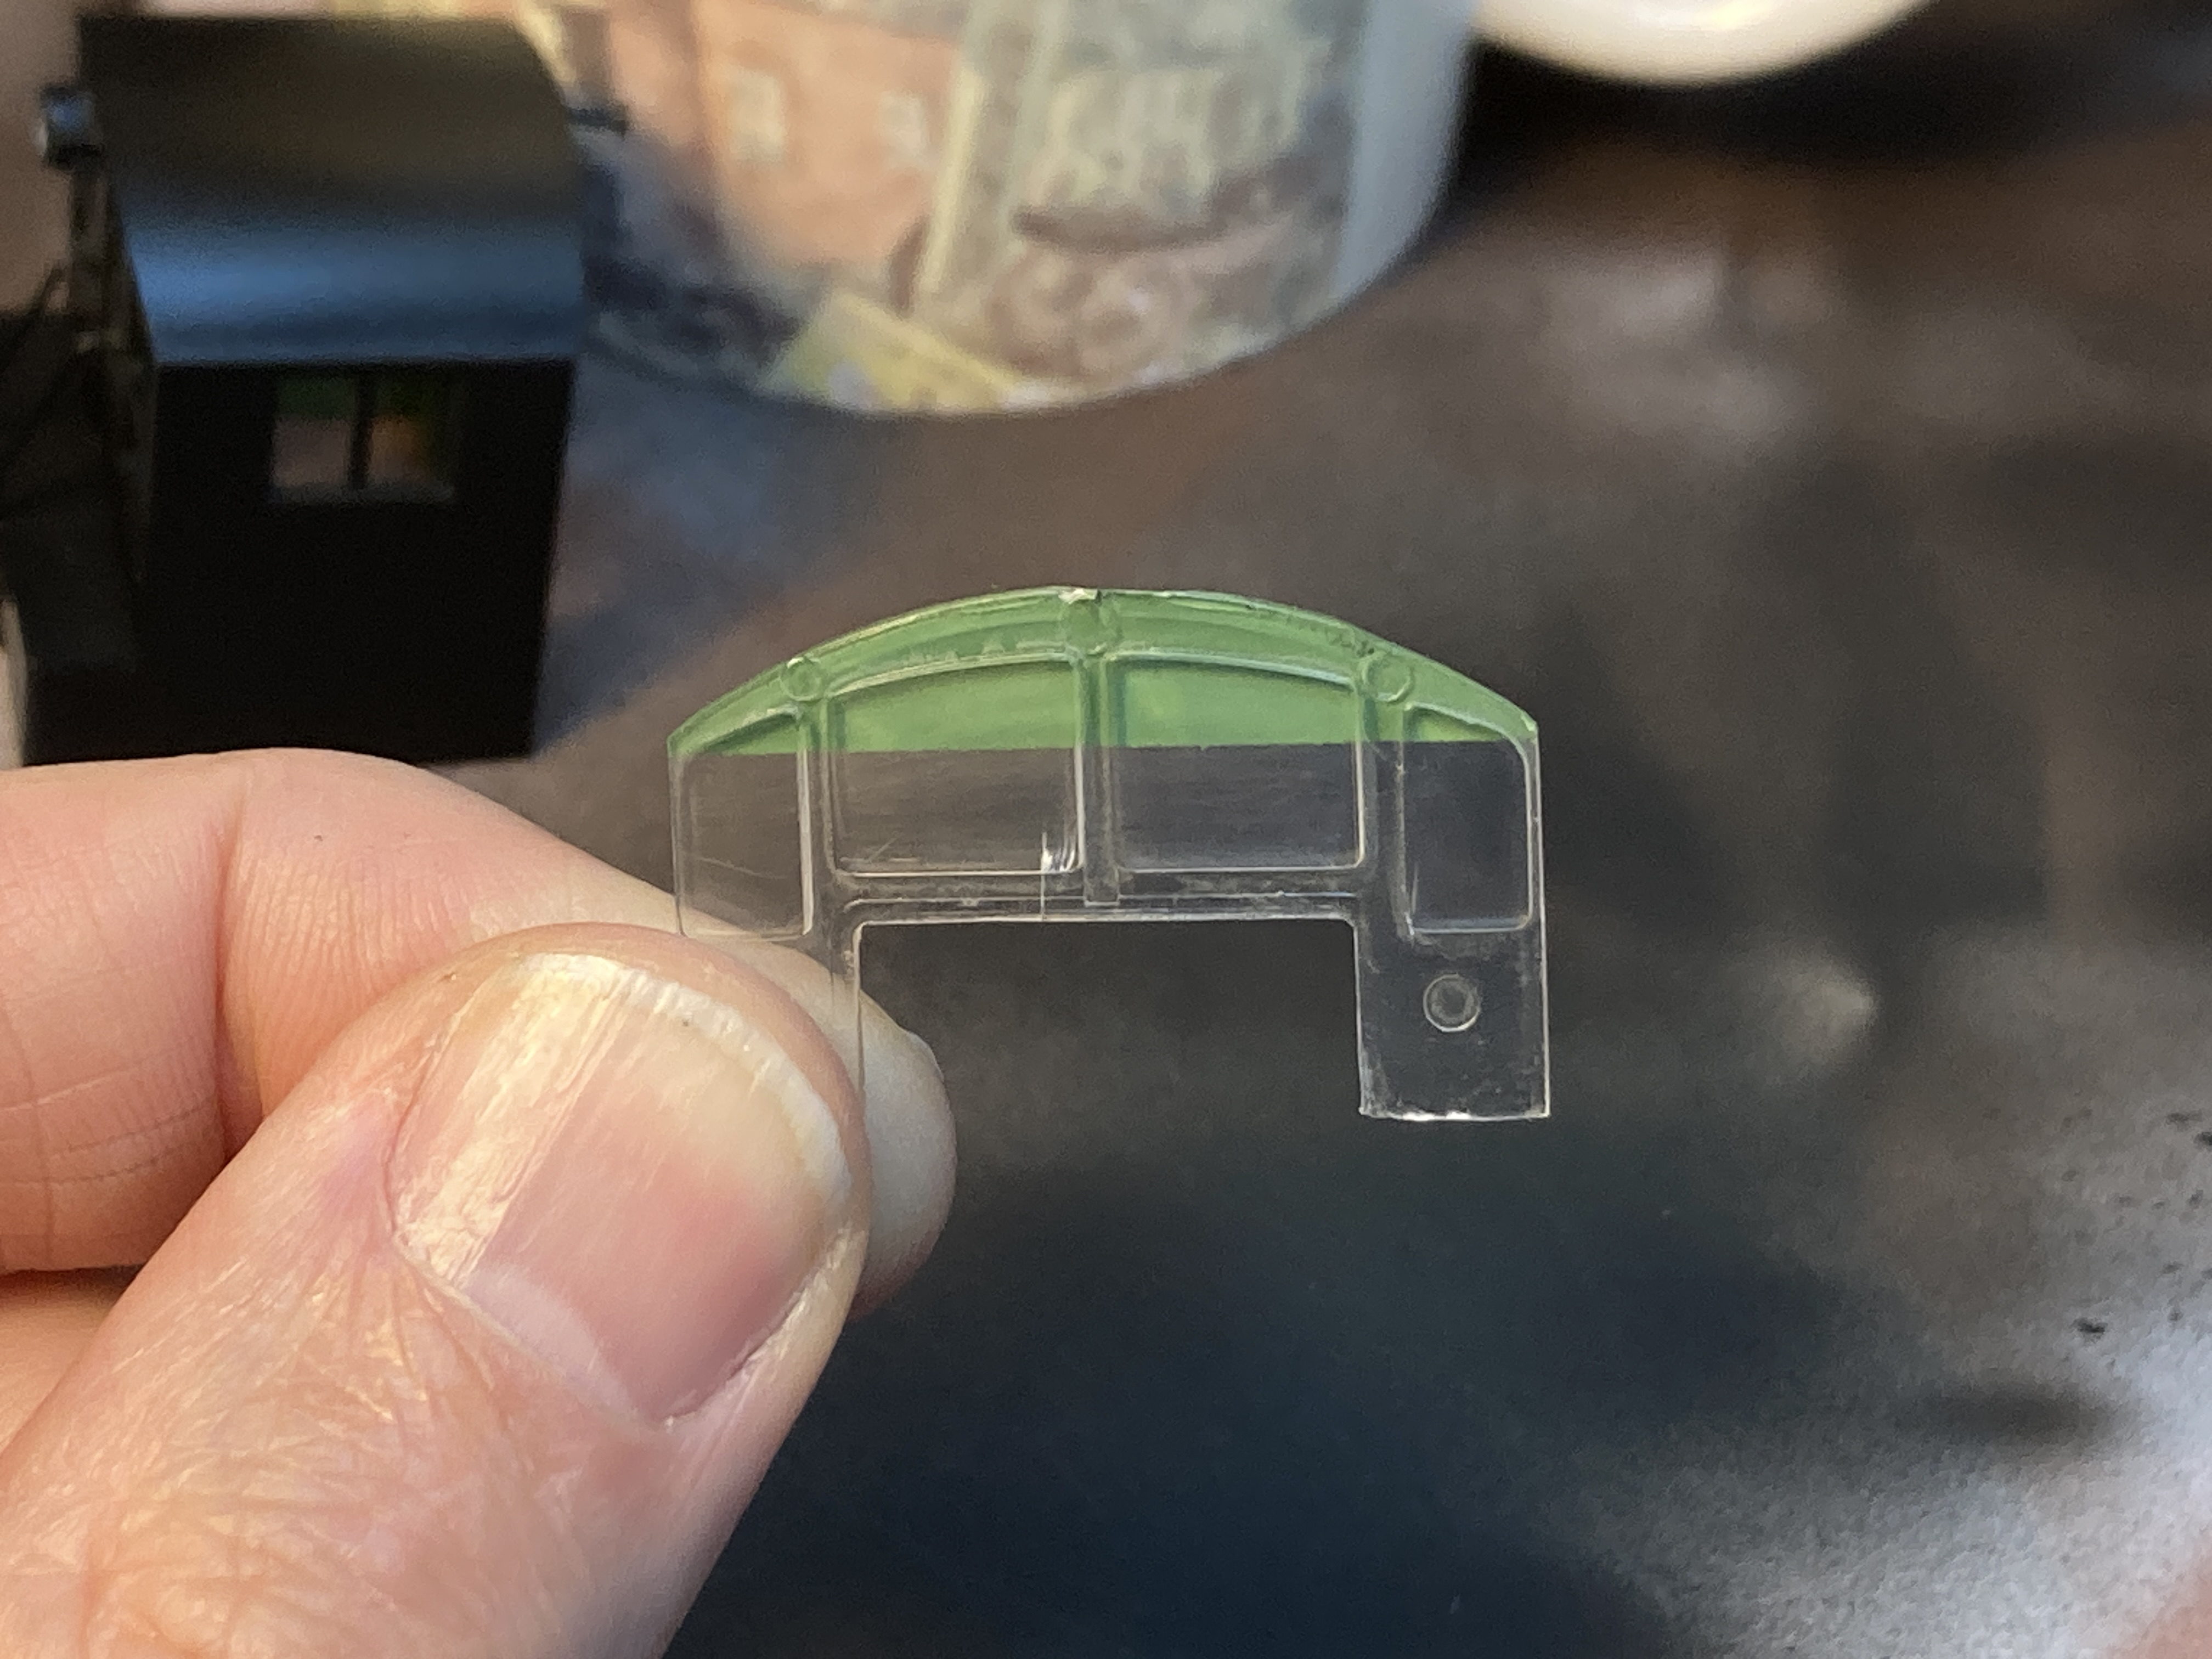
As an all-black loco, the addition of a little color is most welcome. And as it turns out, the Boston & Maine started painting "sun visors" on the cab windows to relieve the crews of the glare that resulted in the beautiful (but blinding) large "greenhouse" windows. Based on research over at the Model Railroader's Guide to B&M/MEC Diesel paint schemes Facebook group, the paint was one of two different greens - depending on the era. Apple Barrel Marsh Green was about as close as I could come with what I had on-hand. I just needed to add some materials to make it "airbrushable" (using this as a guide).


Consulting the prototype photos, it looks like the paint line occurs just as the windows start to curve down. Above is the rear window all masked. . .


And finished


And the front window finished. Just remember to spray the inside of the windows...

With the painting done, it's time focus on lettering and for that I have to thank David Hutchinson for the fantastic prototype photos - including one in color of the scheme I want to do!

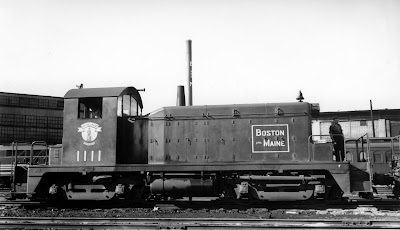
I couldn't find any engineer's side pics of the 1109 in the right scheme, so this one has to do...


After thinking I had the decals ready to go for, literally, months, once I started "dry fitting" them to the hood, I discovered that the square heralds that come with the Accucals set are too small. UGH! 


Thankfully, Dave came through with the right size heralds from the Microscale set, which also included better Minuteman heralds and end numbering.
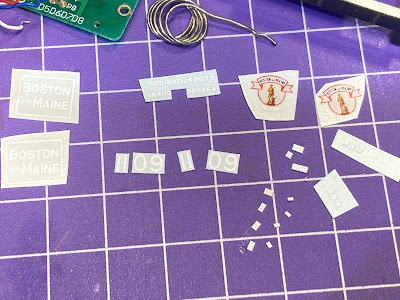

Unfortunately, there were no numbers small enough to fit in headlight numberboards. But I found some freight car data and used some teeny tiny numbers from that set. In the pic above, I've cut out all the necessary decals - including the number board numbers, which had to be cobbled together. Yikes! Those four tiny bits are the four #9s I need - and they're only 1/32" wide(!)


It too a steady hand hand and good tweezers, but thankfully I was able to shoehorn the teeny tiny bits where they're supposed to go. I used Microset and Microsol per the instructions to fix all the decals in place.


The cab end lettering is centered over horizontal top of the windows.


And I centered the hood end lettering over the two side panels of the radiator screen.


Paying close attention to the prototype photos, I centered the Minuteman herald and numbers on the side of the cab wall.

I applied multiple coats of Microsol to the decals and they looked fantastic, settling down very nicely with no silvering.  My next step is typically to spray on a coat of Dullcote to seal the decals and provide a base coat for weathering. 

But I'd been hearing about adding a gloss coat instead to provide a "ramp" between the body shell and the top of the decals to make the decal edges totally disappear. Being a clear acrylic, fairly viscous, and self-leveling, I decided to try an overspray of Future.

And here's where the second fail occurred . . .


For some reason, the decals seemed impervious to the Future - it glossed everything BUT the decals. That's not silvering you're seeing in the pic above, but the difference in sheen when I bounce the light off of it.


While waiting to figure out what to do about that, I remembered I still needed to add the four door handles I'd left off so I could add the hood decals. But they had to be painted first. Have you ever tried to paint something this small?? Sticking them to some masking tape helps hold them in place.  Of course, I needed 4 - had 5 - and lost one - twice!! Fortunately, I also found it twice. Whew! Next time, I'll paint them on the sprue.


And at some point, I noticed one of the NBW castings I'd added next the sandbox grabs had fallen off.


Thankfully, I had some spares - so I used a black Sharpie to "paint" it at the bench, then glued it on with CA. Yeah - that's the casting at the intersection of lines - just a smidge larger than a poppyseed(!)


The only part of the body that I hadn't overcoated with Future was the engineer's side of the long hood. So I applied a coat of Tamiya Gloss Clear to that side and the result was perfect. So lesson learned - I'm not going to apply Future as an overcoat for decals, at least not over a decal I've affixed with Microset/Microsol (maybe they just can't get along).

The Tamiya gloss may not be as viscous and self-leveling as Future - and, therefore, less effective in causing decal edges to disappear (thoughts, anyone?) - but at least it helps, and without the bad side effects (no pun intended).

After the gloss coat dried, I applied a coat of Tamiya Semi-Gloss Clear over the entire body shell to provide a base for weathering which is next.


Again, not absolutely perfect, but turned out fine - much better than I'd feared.


Oh - and I Dullcoted the truck sideframes and the chassis as well, in order to provide some "tooth" for heavier weathering.


So this is where everything sits at the moment - "done" and ready for reassembly. And typically, that's what I'd do - put it all back together and in service, figuring I'd get around to weathering it "someday."

But among the many cool things about this project, the coolest is that it's really been a test bed for trying some new techniques and - most importantly - to just "go for it" without worrying that it's my flagship locomotive. It's "only" leased power, after all.

So - with a little guidance from my friend Ralph - I'm actually going to weather the 1109 before putting it on the layout. Then, it'll really be "done done" and I can enjoy it without the guilt of "man - I really gotta get around to weathering that engine..."

Here's hoping you can follow along to see how that goes. There may be some more fails, but if you/I learn something from them (especially how to fix them!), then they'll be worth it.

Sunday, December 11, 2022

Taking the Pain out of Painting

Painting is one of my least favorite things on the planet. Well, to be a little more specific - this kind of painting . . .


Painting about anything in the house is a pain, start to finish. My OCD goes into overdrive and I never feel like I do a great job. Yeah, all those blue lines? Painter's tape, to mask off all the trim. Painful.

For the longest time, the pain of painting extended to my hobby - to the extent that I let my first airbrush languish in its box for over 25 years, way too fearful of messing up to actually use it (click here for that story). Forget about ever actually enjoying it.

In fact, the only painting I've come to actually enjoy has been on the layout. Blue sky for the backdrop and dark green for the fascia is super easy with a roller and a huge boost of progress for the time spent. And no taping!


So early this morning, now that I'm finally done with filling in the screw holes and seams, I decided to get out the roller and prime the fascia in Essex. But later this afternoon, the fun really began . . .


I actually used my new(ish) airbrush! It's a lot more sophisticated than "The Choice of the 80s" and I figured using it to seal my foam-built Dickinson coal dump with a clear coat would be a good way to practice.

Fortunately, I also had some "training wheels" along for the ride in the form of some airbrushing notes derived from a number email conversations - not to mention virtual visits - with my friend Ralph Renzetti. In one handy place, I have crib sheets for thinning ratios, air pressures and cleanup tips for all different kinds of paint.


But after today's airbrushing session, I don't think I'm going to need that much info because after seeing how easy - and actually fun - Tamiya paint is to use, I may just decide to use it exclusively.


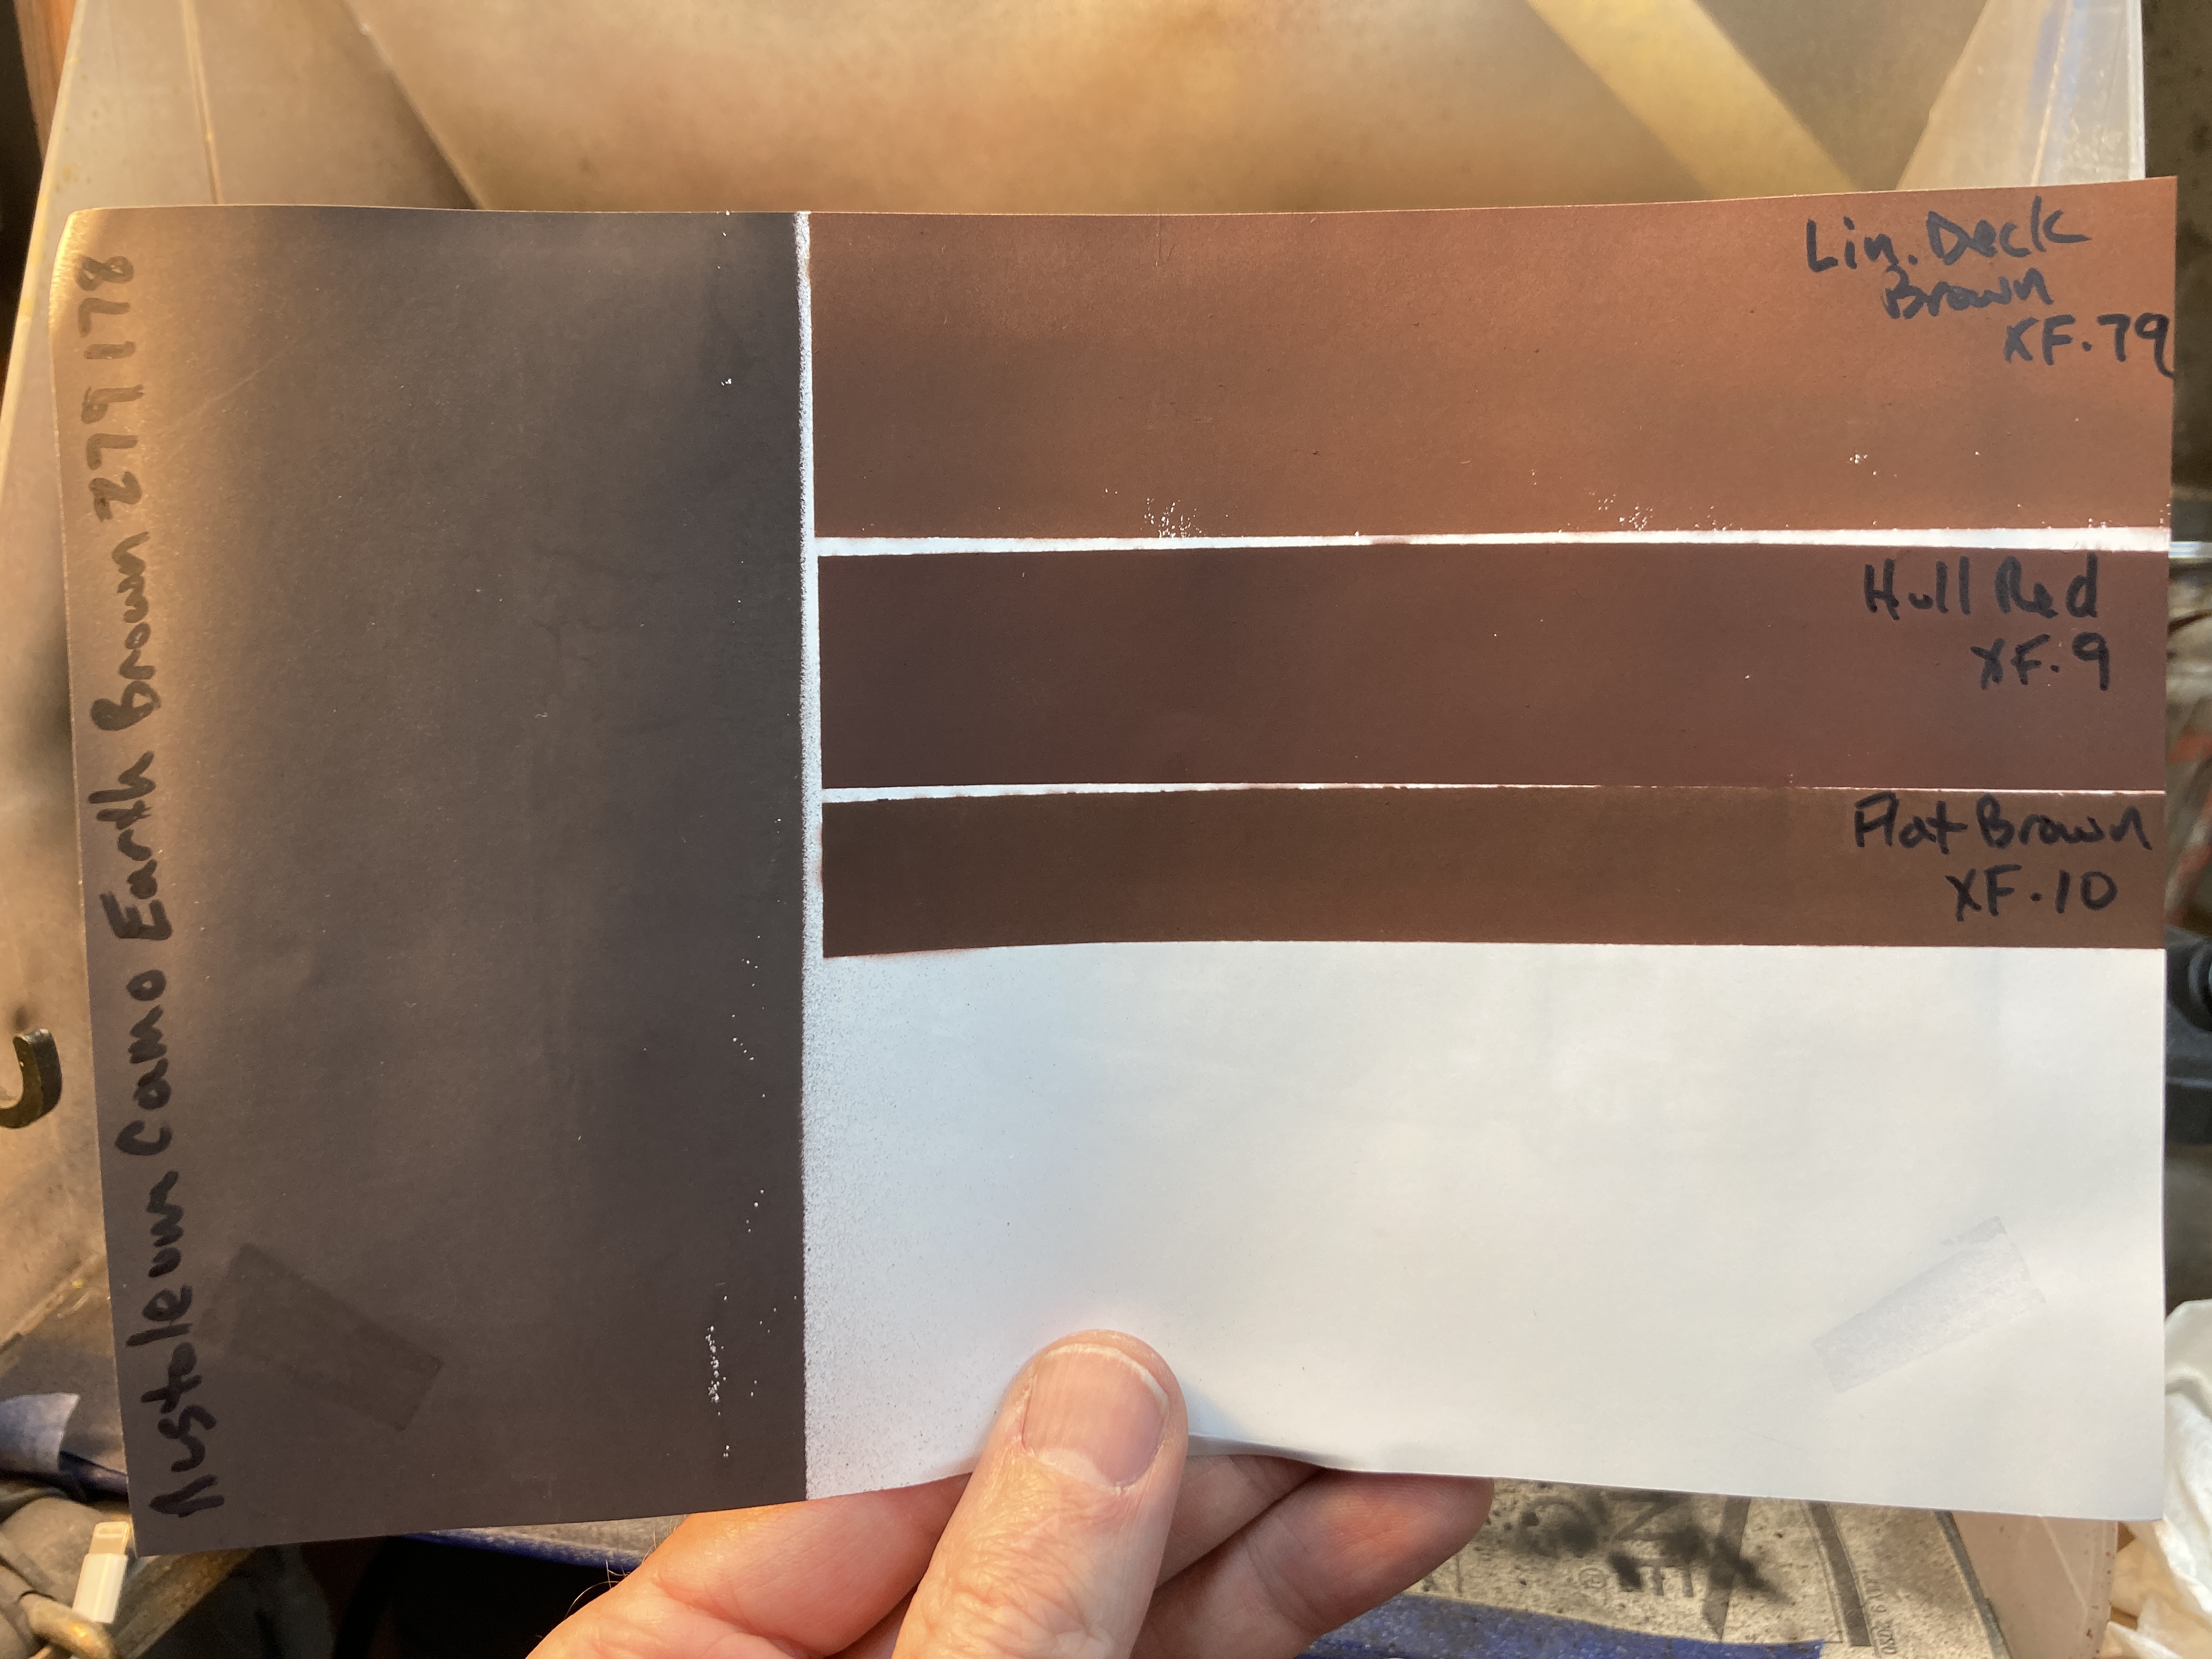
After sealing the coal dump, I figured I'd see if any of the Tamiya paint I had on-hand would match my go-to track paint - Rustoleum Earth Brown. I've been looking for a non (or at least less) toxic way to paint the track indoors during the winter and Ralph suggested I try some Tamiya colors. I'd used them to paint the coal dump track a few weeks back and it came out well, so painting a sample color swatch was a great way to practice double-action triggering.


And my new airbrush of choice? The Badger Patriot 105, another Ralph suggestion. I actually got it during a great sale last February and had fallen into my old rut of being afraid to actually use it.

But I have to say, much to my pleasant surprise, shooting Tamiya paint through it is just about as easy as using a rattle can. Sure, there's a little more involved than just taking off a cap and firing away, but you more than make up for that in additional control. Coupled with an in-line moisture trap (shown here - and another Ralph suggestion and sale acquisition), I daresay airbrushing is becoming almost easy.

It's certainly become a lot more fun. And if you have fun doing something, you'll tend to do it more often. And while practice may not result in perfection, you can't help but get better over time.

That's what I'm counting on - and I'm already looking forward to the next time I can fire up the 'brush and paint something!

<><><><><><><><><><><>
In case you're interested, here's my nascent go-to airbrushing combo:
  • Airbrush: Badger Patriot 105 dual-action, top feed, internal mix
  • Paint: Tamiya, thinned 1:1 with 91% isopropyl alcohol (IPA)
  • Air Pressure: 15-20 psi
  • Cleanup: IPA & Windex


Thursday, December 8, 2022

Thankful Thursday

A couple of weeks ago, I posted what - for this blog anyway - was an unordinary post, but something that's often on my mind when I'm engaged in this great hobby. Without repeating it all here, suffice it to say that our creative endeavors can provide much needed time for R&R&R (Rest/Relaxation/Reflection) and that time will often remind you how blessed you are not only to have that time available to you, but to have so many others that are so willing to spend some of their precious time helping you along the way. Given the feedback I've received on that post, it sounds like many of you feel the same way.

So while this isn't my first edition of Thankful Thursday (click here for that), they've been far too infrequent and - like Wordless Wednesday, which I hardly ever miss posting - I'm going to try to make this a weekly thing. There's certainly enough to be thankful for - I only need to stop and think for a moment...

I've posted here and here about the folks that have contributed so much to the progress of the Valley Line - I literally couldn't have gotten this far without them. But an update is long overdue. So, at the risk of leaving somebody out, but in the spirit of the season, here's a quick list of elves that have helped out in recent months:

(apologies that I don't have pictures of everyone - or "you're welcome" if you don't like having your pic posted)

  • B&M SW1 Project
    • Philip Taylor for contributing the model which has provided many hours of enjoyment, before it even enters "revenue service"
    • Dave Owens & Tom Johnson for contributing decals
    • David Hutchinson for contributing detail parts and additional decals (not to mention MANY prototype photos and technical information)
    • Hunter Hughson and Seth Lakin for Mainline Modeler articles and additional tech info
    • Rick Abramson, and John Kasey for contributing additional detail parts
    • Ralph Renzetti for help with airbrushing & decaling advice (and TIA for help with weathering!)
  • Scenery help

Jim Dufour

Bill Schneider (as well as for the Cromwell Diner and other structures)
  • Trackwork help
Jim Lincoln (and special thanks to Randy Hammill for the scale track and office building that Jim's installing here)
  • DCC and Technical Help
Kaylee Zheng

Nick Santos
Chris has created a bunch of cool NHRR-specific details, whistle posts and these cool crossing signs.
  • Podcasts specifically, and Lionel Strang & his A Modeler's Life podcast specifically. Lionel has created a rich & extensive community of folks from all walks of life with a wide variety of skills that are all eager to help each other with their projects and generous with their time - usually offered with a healthy side of good-humored ribbing. Anyone who follows the Valley Local Facebook Group knows I owe a lot to the folks on the AML Wednesday Night chat, not only for their insight but their company as I labor at the workbench.

While I've thanked my regular crew elsewhere, apologies in advance if I've forgotten somebody on this list even though I tried to limit it to just this past year. Like most of you, there are countless others we can think of that have offered a bit of advice at a critical moment, some helpful feedback on a process, or have in some other relatively small way helped us make some additional progress on our layouts. I know you'll join me in offering our thanks to all those that take the time to give back to the hobby and help us all along.

It's sometimes easy to take for granted all of the generous people this hobby introduces to us, so let's take some time this week to thank those who have contributed something to our efforts, who have spent some of their valuable time to help, influence, inspire, and inform us.

Finally, thank YOU for continuing to follow the blog, for your comments and feedback, and especially for your patience when I'm not posting as often as I'd like. While I do the blog primarily for my own future reference, having the benefit of your experience and encouragement makes it even more worthwhile.

Here's hoping you and yours are having wonderful holiday season.

Monday, December 5, 2022

Continued Progress on the 1109 & Coal Dump (and even the 0967! Conversion Part 1)

As I hinted in last week's Wordless Wednesday post, I've been making progress on many different fronts lately and I'm in that rare state of "flow" where everywhere I look I see opportunities for progress rather than feeling overwhelmed. And it's a wonderful - although often fleeting - place to be: where any obstacle you meet you either figure out a way around it, or you pivot to something else. This way, you usually get to do whatever you happen to be in the mood to do at a given time, and if you're enjoying what you're doing, you're likely to do it more.

And you make more progress.

Here's what I've been up to since my last update:

I starting converting a NOS P2k S-1 into NHRR DEY-3 #0967. First step is to make it "truly" DCC ready by isolating the motor. This involved removing the motor and soldering a new orange wire to the lower motor brush tab/washer (which had previously gotten its power through the frame). I also had to remove the old orange wire between the PCB and the top of the frame.

I plan to install a Loksound v5 decoder and Power Pack. In the photo above, you can see where I think I'm going to put the PP.

In addition to the decoder and capacitor, I'm also installing a custom-fit Scale Sound Systems speaker. The install requires removal of the top weight, but that's only a loss of 1.5oz - a small price to pay for the resulting free space. I plan to do some more-detailed posts on this conversion a bit later.

My bench time tends to be during weeknights so I can reserve larger weekend blocks of time for the basement. Segueing from DCC installation, I got back down to Essex a little over the weekend to make some more progress on the Dickinson coal dump. Part of that process required removal of the fascia so that I could trim it to match the terrain and open up the area where the dump will be.

As for the dump itself, I painted a base coat of my "concrete" color on the walls and bulkheads/piers and "pavement" on the ground/floor. The black will be covered in dirt, cinders, and - of course - coal. I'm now trying to figure out how best to weather the concrete. I plan to do all that before installing it on the layout and gluing the track to it.

Pivoting from painting back to the bench, I got some critical decals from David Hutchinson to get me over the finish line with B&M SW1 #1109. Here, I've cut out all the necessary decals - including numbers for the headlight number boards, which I had to cobble together. Those four tiny bits are the four #9s I need - and they're only 1/32" wide(!)

I then spent the rest of the evening with the stove going, listening to 1940s Christmas music, and doing all the decaling on one side of the loco. Notice the reference photos, also courtesy Mr. Hutchinson.

As you may have guessed, as is often the case, when one is busy making progress, posting to a blog takes a back seat. But as much as I enjoy sharing my progress with you here, there's something I enjoy a bit more - and that is making even more progress to share :^)

Here's hoping you're enjoying this holiday season and that you're able to make some progress on your projects too!

Rosie says: "Get back to your bench!"


Thursday, December 1, 2022

Hindsight 20/20 14.0 - Saturday, December 10

After a little hiatus - and, literally, back by popular demand - the virtual clinic juggernaut that is Hindsight 20/20 will be next held Saturday December 10th, from 11:30 - 6:00.

As you can see from the schedule, and typical of a Hindsight agenda, there's a real treasure trove of clinic offerings - four on each side of a 45 minute break, for a total of 8 great clinics - covering a wide range of modeling subjects. Unless somebody agrees to swap with me, right after the break at 3:15p yours truly will be covering an attempt to adapt prototype operations to a prototype-based layout.

Best of all, all of this wonderfulness is free - you just need to sign up here.  Of course, though there's no charge, it isn't truly "free." It definitely costs the organizers actual coin, in addition to their time. So there's a tip jar if you feel so inclined and want to see these events continue.

So make plans now to join us for a fun day where you don't have to get in your car or a plane, travel long distances, and get a hotel room to see a great slate of model railroad clinics. Heck, you don't even have to leave your living room couch. Bunny slippers optional - just be sure to have a nice beverage on-hand. I recommend hot cocoa in keeping with the season...

 Hope to see you on the 10th!