
After musing about the Muse in my last post, I doubled-down on finishing the Somerset module. As I mentioned before, the most glaring "incomplete" was the unballasted trackwork and I also needed to install a grade crossing to get folks from the "town" to the station. While all that was drying, I revisited my B&O P-11 flatcar and finished up the painting - which included airbrushing cheap WalMart craft paints(!). I also discovered a (partial) solution to my old vs. new scenery problem, finished up the ballasting, and tackled static grass for the first time.
Whew! It was a fun-filled weekend of breaking through some mental roadblocks in the hobby. So, pictures being worth a thousand words - and not wanting to bore you or type my fingers off - here are some photos, with captions as needed:

After considering my options for the old/new scenery problem, I realized I hadn't vacuumed/cleaned the layout in a long time forever. I figured 8 yrs worth of dust and such would likely make a difference - and it did. Check out the roof above to see the difference vacuuming makes (that's a lot of dust!!)
While it didn't totally cure the dark vs. light scenery problem described in my last post, it certainly made the difference a bit less stark.

Next, I tackled the grade crossing. You can see where the road just stops at the tracks above - so I took out some of my pre-stained stripwood (thanks Pieter!) and cut some to road-width length.

I then pieced them in, attaching them to the ties with full-strength white glue. It's not perfect, but it's better than nothing and it's a fair distance away from view.

Finishing the ballasting was next on the list. The photo above shows what I had on-hand and have been using: Woodland Scenics "Medium" brown ballast, and "Fine" cinders. I took the pic above primarily to see how the two sizes would look in photos. I'm considering using all "Fine" size in the future, since it looks like the "Medium" may be too large. What do you think?

But "bird in hand" as they say - so I just continued to use these grades on the module (which - as I've mentioned before - acts as a sort of practice/testing ground for techniques/materials before using them on the "real" layout). The photo above shows me starting in the tunnel at the right end of the Somerset module - it's darker cuz I just finished wetting it down with 70% alcohol and gluing it down with 1:1 white glue - both applied with pipettes.

I stopped my ballast progress at the grade crossing since I needed to fill-in the area between the main track and siding - otherwise, I'd use up a LOT of material unnecessarily. For fill, I troweled in some ground goop, being careful to come up only to level with the bottom of the siding ties and the top of the main track roadbed.


When I got to the grade crossing, I troweled in an extra thick layer of goop as "asphalt", working it into the ends of of the ties and bringing it up level with the tops of the rails (and avoiding the switch throwbar!). The plan here was (had been) to paint the goop to match the rest of the road.

While all that was drying, I got myself to the paint room, pulled up "Miracle on 34th Street" on the iPad (1947 radio show version - with the original stars(!), so I wouldn't be visually distracted), and got the flatcar parts together to paint.

I wanted to try airbrushing cheap craft paint, so shot the crates first with a khaki color from Apple Barrel, thinned way-too-much with the "high performance acrylic thinner" recommended by Model Railroad Hobbyist's "Acrylic Painting Guide." How thin is "way-too-much"? Well, for some now-forgotten reason, I started by thinning 3:1 - that's thinner-to-paint. And continued to add more thinner until the paint actually sprayed. Then I realized that I wasn't getting the coverage I wanted, so I made the rookie mistake of laying it on too heavy. You guessed it - with all that thinner, paint pooled at the bottom of the crates. I wicked up the paint with the corner of a paper towel and plan to touch it up later.

I had a much better experience with the flatcar deck. I've forgotten the thinning ratio I used, but it was much less. I still used an Apple Barrel craft paint (this time a gray), but I exercised more patience in laying the paint down in lighter passes, holding the airbrush further away. I'll be heavily weathering the deck anyway, so I wasn't too worried how it came out.
Later that day, I found an old RMC article about airbrushing craft paints which recommended adding airbrush medium and flow aid to the paint, instead of thinner. I'm looking forward to trying that next time (and in a case of coincidence/serendipity, just today I see that the December MRH has a craft paint weathering article that references the RMC article!)

With the actual flatcar carbody, I wasn't going to take any chances. I airbrushed Badger's ModelFLEX "weathered black" which I took straight from the bottle after thoroughly mixing it and straining it through a piece of pantyhose. As you can see above, it worked beautifully. Even though I laid it on a bit heavy on the underframe, the paint settled in well and didn't run. And hey - it's the underframe. The carbody sides/ends look great and the car is finally ready for its final build and decals!
After waiting overnight for everything to dry, I discovered that my ground goop shrunk a bit. As a result, the nice "pavement" between the tracks on my grade crossing was no longer level with the rails. Ugh!

So I decided to go over it again with a layer of vinyl spackle. First, I laid out two forms using stripwood, as you see in the photo above . . .
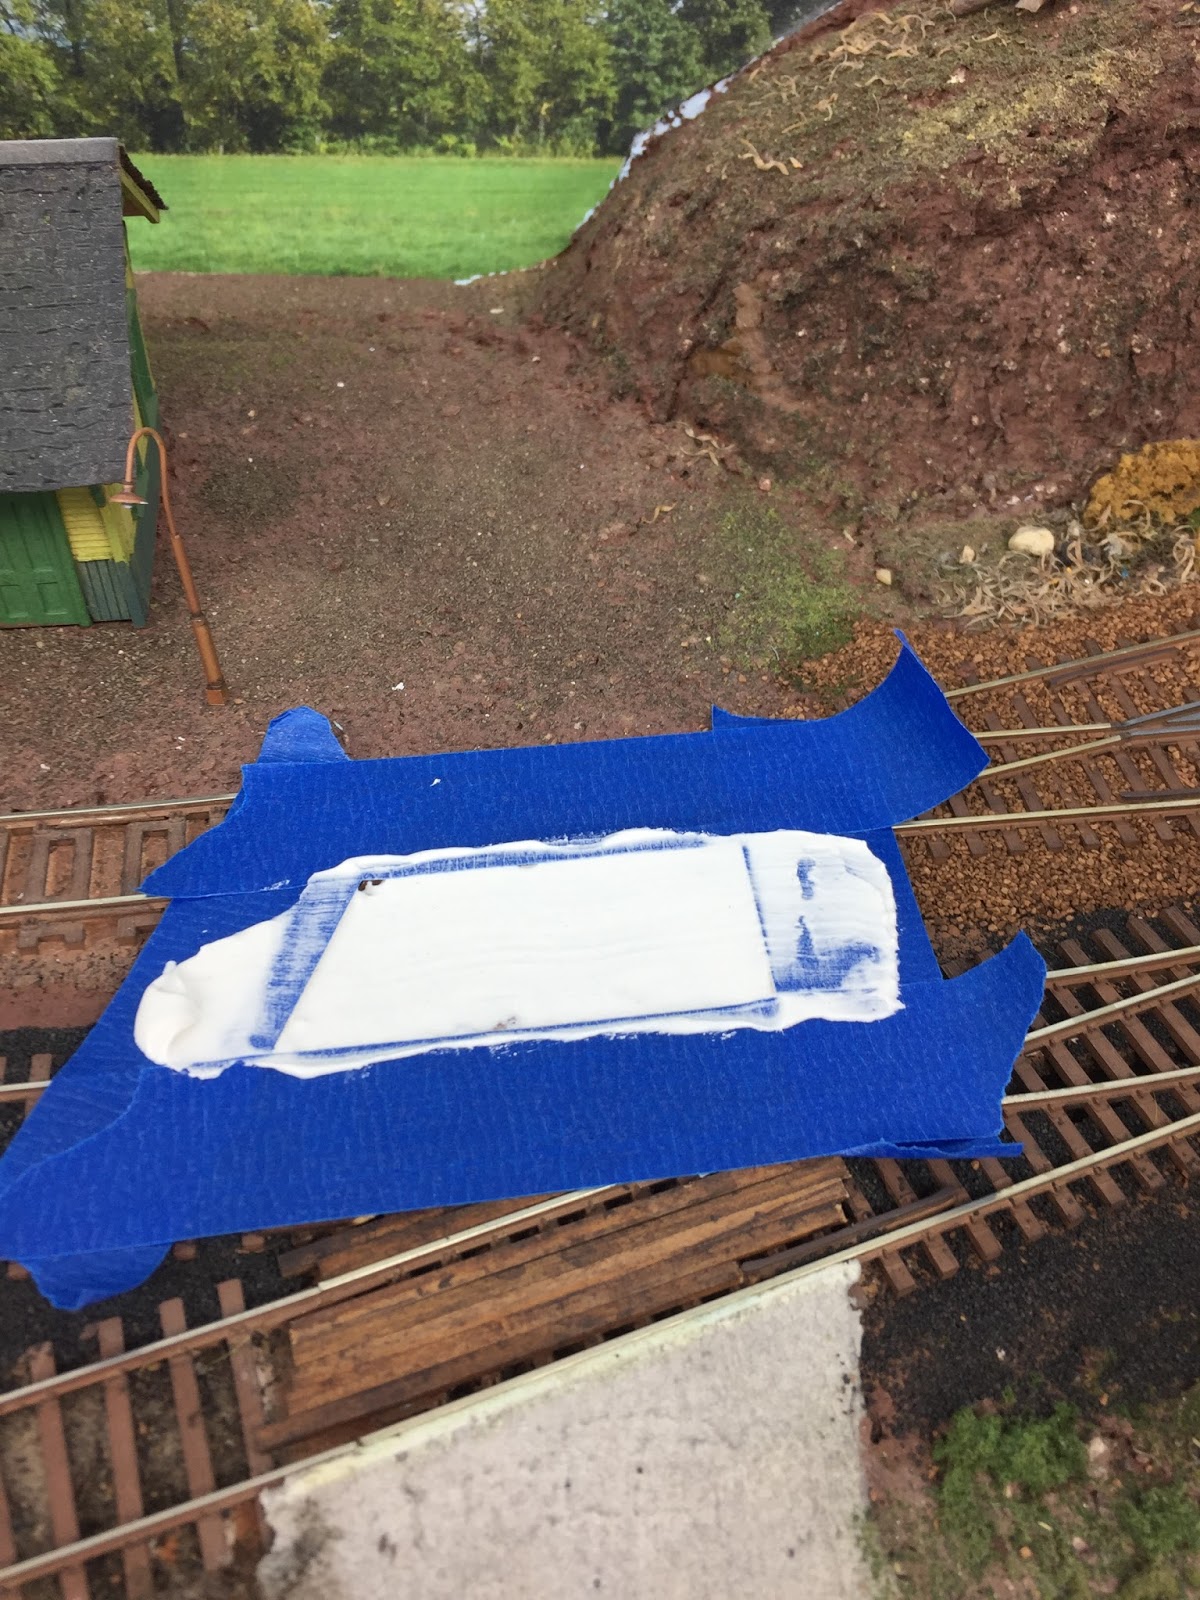
. . .and I masked off the track/rails and surroundings with painters tape. Then it was just a matter of troweling in the spackle and "screeing" it across to make it level with the tape. I removed the tape after the spackle had started to set up, and used a wet finger to tamp down any glaring imperfections.
 |
| Proof that I can, in fact, make a mess. And that staging box sure makes a nice work shelf! |

Most sane folks do static grass as part of their initial scenery - and well before structures are installed. I of course didn't have that choice here, so these photos show what I did to protect everything from the spraying and grassing.

Newspapers over the backdrop, large baggies and plastic film over the structures. Not shown is the paper towel I tore (irregularly) into a strip to cover the track (I weighed it down with some water I sprayed on). You can see the grassing starting in the photo above (back left).

Since things were going so well (surprisingly!), I went ahead and continued along the back of the module until I hit the hill.

I wish I had a good "before" photo to go with this "after" view - but imagine the above with just brown dirt/sand in that area next to the station and you can appreciate the difference made by adding the grass. The Missus mentioned that the static grass color doesn't quite match the backdrop grass color, but she said it's pretty close considering I'm color blind %^)
Before I forget it for next time, here's the process I used:
- Squirt straight (undiluted) white glue over the area (no more than 1-2 square feet)
- Spread evenly with a damp brush
- Spray the area with "wet" water until damp (not soaking wet - you just need enough to ensure the electricity/static charge gets everywhere you want it)
- Apply the static grass with an applicator, tapping it on the side and holding it no more than 1/2" away from the layout surface, if possible (I used the narrow nozzle for around the buildings and next to the backdrop - in a few areas, I still couldn't get the applicator as close to the layout as recommended)
- Go back over the area with the applicator only - still charged/on but not applying grass, holding it just above the fibers to get them to stand up more
- After the glue starts to set (10-15 minutes or so?), go over the grass with a vacuum, holding the nozzle close enough to get the fibers to stand up even more, but not so close to suck them up.
Any other suggestions/tips/guidance?
I've read where you shouldn't try to cover everything with one pass - that you should go back over the grass with hairspray and add more grass on top. I haven't tried that yet and am a little afraid I'll mess things up. What's been your experience?
So there you have it - a Long weekend with a LOT of activity. Apologies if that's resulted in a post that's far too long, but I wanted to be sure and get all this stuff down on "paper"/pixels before I forgot. Hopefully, if nothing else, my experience over the past few days will encourage you to break through some of the barriers that have been holding back your hobby progress.
The next barrier I have in my sights is resin casting - but I think I'll wait for the next large block of time before tackling that. In the meantime, I have a flatcar to finish . . .
No comments:
Post a Comment