Showing posts sorted by relevance for query 71 trains. Sort by date Show all posts

Saturday, July 12, 2014

Trains Through Old Saybrook, 1947

One of the best parts of prototype modeling, IMO, is the fun research projects that it presents.  And while research often highlights how much we have to compromise to fit the prototype into our space (and budget) - e.g. the more you know, the more you know you have to choose what to do without - sometimes research will help you be true to prototype with little, or no, compromise at all.*

Case in point: Modeling Old Saybrook at the south end of the Valley Line - and its dense traffic.  Follow along as I show you how I reduced a daily schedule of 71 trains down to just 4 - much easier to model, and all perfectly prototypical.
Data from Employee Timetable and Arranged Freight Service Book, entered into Excel and sorted by time-of-day.
I finally finished compiling a list of all the trains that would have gone through Old Saybrook on a typical day in 1947 (see above pic - that's just the first page).  As I mentioned in my last post, not counting the two Shoreline Locals I plan to model (PDX-2 New London-Cedar Hill, which serves the lower end of the Valley Line, and PDX-1 Cedar Hill-New London, which exchanges cars with PDX-2 in Old Saybrook), there are a staggering 23 through freight trains and 48 passenger trains during a typical day.

Yikes!

Now, unless I want to model a full 24-hour period (which, considering my main focus - local freights on the Valley Line - operated during the day, is unlikely) I can confine Saybrook traffic to the daylight hours only. 

How do I determine what the "daylight hours" were during October, 1947?  Google, as it often turns out, is your friend. I threw in a quick search and came up with this website which told me just what I needed to know.  During that month, daylight ranged from 5:54a-5:36p at the beginning of the month to 6:24a-4:55p at the end of the month.  So, as you can see from the pic above, I sectioned-off the trains that would have operated during the day.

That little exercise made things a LOT more manageable for freight traffic and a little more manageable for passenger trains.  Turns out, there are only 3 daytime through freights:
  • Boston-Cedar Hill train 9 (BN-9), westbound through Old Saybrook at 7:10 am
  • Boston-Cedar Hill train 3 (BN-3), westbound through Old Saybrook at 8:40 am
  • FGB-2, eastbound through Old Saybrook at 2:30 pm
The remaining 20(!) through freights operated at night.

But there are still 20 daytime passenger trains through Saybrook, from westbound train #401 at 6:40 am to the eastbound Puritan (train #20) at 5:10 pm.  Interestingly, the mid-afternoon features an especially impressive show of famous New Haven Railroad name trains during a short period:
  • 2:43 westbound Senator
  • 3:05 eastbound Yankee Clipper
  • 3:22 westbound Yankee Clipper
  • 4:17 eastbound Colonial
Check out the pic above for a full listing of daytime trains.  That's still a lot of trains.

From a practical standpoint, there's no way I have the space or the equipment (or time or money) to model all of these trains.  The three through freights would be great to have - they had either a DER-1s (DL-109s) or an R-3 4-8-2 on the point, and of course included any freight car you can imagine.  The Yankee Clipper, Senator and Colonial all have very distinct consists so should probably be modeled, but the other passenger trains could be represented more generically - maybe even with just a couple "typical" trains running around and around to simulate the high level of traffic.  

On the other hand, I could just concentrate on representing the trains that would be going by when the two Shoreline Locals are in town exchanging cars - that would still keep things hoppin'!  Assuming the locals met sometime in the early afternoon (based on PDX-2's 12:30 on-call time at New London), I'd only need to model the Pilgrim (1:17p), 42nd Street Express (1:32), and Bostonian (2:07).  Only downside is that I'd only get to see one through freight (FGB-2 at 2:30).

That's just 4 shoreline trains, in addition to the two Shoreline Locals - so much more manageable than trying to model 71 trains.  And I don't have to worry about "night" lighting!

We have to selectively compress so many things on a model railroad, from the Right of Way, to track layout, to structures.  But with the right research - and a little luck - you can model one of the busiest stretches of railroad in the country with just four trains.

Monday, June 26, 2017

A Plug for Fast Clocks - Given the Right Circumstances

(This was a response I posted to a question over at the Model Railroad Hobbyist Forums. Since it addresses some of my operating philosophy - especially with regard to using a fast clock - I figured I'd post it here too for reference. Thoughts & comments welcome, as always!)

I'm still relatively new to operations, but am trying to follow my prototype (New Haven RR in the late 1940s) as closely as possible. I've modeled a one-town segment of double-track mainline (with loops and staging off each end) and two branchlines. The branches are operated by three local freights (one of the branches is split between north and south halves), one of which also operates through the mainline town. There's one other local that works the mainline and does the bulk of the switching in the mainline town.

That's all by way of background. The locals are all operated by TT/TO and the two that are out totally by themselves on the branches are pretty straightforward (don't even really need TT/TO since there's nobody to look out for - except the occasional speeder or work train). However, the mainline local, and the local that operates partially on the main have to consult the timetable to keep out of the way of the mainline trains that come through the one mainline town I model. And that's where I get to this statement...
"Taking a prototype timetable and pasting onto to a fast-clocked layout is an almost certain recipe for problems."
 .... with which, as a general rule, I absolutely agree. However, it's only "almost certain" :) and actually depends. I took the New Haven's prototype TT and pasted a 4:1 fast clock onto it and it works wonderfully - but I suspect this is because of two very important circumstances:
  1. I'm only modeling one mainline town;
  2. The locals on the branchlines can take as much time as they need to do their work.
The town I'm modeling - Old Saybrook, CT - had 71 trains per day during my era. I'm "only" modeling a 12 hour period, so "only" 33 trains. But I'm still running 33 trains through town - according to the times from the actual prototype timetable. Using a 4:1 fast clock, that gives me a 3 hour session. See the schedule below (times on the left are from the actual Sept. 1948 prototype timetable):


Now, the actual amount of time between trains is much less than it was on the prototype (naturally, since I'm using a fast clock), but during the entire 3 hour session, there are only three times where there's only 1 actual minute between trains (7 times there's 2min & 7 times 3min); otherwise, there's 4 to 21 actual minutes between trains. I typically have 2 guys running the mainline trains - one in staging at each end - and they "launch" trains across the Old Saybrook scene according to the prototype TT schedule. It's actually pretty cool to just sit there and watch the parade of trains go by, just like they did in 1948. And it's especially cool that I could use the actual prototype timetable times. (now I just need to figure out and model all the proper consists... but that's for another time).

Now, that's just the mainline trains - and so far, no problem using a fast clock. It does admittedly get a little more complicated when the locals are in town - they have VERY small windows within which to work. However, that's again where following the prototype closely saved my bacon. In Old Saybrook, there were "local" tracks on each side of the double-track main, so - for the most part - the locals can do what they need to do without interfering with the mainline trains. But when they have to cross over the main, they have only a few sufficient time windows within which to do that. 

And here's where I did make one compromise: On the prototype, the locals are both in town at the same time around mid-day. Given that I'm using the fast clock, the windows of actual time available mid-day are pretty short. But since the locals are extras, I could plausibly have them in town during a time when they have better opportunities to get across the main. So - though a compromise - certainly in my mind worthwhile to get everything else I'm getting. 

As for the locals out on the branchlines - admittedly, no fast clock needed there. But it's still cool to have. Others have pointed out that one benefit of the fast clock is that it makes your run seem longer. Well, the fast clock really shines for me on the branchlines since I can only model a handful of towns on each line. Using the fast clock, the locals finish their work and get back to their home terminal about "12 hours" after they start (3 actual hours). That passage of time, to me, makes for a real day's work. 

Now, of course, YMMV - and I've said all along that my situation may be unique since my mainline town is operated in "British" fashion (one scene with staging off each end). And not everybody is willing to limit themselves to modeling one town (heh - I'm glad I have all the towns on the branchlines too!). But I think that circumstance at least would allow you to use the actual times your prototype used in its timetable. I for one find that to be pretty cool - but I'm admittedly a bit biased. :)

Thursday, February 18, 2016

Fun With Research - Old Saybrook Operations, Trains, and Locomotives

If you've read anything on this site so far, you discovered pretty quickly that I'm a sucker for research. In fact, if it wasn't for the fact that I want to recreate in miniature this whole lower Connecticut River Valley region as it was in the late 1940s (at least as much as practicable), I'd probably be content with doing research for its own sake.

But as a prototype modeler, research is a means - albeit a fun means - to an end. The modeling provides the catalyst, and most of the reason, for the research. And, in the case of my latest Saybrook/Staging Saga, the research provided, and continues to provide, the catalyst and reason for all the track changes. What started as an idle curiosity while I was doing some incidental research, quickly blossomed to a full-blown dissection of railroad operations in the Saybrook area. I'd already done some pretty comprehensive research on my main focus - Valley Line freight operations - so segueing to Saybrook operations generally was an inevitable evolution.

Before you can have all this fun though, you have to have some primary research material. Fortunately, I've been collecting this information for a while now . . .

Binders full of NHRR prototype information

If you aspire to model a prototype, here's a list of the basic, primary source material you should have in your library:

  • Railroad rulebooks (includes critical operating rules)
  • Passenger Timetables (includes general, public info on passenger trains)


  • Employee Timetables (includes more detailed information on passenger trains)
  • Freight & Package Schedules (public info on freight trains)


  • Arranged Freight Service books (the employee version, showing detailed info on freight trains and service)
  • Engine Assignment Books (I'm still looking for a New Haven one from September, 1947)
  • Misc
Under that last "category" would be anything else produced by the railroad that provides information on how it operated. In my case, a real treasure is a report the railroad did in April 20, 1948 showing what every locomotive did that particular day.


While this material can be hard to find - and sometimes expensive when you find it - you could do what I've most often done: purchase the original (no matter what the price), photocopy it, and resell the original to recoup funds for the next purchase. I'm a lot more comfortable thumbing through (and sometimes marking up) copies rather than originals. YMMV

So, what's all this have to do with my Saybrook/Staging Saga? Well, I "hit the books" (see end of post for sources used**) and discovered some really cool information about what a typical "day" would look like on my version of Old Saybrook - not only what trains there were, but what actual locomotives were used(!)

Since my "main actors" are the locals, they'll dictate the period of time I'll operate in Old Saybrook (there's no way I'm going to run a full day of 71 trains!). Originally, I thought I could get by with 3 passenger trains and one through freight, in addition to the two Shore Line locals. I could still do that in a pinch, I suppose. But making the track changes in Saybrook and in the two staging yards should allow me to do the following very interesting schedule.

The activity I model in Old Saybrook would start shortly after noon, with an eastbound passenger train:
  • 12:10 - Train #12, the eastbound "Bay State" (NY-Boston), powered by DER-1s (Alco DL-109) #0716 & 0717 towing a parlor car, grill car, and coaches passes through without stopping.
  • 12:14 - PDX-2, the New London to Cedar Hill Shore Line local, powered by DEY-5 (Alco S-2) #0604, arrives from the east.
  • 12:20 - Train #182, the eastbound "William Penn" (Phila-Boston), powered by DER-1 #0728 tows a parlor car, dining car and coaches, and passes through without stopping.
  • 12:26 - Train #11, the westbound "Bay State" (Boston-NY), powered by DER-1s #0739 & 0740 has a parlor car, a dining car (instead of grill car) and coaches, and passes through without stopping.
  • 12:35 - PDX-2, having done its switching, including dropping cars for PDX-1, and received its orders, heads north up the Valley Line to East Haddam.
  • 12:40 - PDX-1, the Cedar Hill to New London Shore Line local, powered by DEY-5 #0612 arrives from the west.
  • 1:10 - PDX-1, having done its switching a leaving cars for PDX-2, departs, continuing eastbound.
  • 1:17 - Train #188, the eastbound "Pilgrim" (Phila-Boston), powered by DER-1 #0743 and hauling a parlor car, dining car, and coaches, arrives, makes a station stop, and continues east.
  • 1:32 - Train #13, the westbound "42nd Street Express" (Boston-NY), powered by DER-1 #0733 and hauling a parlor car, dining car, and coaches, arrives, makes a station stop, and continues west (depending on the timing, both 188 and 13 could be at the station at the same time).
  • 2:07 - Train #14, the eastbound "Bostonian" (NY-Boston), powered by DER-1 #0744 and hauling a parlor, grill, and coaches, passes through without stopping.
  • 2:30 - FGB-2, hauling through freight from the PRR and the car floats at Bay Ridge, NY to Boston, and powered by DER-1s #0722 & 0731, passes through eastbound.
  • 2:43 - Train #177, the westbound "Senator" (Boston-D.C.), powered by DER-1s #0742 & 0735 and hauling parlors, dining cars, and coaches (likely PRR equipment), arrives, makes a station stop, and continues west.
  • 3:05 - Train #22, the eastbound "Yankee Clipper" (NY-Boston), powered by I-5 4-6-4 #1405 and hauling parlor cars, a dining car, a grill car, and coaches (alas, no longer all-parlors) highballs through town.
  • 3:22 - Train #23, the westbound "Yankee Clipper" (Boston-NY), powered by DER-1s #0711 & 0752 and hauling parlor cars, a dining car, a grill car, and coaches highballs through town.
  • 3:40 - PDX-2 arrives back in Old Saybrook from the Valley Line.
  • 4:10 - PDX-2, having finished its switching, departs Saybrook, westbound.
  • 4:17 - Train #174, the eastbound "Colonial" (D.C.-Boston), powered by DER-1s #0755 & 0748 and hauling parlors, a dining car, and coaches (likely PRR equipment), arrives, makes a station stop, and continues east.
Thus, endeth the session.

Whew!

Couple of cool things to note:
  • A very busy 4 hour period on a typical weekday in Old Saybrook. But considering there were 71 trains in a 24hr period, this level of activity isn't too surprising.
  • 10 passenger trains (3 of which make station stops), 1 long through freight, and 2 local freights that swap cars and do local switching.
  • LOTS of DL-109s! To be truly prototypical, I'll need 14 different numbers (heh - maybe each loco could have a different number on each side - then I'd only need 7!). Of course, the engine numbers are all based on one particular day (4/20/1948). Substitutions regularly (and will) occur(red)
  • One steamer: I-5 #1405, on the Yankee Clipper, no less! (could have been pinch-hitting on 4/20/48)
  • Speaking of the Clipper - they pass through Old Saybrook within 17 minutes of each other
  • One long through freight, powered by DL-109s
  • PRR equipment (both the Senator and the Colonial make an appearance)
  • I really need an Engine Assignment Book from before 1948 (preferably Sept. 1946 or 1947). As I noted here, steam was alive and well for a few years after WWII, then quickly declined very fast (all diesel on the Shore Line by spring of 1948).
Hmmm.... I may need even MORE staging than I thought . . .

**Primary sources of NHRR data aggregated:
  • Arranged Freight Train Service Book No. 76, September 29, 1946
  • Arranged Freight Train Service Book No. 79, April 25, 1948
  • Employee Timetable No. 164, September 28, 1947
  • Public Timetable, September 28, 1947
  • "Locomotive Utilization - Tuesday, April 20, 1948"

Sunday, October 2, 2016

Pre-Ops Session

Saybrook Tower Control Board all tested and paperwork ready to go.
Well, I'm all set for another operating session on the CT Valley Lines of the New York, New Haven and Hartford Railroad, circa October, 1948.

Friday night MikeR (of spreadsheet fame) came over to help set up the layout for the next operating session and to further tweak the spreadsheet that generates my car movements. Since it had been originally developed for just one train on a switching layout, he, Randy, and I have been further developing the 'sheet to work with my four independent trains. I really like how it's been evolving and the latest version is already a significant improvement over something that was pretty darn good already. Even with the spreadsheet though, it still took about 3 1/2 hours to do all the paperwork and setup, but future versions of the 'sheet promise to automate the process even more.

But I don't really mind the paperwork - it's like "an ops session before the ops session" where I, as the Agent-Operator (the most realistic job on a model railroad, IMO), do all the work-a-day tasks of keeping the traffic on the railroad running smoothly. So, once the spreadsheet is printed out, and I further massage it with additional info (car numbers, cars to be transferred between trains, off-spots, etc), it's time to complete the switchlists, train orders, and clearance cards for each of the trains.

Remember, you can always click on the image for more a more-detailed view.
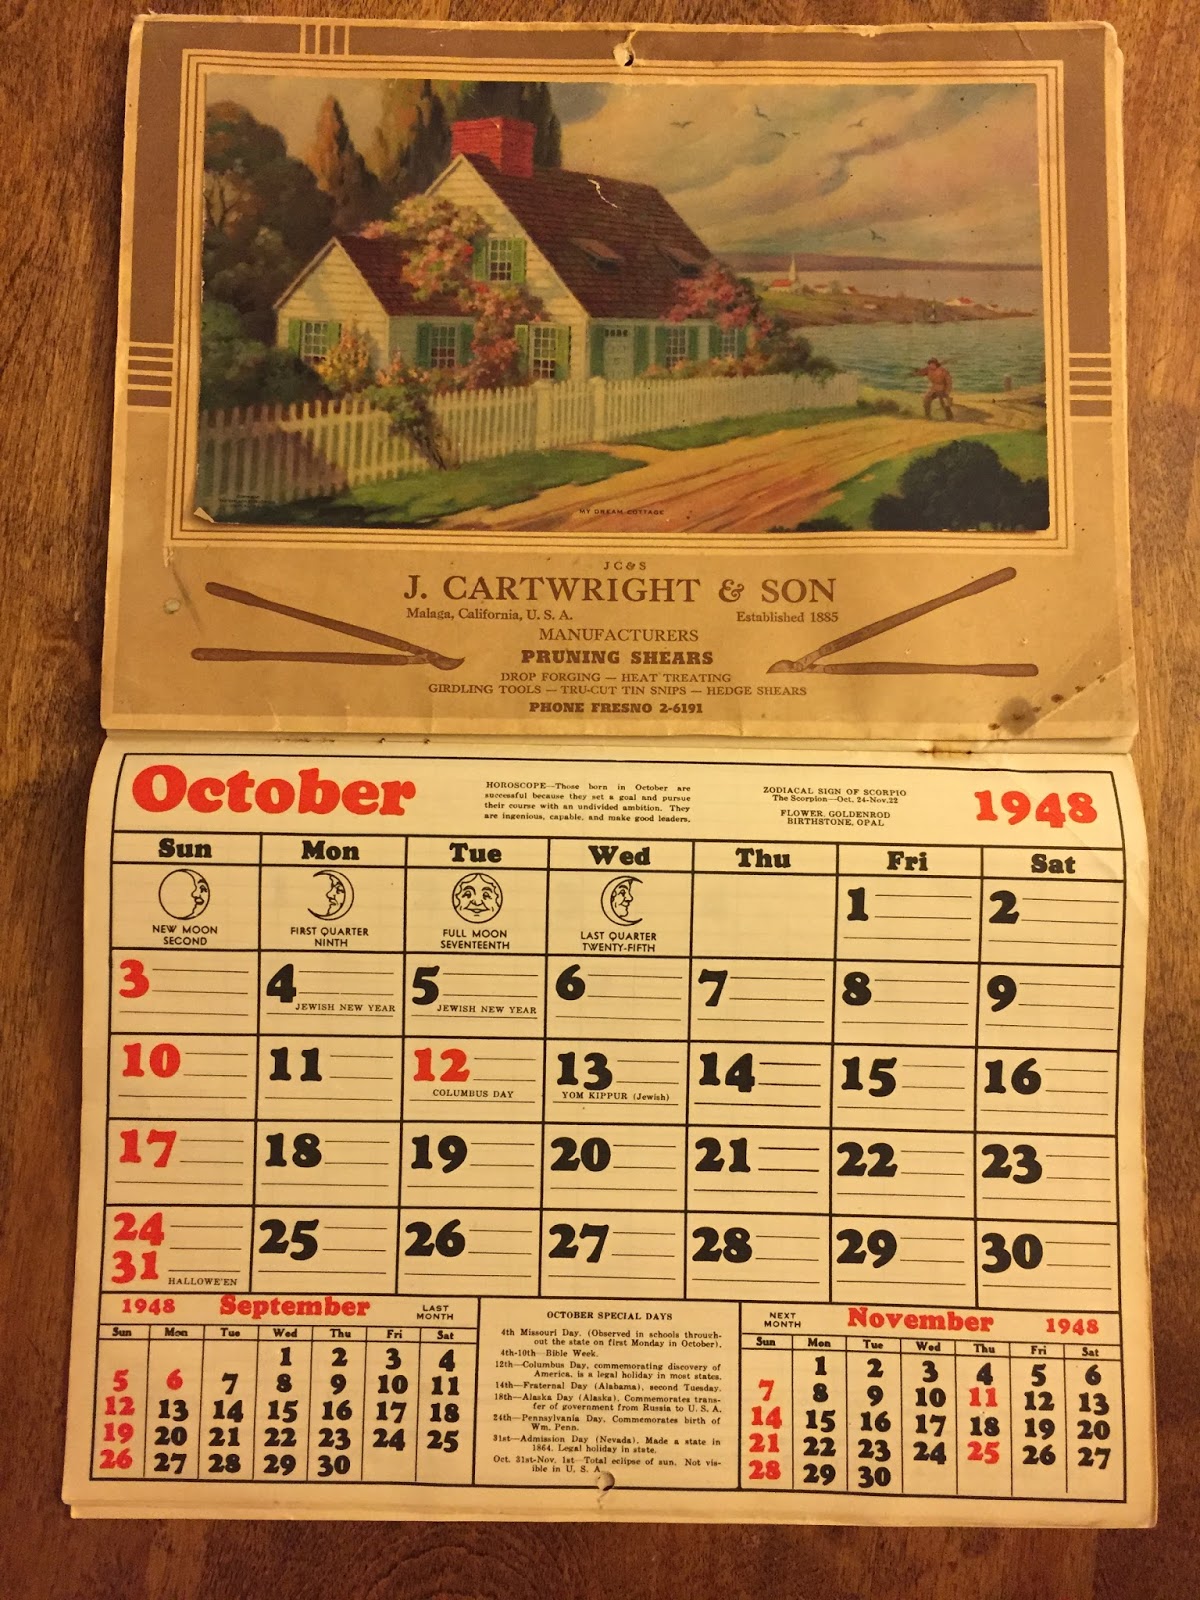
I also have to produce an up-to-date Bulletin Order indicating any changes to the layout, as well as to highlight any special operations notes for the session. And - finally - I have the fun of finding an era-appropriate calendar - in this case, one from October, 1948. I'm still trying to find an original 1948 calendar (I have ones for 1947 and 1949), so in the meantime, I grab what I can off the 'net. Fortunately, this one has Missus' full approval (unlike the calendar for last month's session, which barely made it).

And, new for this session, is some additional paperwork for the A-O to complete . . .


On the left is a listing of all the local freights and the towns they work. I'll use it to record the time each train enters a town (both "prototype" (fast) time as well as actual/real time), and the number of cars the train has at that point in the session. This info will help me balance the work for each of the trains and ensure 1) that my crews are all working about the same amount of time, and 2) that my trains aren't TOO long or unmanageable (the typical "local" freight on my layout is 12-18 cars long!).

The paper on the right has a listing of ALL the trains that go through Old Saybrook during the session. This is just a subset of the 71 trains that go through during a 24hr period. I use this sheet - along with the fast clock - to know when I, as the tower operator, can clear local freights to foul the main. As each train passes, I'll mark through it simulating the operator's duty of "OS-ing" trains - as well as simulating the traffic through Saybrook until I have actual trains running through there on schedule.


Now that all these tasks are done, the Crew Call has gone out, and everything is set up, all I have to do is wait for the guys to arrive and sign the register. Should be another fun day of railroading in the CT Valley.


Thursday, March 30, 2017

Teetering on the Edge of Another Rabbit Hole: Passenger Train Consists

What a fascinating - and frustrating - hobby this is! It offers an amazing amount of depth and breadth - everything from carpentry, electronics, art, scenery, architecture, historical research - but who has the time or money (or either!) to do any more than scratch the surface? The best model railroads balance all these wonderful aspects into a cohesive whole. And almost all model railroads risk teetering off that balance into a rabbit hole . . .

Ever since I decided to expand my erstwhile Valley Line to Old Saybrook, I was quickly swamped by the sheer amount of traffic on the New Haven RR's Shore Line - 71 trains every day! I (thought I) got around this a bit by being clever - reducing this schedule to just 4 mainline trains. But the prospect of capturing - even if only as sand through one's fingers - just a sense of the magnitude of this traffic and - better yet! - having it as such a dramatic contrast to the branchline operations, has proven much too much to resist.

Consequently, I've gone from "just" having the Saybrook Scene and "a few staging tracks at each end" to expanding & cramming as much staging as possible in what little space I have left in order to try and accommodate as many of the trains as I can. And even that's just barely adequate.

Friend Bill Chapin was no help at all a wizard when it came to figuring out that I COULD actually run ALL the trains that ran through Saybrook from 7:38am to 7:42pm. At least in theory.

Talk about an enabler. Here's the staging/choreography he came up with based on all the extensive prototype info I'd gathered:

You really should click on this to enlarge it. It's truly impressive.
All the trains are color-coded and shown on the staging tracks where they originate and terminate. The colored times in the column between New London staging and Cedar Hill staging show what train is going through Old Saybrook at what time. Also indicated are the actual prototype times, train numbers, train names, and whether they stop at the Saybrook station. Following the track numbers downward, you see how long a particular staging track is occupied.

It all "works on paper" - last night I staged it, and a couple victims of us will try to operate it tonight.

Yeah, I'm a loooooong way away from the meandering, once-a-day Valley Local. At least for the moment.

And - believe it or not - this isn't even the squirrel distraction rabbit hole that prompted this post. One of the keys to what BillC did is that the passenger trains are "generic" and the consists are repeated.

For the most part. Unfortunately, I just can't leave well-enough alone. Yes, I confess, I've been delving into the railroad's Consist Books to determine what exactly was on each of the trains I plan to run. Case in point - here's the consist of The Yankee Clipper:

1942 Consist

1950 Consist

(Un?)Fortunately, I only have the consist books from 1942 and 1950. I model Autumn, 1947 (or 1948, or '49 - depending....) so I have plausible deniability regarding the "proper" consist. But look at the difference! In 1942, it was mostly heavyweight equipment, three Parlor Cars, and a few Osgood Bradley streamlined coaches. By 1950, there were only 2 parlors and most of the equipment was stainless steel coaches. And, as it happens, those stainless steel coaches were delivered in 1948.

So, what does the Yankee Clipper that runs through my model of Old Saybrook look like? Well, right now, it has "whatever I can get my hands on."

And, for the sake of my sanity (not to mention, my bank account), that might just have to do for now a while. In the meantime, at least that aspect of our broad-shouldered hobby called "historical research" costs me nothing. Just a lot of very enjoyable time . . .

Sunday, March 22, 2015

Starting Staging

What started in Saybrook has continued and the layout is expanding again. I won't go into all the whys and wherefores of staging - just suffice it to say that it's A Very Good Idea. In order to support the illusion that our trains are actually coming from "Somewhere" and are going to "Somewhere Else" you need to have a staging area. It can be as little as one track, or as large as many multi-track yards, but they're most effective if hidden.

To get even a rough idea of what you may need for staging capacity, start with how many trains you plan to operate during a typical session. On my layout, I'll eventually have 4 locals operating:
  1. The Valley Local (naturally) which operates from "Hartford"  to Middletown and East Haddam;
  2. The Air Line Local which operates from "New Haven" to Middletown;
  3. PDX-1 which operates from "New Haven" to Old Saybrook; and
  4. PDX-2 which operates from "New London" to Old Saybook and up to East Haddam.
In addition to these 4 locals - which are the main actors of the session - there are, um, 71 trains(?!) that go through Old Saybrook during a typical day in 1947 (click here for the details), but fortunately, I only "have" to model four of them (click here for how/why):
  1. The Pilgrim (e/b 1:17p)
  2. The 42nd Street Express (w/b 1:32p)
  3. The Bostonian (e/b 2:07p)
  4. Through freight FGB-2 (e/b 2:30p)
These 4 mainline trains are just supporting characters, going through the Old Saybrook scene from "west" to "east" or vice-versa.

Now, as you can see, there are a few towns that are in quotes - that means they're not actually on the layout. And of course "west" and "east" are in quotes too. So how can I operate prototypically without having the required towns - Hartford, New Haven, New London, and even New York and Boston?

That's the job of staging.

On my layout, "Hartford" staging is relatively easy - it's essentially just one-track within the Middletown yard, hidden behind the Wethersfield backdrop when the session starts. But what of "New London," "New Haven," "New York," and "Boston?" Well, opening up the wall for Old Saybrook was only the beginning of that answer. For the rest of the answer, see the following photos . . .


This is how things looked when I started. I've used this photo before to show the "before" position of the door, but here it's to show how the bike shop area looked with all my racing stuff (I moved things so fast, I forgot to get a better "before" photo of this area).


This is the shop area with all the bike race stuff moved - and you can barely make out a mockup of the return loop in plywood on the floor in the far corner. And note that by this time, the door's been moved 10" to the left and the benchwork for Old Saybrook is in.


A Black & Decker Workmate is an ideal tool for constructing the L-girders: 1x3 web with a 1x2 glued & screwed to the top.


Compare this shot to the one above - L-girder benchwork goes quickly (though help from friend Dick and my dad helped things go even quicker)


And here's the new staging area just about done. Note plastic sheet stapled to the ceiling joists in order to cut down on raining dust and such. It's no use having the rest of the basement nicely finished if all your cars & engines pick up all sorts of dirt while in staging and track it around the layout (heh - "track it around" - get it?). I also move the lighting to be in line with the layout.


And here's what it looks like as of now - just about ready for the plywood subroadbed, cork, and track. I still don't know yet exactly how many staging tracks I need, but this area of the basement is by far the most suited for staging, so I just built out to the maximum footprint I could. Since I plan on having a return/reverse loop here, trains from this one staging area can head "through" Old Saybrook either eastbound or westbound depending on which route they take at the main switch. And, best of all, it's totally hidden once you shut the door - so if you're sitting in Saybrook, the trains you see could plausibly be coming from "points west" (New York, New Haven) or "points east" (New London, Boston).

I still have a few logistical things to work out with regard to the actual trackplan in staging and Old Saybrook (especially the length of hidden mainline that will go behind the Saybrook backdrop), but I'm pretty pleased with how this is working out. My staging capacity here is by no means unlimited, but it will certainly give me enough to convey the impression I'm looking for - especially considering the limited number of trains I need to run.

If you haven't considered staging in your plans, I strongly recommend you reconsider. It's space well spent.

Thursday, January 5, 2017

Shoreline Traffic & Staging Expansion

As I mentioned earlier, at my last ops session it became quite apparent that the Shoreline/mainline trains - which had always been planned as bit players in the grand scheme - are starting to upstage the marquee actors. It's just really cool to see the parade roaring by on the mainline through Saybrook, all in stark contrast to the sleepy branchline locals.

While there were 71 trains through Old Saybrook during a typical day, I certainly don't have to model them all. I never plan to replicate a full 24hr period, and - in fact - could get by with just four mainline trains if I focus only mid-day, when the 2 Shoreline locals were scheduled to be in town. The problem with limiting my ops session to mid-day though is that my session would have the Airline and Valley locals operating for 1-2 real hours before the Shorelines locals would ever start and enter the scene at Saybrook.

So, for now, I'm experimenting with starting all the locals at the same time - 7am. That results in the Shoreline locals getting into Saybrook in the morning rather than midday - not prototypically perfect, but certainly plausible. And if I want to continue running the Shoreline trains until the last local typically leaves Saybrook for the day, I need to be prepared to run all the trains through town from 7am until 7:42pm at the latest. That's 33 trains, not counting the 2 locals(!).

What does that all mean? You guessed it - MORE STAGING!

Now, there's no way I can expand the staging yard at the west end of the Shoreline (New Haven/New York). As you can see here, I'm pretty well hemmed in and have only 4 tracks 8'3" long. So I needed at least to expand where I could - the east end staging yard (New London/Boston).


The pic above shows my main motivation for focusing on this yard (heh - other than the fact that I really had no other choice) - I spaced the track VERY far apart for ease-of-access. But many subsequent ops sessions confirmed that space could be put to better use - more tracks! To orient you, the staging yard is on homasote and those tracks in the background are for storage only and mounted directly to the plywood.

Another view of how spaced-out the original track configuration was. The placards more where I need to put feeders.


The photo above shows the expansion in-progress. I've already moved 3 staging tracks all the way over to the left (aisle side) edge of the homasote (the 4 tracks further to the left are storage only). Moving the staging tracks resulted in a slight, broad S curve, but I - and more importantly, the equipment - can live with that to shoehorn more tracks in. Look at all that real estate opening up!


Before I could move the tracks over, I had to unsolder the feeders. And when I went to reattach the feeders, I had to drill new holes at the new location. Since I'd be threading the ends of the feeders up through the bottom of the layout, I came up with the idea above to keep track of the proper holes.


As you can see, from underneath the layout it's really hard to tell which holes are the right ones. But these little skewers make it obvious.


In the post on my last ops session, I mentioned needing bumping posts at the end of the staging tracks (my engines have pretty high momentum and a few have Keep Alive circuits. 'nuff said). Here you can see clearly why they're necessary - and you can see my stingy cheap thrifty way of solving the problem.

As I've mentioned before, the east end staging yard was originally conceived as only a place where Shoreline local PDX-2 (New London/East Haddam/Cedar Hill) could originate off-stage.

East End Staging, February 2016
And as you can see in the pic above, it was more than adequate for that lone purpose. But once I discovered all the cool Shoreline traffic (not to mention having a beautiful Saybrook scene to run it through), and decided to expand it 11 months ago (see post here), there was no turning back.

I jogged the back (rightmost) staging track (PDX-1 receiving) to the left a little to keep it away from the edge. But looking at it now, if I'd kept it straight I could probably have avoided all those little S curves. No, I'm not going to redo it.
Yeah, that photo above is what the yard looks like as of today. Big difference from last February. By narrowing the track centers to 2", I was able to add three more staging tracks - including a dedicated "PDX-1 receiving track" coming off the main near the east end of Track 6. And BONUS! I had a turnout leftover, so I added yet another track to the storage yard over there on the left (as well as rerailers at the end of two of those tracks to facilitate adding cars to the layout).

Certainly a significant expansion, by any measure. But now truly maxed out. Don't even mention that "vacant" space to the right, near the wall. I want to keep that open for access.


So what's all this time and effort do for me? Well, I'm hoping that it'll make it easier to run those 33 trains I'd like to run. The next step is to see if it actually does.

Tuesday, July 17, 2018

Tuesday Tip: Raising Pilot Couplers on a Walthers/Proto DL-109

Afternoon westbound at Old Saybrook, March 1948 (John M. Wallace photo)
While my main project is replicating The Valley Local, the New Haven's heavy-duty Shoreline mainline figures prominently as well - at least the part that goes through Old Saybrook, CT. And during the era I model (1947-1949), almost all of the 71 trains that pass through Saybrook each day are powered by the New Haven's class DER-1 locomotives - a.k.a. Alco DL-109s.

Fortunately, Proto1000 (now Walthers) produced a very robust HO scale model of the DL-109. It's certainly no Rapido locomotive - heck, it's not even as detailed as a Proto 2000 engine. But those molded-on grabs & railings make them perfect for frequent handling by my Shoreline operators. So I have an even dozen of them to run my Shoreline trains.

But there are a couple of problems: 1/2 of my DLs are at a friend's house being decodered and weathered (along with a beautiful pair of PAs which will hopefully show up soon to squire the Yankee Clipper), one of them is a brass model that will need some reworking, in addition to decodering, and one of them runs very intermittently and I haven't been able to figure out the problem yet to fix it.

So that leaves me with only four units - two back-to-back pairs that basically handle about 80% of the Shoreline trains during my ops sessions (a couple steam engines "taken out of semi-retirement" handle the remainder). Again - and luckily - the prototype helps out here too: During the 1940s, the New Haven practically ran the wheels off their DER-1s sending them back and forth between New York and Boston. I actually have documentation showing pairs taking passenger trains one way in the morning, and the same pairs going back the other way with a freight train that evening.

Unfortunately, all that use means it's just a matter of time before problems start cropping up. And the main problem I'm having with my operable DER-1s is that the pilot couplers droop:

Yup - that's some drop - and they're ALL like this. Note how the entire coupler box is slanted downwards.
Now, it's usually not a problem - but when it is, it's usually on some fancy name train. Paying passengers don't like being unceremoniously left in the (staging) yard while they watch their locomotives pulling away without them.

So what's the Motive Power Department to do (other than get more DER-1s into service)? They Fix the Problem.

I considered a number of different solutions, including shaving down the top of the stock coupler box (wouldn't be enough), bending the coupler up (too risky that you'll break it), getting an offset coupler (would look bad, I'm too impatient to wait for them to come in, and they'd probably end up too high so I'd have to shim to lower them). But I finally decided to bite the bullet and "just" install a new, thinner coupler box.

Here are the steps, in brief:

  • Remove stock coupler box (which has a very thick top)
  • Drill/tap new mounting hole for a new, thinner KD coupler box
  • Insert a small strip of .020" styrene under (on top of) the rear of the new coupler box
  • Tighten screw against the strip styrene.


Start by flipping the engine over and putting it in a nice foam cradle. The coupler mechanism is actually pretty clever - that whole assembly swings from side to side to accommodate tight curves. You can just make out the curved piece of brass strip at the back of the coupler box that acts as a centering spring.

You'll need to remove the body shell eventually, so may as well do it now. It's a simple matter of spreading the sides of the body away from the mounting lugs on the side of the frame. The mechanism slides right out.


If there isn't already some tape holding the motor in, add some as I did in the photo above. You don't want anything falling out when you tip the mechanism over. Ask me how I know....


Weighing almost two pounds(?!) is both the good news and bad news for this engine. Good news for pulling power; bad news that the entire frame - and coupler box mount - is solid metal. Raising the coupler ain't as easy as just shaving away some styrene. Note that I'm resting the mech on "jack stands" of scrap 2x2 wood. I could have used the foam cradle, but I didn't want to risk any wires getting caught on the foam - and for drilling into metal, I wanted a really solid support.


I removed the stock coupler box and curved brass strip, then replaced just the top of the stock box as a drilling template. The coupler mounting lug makes a nice drilling guide (keeping the bit perpendicular to the frame) and places the hole in the proper position.


I drilled & tapped for a 2-56 screw, so I used a #50 drill bit in my Dremel (with flex shaft and foot pedal for control).


It takes some patience, but using the Dremel is SO much better than using a pin vise. Just go slow and keep the bit lubricated (I rub it against some old bar soap) Thankfully, the metal is soft. Just be sure to back out your tap often to clean out the threads.

From that point, it was pretty easy - just assemble a KD coupler box with your coupler and screw it in.

OH! One last - and critical - step: the styrene strip!

Hopefully you noted in the second photo that the original coupler box actually slanted downward. I don't know whether that's due to the frame being cast slightly off or what. But the solution is surprisingly simple.


Just insert a little strip of styrene under the back of the coupler box (between the box and the frame - you can see a sliver of white in the photo above) and then snug the screw down. I used a .020" thick strip, but use whatever you need to get your coupler to the correct height.


May sound like an odd solution, but the proof is in the result. Compare the photo above to the one at the beginning of this post. It's pretty much dead-on. I just need to replace the body shell and this unit can go back into service.

Now I only have 3 (or 8!) more to do . . .

I hope you found this little tip helpful. And if you have any of the P1k DL-109s, I hope you'll let me know if you've had the same issue - and what you did to fix it.

Thursday, August 2, 2018

Throwback Thursday - Ops Session: January, 2018 (a.k.a. October 4, 1948)

Typically, "Throwback Thursdays" tell you about something that happened a long time ago. Well, this one is more in the way of making up for not having posted something in the past - namely, a report on my January, 2018 ops session.

Which is really too bad, because in a lot of ways it was a banner session:
I took advantage of the new year to start a new "week" of sessions. Even though I can run 3 different eras/years (1947/1948/1949 - each with different motive power) I've been focusing my era lately on October, 1948 for the best mix of steam (still have moguls and mikes) and diesel (PAs were delivered in September, 1948 & I can use my RS-1 and RS-2). During this era, the Valley Local operated on a Monday through Saturday schedule, going to East Berlin on M/W/F and to East Haddam T/Th/Sa.

So, I figured I'd start the 2018 operations year on the first Monday in October, 1948 and, according to my handy prototype (and original) calendar, that would be October 4.


Unfortunately, as is too-often the case with ops sessions, I didn't get to take as many photos as I would have liked. Fortunately, other attendees were able to fill in some gaps.


Calm before the storm. Saybrook Junction, 8:36am Monday, October 4, 1948. There's one car on the bulk track, and cars waiting on tracks 5 & 7 for the eastbound and west/northbound Shoreline local freights.

Husband/Wife duo Mike & Mel operating PDX-1, the eastbound Shoreline local. They've worked the Saybrook house & bulk tracks (tracks 10 and 8, respectively) and crossed over the double-track main and are now working tracks 5 & 7. BillS looking on, enjoys a break from operating one of the many eastbound Shoreline passenger trains to New London/Boston.
Overview of Saybrook Jct and PDX-1 working the swap tracks.
James works the Air Line local in Somerset while Mel looks on.

A special treat this session was that Bill-from-next-door, who actually operated the real Saybrook tower before it was closed (and which I didn't even know until we delivered Christmas cookies one year, but that's another story...), agreed to operate my model of Saybrook tower, including the model board. He thought it captured his job pretty accurately, despite the fact that I have easy-to-throw toggles controlling the switches rather than the unwieldy Armstrong levers he had to deal with. His insights and stories, one of which he's probably relating in this photo, were a highlight of the evening.

Mike R, who developed the spreadsheet I use for freight car forwarding, operated PDX-2 - a.k.a. the westbound Shoreline local, a.k.a. The Haddam Local. Here he is switching cars in Essex.

The last of the four local freights, The Valley Local, was ably operated by Kaylee Zheng, who appears here to be working Rocky Hill/Dividend. James is working Middletown on the Air Line local.

While the local freights are out of the way on the branchlines doing their thing, the Shoreline continues its parade of 71 trains per day. Here's a westbound through Saybrook sometime during the late afternoon.
Ah, a late, Indian Summer afternoon in October, 1948, sitting down by the station, watching the parade of trains going by. Could there be anything sweeter?

That feeling is what I'm trying to capture on this layout. Sure, I need to do a LOT more scenery and build/install a lot more structures in order to complete the illusion. But, thanks to Mike, Mel, Mike, Bill, James, Bill, and Kaylee, operating the trains, the layout comes to life for a few hours every month (or so) and, with the use of a little imagination, we can all enjoy a nice trip back in time.