Monday, May 11, 2020

April Showers Bring Layout Progress (4/18-4/19)

Between the stay-at-home orders and the rainy weather, April turned out to be a very productive month on the Valley Line - at least with regard to scenery progress in Wethersfield.

The last progress pics showed the "grassing in" of the landscape west of the mainline between Jordan Lane and Church Street. Next, I moved east of the line - focusing primarily around Fernwood Street and the residential area there (including John Wallace's house).

Having glued in the sidewalks I made previously, and taped them for protection, I brushed on a layer of glue and added 2mm green static grass with the Noch applicator. It looks especially light here since the glue hasn't dried yet.

I should have done the Cape house first, practicing on that before tackling Wallace's yard. As you can see from this distance, even the fine ground foam in the Cape yard looks good and realistically varied.

The first application was a bit thin, and I also had to complete the back yard as well. So the tape went back on the walks, and I added some cardstock "masks" to protect the surrounding area, and sprayed on some hairspray and added another layer of grass.

Here's the result. You ESPECIALLY want to be sure to cover/mask things when using the hairspray.

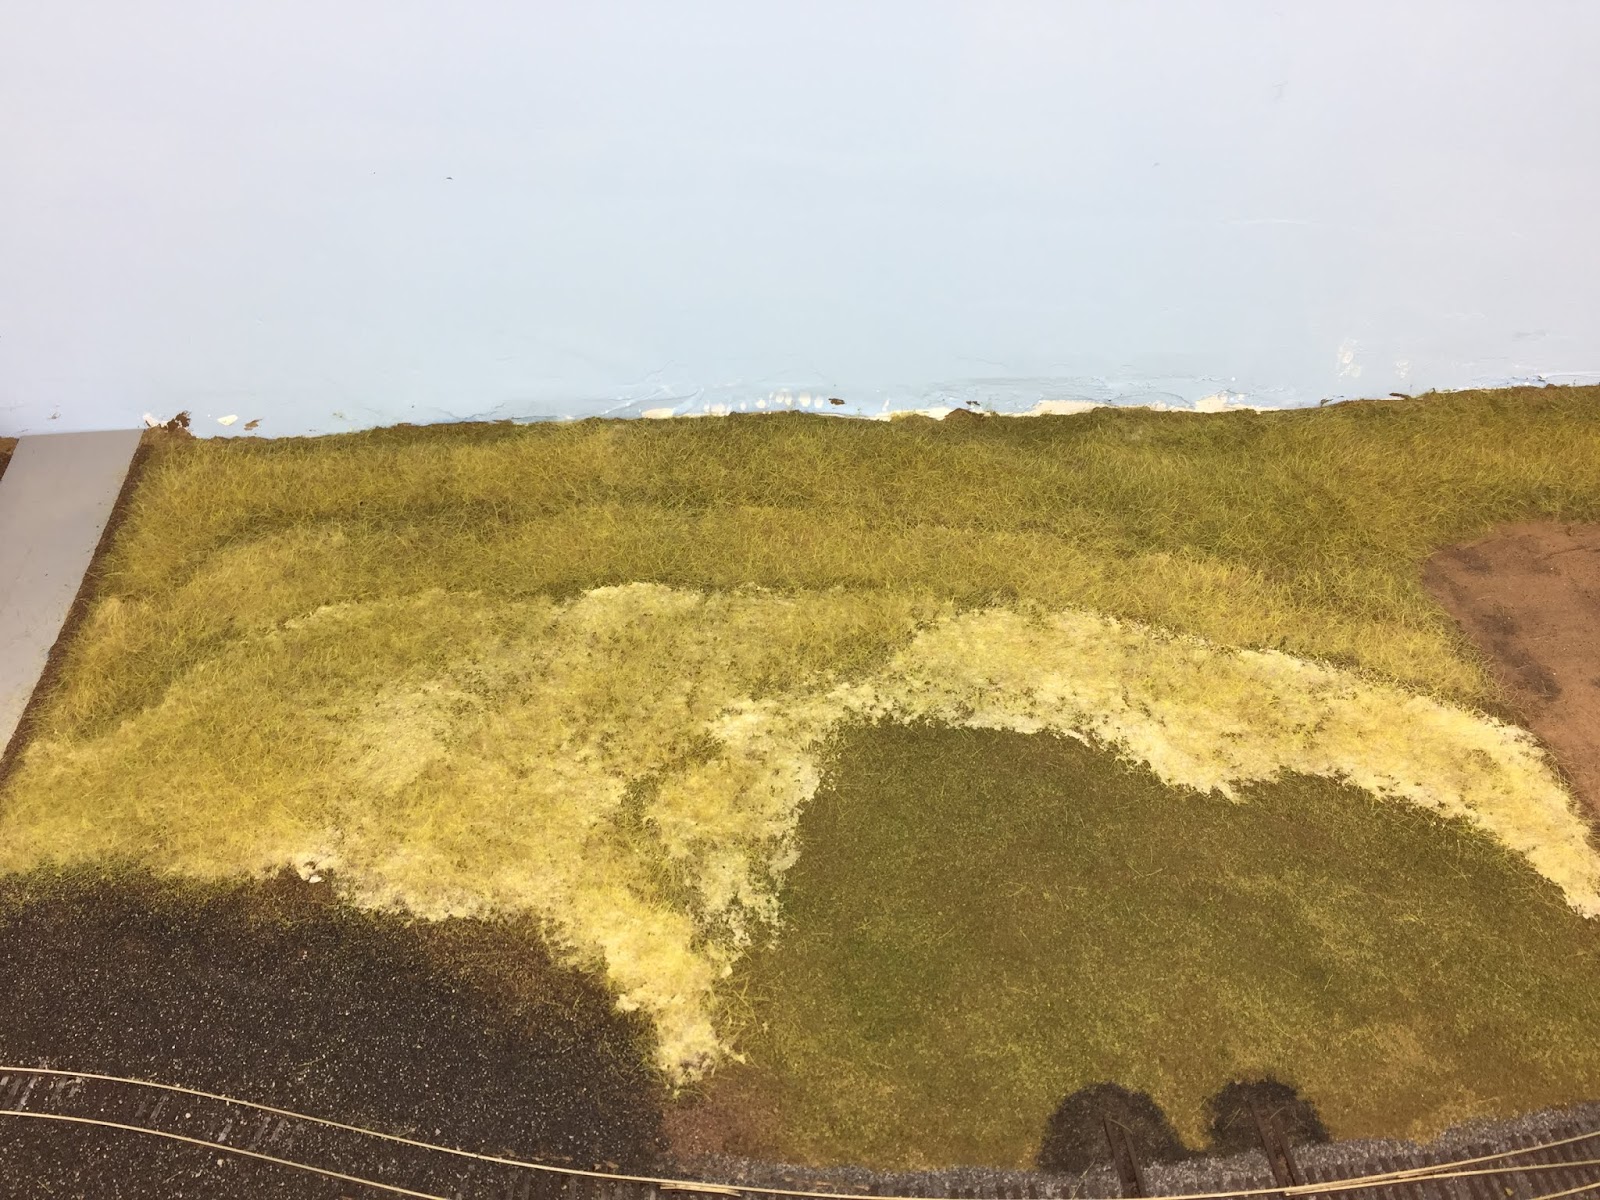
I used the same technique for the "Cape" yard and while that was drying, I added my field grass mix to the area between the lawn and the dirt bulk track area north of the station.

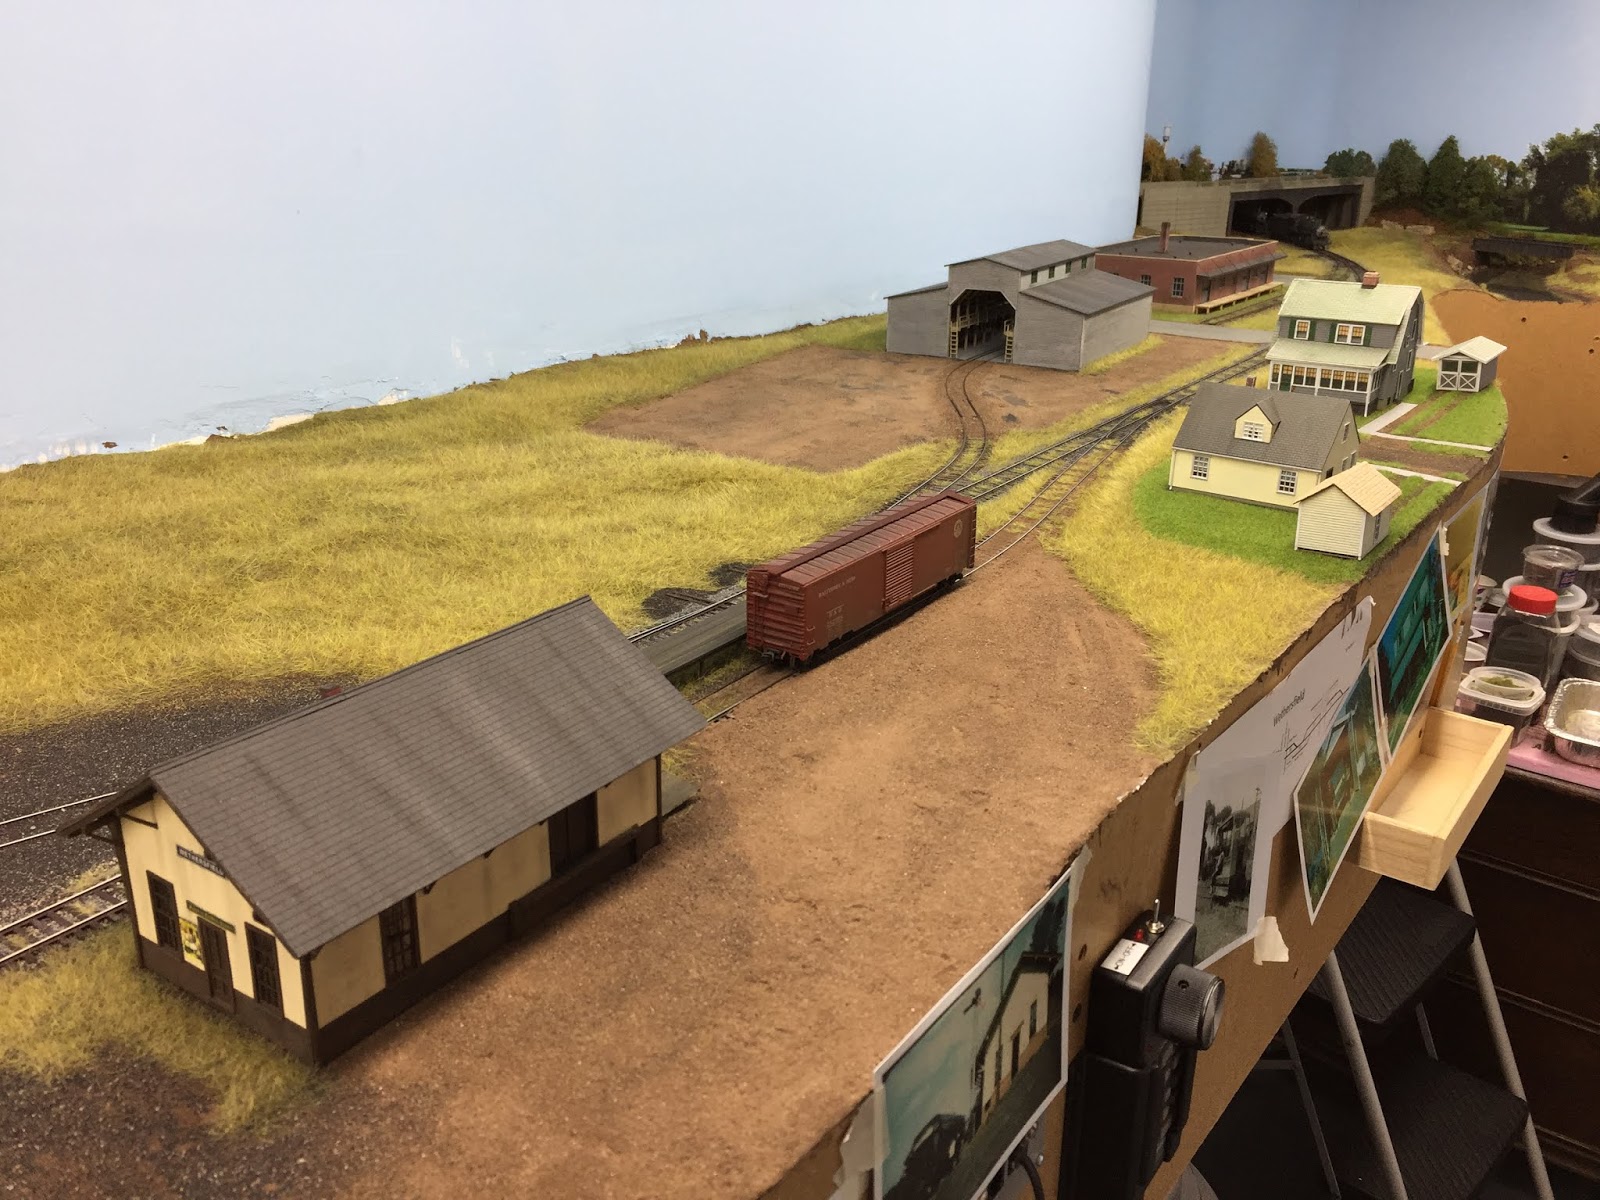
Overall view of the area looking south between Jordan Lane and Church Street. Note the iPad showing a Zoom meeting of other model railroaders staying connected.

Closeup view of the Cape house set in place. Still need to add the picket fence and shrubbery around the foundation. And probably a tree or two.

John Wallace's house will definitely need some shrubs and climbing roses (hopefully still ok for late Sept/early Oct)

Moving from the residential to the industrial, here's how Wethersfield Lumber - and the ROW - is looking with the grass in and dry.

I'd mentioned earlier the problem with the built-in base for this structure (which represents the Ballantine's beer distributor). It looks much better here with the base removed - and some judicious weathering applied.

And speaking of weathering, here's the Ballantine's office - a little more worn than I'd expected it to come out (and a reminder to take frequent breaks to check weathering progress. It's much easier to add more than to remove too much).

Also played around with some bumping posts on the sidings. Thankfully, I sent this photo to John before going any further. And he let me know the only "bumper" there was at the end of this siding was a large pile of ashes from the station's coal stove. Oh - and there was no ramp either by the late 1940s. SO nice to have some first-hand knowledge of the area!

I don't think he recalls how the end of the Wethersfield Lumber Co. siding was protected (why on earth would he?), so I decided to just use these wheel stops. However, he DID let me know that the company office was in the north end of this shed, rather than in a separate building as I'd first thought (and modeled). No worries - that model may end up elsewhere. And not having it here saves some precious space between the shed and the backdrop.

Overall view of the Fernwood Street neighborhood, looking northwest.


So that's the progress-to-date north of Church Street. Definitely needs a LOT more work: more textures, bushes, some trees, details like fencing and such. But it definitely has reached a level of "done-ness" and definitely looks better than the plain plywood and foam (even if it's painted).


The next & final "big" task (as opposed to detailing task) needed here is the backdrop. So it's back to (re)learn PhotoShop Elements..... not to mention hoping that I've taken the right landscape photos!

Friday, May 8, 2020

Friday Fun - Videos Galore!

For this week's version of Friday Fun I have a LOT of video content to share . . .

First off, for those of you that saw my Valley Line layout tour video and happened to notice that I missed covering the "Air Line" branch, or if you want more context & background to go with yesterday's "chase" of the Air Line local, be sure to check out the video below. I wanted to try out my new gimbal, and a quick tour of the "Air Line" seemed like a great way to put it through its paces.

Hope you enjoy it!


Next, for those of you not on FaceBook but who want to see some (or maybe all?) of the cool clinics and presentations that you missed out on during the NMRA's first Worldwide Virtual Convention, you can check them out here on YouTube!

Click here for the videos
Even better, they're now all cut up into segments by clinic/presentation so you should be able to find what you're looking for much more quickly.
Speaking of which, you can click here and go right to my presentation . . .


There are 12 videos uploaded so far, but there's plenty more to come. So be sure to check'em out!


And if you are on Facebook, and if you haven't heard, The Valley Local has its own FB group. Check it out by clicking here.

Hope you enjoy all the great model railroad content that's coming out these days and get to escape from the current craziness, even if only for a little while. . . . Have a great weekend!

Thursday, May 7, 2020

Throwback Thursday - Railfanning the Air Line Local

I've noticed something about layout owners, especially those that host regular ops sessions. . . They seldom operate their own layouts. And I'm no exception. Between setting up sessions, and maintenance between sessions, and wanting to make more progress to have something "new" to show at the next session, I can count on the fingers of one hand how often I've truly operated my own layout.

But once way back last February 2019(!), I'd set up for my normal full session (4 local freights, 2 mainline crews, agent/operator), but ended up short-handed. So I annulled the Air Line local for the session.

Bonus for me: All the paperwork was already done, and the train was staged and ready to go. Fortunately, my car forwarding system doesn't require that all the work be done during a session. But I took advantage of the opportunity to make a small pot of coffee, put on some period-correct big band music, and ran the local.

Follow along as we catch up to it in the town of Somerset . . .

By the time I shot the first photo of the local, it had already completed its work in Somerset and was pumping up the air in preparation for its trip northeast to Mill Hollow and, eventually, Middletown for interchange with the Valley Local. Here you can also see the ops paperwork laid out on top of the west end staging box.

Climbing up on top of the hill above Somerset, we get a better view of the over all scene. The setouts have been done and the pickups destined for Cedar Hill Yard (where our train originated) are set out on the siding for pickup on the return trip home.

The local has just arrived in Mill Hollow and has stopped short of the grade crossing so as not to foul it for longer than the 15 minutes allowed by the Rules.

The crew has to go up to the station to find out what work it needs to do in town - which is indicated on the switchlist left in the bill box. DERS-2b #0510 was just recently delivered to the railroad and hasn't even had a chance to get dirtied up.

Air Line local arriving in Middletown. This is where it exchanges cars with the Valley Local, which is seen here switching Middletown yard. The 0510 will head south on the Valley Main, then back north into the yard to drop off/pick up.

After all the switching is done in Middletown, and the hack is on the south end of the cut of cars, the local backs south out of the yard, past the tower and across the diamond.

Once south of the switch, the local can proceed northwest around the quadrant track to head back to Cedar Hill yard in New Haven.

Return trip coming south (railroad west) into Mill Hollow.

No work here on the way back, so continuing south/west.


Back in Somerset, we have to pick up the empties we set out this morning. Note that the rest of the train was dropped short of the grade crossing to avoid blocking it.

Once the train is back together, time to pump up the air and get ready to go.

Just departing Somerset - next stop, Cedar Hill yard, home, and dinner.
Hope you enjoyed railfanning on the Air Line a bit. Now, admittedly, the photography isn't great, so let's just say that I've set the bar low here and plan to improve (especially now that I have a fancy new photo gadget). Heh - I can only get better from here!

Also, the Air Line local traverses two 2x8' sections of railroad that host structures from a dear friend and represent my first-ever attempts at scenery. So, while "finished," the Air Line is neither prototypical nor up to the standards that I'm setting for the rest of the layout.

But boy is it a hoot to operate! Just goes to prove that even poor scenery is better than no scenery at all. There's just nothing like the immersive experience that even a rudimentary setting can create. And this area of the layout also proves that you don't need complicated trackwork to operate prototypically and have a blast while doing it.

I hope you've enjoyed a day on the Air Line local, no matter the shortcomings or how tardy. And that you'll look forward to chasing another local on the Valley Line sometime soon!

(For more on "Somerset" and "Mill Hollow" click here and here.)

Tuesday, May 5, 2020

Tuesday Tip: Razor Blades, Organizers, Tweezers, and Toothpicks

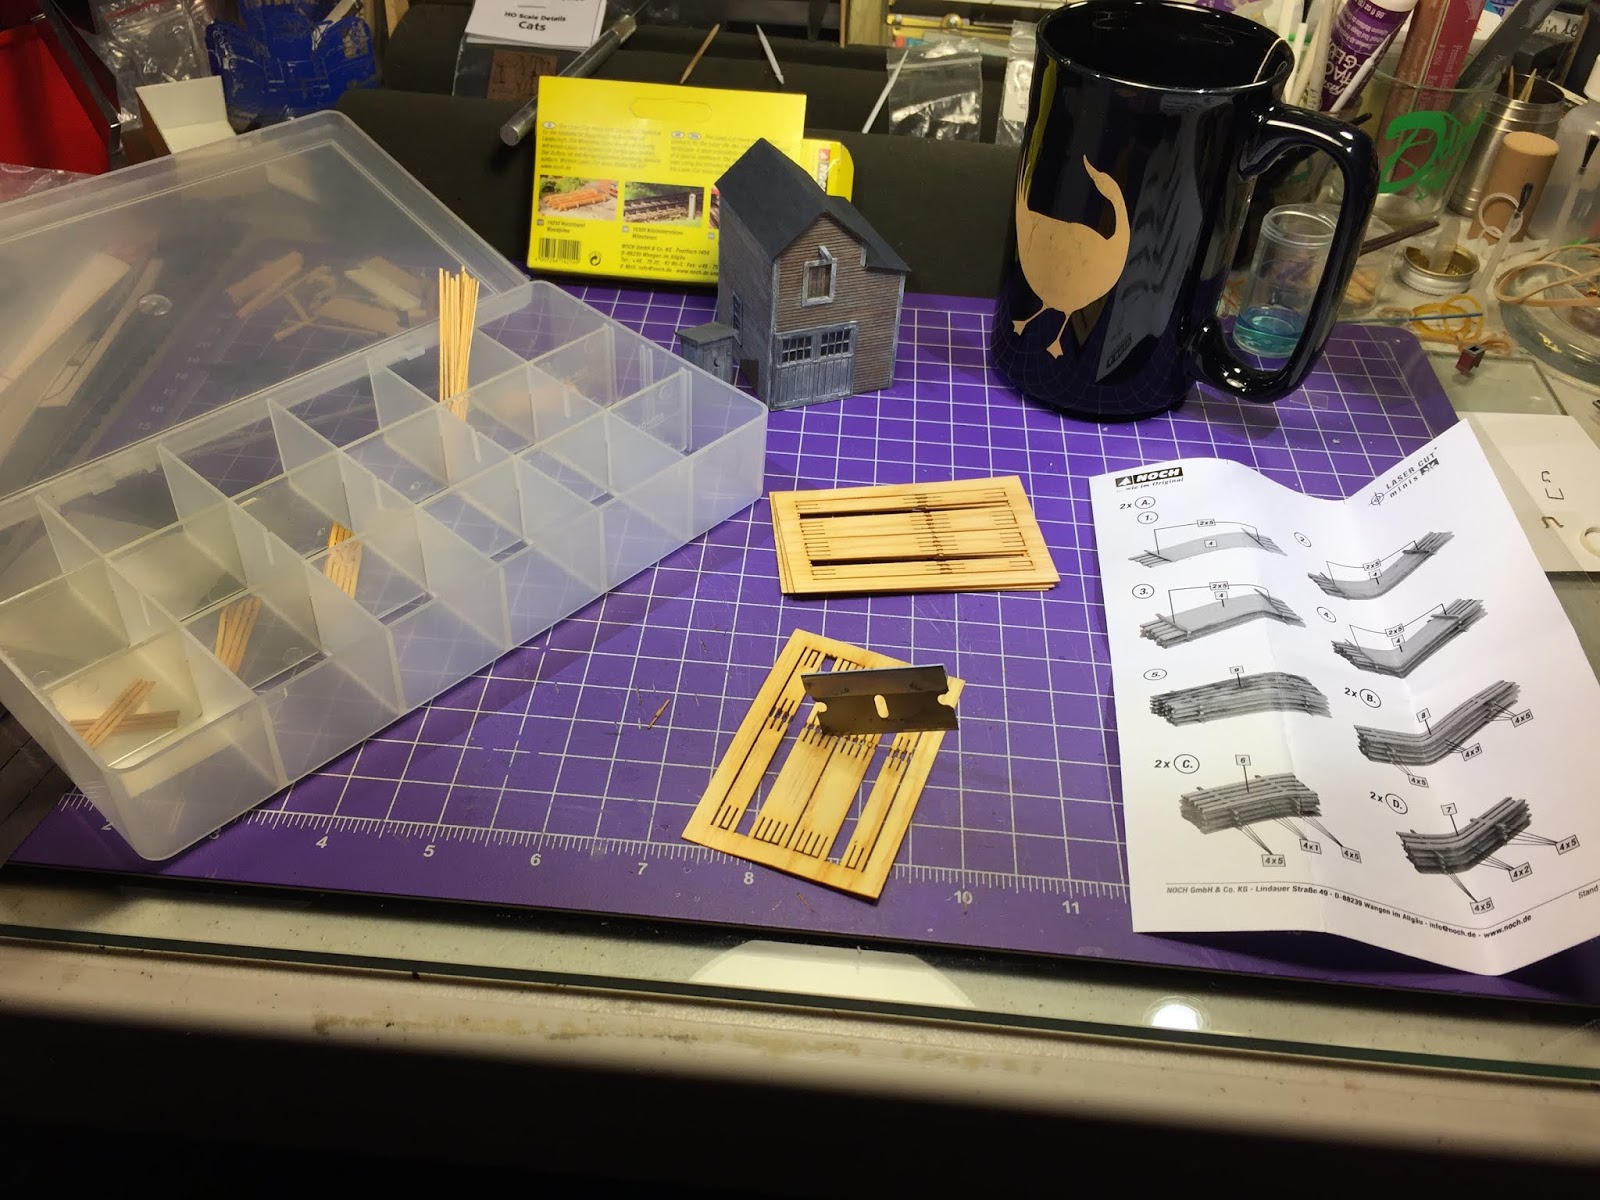
A couple of Christmases ago(!), I got some stacks of lumber to help detail my Wethersfield Lumber Company scene. Well, actually, they weren't stacks yet - they were in kit form. Ugh. Noch gives you enough material to do eight stacks of lumber in four different configurations. But you have to put them together.

Here's what you get in the box:


Looked a bit intimidating to me at first, but the key to success - other than being methodical and taking your time (and taking a break from it if it becomes too monotonous) - is to get back to basics:

  • Use a razor blade to remove the laser-cut parts from the carrier sheet
  • Use an organizer to keep all the like parts together and separate from one another (bonus if you label the compartments with the part numbers, or at least organize them in the order they'll be used)
  • Use a comfortable pair of tweezers to handle the parts
  • Use a toothpick to apply very small amounts of wood glue


Believe it or not, when you have the right tools, a nice area to work, and a little bit of patience, assembly actually becomes - dare I say it? - fun! It definitely helped to do this over a couple of evenings and not try to do them all in one sitting. It also helped to listen to some favorite model railroad podcasts along the way.

And before you know it, you'll be done and have some very nicely detailed lumber stacks for your layout!


Now I just gotta finish Wethersfield Lumber so I can have someplace to put these!

Monday, May 4, 2020

Monday Mail Call (an early Thankful Thursday)

I don't know about you, but these days the Missus and I are getting just about everything we need through the mail. We get our groceries delivered through Peapod and just about everything else through Amazon. Consequently, the mailman is one of our few links to the outside world.

But over the last couple of days, he's become even more than a hero on the front lines of the current crisis, delivering our much-needed supplies. He’s morphed into a springtime Santa's elf with the things he's been bringing!

First of all, admittedly, he delivered the last of my "add-to-cart" evidences of weakness.


Having just a bit of, um, extra time on my hands here and there, I've been cleaning out the photos on my phone and one of the things I use the photo function for is to take screenshots of info on various items of interest. That's how I was reminded that I'd "screenshotted" a Kadee ad a few months back where they announced they'd be releasing PS-1 boxcars with the 6' door. And not only that, but it'd be available in the NYC scheme. And not only THAT, but these cars were delivered in April, 1948 and had the correct dates/data already printed on the car. Well whattayaknowaboutthat! Just a light bit of weathering for my Autumn, 1948 era layout and this car could go right into service.

So yeah, that was a must-get. Unfortunately, KD only ran one road number. And they were sold out just about every where by the time I got around to looking for one. But thanks to Google, I discovered that Harris Hobbies had one left! Well, turned out, by the time my order went through, they'd already sold it. But they promised they'd find me one - and, thankfully (and obviously, given the pic above) they did! Thanks Jack & Paula!

Then, the very next day, I got a package from my friend PeteL. He'd been going through his collection during the stay-at-home order and came across a couple of trucks that were surplus to him. He asked me if I was interested - "What kind are they?" The answer came back - "1948 Peterbilt tractor trailers."


Heh - I couldn't say "yes please!" fast enough! Vehicles for just about ANY layout are kinda tough to come by. And vehicles that are already built & ready to add to your layout (and even the right vintage) are very rare indeed. So yeah, these will be going on the layout soon - probably somewhere in the neighborhood of Wethersfield Lumber...

Now those trucks - they'd be getting thirsty at some point. So at some point, hopefully soon, I'll be needing to build a few gas stations. Well, how do you get the gas from the underground tanks to the trucks?

Well, you pump it.


In a strange case of serendipity, these pumps actually arrived the same day the trucks did! My friend Jim Lincoln (of Jim Lincoln Chev-Olds, though he's a Ford guy. . . it's a long story . . .) has been experimenting with his resin printer and came up with these awesome period-correct gas pumps! And in two different styles! Thankfully, he painted and put together one of the "kits" so I could see how to build them. I think the "glass" globe is some sort of tubing, but I'll have to ask to be sure I get the right stuff. These are gonna look great on the layout for sure! And when I get them done, I'll be sure and take a picture . . .

Or maybe a video?

Along with a lot of other folks creating videos for quarantine-weary, and content-hungry model railroaders these days, I joined in and uploaded a layout tour a few weeks back. It came out pretty good, I thought, and it at least provided some context for all the photos I've taken of the layout over the years. 

Now, I know enough about good photography (and, thus, good videography) to use a tripod when possible (check out this video of switching in East Berlin for a rock-steady example), but a walk-around tour of the layout is much more challenging. No matter how steady I thought I was holding my camera (ok, it's an iPhone 6), it still looked way more wobbly than I wanted.

The only time I'd ever heard about gimbals was in the context of one of my favorite movies. But the more I've watched other model railroad videos (not to mention, car videos - another passion), the more I'd heard about a cool tool that would make your camera movement silky smooth and steady.

So on one of my posts over at the Valley Local FB group, I'd mentioned maybe getting a gimbal for Christmas. Well, "Santa" apparently was listening . . .


One of the cool developments of the NMRAx Virtual Convention last weekend was that my mom and dad discovered the wonderful world of model railroading on Facebook - and all of the cool layouts, photos, videos, and artistry of the many talented people posting there. They'd tuned in to see my presentation (being such wonderful parents and all), but they've stayed on the NMRA FB group because of all the great content.

They figured I'd post more videos of the layout if I had the right equipment, and they just didn't want to wait until Christmas. So that probably undermines their "Santa" status. I guess they'll just have to be content with being wonderful - and very generous - parents.

Speaking of not being able to wait . . . I certainly didn't want to wait until "Thankful Thursday" to thank Pete & Jim for the very cool additions to the Valley Line, and to my mom and dad for making it possible to share it with you more often via video - and without making you seasick in the process.

If any of you have used a gimbal to video a model railroad, I hope you'll let me know. I'm learning what I can, but "Pan Following," "Pan & Tilt Following," "All Locked," and "All Following & Inception" have me a wee bit confused. Not sure yet which mode is best for shooting the layout. . . 

But I sure expect to have some fun experimenting with it! So stay tuned for more videos . . . (and more layout progress so I have something different to shoot!)