
Now, I've technically done a few craftsman structures already - 3 small garages made from Best Trains kits (click here and here for details on those). But, although they were kits made up of separate parts that I had to paint and put together, they just barely qualify as "craftsman" kits. And it took me 18 months from when I opened the packages to when I finally completed them.
So, they hardly count as my first.

Dannen Feeds from RailroadKits.com is a step above simple garages, and makes for a nice way to dip a toe into the wonderful world of craftsman structures. With more than a basic roofline and a couple different door and window openings, this kit makes for a nice introduction. All the better that I got it free as part of a swag bag at "OP"toberfest last fall.
Once you get over your initial fear of starting, it's really a fun, simple build (but still best not to ask me how long it took me - all due to other distractions, not anything complicated with the build).
Here are some photos of the finished kit at one of the train shows for reference (not built by me).


While the assembly is pretty straightforward, it'd be a good idea to get on the Railroad Kits website (link above) and download the detailed instructions - especially if, like me, this is your first time.

Even the "detailed" instructions aren't that long. If you follow them carefully and to the letter, you'll do fine. In my haste (after having set the build aside for a few months and being anxious to finish it) I added the windows before adding the trim. since the windows stick out from the wall a bit, it's hard to add the trim flush to the edge of the wall since the wall can't sit flat on the work surface. And the bracing on the back of the walls presents the same problem, just worse. No worries - the instructions have you do it in the proper order. So don't do as I did - just follow the instructions.
What follows is not a substitute for the instructions, but will hopefully provide some additional illustrations for some of the key steps. . .
 |
| One of the most fun parts of the build: Opening the package and laying out all of the parts! |

After making sure you have all the parts, the first step is to remove the wall pieces. I started with an X-Acto knife, but quickly moved to a razor blade - much thinner blade and a bit easier to handle.

Once the walls are removed, cut and add the bracing. Follow the diagram carefully and use wood glue, applied with a microbrush or toothpick.


After I braced the walls, I primed all the wood parts with spray primer to keep them from warping. I used a gray color since I planned to do a weathered wood effect later. But black or even white would do as well. You really just need to seal the wood, and any color will do.


And . . . . that's where everything stopped for a few months while I worked on other things and suffered some Analysis Paralysis in trying to figure out how best to do a weathered wood effect. (Let's just say I have a LOT of pictures of a LOT of weathered old barns...)
Then, like so many folks are discovering in our hobby, I came across a helpful how-to video on YouTube. While the video was about making styrene look like wood, I figured the same technique could work for my actual-wood walls.
So, after practicing the technique on a station platform and getting a good result, I decided to try the same thing here. Click here for the step-by-step process, but the short version is told in the photos below. . .
 |
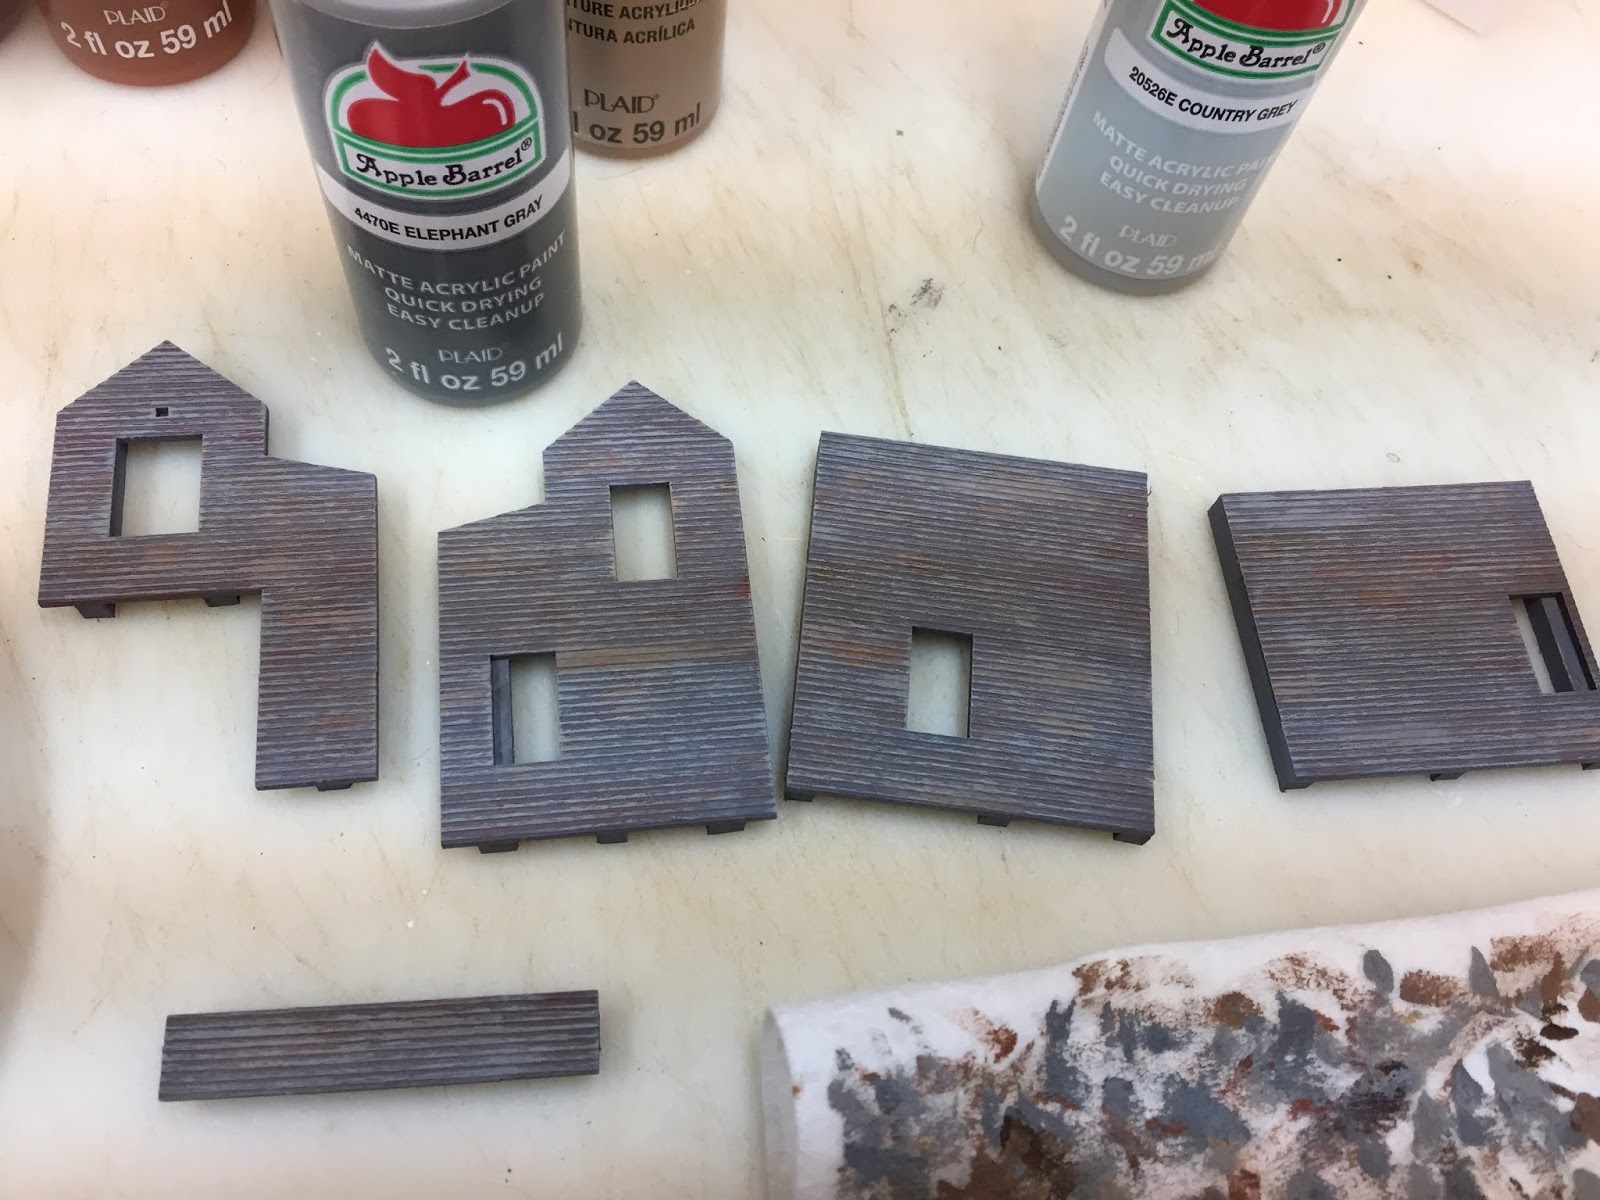
| I used 6 different colors and drybrushed them on the walls, going in the same direction as the clapboards. |


 |
| Here's a close-up of the completed effect. If you need to tone down a color, you can drybrush some of a different color. |

While the walls were drybrushed with a variety of half-a-dozen colors, in an attempt to replicate the varied colors of weathered wood, the windows, door, and trim were just drybrushed with white - to create a peeling paint look. You can click on the image above for a larger, more detailed view.
Granted, a few months passed between starting this kit and getting it to this point. But honestly, the sum total of the time spent to this point was really only a matter of a few hours - and much of that was waiting for the primer coat to dry!
Once your walls, doors, windows, and trim are all painted and weathered to your liking, you're ready for The Most Fun part of a kit (and the step we all-too-often rush to before we really should) - Assembly!
That includes not only adding trim, windows, and doors to our walls, but also assembling the walls themselves, and adding the roof (or "roofs" in this case).
But that will have to wait until next week's edition of "Modeling Monday." In the meantime, if you decide to dive in to doing a craftsman structure kit, I hope you'll let us know in the comments. And if you're following along with this build, be sure to let me know if there's anything I can do to help.
MOST importantly though, if you're NOT a craftsman structure kit newbie and have any tips, suggestions, guidance, or techniques to share, I hope you'll let us know!
Till next time. . .
No comments:
Post a Comment