

Not much, eh? That's the bad news. The good news is that I can pretty much do what I want as far as finishing. As long as the shed is the pass-through type, and has a dark-ish roof and light-ish walls, I'll be ok - though I'd love it if somebody could prove me wrong with a better photo.
When last we left this kit, I'd asked how to go about painting it - and I really appreciate all of you who took the time to weigh in. I took advantage of having my airbrush already full of Grimy Black when painting Ballantine's that I shot the roofs of Wethersfield Lumber too. I also took a gray rattle can and sprayed the "concrete" floor of the two sheds. Somehow, the windows ended up getting painted green but I don't remember how (?!)
So the next step was to paint all that interior bracing/rack detail. Unfortunately, a lot of it will be hidden or otherwise difficult to see since it'll be "inside" so - taking some advice from my Thursday Night Crew - I decided not to obsess and just "rattle can" it.

I did, however, decide to use my new MicroMark "distresser" to add some wood grain on the front-most parts. It went much quicker than I thought it might.

After making sure to remove any random flash, I separated the main parts for painting and headed down to the spraying room.
Earlier in the day, I'd found a small can of "weathered brown" from Floquil. Unfortunately, it'd "seized up" and I couldn't get it to spray. So I removed the nozzle and used some lacquer thinner to clean it out. It still wouldn't spray. So I cleaned a little more and also used a pipecleaner to clean down inside where the nozzle goes. It was still hard to push down.
So then I got what turned out to be a wonderful, awful idea - I took a bamboo skewer and pressed it down into the hole. . . .
And promptly shot "weathered brown" all over the place, including on my still-like-new black bracket light. Here's a tip: Don't use lacquer thinner to clean off a still-like-new black bracket light. It now looks like an old light with a grayish haze finish, but at least it still works. And, fortunately, so does the can of "weathered brown" spray paint.
So I started spraying, and things were going pretty well - until I ran out of paint. Yup - totally empty, not just "not working." But in an amazing turn of fate & coincidence, I had just that morning gone to the store to get some new lightbulbs and other odds & ends and wandered over to the paint section - where I bought a couple of different colors of Rustoleum "camoflage" paint.

And - miracle of miracles - it actually turned out to be a fairly close match (at least to my color-blind eyes) and dries dead flat. But I'm glad this is all in the interior...
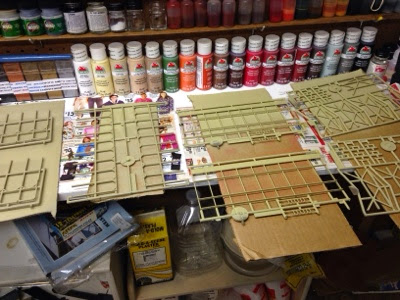
The "weathered brown" Floquil is on the right and the Rustoleum camo' is on the left. Pretty good to my eye - and will be even better with some "dusting."
So that's where things stand now. I sprayed both sides of all the parts, so when everything's dry I should be able to start putting things together.
D'oh!! Actually, not. I still need to do something about the walls. And, since they'll be what you see the most, I'll be taking a bit more time to do things right. And I don't think I'll be using any rattle cans - especially since it looks like that paint filled up all the nice woodgrain detail I added to the bracing/racks.
Ah well, live and learn. Like I said before, this is a very varied hobby and you can always find something fun to do that suits your mood. Heh - maybe I'll go back to building Ballantine's. . . . or maybe start a freight car kit . . . or work on the backdrop . . . or . . . or . . . well, you get the idea.
No comments:
Post a Comment