Showing posts sorted by date for query analysis paralysis. Sort by relevance Show all posts

Sunday, July 9, 2023

Scenery Base Progresses Northward, Despite Ground Goop Gotchas...And Mind the Mental!

I'm happy to report that the "flow" of scenery work I discussed in my last post is continuing northward from the Old Deep River Road area up to Deep River itself. Unfortunately though, while I'm in a scenery flow, my ground goop recipe seems to have ground to a halt . . .

Ground Goop Gotcha


As you can see in the pics above, the latest batches have come out VERY lumpy/bumpy. I'm using the same formula that's worked fine in the past (2 parts Sculptamold, 1 part brown latex paint, 1/2 part white glue, 1/2 part water - adding more if 1/2 part doesn't seem to be enough), but for some reason, while it looks smooth enough when I trowel it on, once it dries all the bits of paper stick out like a sore thumb.

I mixed up another batch this morning, adding more water to make the goop easier to smooth out, but so far it seems to be doing the same thing.

I'm beginning to wonder, as some folks pointed out on the Valley Local Facebook Group, if I'm using too much paint and the paint is shrinking as it dries - leaving lots of undissolved bits that are even more prominent since everything around them has shrunk.

So next time I need some "ground goop", I'm just going to mix up some Sculptamold according to the instructions, just adding water to it - no paint & no glue. I'll see if that ends up drying smoother and, if it does, I'll just get in the habit of painting it as a separate step rather than try to prepaint/color it.

Stay tuned! And if you're getting good results with my (previously used) formula, let me know what you're doing and/or what I'm doing wrong. . .

We're Rockin'!


I've had some pretty good luck with the few rocks I've cast and colored (see above), but - like with the goop - my latest efforts have been less satisfactory. Since I figured I could use some more practice - and knowing that modeling New England requires LOTS of rocks - I've been a rock casting fiend lately . . .


Thanks to those that have offered advice, as well as pointed me to videos and such, on different coloring techniques. As you can see in the pics above, I have plenty of castings to practice on - I just have to wait a week or so for them to fully cure before coloring . . .

Plaster Riverbed


While watching one of those videos, I learned that foamboard - even if painted - could offgas underneath resin water. Certainly not something you want! You need to seal the riverbed with a batch of thin plaster. Since I was already plastered in a plastering mood working on my rocks, I mixed up a batch, "dammed" the ends of the creek at Old Deep River Road with blue painters' tape, and poured it out, allowing it to find its level.  So far, I'm liking the results - and hopefully not only will this eliminate the offgassing possibility, but should also prevent any resin pour from leaking onto the floor . . .

Ballast Experiments

Yikes! It's been over FIVE years since I first solicited opinions about, and started researching, different ballast choices. If that's not the epitome of Analysis Paralysis, I don't know what is!

While I've been making scenery progress "up the line" in the Deep River area, the Saybrook station area continues to taunt me with its lack of ballast. An otherwise perfect prototype scene is marred by the "obviously a model" look of unballasted flextrack.

Thankfully, in addition to samples from KayleeZ and JimD, my buddy Randy dropped off a number of different grades of ballast - all sifted from local traprock (e.g. the exact same thing our prototype used for ballast). I won't admit to how long ago he did this, and I'm too embarrassed to try and remember anyway.


Since my main goals for the day (coloring rocks, doing base scenery, groundfoam, etc) were thwarted, I just pivoted to finally figuring out what ballast I should use on the Shore Line through Saybrook. So I took out my trusty test tracks and poured out three different grades, affixing them in the usual way. I'll be interested to see not only how the color ends up but, most importantly, which grade is going to look best - and most like the mainline ballast I'm used to seeing in the old prototype photos.

Foamcore Road - Rt. 82 in East Haddam

While all that was drying, I turned my attention even further up the line to East Haddam. Going full circle to the beginning of this post, I figured this would be the next best place to try some additional ground goop formulas - starting with plain ol' Sculptamold.

But first! I wanted to finish some terraforming in the area - specifically the roadway that crosses the tracks at the south end of the scene.


In the pic above, you can see my method for creating cutting templates so I don't waste any good foamboard.


This method comes in particularly handy when trying to fit odd spaces. The road itself is made up of pieces of foamcore board with the paper peeled off to reveal a nice textured surface.

Mental vs. Physical Health

So that's where I had to quit for the day - not bad for an afternoon's work! And I'm still chomping at the bit to make even more progress in the coming days. Unfortunately, weekends - and their big blocks of time - only come once a week (duh!) and it's tough to get to the basement after work during the week.

But The Missus gave me a great idea . . . while in this state of flow, why not spend the time in the morning before work, when I'd normally be hitting the treadmill or riding the bike, working on the layout instead? She reminded me that mental health is just as important as physical health and as long as working on the layout doesn't become a source of stress, it can be a great way to reduce stress (something sorely needed lately, given my day job). Mental and physical health are more closely related than many of us realize, and it's all too easy to neglect one or the other. Or both.

While I certainly wouldn't recommend giving up exercise to work on a model railroad (since you can't enjoy your layout - or anything else for that matter - if you're in poor health), she raises a good point. And as long as I'm in this flow - and the resulting immersion gives my dayjob brain a rest - I can just get some extra steps in during my lunch break :^)

And when this flow period inevitably ends, the treadmill will be right where I left it and the balance can swing back the other way until the next flow hits.  But for now, instead of riding my bike, I'm going to enjoy riding this wave . . .

Monday, March 27, 2023

A Tale of Two Sundays: Old Deep River Road

With the backdrop done in Essex, along with some (very) basic ground cover, and grade crossings, I wanted to get some terraforming done north of Essex - between Essex and Deep River - around the Old Deep River Road grade crossing.

This is the first public crossing north of the Essex station area and notable in that it provides a great photo opportunity of the northbound steam trains. There's not a cut there per se, but the track curves around a hill with some rock outcroppings, then crosses the road and goes alongside a tributary of the Falls River (which, due to its being dammed upstream to power mills of yore, is little more than a large creek).

Old Deep River Road itself is notable as the original alignment of the old Middlesex Turnpike. But the ol' Turnpike crossed the railroad twice in short succession here - and both times on curves - so an early (c.1907?) realignment of the road resulted in Old Deep River Road being truncated to a dead end, an reduced to just providing access to a couple of homes on the east side of the tracks.

Given the topography and the history, I definitely wanted to include the scene on my layout - and the turnback curve at the end of the peninsula between Essex and Deep River would be the perfect place.  So, as BillS and I were brainstorming last Sunday on how to go about modeling the scene and trying to figure out just the right topography, it suddenly occurred to us: Why not just take a quick field trip and get some photos of the area?

Now, not everybody is lucky enough to live near their chosen prototype, but I certainly am - so I definitely took advantage of the opportunity. Into Bill's truck we jumped and north we headed. And I'm really glad we did, as you'll see . . .


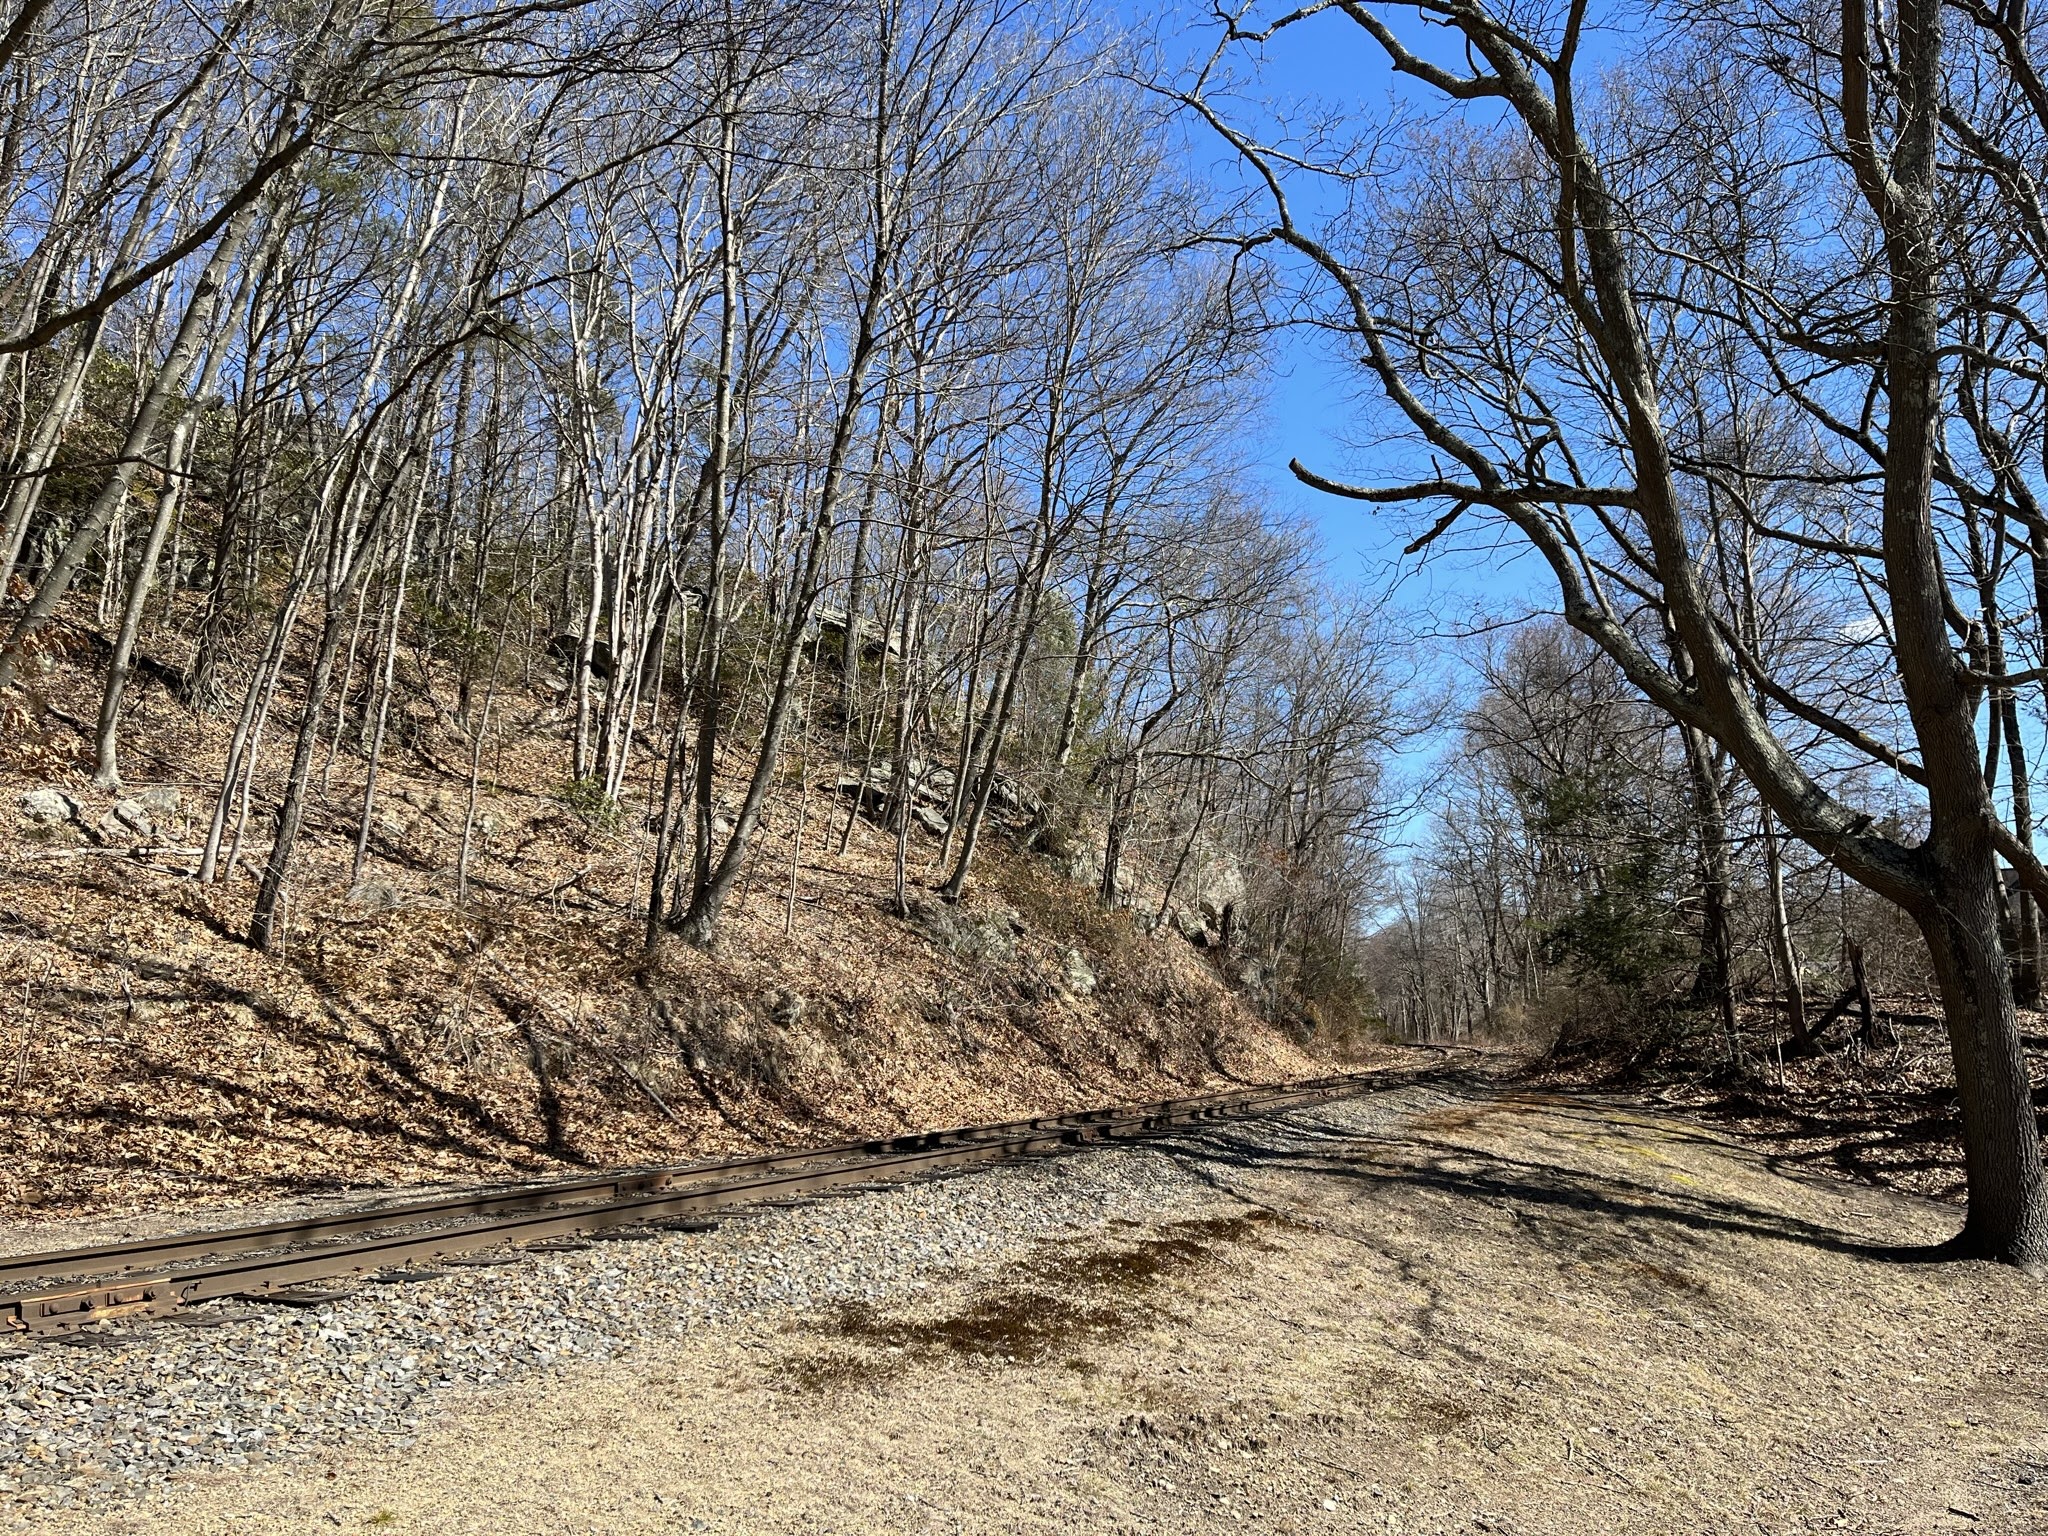
This is the view from the road looking south back toward Essex - and the first thing that occurred to us was that the "cut" wasn't really a cut after all - and the hill wasn't as tall, or as steep, as we'd thought. While the track looks straight here, we're actually on the outside of a curve.


After walking a bit south, I turned to get this shot looking north toward the crossing itself. I took special note of all the rocks, which I never notice (or really see) during the rest of the year when all the trees are filled in with leaves.


Perspective looking east - note not only the rocks, but also the difference in elevation between the road, the land leading up to the track, and - of course - the hill.


Another shot, southeast, showing the road and track (and hill, and rocks)


Last of all is a shot looking due north along the road. It dead-ends in the far distance, with the track continuing to curve until it parallels the road. The track continues to curve and used to cross the road again, but the Rt. 9 highway (just out of sight in the far distance) has obliterated all evidence of that. And incidentally, while you can't really see it here, there's a brook to the left of the track and road that flows into the Falls River.

Having photo-documented this area, we figured since we were out anyway, we might as well head up to Deep River proper to get some additional detail shots of Tate's Cut (a signature scene north of the station) and the station area itself - especially since that'll be the next place where we'll tackle terraforming.  I'll save those reference photos for when we get around to that - but I definitely wanted to share a bit of serendipity . . .


We went for the cut and the station, but we were pleasantly surprised to find a steam locomotive doing some switching! We had no idea they'd be there - the VRR seldom uses the steamers for switching - but there was the #40, switching cars on the old house track. Incidentally, I got some shots of another "faux cut" south (off the back) of where the engine is here - which I'll also try to model.

After allowing ourselves to be thoroughly distracted by #40 for a bit, we figured we'd walk north to the other end of the station area to get what we came for: Shots of Tate's Cut. And just as we did, we heard a whistle - but it wasn't coming from the steam loco . . .


It just so happened that a special train was coming into town from the north - through Tate's Cut -  powered by this 80-ton centercab diesel and blowing its Hancock air whistle for the crossing!

Talk about lucky! Two trains, diesel and steam, meeting in town, which we got to see only by chance since we were doing some prototype research. Pretty cool!

But time was ticking by, so it was time to do something with that research. So we headed back to the basement . . .


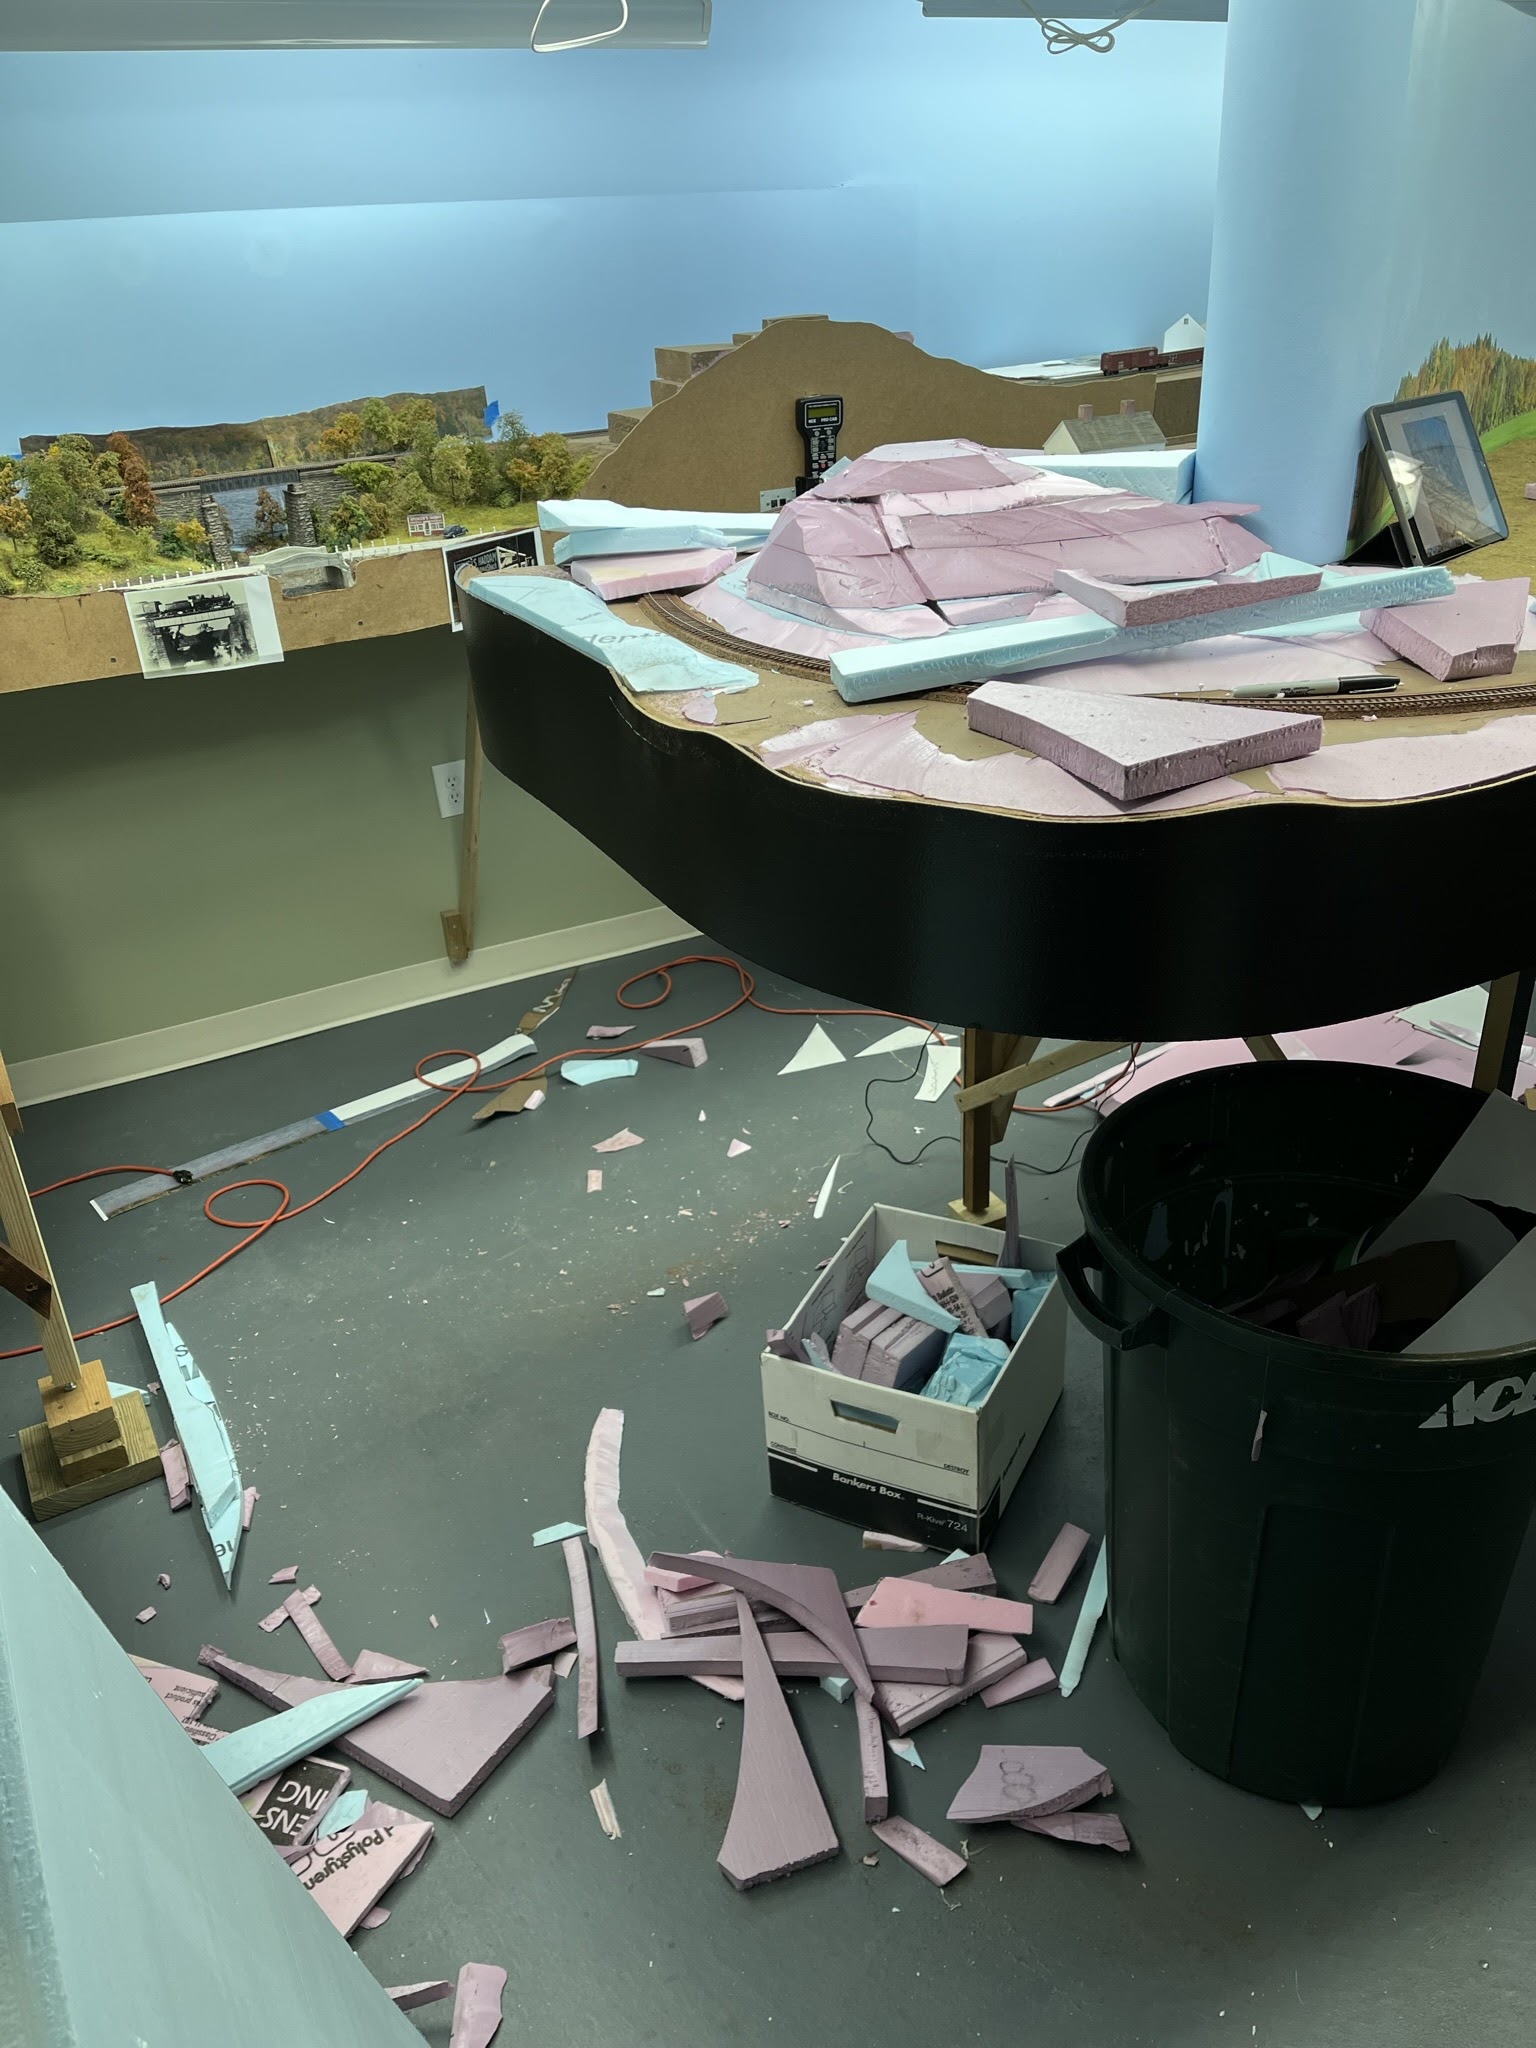
Unlike me, Bill is a true aficionado of the foam scenery technique. In fact, it's really his fault he's the reason I even bothered departing from my tried-and-true cardboard lattice/plaster cloth to try foam on the Essex-Deep River-East Haddam section (and it really didn't start well - click here for that story. I can't believe it's been over 7 years already!). I'll admit, it goes pretty fast - at least if you're Bill . . .


And it makes a heck of a mess! This view doesn't even show all the static-charged foam "dust" that seems to get everywhere during process. But pick your poison - it's either this or plaster cloth...


But you can just start to see the Old Deep River Road scene starting to take shape - from the hill in the first photo, to the brook and road on this side of the hill in the pic above.

Other than the mess, another common "downside" I've discovered with this technique (or maybe it's just how fast Bill works) is that it sometimes goes TOO fast! Case in point: We were motoring along and cut the foam and fascia(!) way too low (IMO) for the little brook:


Yeah - that's a bit too deep . . .


Other than the ravine brook, if you compare this view to the prototype photos, you might agree that the scene is coming along nicely..


And just to orient you a bit, this is looking "north" from Middlesex Tpke at the north end of Essex showing the curve around the big hill.

The hill needs rocks though, so after Bill left I decided to cast some out of hydrocal. I often mention that the main reason I continue with the blog despite how easy FaceBook is by comparison is so that I have a (b)log of my past efforts. So I looked back through the archive to see how I'd done rocks before...


Turns out, as I suspected there's an app a blogpost for that! Click here for the details, which I followed again this time around . . .


. . . to great effect. I now have a BUNCH of rock castings I can use in the Old Deep River road scene. Now, I just have to color them . . . Thankfully, I have TWO posts on how to do that - here, and here - which I'll follow when the time comes.

So that was the first of two Sundays. Here's what I did yesterday (well, it took the whole weekend, but was essentially finished yesterday...)


I fixed that "ravine" that was bugging me... One of the many important lessons you learn as you advance in this hobby is that you really can fix just about ANYthing. And that's super important to know since, if you know how to UNdo something, you're much more likely to DO something. Analysis paralysis is real and if you never DO, you'll never ACCOMPLISH. And if you're afraid to even try, you'll seldom DO. I - and many others - have discovered that if you know you can UNdo, your fear of trying diminishes greatly. Ergo - more "DO" happens.

At least that's what I think %^)

In the pic above, you can see that I "backfilled' the fascia and foam with the cut-off fascia and more scrap foam. I covered over the seams/joints in the fascia with drywall mesh tape and then coated it all with a few coats of drywall topping. Mesh tape has helped me fix a number of things - click here for a detailed how-to.


It may not be obvious in the pic above, but the topography here is MUCH better and will be much more in line with the prototype. I really like how it's all shaping up - literally. I just have to be patient and keep working (an be willing to REwork) it until it looks the way I want.

While I still have to do some sanding on the topping, I didn't have time since friend ChrisZ was on his way over with a few friends to see the layout. Thankfully, I got everything cleaned up in time and enjoyed the remaining hours of Sunday afternoon having a great visit with Chris, Andre, Mike, and Stu. Unfortunately, there's no pic to document the visit - but at least I got them to sign the guestbook! (and I may have converted at least one of them to the ProtoThrottle... we'll see!)

So, all in all, a pretty productive couple of Sundays. And - bonus! - the layout is cleaned up in time for my next op session which is coming up later this week. But a post on that will need to wait...

Tuesday, January 26, 2021

Coloring Rocks & Roads

I think I may have mentioned before that I'm a little intimidated by doing scenery. And, like some (many? most?) model railroaders, there are typically two ways to confront such intimidation - well, other than Just Doing It: You either throw money at it (in extreme cases, hiring someone to do it for you), or you research it (to death). The first leaves you lighter of cash, and still bankrupt of skill. The second typically results in Analysis Paralysis.

Now, being the sort that actually WOULD like to develop some scenery skills (and having a wee bit o' the Scots in my blood), I tend heavily toward Option 2 - to wit:


Um, yeah. And this is just a fraction of my collection of "scenery research" (I won't bother posting all the dozens of YouTube videos I've collected...).

But thankfully, lately, I've come to the realization that I'm not getting any younger and if I want to develop any scenery skill, I have to (yikes!) dive right in . . .

So, starting at the end of 2019 and going (a bit) through 2020 (a rare "COVID consolation") and propelling into the new year, I've been getting some scenery done. Overall, I've been pleased with the results, no matter how glacially slow they've been to accomplish. But as I sometimes say: "Redoing scenery doesn't waste time, obsessing over trying to do it perfectly the first time - and thus never getting around to it - wastes time." So, dive right in? Why not?

Consequently, last week I dove right in to coloring rocks. I said then that I wasn't sure where I came up with such a simple technique - literally, simple as 1-2-3. But since then I remembered where I'd gotten the inspiration - so in the spirit of giving proper credit where due . ..

. . . thank you to Mr. Lou Sassi (and, yes, I have the first edition of this book too...)


Right there on page 42 he describes the technique of coloring rock using just 3 washes made from tube acrylic paints (raw sienna, raw umber, mars black) to color rocks made from foam putty. Well, I didn't have the right tube acrylics on-hand, and my rocks were made from plaster rock molds. So I adapted Sassi's technique using inexpensive craft paints. Click here for the step-by-step.


After practicing on extra rock castings last week, I decided to tackle the rock castings I "sprinkled" on the Sculptamold icing . . .


All I did was apply the same 3-wash technique to the rocks I'd put in place on the layout.


And this technique especially shines when you haven't used ground goop. You can just slap the washes on - you don't have to worry about "painting outside the lines" and getting the wash on the area around the rocks. You'll just paint your dirt-colored paint right up to them and cover the paint with ground foam. If all goes according to plan, the rocks will look property "planted."


You may or may not notice that the series of photos - while they may look the same - are actually views of the castings after I added each color.


The difference certainly isn't readily apparent, but the overall effect is undeniable. There's definitely an undeniable variety of color along and within the different textures. And the washes allow the different layers of color to come through.


And it's a versatile technique as well. The rock above for some reason came out too brown/orange compared to the other rocks - and the rocks closest by, were much darker . . .


So I simply added another layer (and then another) of the diluted black wash and got the result above.


Keep adding washes of color until you get the effect you're after. Having reference photos on-hand definitely helps.


Another "bonus" of coloring the rocks in place - and not being super neat about it - is that the rock coloring covers any white that the "earth paint" might otherwise miss.

Edited to add: Washes applied to unsealed plaster need to be sealed afterwards for two primary reasons - 1) if left unsealed, the washes will fade over time, and 2) since you'll likely be applying scenery materials afterwards (as well as spraying glues & other liquids around) you don't that affecting your coloring.


Once the rocks were done, I turned my attention to coloring the road. One thing I'm finding VERY helpful in reducing the anxiety and stress of doing scenery is to do littles tests and practices on scrap. That way, nothing at all is "at stake" and I'm free to make mistakes where it doesn't matter. That worked out REALLY well with practicing rock coloring on scrap castings, so I decided to do something similar with the road coloring.

I'm sure glad I did.


This road in East Berlin - one of the first I did - came out particularly well so it's become my model for all subsequent roads. Believe it or not, though, the base color of this road was Apple Barrel "Pewter Gray" (from a $.50 bottle of craft paint).


When I tested that color on a sample of my road material though, it came out looking really dark for some reason. See what I mean by doing tests ahead of time on a piece of scrap?


As a result of this test, I ended up using Apple Barrel's "Country Gray" for the concrete pad at Hartford Rayon - as well as Belamose Road itself.


I'm using foam core, with the paper removed, to make my concrete roads/parking lot here. It was easy enough to add expansion joints (20' scale squares), but for some reason, this particular foam came out with a very strange textured effect.


This is how it looked when the paint dried. Since it looked a bit rough for my taste - and since it was already hot-glued in place - I added another thick coat of paint to fill it in some.


That definitely toned down the texture, but you can still see it.


But I actually think it looks appropriate - one of those "happy accidents" that you sometime come across in the hobby. I think once I weather this lot with chalks and such, it's just going to look like a really worn, industrial lot. And that's the look I was hoping for - it just didn't happen the way I was expecting.

And maybe that's an important lesson I need to learn when doing scenery. Not only can you do it over, you sometimes end up with unanticipated results that end up turning out even better than what you planned. And that can be a pretty fun thing to experience - provided you don't let analysis paralysis keep you from even getting started.

I'm sure I'll hit additional - and different - roadblocks as I continue building my scenery skills. But at least I've started and can attest to the fact that the journey is almost - if not at least - as fun as the destination. That's a relatively foreign concept to a left-brained hobbyist like me, but I'm learning to use the other/artistic side of my brain more and more.

And getting into the "right mind" is probably Step 1 toward enjoying - and eventually getting better - at doing scenery. Hopefully, if you haven't already, you'll try it too.