Almost three years ago to the day, I posted about a box I made from foamcore to mount and use my NCE PowerCab more easily.
Click here for how I did that project.
The small size of NCE's PowerCab DCC system makes it ideal for taking to the workbench - or even taking to a show. But not being mounted to anything makes its ungainly components a bit inconvenient to manage. The foamcore box solved that problem.
Well, after almost 3 years of use, turns out the foamcore box - while nice - had a couple of shortcomings. First, its light weight wouldn't prevent it from being pulled around by the wires if I had to move them. Admittedly, that didn't happen that often and wasn't really a problem - but I wanted something a little heavier and more substantial. Even if that didn't bother me, one of the hot glue mounting connections came undone and wasn't where I could repair it easily.
 |
| This is the old foam box. If you click on the image to enlarge it, you'll see the vertical PCB has some unattached. |
 |
| This thing was more like a tray than a box - no lid and the throttle would just lay on top of everything. |
So, being one to embrace a new woodworking project, I figured I'd just make a new box.
Beware: This post has a LOT of photos, but I let them do (most of) the talking. And if you make it to the end, you'll know how to make a cool box like this of your own:
 |
| Everything is mounted directly to the wood - including the throttle (mounted with velcro) - and the wires are stapled in place, so no fear of things moving or coming apart. |
 |
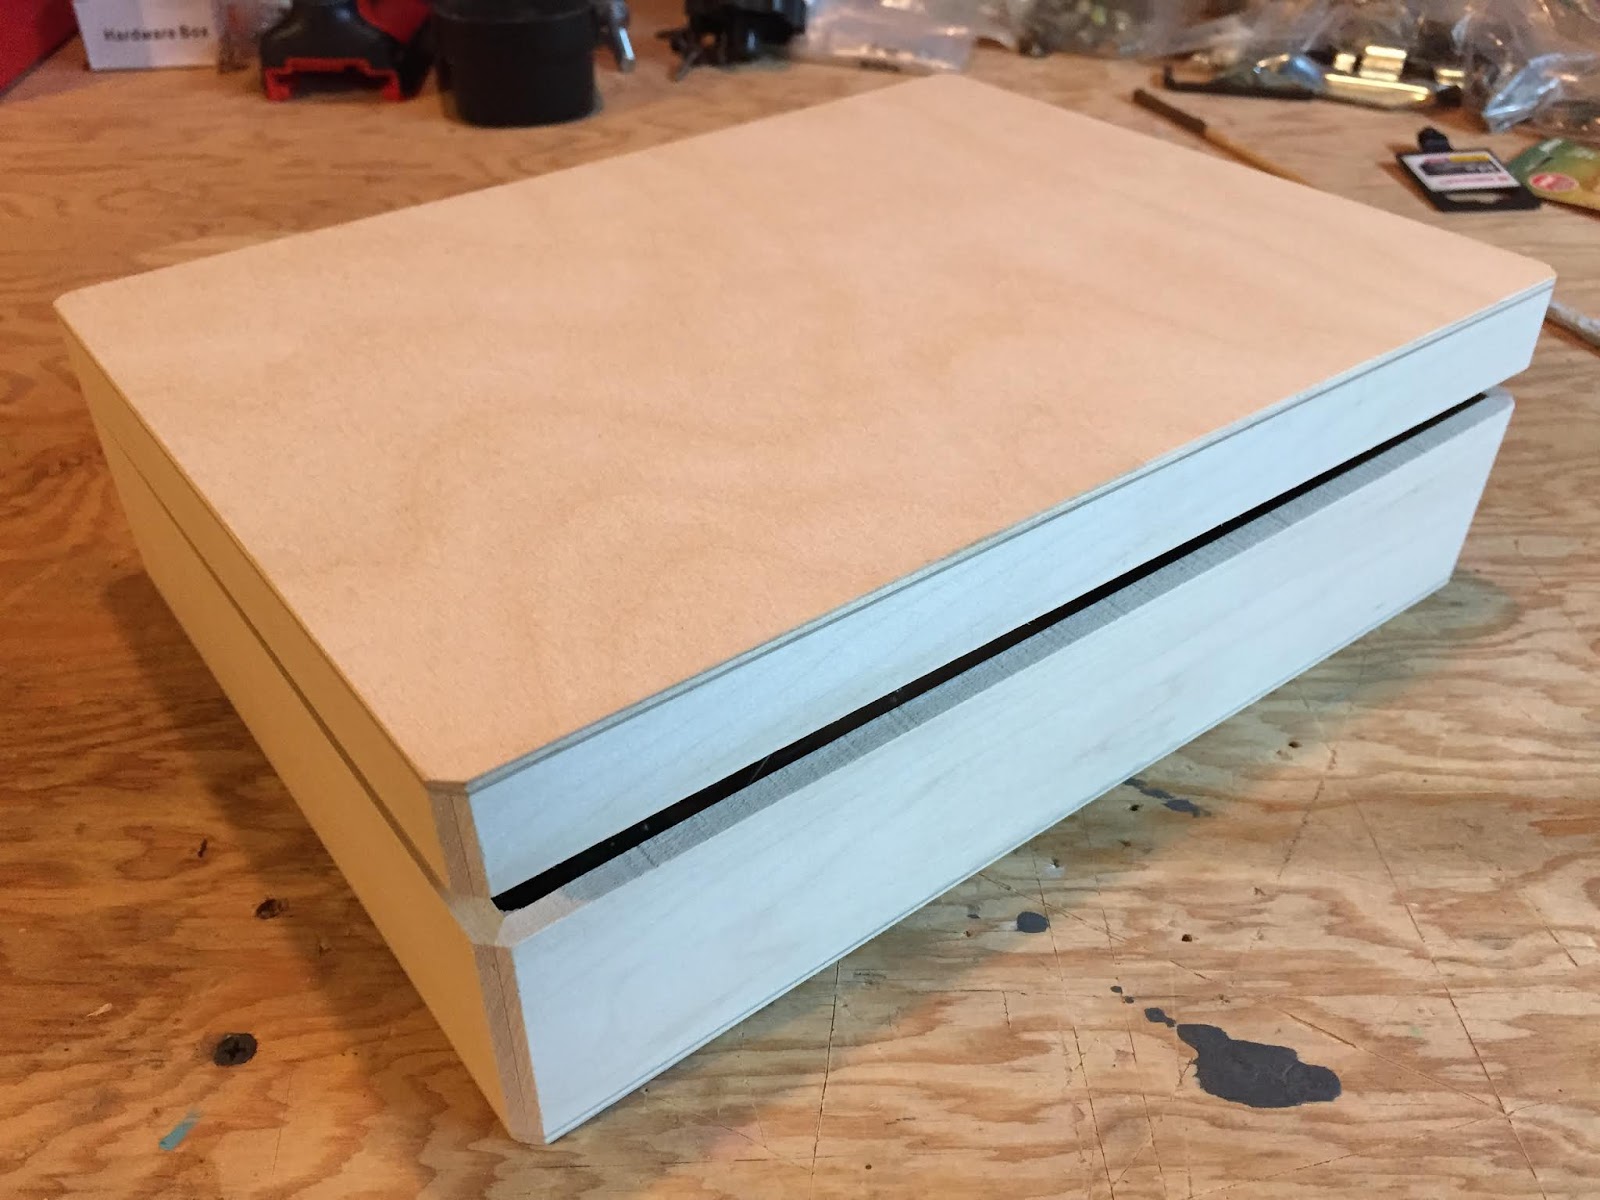
| I started with a wooden box I got from Michael's Arts & Crafts. I think it's used primarily as a keepsake box, but I liked its plainness - and lid. |
 |
| Here it is on my bench, ready to be modified. |
 |
| First thing I did was lay out all the components so see how they'd best fit and work in relation to each other. Then I marked where the plug-in panel would go. |
 |
| Three hole-saw holes got me started . . . |
 |
| . . . and a 4-in-hand file made quick work of the remainder of the soft wood. |
 |
| I also used a small saw when I wanted to remove material more quickly. It also came in handy when squaring things off. |
 |
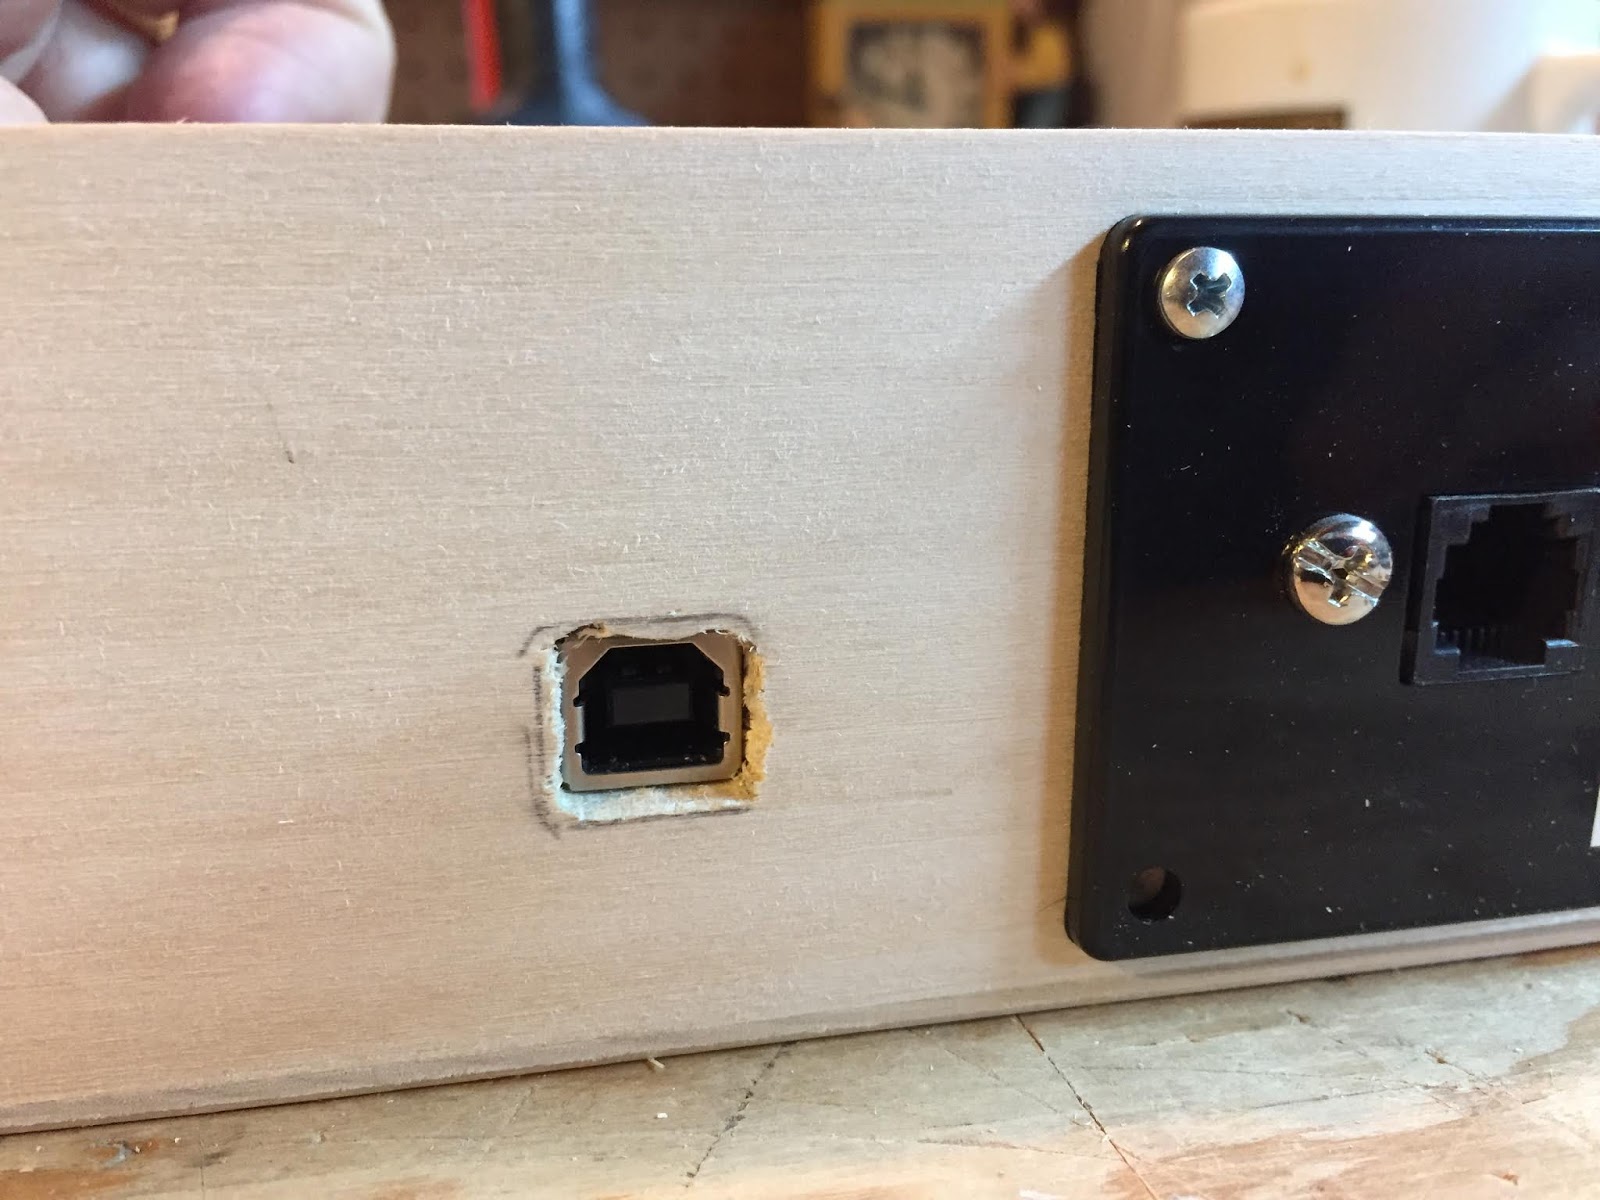
| And here is the panel all mounted, and a mark for the USB interface made, there on the left. Given the size of the box, I was able to include my Lokprogrammer module as well - something I couldn't do with the foamcore box. It's mounted inside toward the back of this photo. I'll get into precisely how it's mounted a bit later. |
 |
| I couldn't mount the USB interface directly to the floor of the box since there are components on both sides. So I put it on its own wooden pad to lift it up. Since I'd be drilling the hole for the plug from outside the box, I needed to mark the outside. And since I needed to account for the thickness of the floor of the box, I mocked it up to get the correct height of the hole. |
 |
| Once that was done, I drilled a couple 1/4" holes and filed to the markings. |
 |
| Here's the mounting pad I mentioned. I was too impatient to just get the proper plastic screw sleeves to mount the board, so I used some balsa I had on-hand to create the needed clearance. Bonus: the balsa glued nicely to the plywood base. |
 |
| Here are a couple of views of the mounting pad glued in place, showing how it was made. |
 |
| Here's the USB panel all mounted - not as pretty as the plug-in panel, but just as effective. |
 |
| And here's how it looks inside. |
 |
| Remember I mentioned the Lokprogrammer had to be mounted with a screw? Well, that screw comes up through the bottom of the box and the Lokprogrammer is secured with a nut on the end of that screw. Problem is, now I had a screw head sticking out that would mar any surface the box was placed on. And I couldn't countersink the screw since the floor of the box is so thin. So I used these little wooden plugs to make four "feet" - thereby keeping the screwhead from ever hitting anything. |
 |
| Da feets |
 |
| Closeup view. The little feet were simply wood-glued to the box. |
 |
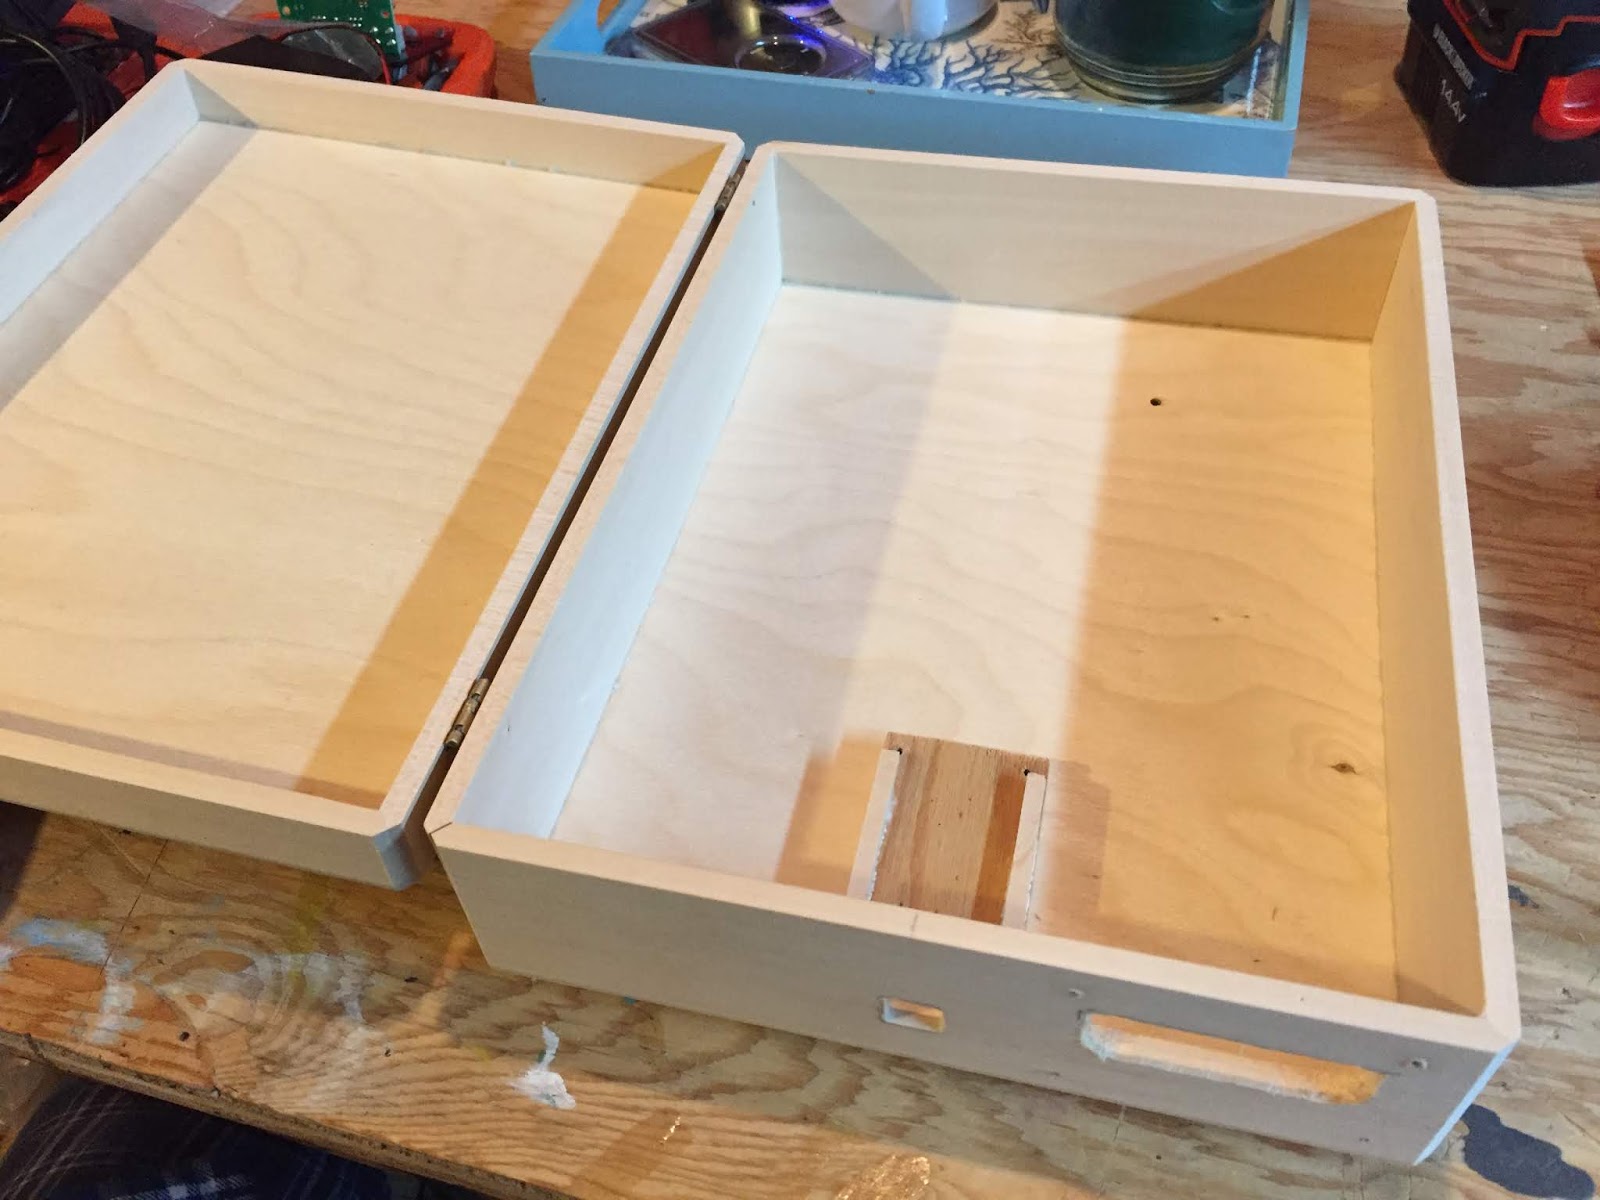
| So here's the box "done" - but I took everything out so I could give it a much better, more finished appearance. |
 |
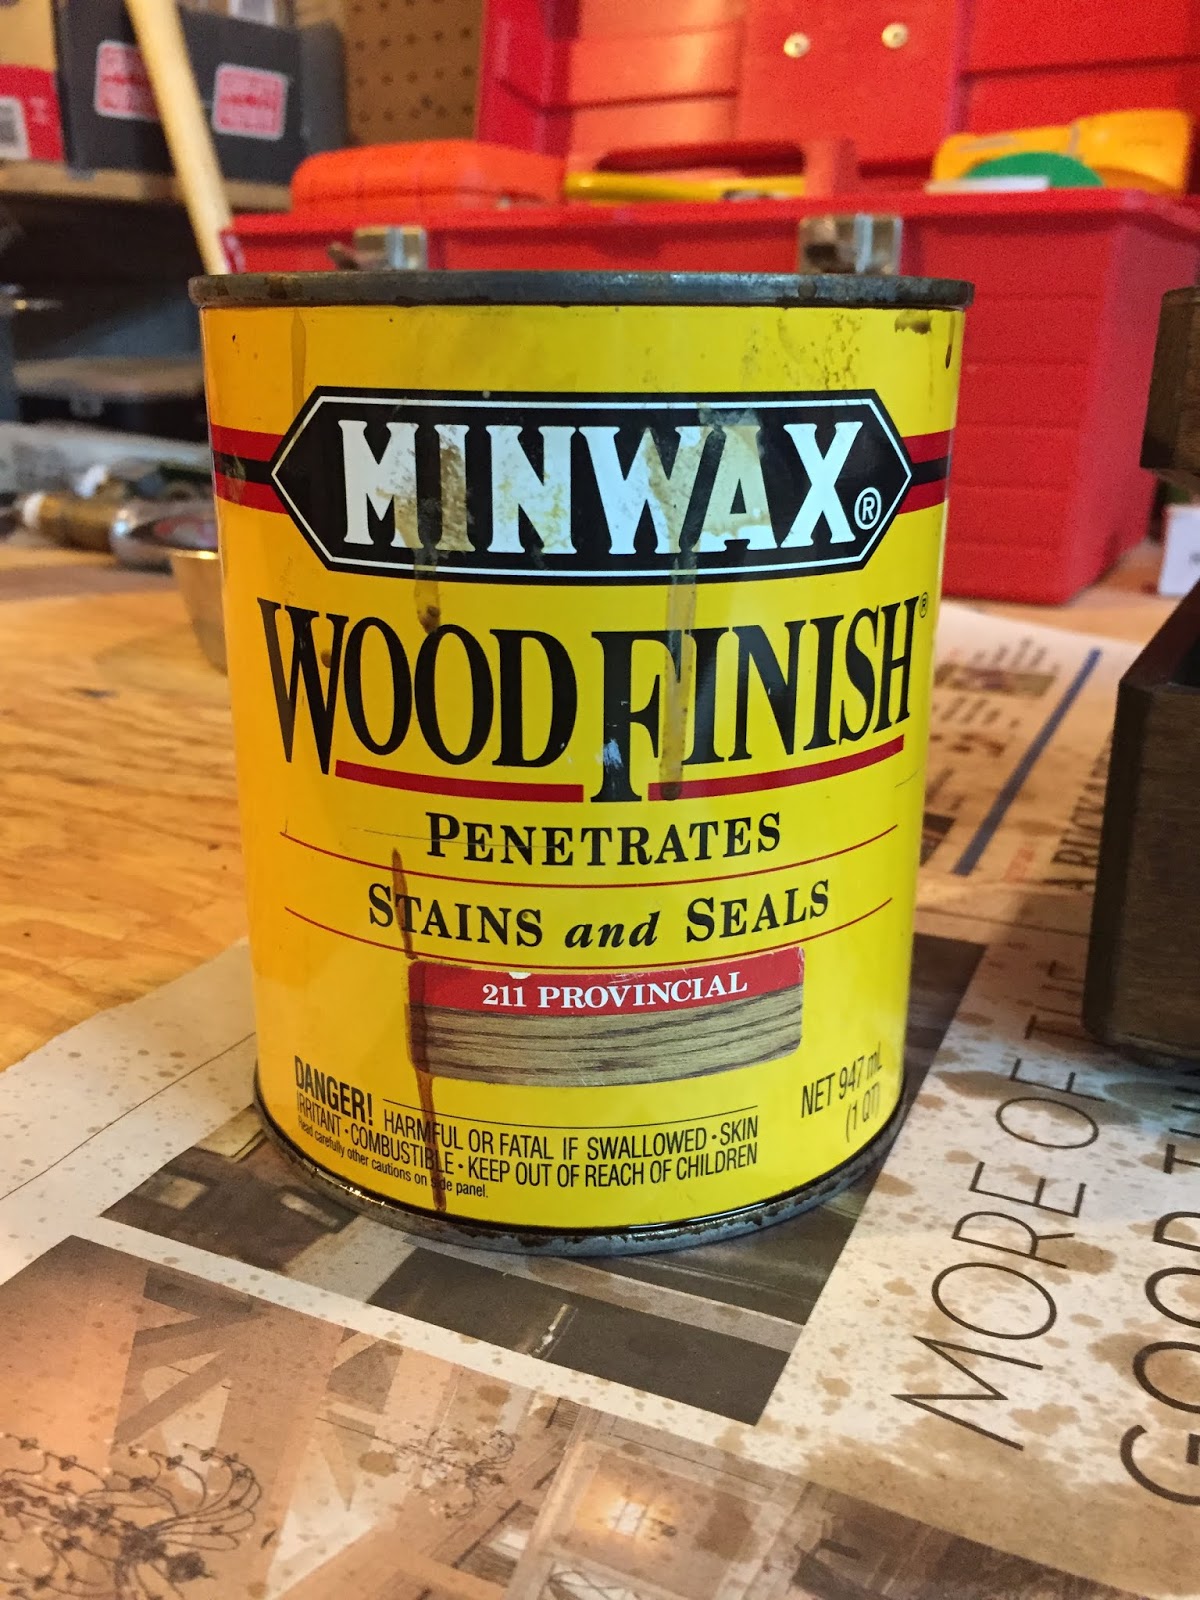
| The smell of Minwax brings back many great childhood memories of my dad refinishing furniture. One of the running jokes was that he stained everything Provincial - and it turns out, that's what I chose for my DCC box :^) |
 |
| Just brush it on and rub it down with a rag. ProTip: Don't do this while wearing nice clothes. And be careful of the brush whipping stain all over the place, well beyond the newspapers you put down . . . |
 |
| But doesn't it look purdy? |
 |
| Huge improvement over just a plain wooden box. |
 |
| Here it is with the components mounted. And I added a little hook & clasp to keep the lid shut. |
 |
| At first, I figured I'd just store the throttle loose on top of everything as I did with the other box. But I changed my mind about this later . . . |
 |
| Here's everything all out and ready to go. |
 |
| A couple more closeups of the exterior - this one showing the latch. |
 |
| And showing the "business end" |
 |
| I changed my mind about how to store the throttle once I realized that the lid had enough depth to store the throttle there. So I got some velcro . . . |
 |
| . . . and just used that to mount the throttle in the lid. |
Like I said, quite a few photos, but hopefully you enjoyed seeing this little project go from dream to reality. And if it inspires you to do something similar, I hope you'll let us know in the comments!


That's very cool, Chris! That looks very portable and durable.
ReplyDeleteIt is! I'm actually considering putting a handle on it, but that might be a little much...
Delete