Wednesday, March 18, 2020
Monday, March 16, 2020
Uncle Sam Says: "Work on Your Model Railroad" (grade crossings)
If you ever needed a compelling reason to stay at home (notice I didn't say a "good" reason - there's really nothing good about the Coronavirus), I think our current situation should be reason enough. Provided you're able to. Huge thanks go out to all the folks that still have to go into work - the first responders, medical folks, and yes the drivers of the delivery trucks, the post office, the grocery workers, etc. These will be the heroes of this crisis.
But if you are able to stay home, please do & flatten the curve. And if you do - and you're reading this blog - you're probably a modeler of some sort, so do some modeling! Lots of time at home couldn't be a more ideal opportunity to finally get to all those projects you've been putting off (and I don't mean home projects. This IS a model railroad blog, after all).
I've definitely been doing my part lately. Since we've been ordered to work from home and I don't have to commute, I have two additional hours a day to work on the layout. Add to that the - ahem - lack of any need to get all dressed up, and that's even more "found" time.
And I've been trying to make the most of it in Wethersfield.
As of my last progress report back on March 5 (seems like an eternity ago...), I'd finished the bulk of the terraforming, then I worked on some structures, and did a quick & easy tar & sand road. Since then, I've been working on grade crossings.
"Why?" you might ask. Well, before you add any scenery to that terraforming, you really should put your roads in. And before you put your roads in (generally speaking), you should put in your grade crossings. Seeing that I needed to do three different crossings in Wethersfield (actually four - well, five, but we'll get to that), I figured I'd try some different techniques. Follow along in the photos and you should find a tip or two - if only of what NOT to do...
| I must have beginner's luck since my first grade crossing is my standard for all future crossings and I really like how it came out. This is the crossing in East Berlin - made out of individual pieces of 1/16' x 3/32" stripwood to simulate 4"x8" in HO scale. The strips are a scale 13' long and include impressed bolt holes where they "fasten" to the ties. They're also beveled on the ends and at the edges where they press up against outside rail. I glued them to the ties with Aleene's Tacky Glue and used an india ink and alcohol mix to stain them to simulate sun bleaching. The road is foamcore with the paper peeled off, joints and cracks added, painted with Apple Barrel Pewter Gray craft paint, and weathered with brown and black Bragdon powders. |
| For the Church Street crossing(s), I decided to try a pair of Blair Line grade crossings I had on-hand. Like the Jordan Lane crossing, I used the Duco cement, applied with a microbrush. |
| Thankfully, I have the perfect setup for that: a piece of plate glass and an actual piece of rail! |
| The "outside" pieces only warped a little, so I applied some more glue and weighed those down in place. |
![]() |
| I also took the time to add some bolt detail. I don't know if anybody will notice it, but it didn't take long and I at least will know it's there! |
![]() |
| Final step is to mask off the pre-existing road and apply my I&A mix (sparingly, this time...) |
| The crossing at Jordan Lane turned out pretty good. You can just make out the bolt holes and you see how the I&A looks when dry. I'll cover the real concrete road construction in my next post. |
| And here are the Blair Line crossings at Church Street - all flattened and stained. The road here is sheet styrene, but - like Jordan Lane - I'll get into the specifics later. |
In the meantime, I'm going to try not only to make continued progress on the layout, but also try to post daily updates here. For those of you that don't yet have a model railroad - or are confirmed armchair modelers - I hope you find these updates entertaining. And if you do have a layout, I hope you're spending some "found" time working on it - and that these updates give you something helpful - or at least tell you about something to avoid other than a virus.
We'll get through this crisis together - our country has been through worse - and maybe, if we're lucky, we'll come out of the other side with a whole new slew of completed projects to show for the time.
Thursday, March 12, 2020
Throwback/Thankful Thursday: Chester (Chet) Rech
Going back through old photos looking for a road construction pic I took almost 35 years ago was a real trip down Memory Lane. I've mentioned Chet Rech here and there on this blog, but suffice it to say here that he was a huge early influence. That's him in the photo above, with his original 4x8 layout. Alas! the layout itself is no longer, having suffered two long moves - from Wilmington, VT to Milford, CT then to Old Saybrook. But Chet's work lives on, having been salvaged & reconstituted as the Somerset & Mill Hollow (aka "The Air Line")
I wrote the following sometime during the winter of 2005, shortly after his widow visited the layout when it was in Milford. At that point, I and a bunch of friends (many of whom still help on the Valley Line today!) had restored the original layout to operating condition for her to see & enjoy.
That was way back before blogs, so I never did anything with this little story. But remembering Chet's road construction story prompted me to go back and find it, so I'll share it here with you. It's another example of how the greatest part of this hobby are its people. I hope you enjoy reading it.
4x8 and 400 pounds: A
Legacy in HO Scale
"Looks
like you're pretty interested in trains." The small-town librarian noticed
the pile of magazines stacked around me like sandbags around a foxhole. It
was the summer of 1983. I was fourteen
years old, away on family vacation and it had been raining for days. With
nothing else to do, the library's collection of Model Railroader magazines was
a godsend. I'd purchased my first copy that January and was eagerly
soaking up the contents of every issue I could get my hands on, learning as
much as I could about my new hobby.
"The man who donated them has quite a train layout. I'm sure he wouldn't mind a visit - he lives just outside of town." I could hardly wait to ask my dad if he could take me. We called the number the librarian gave us and were soon welcomed into Chet and Martha's home like old friends.
After a short visit, we made our way to the basement. Standing there in the middle of the floor, surrounded by workbenches, power tools, and various storage items was a standard 4x8 layout with brass track and 18" radius curves. The Mill Hollow & Southern was based on the Hoosac Tunnel & Wilmington – or the Hoot Toot & Whistle, as Chet liked to call it – and what detail! Every building was lighted and almost every one had a full interior. There were two towns on two different levels and more mini-scenes than I could count. It was obvious that Chet's primary interest was in detailing rather than operation. His passion was evident in every nook and cranny.
My dad and I visited again the next summer and once I got my driver's license, I was able to make the trips by myself. Over the years, we developed a friendship that went beyond model railroading. Having lost both sets of grandparents way too soon, Chet and Martha became willing surrogates. I even took my girlfriend, then fiancée, to visit. When we were married in 1995, they came to our wedding.
I had known Chet for over 15 years when his health started to decline and when I read Martha's letter of his passing it was like losing a member of my own family. A few months afterward, Martha phoned asking us to visit. She was going through Chet's things and wondered if I'd be interested in taking the train layout. In my mind, there could be no better keepsake of our friendship, and my dad and I made the long trip up toVermont to pick it up.
When we got to the basement, we discovered to our surprise that we couldn't actually lift it! When we tried to pick it up, it felt like it was bolted to the floor. Only then did we realize that Chet had used "natural" scenery materials. Those weren't hydrocal rock castings we'd admired all those years, but actual chunks of granite and stone! And everything was covered in gallons of concrete-like plaster. It was a beautiful layout, but weighed close to 400 pounds.
We had quite a time getting the railroad out of the basement in one piece, but it finally made its way home where it became the only "complete" section of railroad I had. Once I set it up, I discovered that it had deteriorated over the years - and the big move hadn't done it any favors either. Martha said she didn't remember the last time the trains actually ran, but I was determined to return the layout to its former glory. One of my proudest moments was when Martha visited us for Thanksgiving later that year and I was able to show off the restoration, complete with a train operating over track that hadn't seen any action in years.
"The man who donated them has quite a train layout. I'm sure he wouldn't mind a visit - he lives just outside of town." I could hardly wait to ask my dad if he could take me. We called the number the librarian gave us and were soon welcomed into Chet and Martha's home like old friends.
After a short visit, we made our way to the basement. Standing there in the middle of the floor, surrounded by workbenches, power tools, and various storage items was a standard 4x8 layout with brass track and 18" radius curves. The Mill Hollow & Southern was based on the Hoosac Tunnel & Wilmington – or the Hoot Toot & Whistle, as Chet liked to call it – and what detail! Every building was lighted and almost every one had a full interior. There were two towns on two different levels and more mini-scenes than I could count. It was obvious that Chet's primary interest was in detailing rather than operation. His passion was evident in every nook and cranny.
My dad and I visited again the next summer and once I got my driver's license, I was able to make the trips by myself. Over the years, we developed a friendship that went beyond model railroading. Having lost both sets of grandparents way too soon, Chet and Martha became willing surrogates. I even took my girlfriend, then fiancée, to visit. When we were married in 1995, they came to our wedding.
I had known Chet for over 15 years when his health started to decline and when I read Martha's letter of his passing it was like losing a member of my own family. A few months afterward, Martha phoned asking us to visit. She was going through Chet's things and wondered if I'd be interested in taking the train layout. In my mind, there could be no better keepsake of our friendship, and my dad and I made the long trip up to
When we got to the basement, we discovered to our surprise that we couldn't actually lift it! When we tried to pick it up, it felt like it was bolted to the floor. Only then did we realize that Chet had used "natural" scenery materials. Those weren't hydrocal rock castings we'd admired all those years, but actual chunks of granite and stone! And everything was covered in gallons of concrete-like plaster. It was a beautiful layout, but weighed close to 400 pounds.
We had quite a time getting the railroad out of the basement in one piece, but it finally made its way home where it became the only "complete" section of railroad I had. Once I set it up, I discovered that it had deteriorated over the years - and the big move hadn't done it any favors either. Martha said she didn't remember the last time the trains actually ran, but I was determined to return the layout to its former glory. One of my proudest moments was when Martha visited us for Thanksgiving later that year and I was able to show off the restoration, complete with a train operating over track that hadn't seen any action in years.
The result was a near perfect restoration – and anyone that sees the layout would recognize Chet’s work immediately. The Mill Hollow & Southern is sure to be around for a very long time, giving me a chance to share the talent of a man whose attention to detail inspired me in my own modeling efforts and whose friendship gave me a legacy that lives on.
Wednesday, March 11, 2020
Tuesday, March 10, 2020
Tuesday Tip: An Easy Tar & Dirt Road
The first time I ever heard about building roads with tar & dirt was the first time I ever visited Chester (Chet)'s model railroad. Like many of his generation (the "Greatest") he had a 4x8 in his basement and spent his retirement years working on it, bit by bit. One of the things he enjoyed most was recreating scenes from his younger years. One of those scenes was the scene above, taken during the summer of 1985 with my Kodak Instamatic. It depicts a road crew, using a truck to pour on the tar and two guys shoveling dirt onto it. Chet enjoyed telling the story of how roads were built when he was growing up, and how fascinated he was every summer he saw the crews out building a new road, or maintaining an old one.
Curiously, I couldn't find much about this process on the internet. I found the photo above, and I found a cool article from the August 1920 issue of "The Road-Maker, Excavator and Grader" magazine (a pretty cool read, actually). But Chet's word was certainly more than enough - and the mini-scene on his layout depicted the process nicely.
So, when it came time to work again on Fernwood Street in Wethersfield (click here and here for the previous posts on Fernwood), I again consulted my primary source photo:

John Wallace took this photo of the southbound Valley Local from his bedroom window sometime during the early 1940s. Fernwood is a dead-end street that ends at the railroad tracks. But most interestingly, it looks to ME at least like this is a tar/dirt road.
I fear John may contradict me with actual prototype information (always a risk), but it sure looks the part - and this method of cheap road construction would certainly make sense on a dead-end street, especially during the 1940s.
So, after a famously failed experiment attempting a "concrete" Fernwood Street, I decided to pay homage to Chet's story and try a "tar & dirt" road here.
The pic above shows where I started. I "capped" the failed ground good/masonite base for the concrete patch road with a sheet of .060" styrene sheet. The two pieces of cardboard on top of that define the limits of the street and provide an elevated base for the yards/houses.
Step 1: After "damming" the fascia end of the road with masking tape, I applied a thick coat of flat black paint on the road surface.
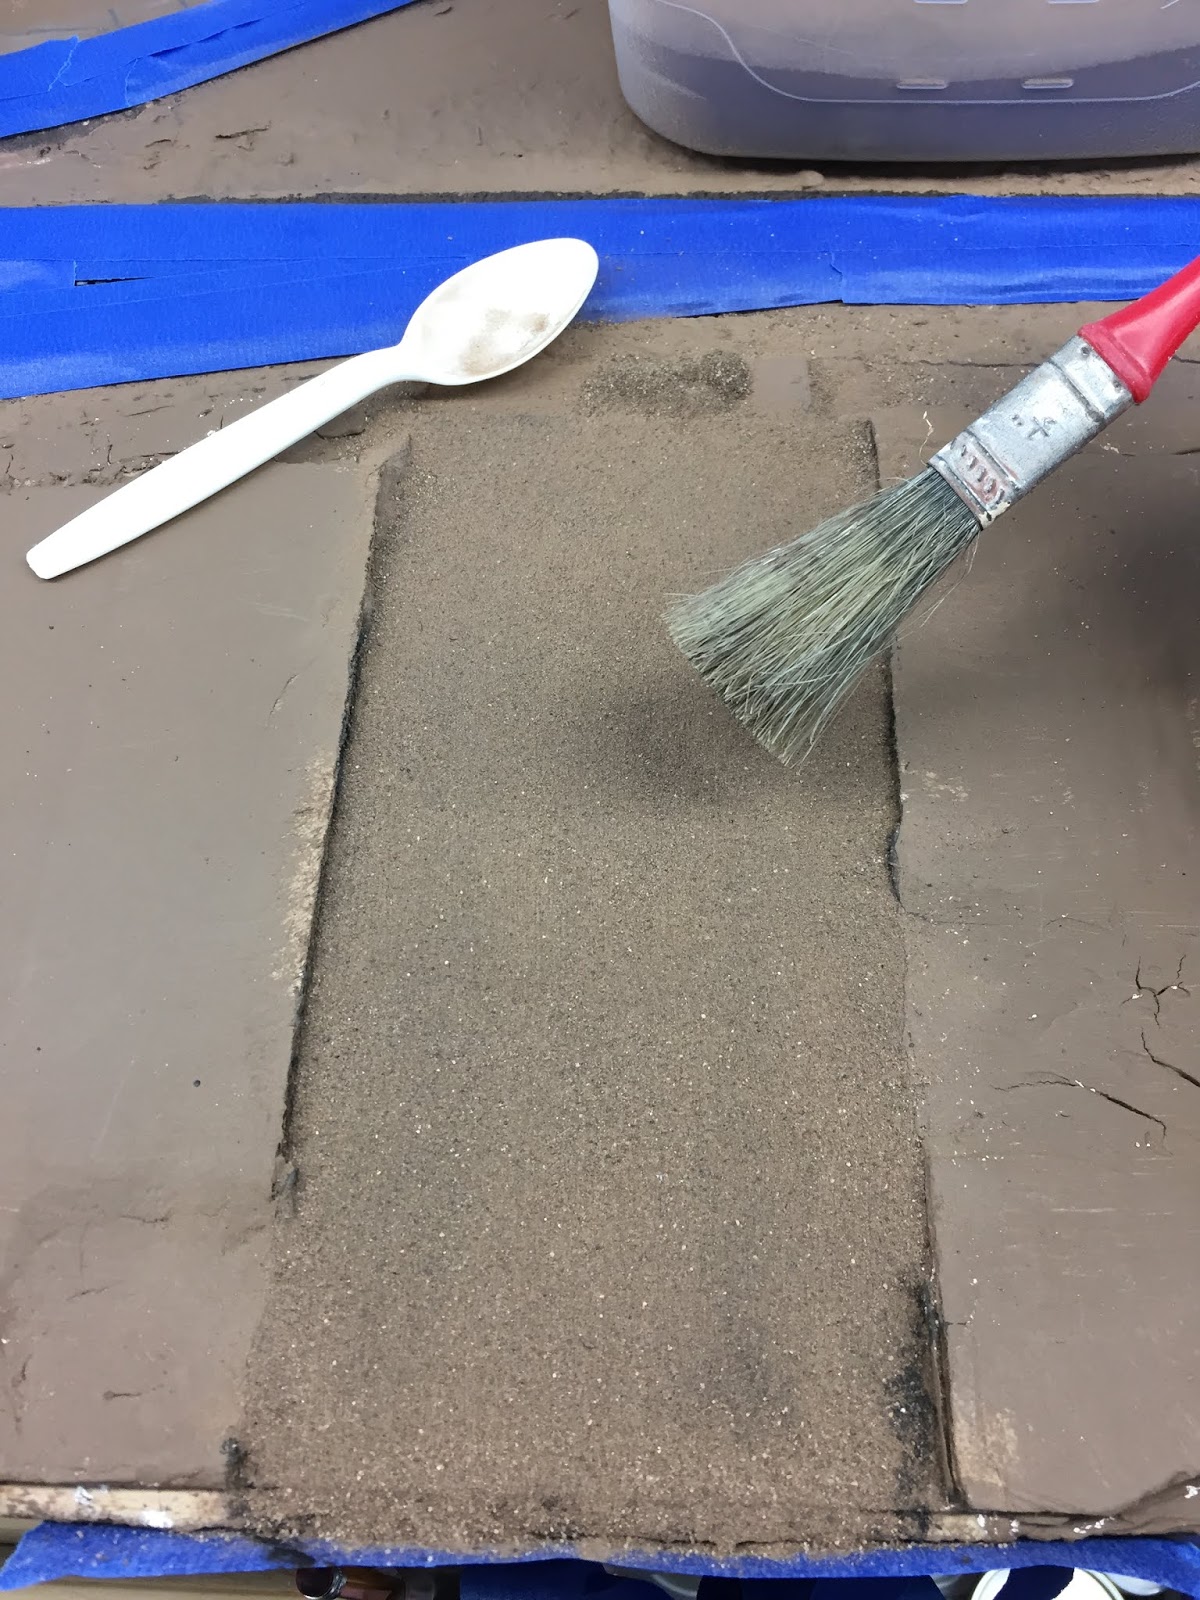
Step 2: Next, I sifted on a thick layer of my finest grade dirt using a spoon.
Step 3: After waiting overnight for everything to dry, I used a soft brush to brush the excess dirt into a pile to scoop it up with my spoon (dirt may be "dirt cheap" but there's no need to waste it!). I brushed lengthwise along the road, following the direction of traffic (such as it is on a dead-end road).
Step 4: I vacuumed up any remaining excess with my ShopVac, which really made the road "pop" and look like some of the dirt had worn off and the tar soaked through.
Super easy, and a great effect - if I don't say so myself.
The thick black paint (aka "tar") acts as the adhesive - similar to the prototype. The one thing I might try to do differently next time is add some wheel ruts after adding the dirt, but before everything dries. I just don't know 1) whether the paint is really thick enough for that, and 2) whether that would just tend to make black lines rather than ruts.
Then again, according to the article, one of the benefits of this type of road construction is that it creates a (relatively) hard surface. So maybe ruts aren't needed.
One thing that's definitely no longer needed is a road surface for Fernwood Street! I'm pretty happy how nice this came out - and how easy it was to do. I hope you try this technique yourself - and if you do, let us know in the comments!
Monday, March 9, 2020
Modeling Monday: Railings, Posts, & Painting
Work in Wethersfield continues, with a focus on structures. First, I added some details (railings and porch light) for the Ballantine's beer distributor office.
I spent a LONG time Saturday on Wethersfield. The good news is that I had a nice long block of time to spend. The bad news is that I don't have lots of progress to show for the amount of time used.
However, I did plow through some mental roadblocks and tried my hand at making a few different grade crossings - and roads. Stay tuned & maybe you'll pick up a few tips!
| The railings are from Central Valley and Plastruct. The porch lights are Tichy #8170). Just took a quick shot of flat black rattle can paint. |
| I drilled holes to accommodate the railings and glued the lamp to the bracket. |
| I glued the light over the door and carefully added the partial railings onto the top landing. All that's left to do on this structure is a bit of weathering on the roof and the foundation/stairs. |
| While I was at it, I drybrushed the same "granite gray" paint over the outhouse. I was pleasantly surprised to see how much it looks like weathered wood. |
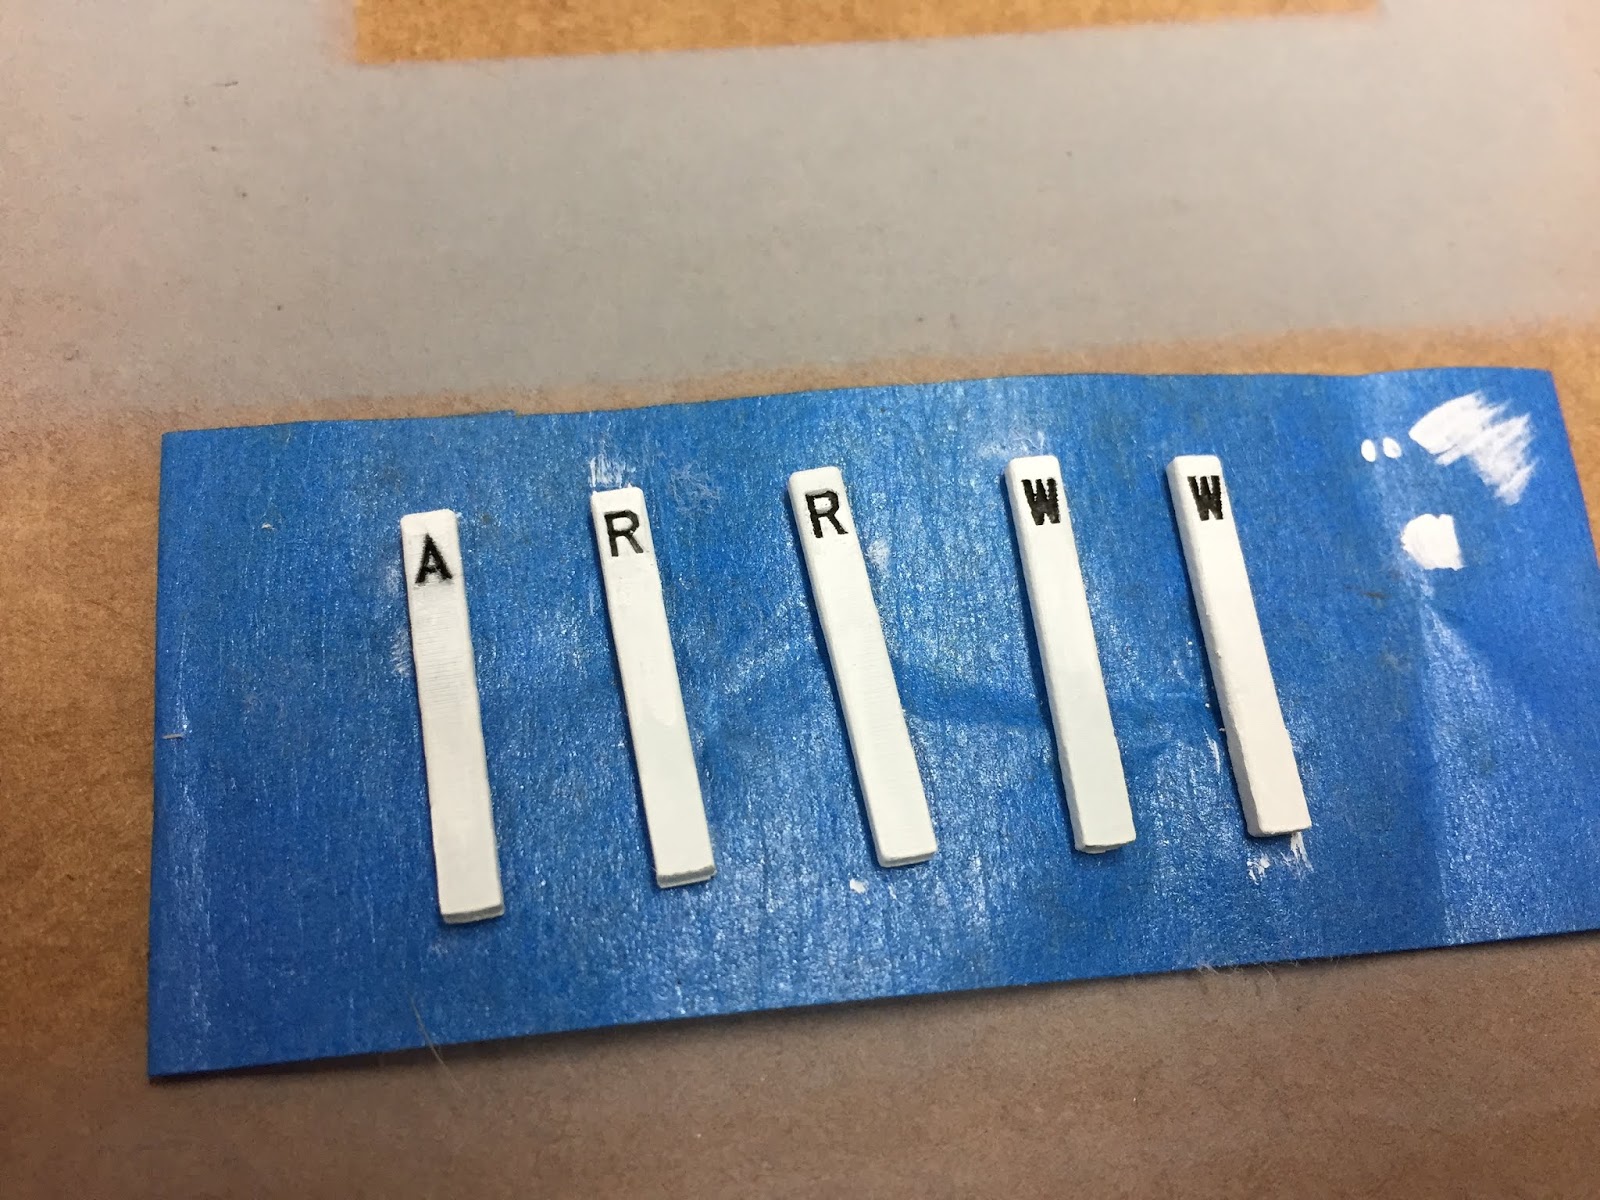
| While I was in the paint room, I grabbed the lineside details I'd spray painted last week (yes, that's actually white - the color in the camera is off a bit). |
| ChrisZ made these from actual New Haven RR prototypes, including beveled base and top, and - most impressively - recessed letters! |
| It wasn't that hard to do, but it is fairly fussy work and does take some time. But it's an enjoyable way to spend a bit of time for some really cool details, especially with a cup of coffee and podcasts playing. |
However, I did plow through some mental roadblocks and tried my hand at making a few different grade crossings - and roads. Stay tuned & maybe you'll pick up a few tips!
Friday, March 6, 2020
Friday Fun: A Few Words About Wordless Wednesday #306
Way back last June, I wrote about a debate I was having concerning whether to move the siding at the Wethersfield Lumber Co. What I didn't mention at the time was that the debate wasn't just internal, but had been prompted somebody familiar with the area who felt pretty strongly that the siding should more closely follow the prototype and be parallel with the mainline.
Well, I'd concluded last year that the trouble of moving the siding wasn't worth the extra prototype fidelity. But last month, I had a change of heart - not the least prompted by discovering this in the NHRHTA Photo Library:

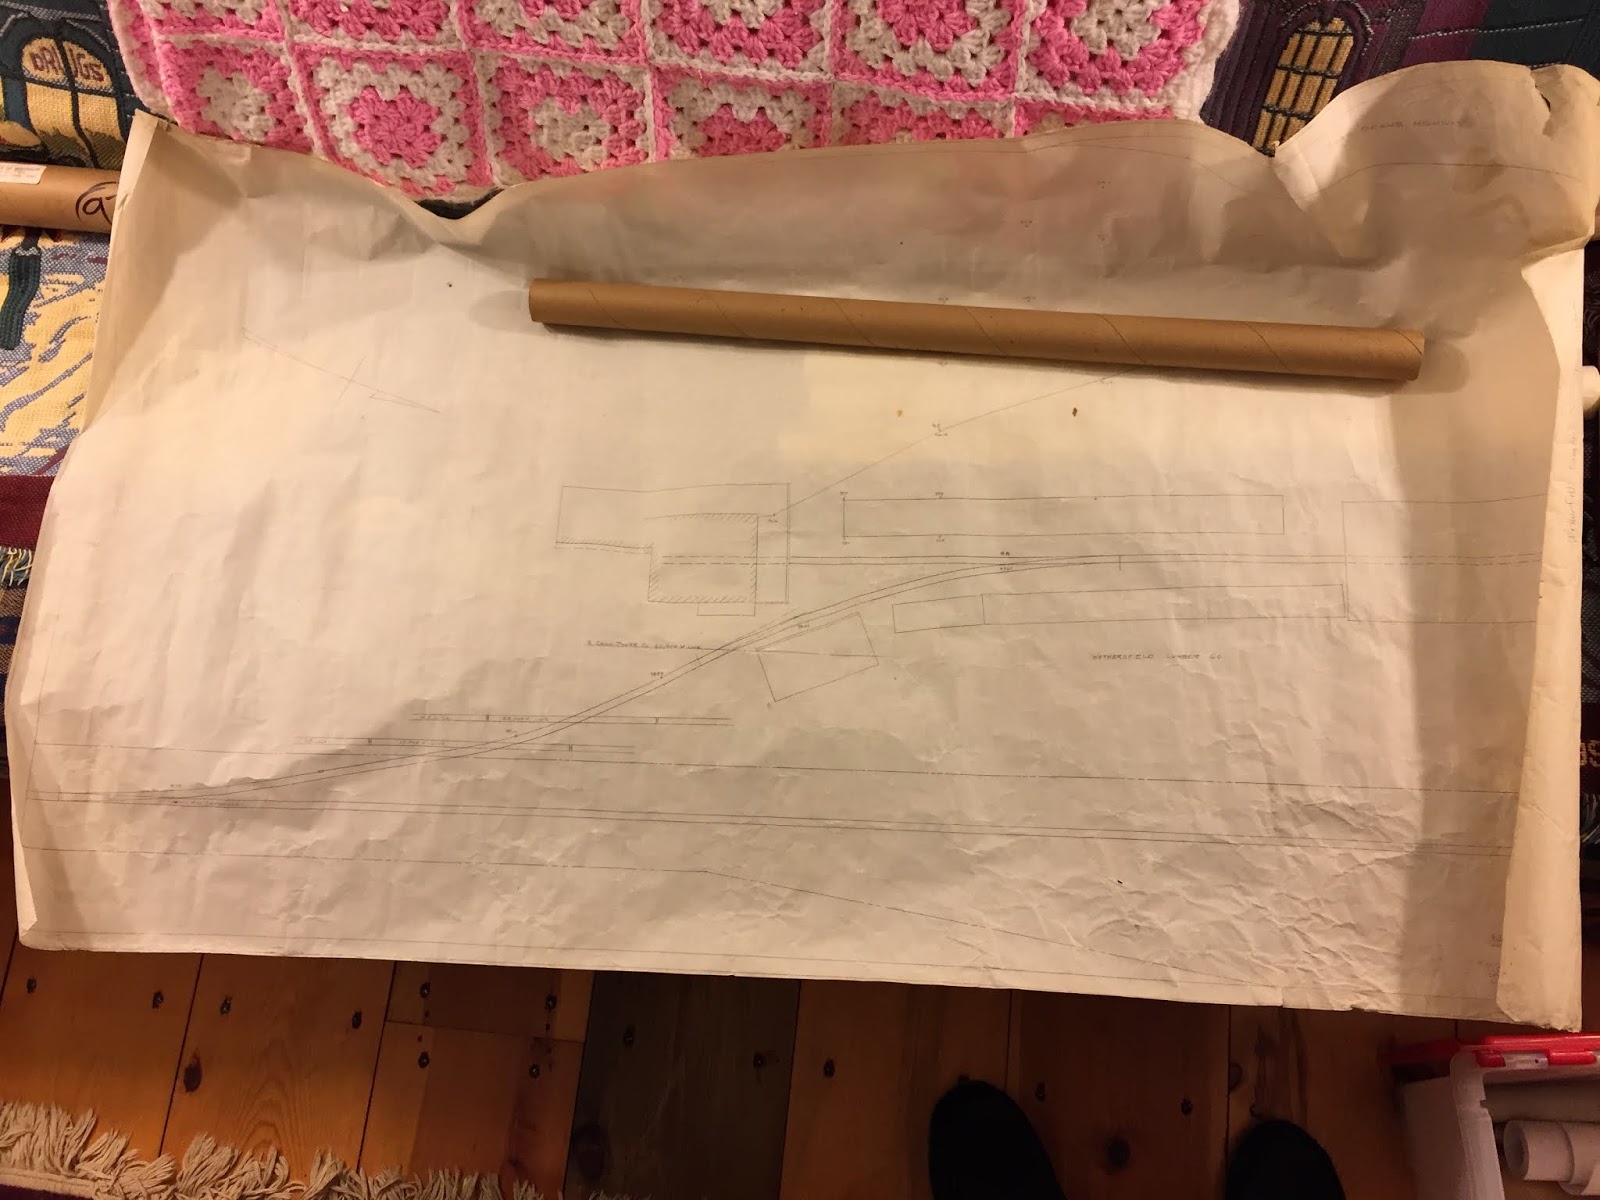
Well, I'd concluded last year that the trouble of moving the siding wasn't worth the extra prototype fidelity. But last month, I had a change of heart - not the least prompted by discovering this in the NHRHTA Photo Library:
Yup - you see what you think you're seeing. Right there in our collection all along (or at least since the cardboard tubes containing a bunch of items were donated) is the honest-to-gosh prototype diagram for the Wethersfield Lumber Company siding. We discovered it as we were cataloging the items during one of our volunteer nights.
Talk about a shocker!
So yeah, I finally succumbed to Dave's persuasion - pushed along pretty hard by this discovery as well. The siding is on the move - but don't expect me to include the switchback. Really.
Subscribe to:
Posts (Atom)