Saturday, December 17, 2016

Christmas Diorama: Trestle Construction/Installation

Once all the trestle pieces dried, it was time to collect the bents, 1/8" square stringers, bridge track, and abutments and put them all together into some semblance of a trestle...

Be sure and click on the image for a larger view - that way you can see how the abutments came out.
First thing I did was hot glue the abutments in place, centering them on the cork roadbed. Then I placed the bridge track in place and marked on the cork where the rails would end up. See photo above. This way I'd know how best to locate the 1x8" square stringers underneath the rails (Even though the trestle is curved, I decided that it was short enough to allow me to use straight stringers.)


You can see the four marks on the cork in the pic above (click to enlarge) - then it was just a matter of hot gluing them in place.

Next I needed to place the trestle bents. Unfortunately, it turned out that the distance between the surface of the "river" and the bottom of the stringers was Just A Little Too Short. So up to the workbench went the bents, and out came the razor saw.


I just sawed off the bottom of the bents, figuring I could place them into "snow"


And that's just what I did - I took a bit of "snow goop" and made little piles where the, ahem, pile trestle bents would go. Notice that they're evenly distributed (just eyeballed).


Then it was just a matter of inserting the bents into the piles of snow at an angle and straightening them up to meet the bottom of the stringers. I was going to use contact cement to attach the bents to the stringers, but opted to tack them with hot glue instead to hold them in place while the "snow" dried and hardened. While I had the snow goop out, I backfilled some snow around the bottom of the abutments as well.


So there you have it - it's now all ready for track!

Love the look and the way the mirror in the culvert is working out!
All in all, I'm really happy with how it's turning out - I only have a couple of bucks invested, but a lot of time between distressing the "wood," carving the abutments and painting/finishing everything. Once I thought through the installation (I'd considered and discarded a number of different approaches), it all went together pretty quickly.

Next, I can finally get around to installing some track and buildings!

Friday, December 16, 2016

Christmas Diorama: Abutments & Trestle/Bridge Painting

Painting is one of those things I always find intimidating. To a great extent, once you start, there's no going back - it's way too hard (in my mind at least) to reverse whatever I do. So the stress and anxiety builds. But I've started to develop an incremental approach, building up more slowly, so I can stop before things get too far. Here's how I went about painting/finishing the overpass and trestle bents.


I'd recommend roughing up all the simulated wood parts before you build this kit. Trying to do it afterwards was a bit awkward and I was worried I'd break something. Fortunately, all went well and I started the painting by giving it an overall light coat of gray from a rattle can.


While the overpass was drying, I took the trimmed/modified/roughened trestle bents and taped them to a piece of cardboard to make them easier to handle. and sprayed them gray as well to start.


The pic above shows the colors I used for "staining" the pieces after the gray paint dried - a variety of browns, tans, grays, and - of course - black. My biggest challenge during this stage of the process way to try and not cover over everything. I ended up going back and forth between full coats of color before I figured that out(!)


I the paint booth was still on, I shot the bridge track with some flat brown paint (again, from a rattle can) and used a wood block to wipe off the rail tops before the paint dried too much.

While the bridge/trestle pieces were drying, I decided to make some abutments for the trestle. I'd vacillated between precast stone abutments and scratchbuilding wood or concrete abutments, but I finally decided to do what my friend Pieter did for the Goff Brook Bridge and hand carve some foam blocks to simulate stone block construction...


Once I thought it through, it was pretty straightforward - I eyeballed a top course (cap) of concrete and then used my exacto knife and a straightedge to score the lines, as you can see in the pic above.

If you're going to be painting again later, you can save having to clean up and start over again if you use some plastic wrap to cover everything.
I used a "concrete" (gray/tan) color to brush-paint the cap and then used a variety of browns for the stone blocks. Unfortunately, I forgot to take a close-up photo of the result, but you'll see the completed abutments in the next post when I build & install the trestle.


Thursday, December 15, 2016

Christmas Diorama: Trestle Beginnings and Backdrop Support

When it came to building the trestle, I started to get all ambitious. I figured it'd be an easy relatively easy maybe not-so-bad scratchbuilding project, and even found an article on building a pile trestle in an old Model Railroader. I was actually fairly excited to do it. But, despite the fact that I thought I had all the stripwood I needed in my extensive stash, I had NOT ONE piece of the proper dimensions. And the local hobby shops didn't either. Luckily, I was going to a train show so figured I'd get some stripwood there - or, even better, get a deal on a trestle kit (like this).

Alas, I found no stripwood and the only trestle kit I found was in N scale. I thought all was lost until we were leaving and friend JohnG reached into his bag and pulled out these:

Already starting to modify them by removing the track clips and mounting slots
Yup - those are the trestle bents from your old "up and over" train set. You're probably thinking the same thing I thought, but the price was right and I figured they were worth a try. Besides, I didn't have anything else to use. I started by removing the track clips and mounting slots (see pic above) and then roughened them up (to simulate wood grain). I gave my completed overpass kit the same roughing up treatment.

Here's the overpass and all the trestle pieces ready to go:

If you've visited this blog for a while, you've probably guessed that I love "what's on your workbench" photos.
The "trestle pieces" consist of the bents described earlier, two lengths of 1/8" square strip (for under-track stringers) and a section of MicroEngineering bridge track.

Since I was chicken decided not to try and make plastic look like wood quite yet, I turned my attention to something more familiar - topping and sanding...

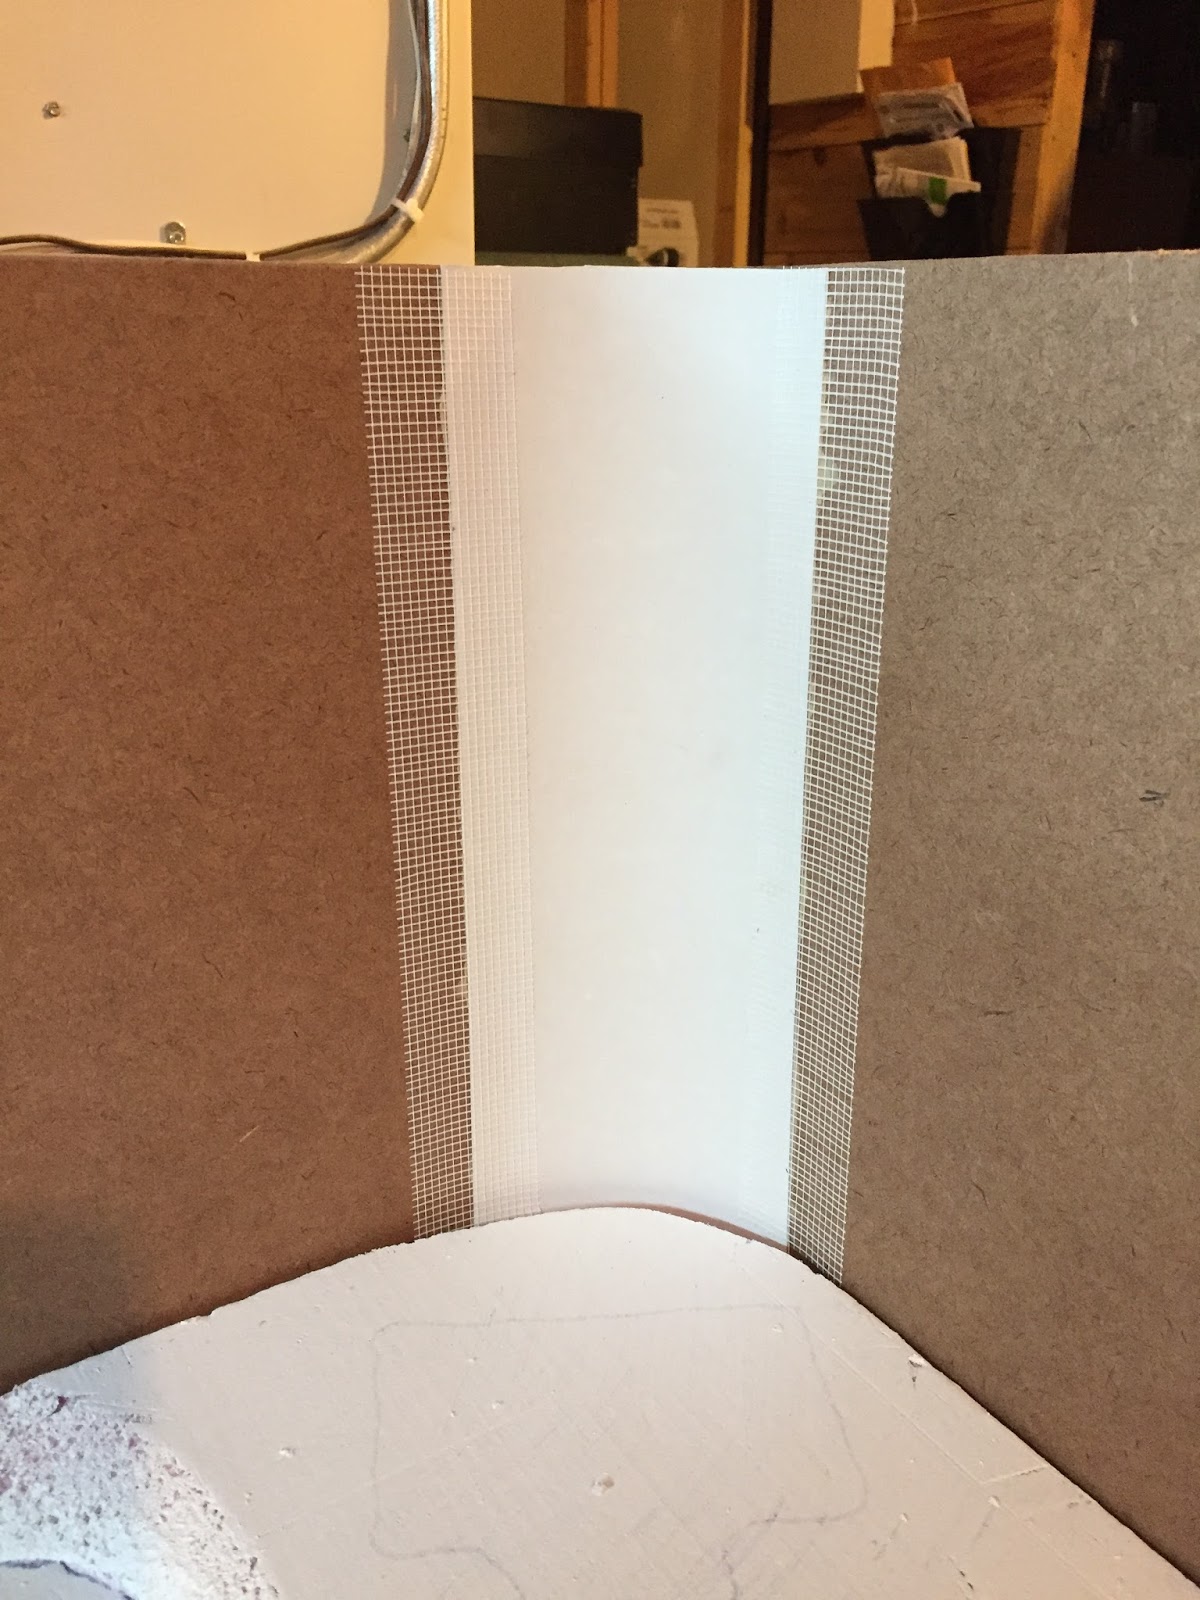
Here's the masonite backdrop in place. The seam on the left is all done (3 coats of topping, sanded in between coats), and a piece of vinyl in the corner
The above pic shows the masonite backdrop in place. The seam on the left is all done (3 coats of topping, sanded in between coats) and a piece of scrap vinyl to form a coved corner.


Since the edges of the vinyl needed to be feathered in, I used my handy dandy fiberglass mesh tape.... and some more topping. Here's the result once all the sanding and (re)topping were finished:


This would provide a good base/backing for the photo backdrop. But first, I wanted to figure out how far down I needed to paint the sky. So I taped up the photos temporarily:


This way I knew I didn't have to paint ALL the way down to the "snow" (since the photos would cover the lower portion of the masonite). Here's the backdrop all painted:


Once I got in the painting mood, I figured it was time to tackle painting/coloring the trestle parts and overpass. I'll go over that in the next post.

Wednesday, December 14, 2016

Wordless Wednesday #149 - G.Fox Christmas Village

Christmas village display on top of the awning of the old G. Fox department store, Hartford, CT
(photos from CT Historical Society via Pieter Roos)


Tuesday, December 13, 2016

Christmas Diorama - Fascia & Foamcore

Yikes! Between the holidays and spending any leftover time on the Christmas diorama, I haven't had any time to post my progress. So it's been over two weeks since I posted the latest progress pics that showed the initial "snow gooping."

The state of things when I ended Nov. 27
Since there are so many steps that require dry time (gooping, taping/topping, painting), I decided to leverage early-morning-time-before-work to keep progress going. So the next morning, I did the initial taping/topping on the masonite I'd be using for the backdrop:

Fiberglass mesh tape over the joint with vinyl spackle over that.
 While that dried, I decided to tackle the fascia. One of the benefits of using layered foam for scenery is that you can easily determine the contours of the land. So all you need to do next is temporarily clamp your fasica board to the layout:


Trace the contour:


And cut on that line with your saber saw. Voila!


Since I used 1x3s for the benchwork, there was almost as much foam as wood to attach the fasica to - so I used some foam-friendly adhesive (Loktite PL300) to glue the fascia and used screws in the wood. In the photo above, you can see I clamped it while it dried and spackled over the screw heads (which I'd countersunk).

Next, I decided to add some relief to the town area, defining roads and sidewalks. Foamcore is super handy for this. As you can see above, I used some scrap foamcore to provide a base for the town buildings and to provide a sidewalk/curb that would also define the roadway. This was all hot-glued in place after cutting to fit.

Here are the cut lines - the sidewalk is about 1/2" wide.
I used more foamcore to define the rest of the town streets as well as define a park to the left of the station. It'd be "raised" a bit above the rest of the scenery and the foamcore would, in turn, define the sidewalk around it. See the result in the pic below:

Remember you can always click on an image to enlarge it. I plan to cover the foamcore and cracks with more snow goop.
With the final rough contours of the town finished and roads/sidewalks defined, it was time to turn my attention to the trestle scene.


I didn't know quite how to go about building the trestle, but I knew where the track had to go, so I mocked all that up and used more foamcore to trace the track that would rest on the trestle and create a template for construction. I've never built a trestle before, so it'll be interesting to see how this turns out. Stay tuned!

Thursday, December 1, 2016

Thankful Thursday - New Trucks!

Ray Seery drops off a Christmas tree to Wallace (Wally) Peck, the operator at Rocky Hill, while the NetCo truck delivers a number of parcels for the holidays.
Model railroading provides an impressive number of opportunities to learn, build, and do - but one of the best aspects of the hobby is the wonderful people you meet along the way. I'm truly blessed by the number of new friends I've made while doing this Valley Line project and am constantly amazed by how willing folks are to help, either hands-on or with information. And sometimes, I'm treated to a little bit of their imagination along with help.

Case in point - my friend DaveM, who grew up in Wethersfield in the early 1950s - recently sent me an email reporting (imagining) that, with the holidays fast approaching, there was a problem in Wethersfield since the Express Agent in town, Ray Seery, was having problems with his truck. As if that wasn't enough, NetCo was short a truck and deliveries were starting to pile up. "Maybe I can help" was Dave's intriguing sign-off...

Well, Christmas came the day after Thanksgiving when a parcel from Dave showed up and two beautifully built & finished trucks were added to the Valley Line. You can see'em up there in the photo above. The scene is "proto-imagined" in that the people are/were actual people, and the pickup truck is true to the prototype as well (Ray owned a blue Dodge - though, from what I've heard - it was never in this good a shape). I don't know if a NetCo truck of this type ever actually visited Rocky Hill, but at least it's prototypically plausible . . .


Note the NetCo truck backed-up to the Essex freight house. Sure, it's a panel truck, rather than a tractor-trailer, but it certainly conveys the same flavor.

And that's really the art of prototype modeling. We certainly don't have the space - and often don't have the equipment - to do things perfectly prototypically, but if we convey the right impression we've acheived our goal. And with friends like Dave helping out with the right equipment, conveying that prototypical impression is made so much easier.

Now I just have to get going on finishing/scenicking the Wethersfield scene so Ray can get back to his usual haunt...!

PS: When he's not distracting himself with making "rubber-tired rolling stock" for the Valley Line, Dave's an accomplished modeler of passenger equipment - check out his recent RMC/Dremel Kitbashing Award in the December 2016 issue of Railroad Model Craftsman - Thanks again Dave, and congratualtions!