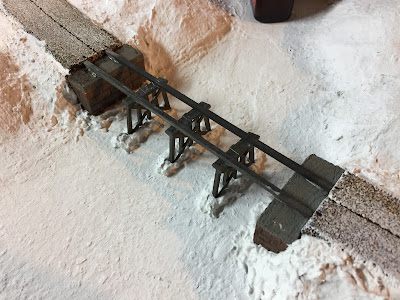
Once all the trestle pieces dried, it was time to collect the bents, 1/8" square stringers, bridge track, and abutments and put them all together into some semblance of a trestle...
 |
| Be sure and click on the image for a larger view - that way you can see how the abutments came out. |
You can see the four marks on the cork in the pic above (click to enlarge) - then it was just a matter of hot gluing them in place.
Next I needed to place the trestle bents. Unfortunately, it turned out that the distance between the surface of the "river" and the bottom of the stringers was Just A Little Too Short. So up to the workbench went the bents, and out came the razor saw.
I just sawed off the bottom of the bents, figuring I could place them into "snow"
And that's just what I did - I took a bit of "snow goop" and made little piles where the, ahem, pile trestle bents would go. Notice that they're evenly distributed (just eyeballed).
Then it was just a matter of inserting the bents into the piles of snow at an angle and straightening them up to meet the bottom of the stringers. I was going to use contact cement to attach the bents to the stringers, but opted to tack them with hot glue instead to hold them in place while the "snow" dried and hardened. While I had the snow goop out, I backfilled some snow around the bottom of the abutments as well.
So there you have it - it's now all ready for track!
 |
| Love the look and the way the mirror in the culvert is working out! |
Next, I can finally get around to installing some track and buildings!


Outstanding work. Should look great on the layout.
ReplyDeleteBA