
Alas, I found no stripwood and the only trestle kit I found was in N scale. I thought all was lost until we were leaving and friend JohnG reached into his bag and pulled out these:
 |
| Already starting to modify them by removing the track clips and mounting slots |
Here's the overpass and all the trestle pieces ready to go:
 |
| If you've visited this blog for a while, you've probably guessed that I love "what's on your workbench" photos. |
Since I
 |
| Here's the masonite backdrop in place. The seam on the left is all done (3 coats of topping, sanded in between coats), and a piece of vinyl in the corner |
The above pic shows the masonite backdrop in place. The seam on the left is all done (3 coats of topping, sanded in between coats) and a piece of scrap vinyl to form a coved corner.
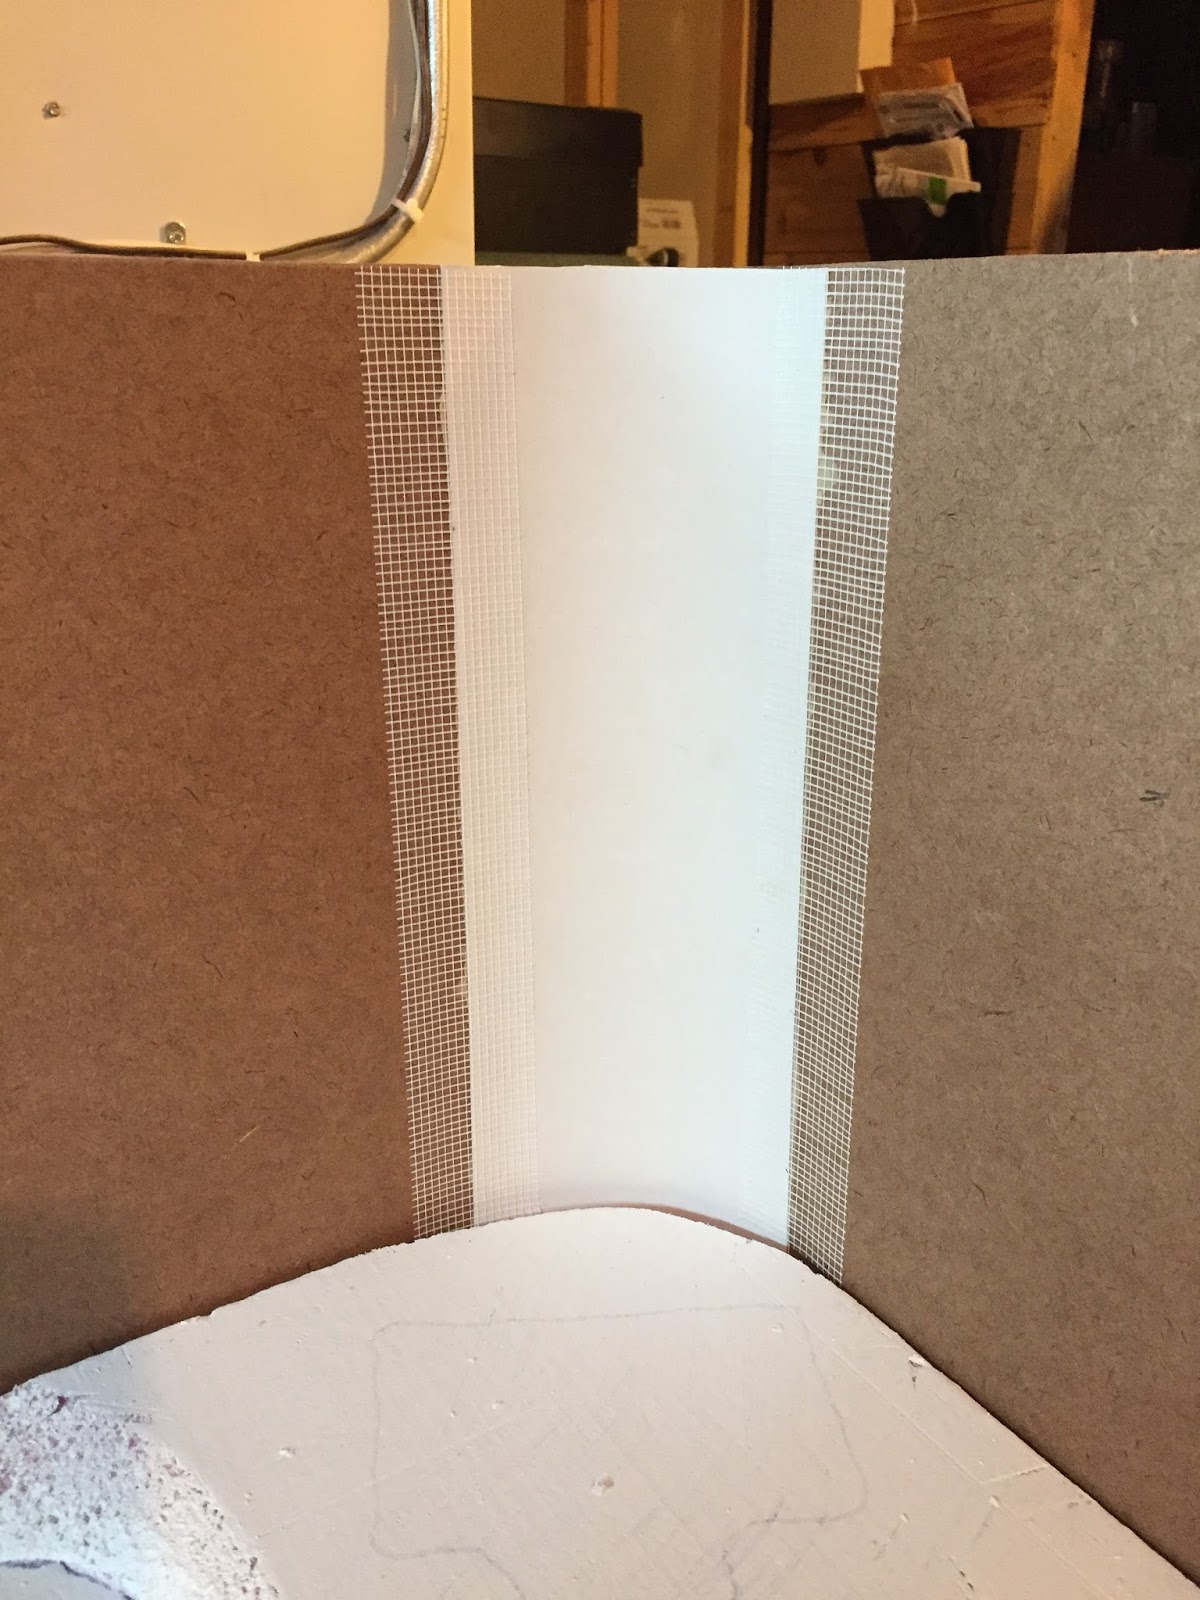
Since the edges of the vinyl needed to be feathered in, I used my handy dandy fiberglass mesh tape.... and some more topping. Here's the result once all the sanding and (re)topping were finished:

This would provide a good base/backing for the photo backdrop. But first, I wanted to figure out how far down I needed to paint the sky. So I taped up the photos temporarily:


This way I knew I didn't have to paint ALL the way down to the "snow" (since the photos would cover the lower portion of the masonite). Here's the backdrop all painted:

Once I got in the painting mood, I figured it was time to tackle painting/coloring the trestle parts and overpass. I'll go over that in the next post.
This probably doesn't help with the this project with the time constraint but a couple years ago I built a Blair Line Standard Timber Trestle (https://bestsnowman.wordpress.com/2013/12/29/trestle-me-this/) and had a pretty good go of it. It was the first (and so far only) trestle I've built and would do it again if I had a project that called for it
ReplyDeleteHey Matt and thanks for stopping by! That looks like a really great and fun kit to build! I've added your blog to my blogroll since I'm especially interested in reading up on your "Raging River" module - what a cool project. Thanks for your comment and have a Merry Christmas
Delete