Friday, September 2, 2022

Friday Fun: Labor Day Weekend, 1948

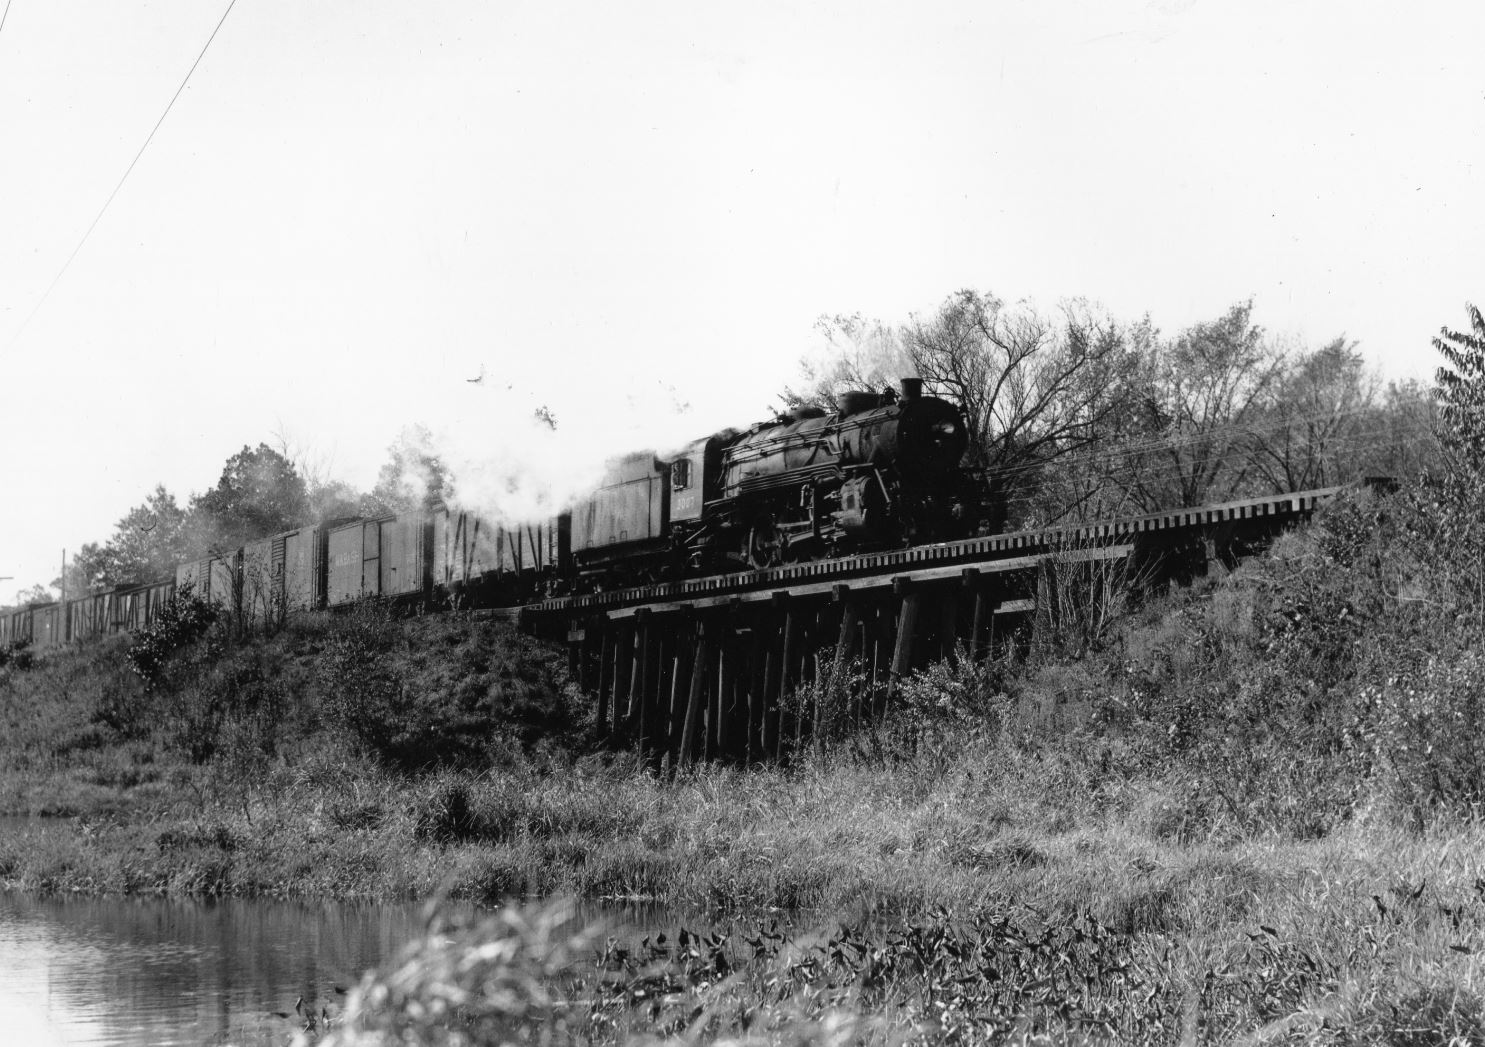
I'm told it was just 74 years ago "today," - the Friday of Labor Day Weekend, September 3, 1948 - when an 8 year old little boy went down to the Old Saybrook station platform to watch trains. The sun was going down - it'd be totally set within a few minutes - and in the gathering dusk a dull roar like thunder could be heard . . .

Looking eastward down the tracks, toward the gathering darkness, the sound seemed to get closer and he could just start to make out what looked like a plume of smoke - or maybe it was two? That didn't make sense. Almost all of the trains on the Shore Line were dieselized now, but, as loud as a pair of back-to-back DL-109s are, they sure don't sound like this . . .

It was the glimmer on the rails, lighting up the curve in the far distance, that was the first giveaway that a train was for-sure coming. Of course, the little boy knew a train was due. He'd been into trains for as long as he could remember and he knew how to read a timetable.

He knew that the approaching train had just crossed the Connecticut River and was accelerating hard off the bridge. It sure sounded like it - and the distinctive bark meant this train had to have a steam locomotive on the point. And with it being a little past 7pm, that meant it had to be The Merchant's Limited.

But was it early? The Merchants wasn't due through Saybrook until 7:17 . . . but just then, the train came blasting around the distant curve - exhaust roaring and headlight blazing! Before he could fully comprehend it all, The Advance Merchants Limited flew by at 65 miles an hour behind not one, but TWO! I-4 Pacifics with 23 heavyweight parlor cars on their tail.

In the rush of the passing train, little John Pryke could just make out the glow of two fireboxes and just as quickly as it had come, it was gone again with the tail sign receding quickly toward the sunset.

As the dust settled and the thunder of the Merchants' passing began to fade, the impression of the sight seared itself into the little boy's memory, and sparked a passion for the New Haven Railroad that would last the rest of his life and spur him into recreating this memory in miniature, someday.

* * * * * * * *
I try to relate this story at or at least near the anniversary of this event, which is all - mostly - verified as true. Especially since it not only inspired John to a life-long love of the New Haven RR, but - indirectly - influenced my choice not only of prototype, but of era and locale. John often mentioned visiting his grandparents in Old Saybrook and going with them down to the station to watch the trains go by. And he remembers seeing the double-headed, steam-powered Advance Merchant's Limited the Friday evening of Labor Day Weekend, 1948. It was this event, more than anything else, that he always pointed to as the inspiration for getting into model railroading and trying to recreate the New Haven in HO scale.

In fact, all of John's layouts - all featured at one time or another in books or the pages of Model Railroader - were firmly set in space and time: Southern New England's New Haven Railroad was the space, and the time could only ever be "September, 1948."

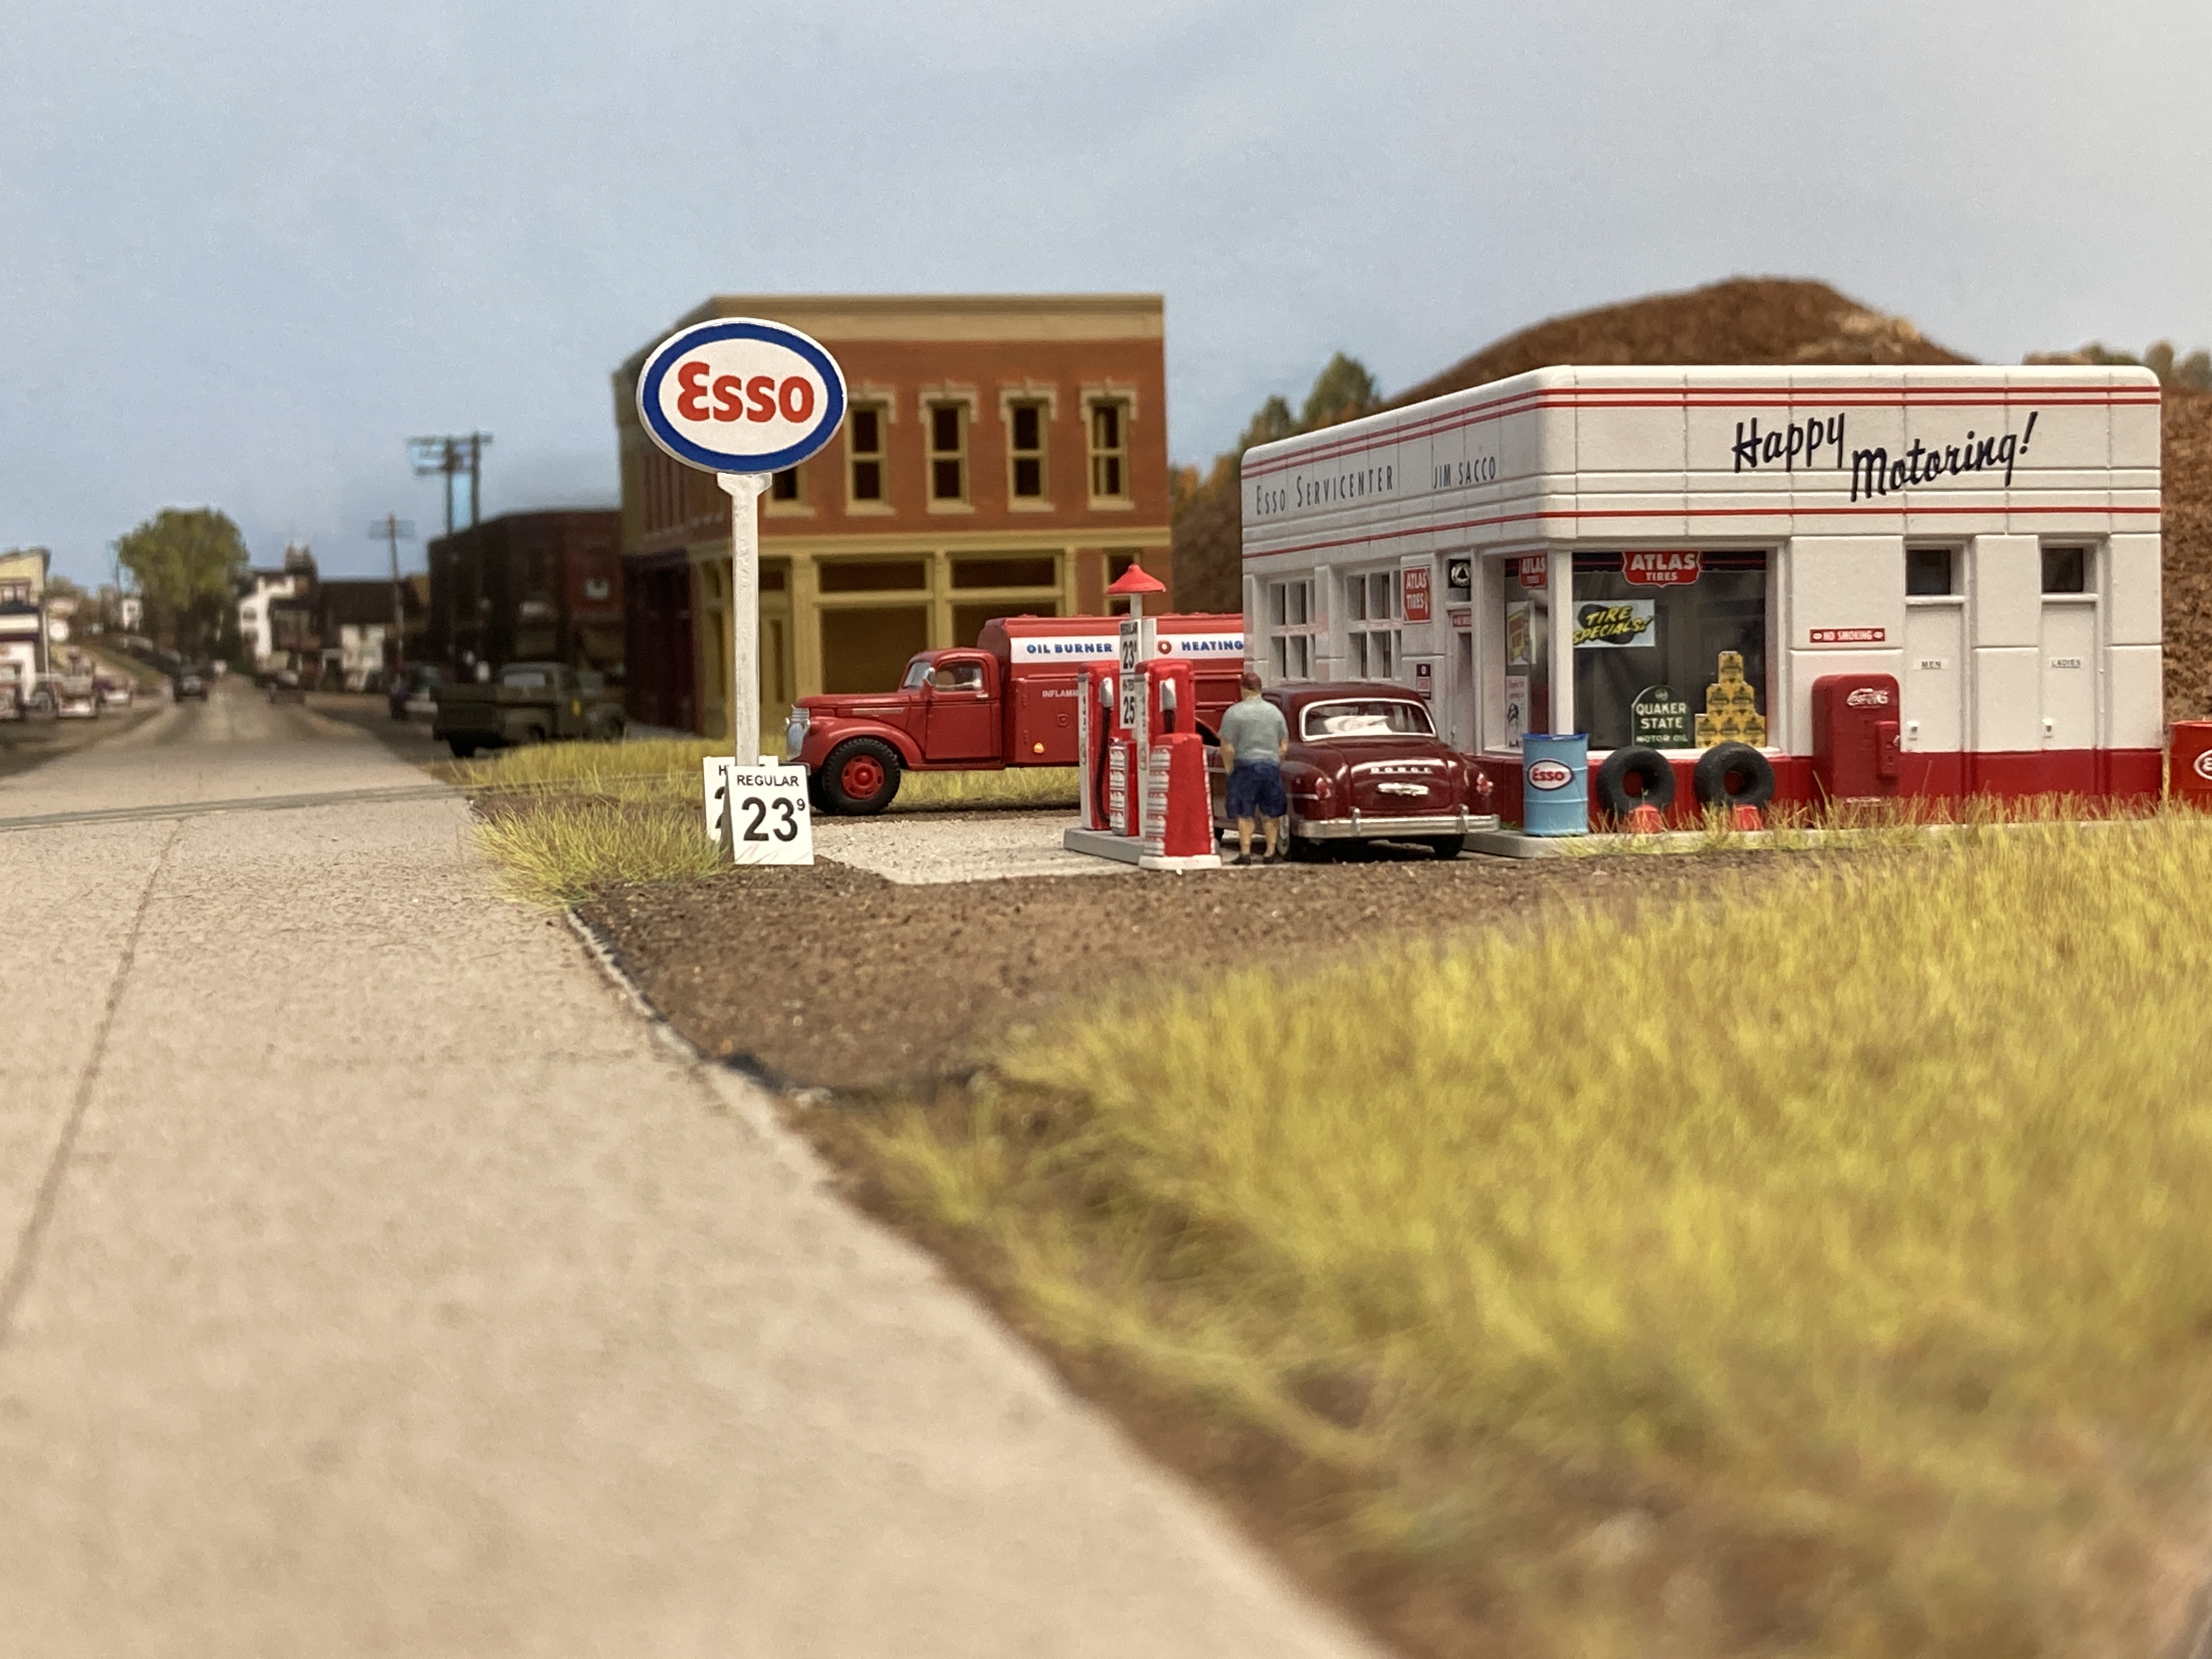
Now, almost nine years after his passing, I'm closer than ever to being able to recreate this memory in miniature. I have the Old Saybrook station scene as a highlight on my layout and, while I don't mind varying my chosen era within the narrow confines of "1947-1949," for all intents and purposes I'm modeling the Autumn of 1948.

I think - and hope - John would be proud of the effort. And I know he'd get a kick out of seeing a little HO scale version of his 8 year old self on the Saybrook station platform, waiting for another train to go by . . .

* This post originally appeared 9/27/2018, 70 years to the month since the event took place. I've reposted it not only to commemorate such an important time in John's life, but to remind myself that preserving these memories is one of the reasons for embarking on this project in the first place.

Sunday, August 28, 2022

Layout Skirting Update

Here are the latest progress photos. I think this is working out pretty great. But it raises another consideration...


IMG_8913.jpg

IMG_8914.jpg

IMG_8915.jpg

IMG_8916.jpg

IMG_8917.jpg

I do like very much how it's hanging - but I'm surprised at how much smaller the aisle width looks as a result of the "below layout" area being closed in. And I suspect that feeling will intensify with the skirting of the other side of the aisle. This (the feeling of being more closed in, in a smaller space) is something I guessed might happen if I installed valences to hide the lighting. But seeing the effect of the skirting, I'm just about decided I won't be adding valences. I just don't want the space to start feeling clausterphobic.

IMG_8919.jpg

Perhaps if, instead of attaching to the backside of the fascia, I instead attached to the L-girders. This would just "wrap" the legs and supporting structure with skirting - hiding all that unsightly stuff. It'd restrict under layout storage space, but this skirting isn't super convenient to get under/into anyway, so I don't expect I'll be storing much - if anything - under the layout. And there'll then be a good 12-24" of "legroom" from the skirting to the front/fascia of the layout. Instead of the skirting being a visual extension of the fascia, it'd look more like a pedestal on which the layout sits. Hmmmm.... Will think about that some more...

At least the seam between two ends of the fabric ended up working out better than I thought:

IMG_8918.jpg

I forget offhand who suggested it, but thanks for the suggestion to overlap the ends.  That's what I've done here. In addition to the clothespin at the top, only a straight-pin is needed at the bottom for a pretty clean seam.

Thanks again to everyone for weighing in - and hoping for and looking forward to more feedback!

Thursday, August 25, 2022

Friday Fun: Another Episode on A Modeler's Life podcast...

I've mentioned before how much fun it can be to listen to podcasts while you're working - and if you're working on your layout, what better way to pass the time than listening to some model railroad podcasts. 

There's some great ones out there (including Around the Layout, The Crossing Gate, Second Section, Crew Call with Mike Rose, and the grand-daddy of them all, Model Rail Radio - which even has a website reminiscent of the late '90s).

But my favorite one by far (and not only because I'm often a participant ;^) is the A Modeler's Life podcast hosted by Lionel Strang. It's about a lot more than model railroading - there are a lot of fun folks there talking about a wide range of topics, all with model railroading in common. The best way to describe it is that it's like you're down at the hobby shop hanging out with the folks, discussing all and sundry topics - from the latest locomotive release to who's in the chase for the pennant.

The episode that posted this past Monday though may be of interest to folks here at the Valley Local. Yours truly goes on (and, admittedly, sometimes on and on) about the latest goings on with the layout - including painting fascia, choosing skirting, lighting, and stripping the SW-1 shell.

Whether you give this - or one of the other podcasts - a listen, I think you'll enjoy the company while you're at your workbench, down in the basement, or even mowing the grass(!)

And if you have any recommendation of other shows to listen to, be sure to let us know in the comments below!

Monday, August 22, 2022

Modeling Monday: Layout Skirting


In last week's Wordless Wednesday, I teased a photo of my use of landscape fabric as an inexpensive alternative to banquet skirting or curtains for under-layout skirting. After encountering some initial disappointments, and doing additional experimentation, I've decided to go with it. I think you'll agree based on the photo above that it works pretty well.

Here's how I'm doing it . . .

The pic above shows the back of the fascia in typical L-girder benchwork construction - specifically, how I attach the fascia to the joists with a 1"x1" cleat. As you may notice, I did not plan well for skirting. If I had, I would have had the cleat end at least 1" short of the bottom of the fascia. That would have provided room for a strip of Velcro to which the skirting could be attached.

Instead of sawing off the bottom end of each cleat (which I considered, BION), I hot-glued clothespins to the back of the cleats. It's important to attach the pins at a uniform height - that'll come in handy later...

In some places, the screw attaching the fascia to the cleat got in the way. Perhaps in a fit of laziness, I decided not to both Dremel-ing off the end of the screw and just glued the pin beside it. You may decide to cut off the screw point - but if you planned ahead better than I did, you probably don't have to use clothespins :^)

Once the pins are installed on each cleat (which, as it happens, are located at the end of every joist and the joists are on about 16" centers), it's time to attach the landscape fabric.

The first such fabric I used (see photos of the Saybrook layout section, as well as New London Staging), was too thin and plastic-y looking. It's ok and will do for now, but I'll probably replace it eventually. The biggest problem was that it was only 3' wide, so it looks too short (my benchwork is at least 48" high).

I later purchased this landscape fabric, primarily because it's available in 4' width. But once I opened it, I discovered two other great qualities: 1) it's much heavier/thicker than what I was using previously and thus hangs much better, and 2) it looks more like cloth than plastic.

Unfortunately, it turned out that 48" was about 6" too wide(!) There was either way too much dragging on the floor, or I had to try and fold it back. At a consistent width. Over 50 linear feet.

I tried cutting it into shorter, more manageable lengths, but then it didn't hang as nice and created unsightly seams.

So I figured I'd "just" cut it down 6" using my chop saw. . .

So far, so good. . .

D'oh!! While it looks a lot like fabric, it's still mostly plastic. Yup - what you see there is melted end from the speed of the saw blade. But at least it's now the right width! And you can still unroll it, with some difficulty. You have to basically tear the one end from the roll as you unroll it. Not too difficult, but it would be SO much nicer if these rolls came in 42" width . .

At this point, all I had to do was start at one end, put the top (ragged/melted) edge into the clothespin - right up to the spring on every one, so the fabric stays at a uniform height - and move on to the next 'pin.

There are some places where the 'pin can't be right on the cleat and the fabric has to go around the end of a joist or splice in the fascia. At those point, you will see a little gapping/bunching, as in the photo above, but it doesn't bother me at the moment and if it ever does, I'll notch the fabric at that point so it tucks up more nicely.

By the way, the photo doesn't render color all that great. The green is actually a bit darker, Pullman green, and the wood boxes are actually painted flat black.

I use inexpensive $1 wood boxes for switchlists, waybills, and other paperwork. I also hot-glue plastic tubes to the side to hold pencils and uncoupling picks (bamboo skewers). These particular boxes are deep enough to allow you to rest of can of soda or a cup of coffee on them.
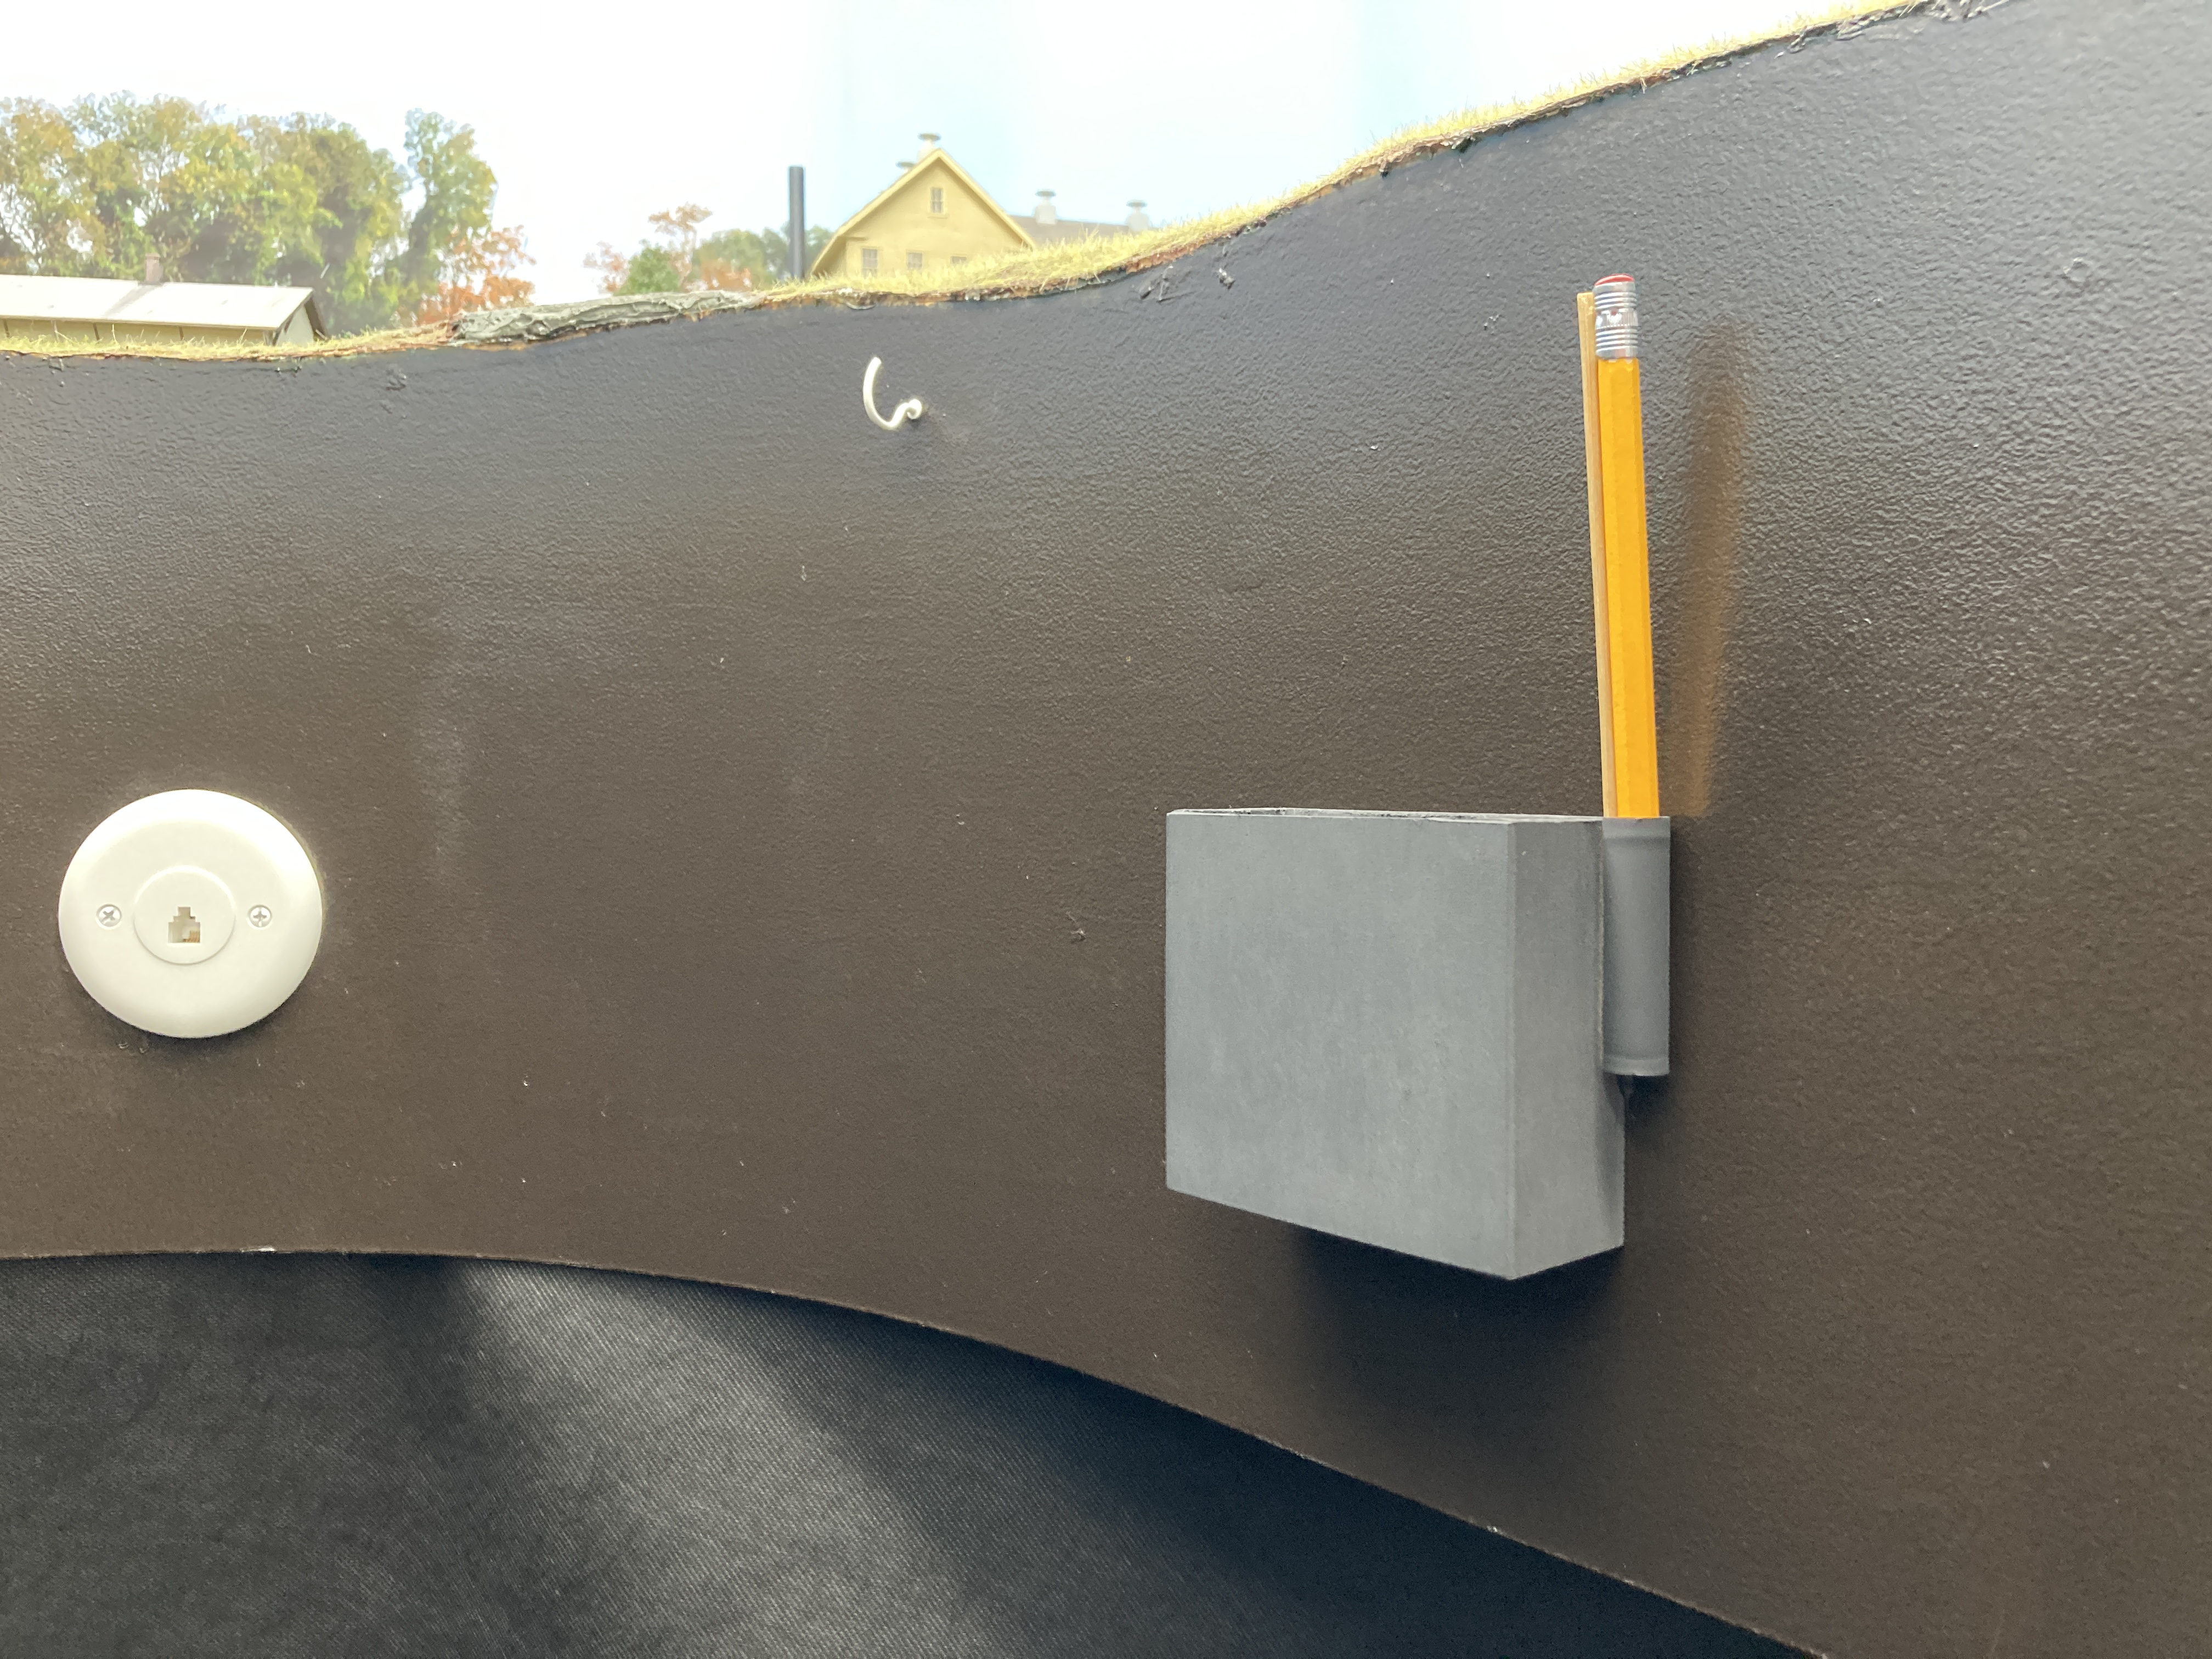
I'd originally envisioned these boxes as inexpensive throttle holders - and they work ok for that for smaller throttles, but certainly not my NCE hammerhead throttle or <gasp!> ProtoThrottle. So I instead use them as bill boxes in places where aisle width is at a premium - like here at the end of the Berlin Branch. By the way, speaking of inexpensive work-arounds, that's a regular phone jack repurposed as a throttle jack (which you can do with an NCE cab bus, provided it's at the end of the bus run).


I'm pretty happy with how the landscape fabric is working out. I have it just a couple inches off the floor, it hangs nicely and really finishes off the bottom of the layout. And the price is right too. 

But I'll withhold my final, final verdict until I encounter my first seam. I think I'm going to use either double-sided tape or Velcro to join the ends evenly. And with so few seams, I'm not sure what kind of easy access I'm going to have to the area underneath the layout. Maybe it'll keep me from putting too much under there. Heh - or maybe just the opposite. It'll be a great place to hide stuff too. . .

So whattyathink? Leave your thoughts and feedback in the comments!