
As I mentioned in my last post, I've been striking a different balance between pre-work workouts and pre-work scenery work. For better or for worse, the scenery has been winning more often than the exercise.
So while my waistline may not be showing any positive effects of my current pre-work routine, the layout is certainly showing some signs of progress. Emulating my friend Tom Jacobs, "An Hour a Day" keeps the layout moving forward. Here's the latest since last time...
 |
| I added some skimcoats of plain ol' Sculptamold over top of the "popcorn"-effect ground goop fail to even things out a bit. |
 |
| Once dry, I painted it all with my "dirt" colored paint (custom color matched to dirt I found/sifted from the area - turns out it's Behr "Davenport Tan" Go figure...) |
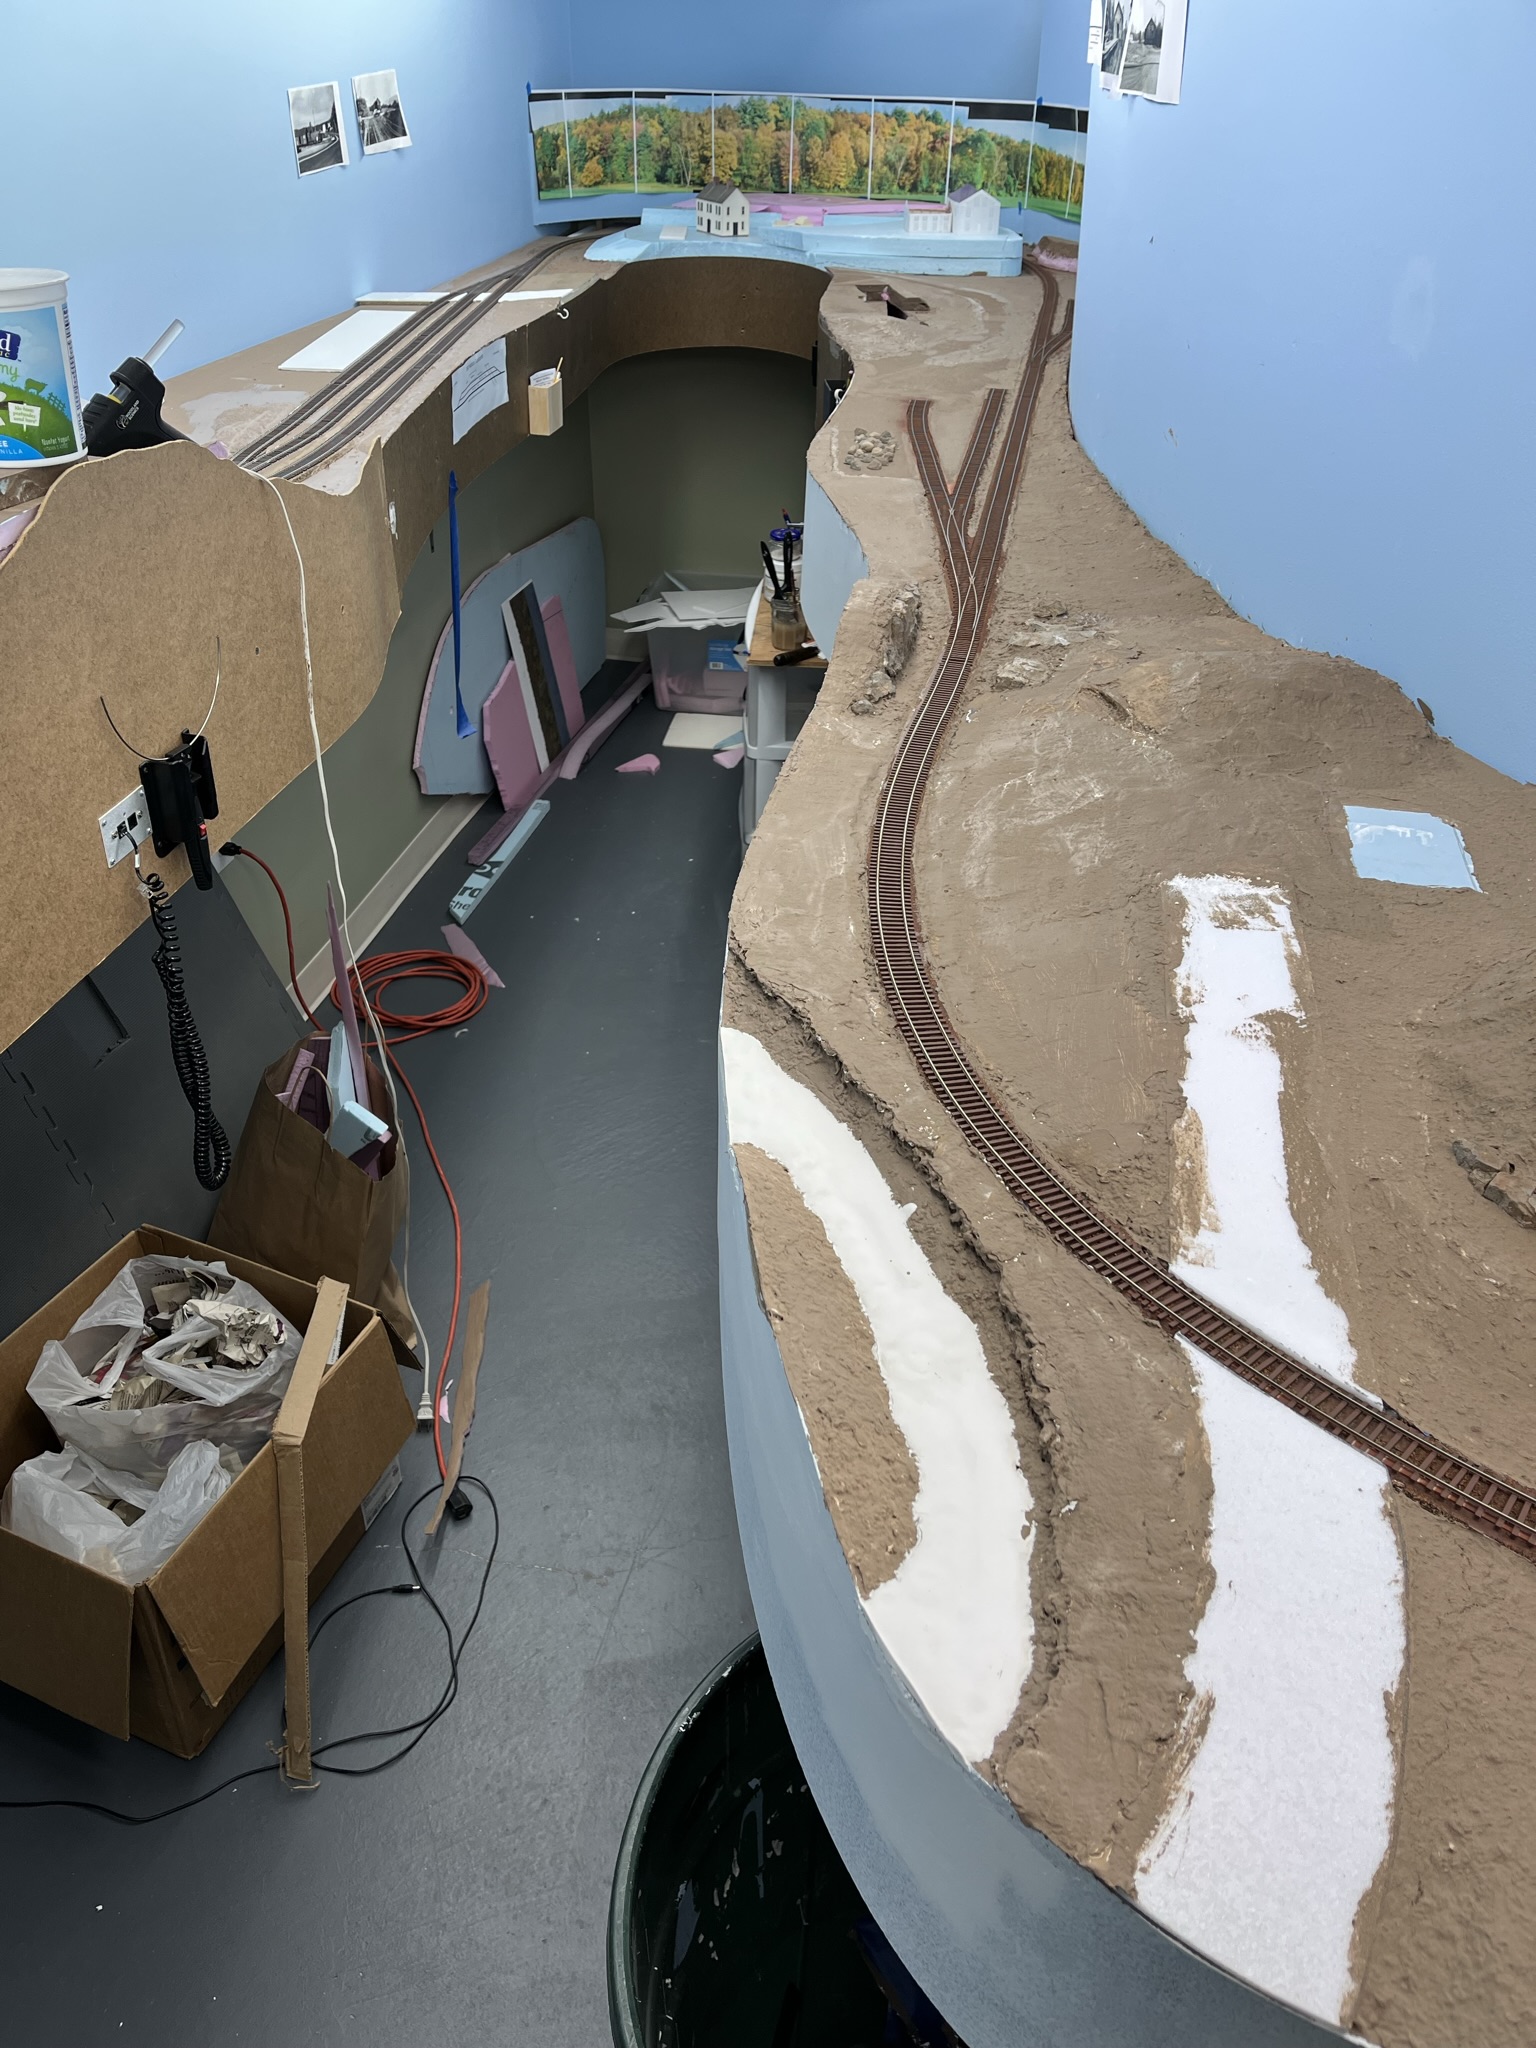
One of the benefits of having "too much" layout (and, depending on your perspective, the downside of same), is that there's always something to do. So, while waiting for all the Sculptamold and paint to dry from Old Deep River Road north to East Haddam, I decided to turn my attention to Old Saybrook.
Now, the Saybrook Scene has been about 80% complete for years, with only the Route 1 overpass to be done, as well as finishing the backdrop. The overpass is being constructed by friend DickO, and I'm not quite ready to do the backdrop yet. So I figured I'd FINALLY (after 5 years?!) choose a ballast and get the ballasting done in the area.
But first, I needed to do some more minor terraforming - by which I mean . . .
Filling Trenches Between Tracks
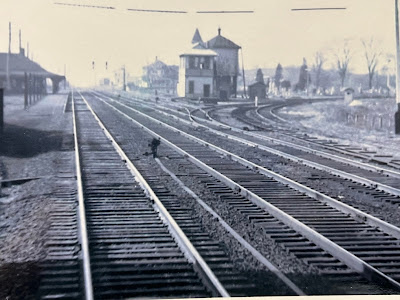
When I first laid track through this area, I just laid it on cork roadbed placed side-by-side. But that results in a trench between tracks and - as you can see in the photo above - there are no such trenches on the prototype.


So I got the "bright" idea of filling in the trenches with a pouring of plaster - figuring it'd fill in nicely, find its own level, and level everything out.

Well, the "bright" idea turned out not to be so bright. Not only was the plaster-filled pitcher hard to maneuver around buildings and such, making it difficult to pour *just* in the trenches without pouring on the track too (I should have at least masked the track!), but in many places the plaster cured "proud" of the trench - where I had trenches before, now I had a BERM of all things!! So, as you can see above, I'm using a chisel to bring it back down . . . ugh.
Now, what I should have done, was either:
1) filled in the trench with play sand, leveled out and glued like ballast (as friends Seth and Bill suggested over at the Valley Local FB group), or
2) not worried about it and just filled the trenches with ballast during the regular ballasting (as friend Randy suggested, also over at the FB group).
This has definitely become a sad example of being penny wise (trying to save ballast) and pound foolish (having to spend so much time trying to salvage it). Ah well, lesson learned - and a lesson worth sharing if it saves even one of you from making the same mistake!
Rock Casting & Coloring
If you were paying attention last week, you'll likely find the pic below familiar...

That's a LOT of rock castings! Thanks to Pete and Bob for loaning additional molds so I could cast a variety of different rocks which, as New England's most famous "crop," I need a LOT of . . .
I also wanted to have enough castings on-hand to try some different coloring techniques . . .

While I experimented with different coloring techniques, I ended up settling on a variation of the technique that worked so well for me last time. The results aren't as predictable or as repeatable as I'd like, but I suppose the inevitable variation is closer to nature than my left-brained preference would dictate. You can click here for the 3-step method I've used before - the only change these days being that I tend to "leopard spot" the color more than just brush it on as I describe in that post.
And to see how I did it recently (literally, just this past weekend), I created a quick (15 minute), impromptu (one take and done), video which you can click on below . . .
Let me know if you use this technique and/or if you have a technique that's worked well for you.
In the meantime, I'm going to get back to chiseling plaster berms in Saybrook and hopefully making more layout progress this week . . . or maybe I'll just go for a bike ride instead :^)
Hi Chris
ReplyDeleteYour rocks, well ROCK...looking very good. I don't have a technique since there are no rock formations down at the old roundhouse. An alternate to the plaster fill would be to soak strips of paper towel in a mix of water & white glue. That would take up the bulk of the depression, allowing a more economical use of ballast. Too late, I know. Anyway, I think you are enjoying all this unusual time available with the layout. You do deserve it after all; so if you miss a workout or two at least your soul is enriched.
cheers
Rick De Candido
Thanks much Rick for the compliments and suggestion. Really appreciate your stopping by and taking the time to leave a comment. Rock on! (couldn't resist LOL)
Delete