
One of the things I've been mulling over with regard to my "proto-freelanced" version of East Berlin, CT is how to load bricks there. Other than the Stanley Chemical Co. at the end of the Berlin branch, the other reason for the line was to serve the many brickyards along the way. Now, on my version of the branch I only have the end of the line, but wanted to pay a little homage to the brick industry in the area. So, I'm considering adding two elements at the end of one of the sidings there: a concrete loading dock, and a pillar crane. This should be enough to at least simulate some brick loading capacity.
Even though this area is proto-freelanced, I still start with the prototype as much as possible. Starting with the crane, I took these shots with my buddies Mike Redden & Bill Chapin in Westerly, RI after the Springfield show earlier this year (this was the same day we were surrounded by the local police, but that's a story for another time...):


Can't believe this crane is still there, in the middle of where the big yard used to be, not too far from the Shoreline of the former NHRR. Even more surprising was how easily it moved on its bearings - very balanced and smooth.
And, even better, as I was doing some more research, it turns out there was a similar crane right in Middletown!


Don't know if it's still there, so I must check ASAP. No good excuse since it's right on my commute to work(!)
If you're like me, you've been in the hobby a long time and have collected various & sundry bits & pieces for the layout you'll build "someday" - and it's not until you actually start building that you start to discover some things you didn't even know you had.
Like this!

Don't know where or when I got this, but I'm sure glad I did. And good thing, since I don't think it's available any longer (please prove me wrong!). As you can see, while not a perfect duplicate of the prototypes I shot, it's pretty darn close and certainly much closer than the other pillar cranes I've seen currently on the market.

Turns out, it's a kit consisting of white metal castings. I assembled mine with thick, gap-filling CA. And boy, was it finicky! But patience pays off - that and doing one step at a time, allowing the glue to cure between steps.

First step was to stick the base to some tape to hold it in place, and then glue the pillar to the base. While that was curing, I added the motor/pulley/handle part to the beam.

One of the fussier steps was to thread the "cable" using the black thread included. Pro Tip: Use some beeswax or something similar to get rid of all the fuzz - or at least smooth it down. I didn't do that and regretted it later. Also, use some self-clamping tweezers or a clothespin to weigh down the hook and keep the "cable" taught. Adding CA to the places where the thread touches the metal will fix it in place - and stiffen the thread, making it look more like cable.
Another Pro Tip: Make sure you set the beam at the angle you plan for final assembly. Otherwise, your nice, straight, vertically-hanging cable will instead hang at a slight angle. Don't ask me how I know this.

Once the thread is all cured, it's time to glue the beam to the pillar and the crosspiece from the top of the pillar to the end of the beam. This is the 2nd most fussy part of the assembly. I first glued the beam to the base, then propped it up with an eraser. Then I measured and cut the top crosspiece and very carefully glued that in the recesses cast in the parts.

Let all of this cure really well, then snip off the excess thread (though you could certainly do that earlier in the process).

For painting, I just attached the assembly to a holder made from a business card and hit it with some dark brown/black Krylon Camouflage rattle can paint.
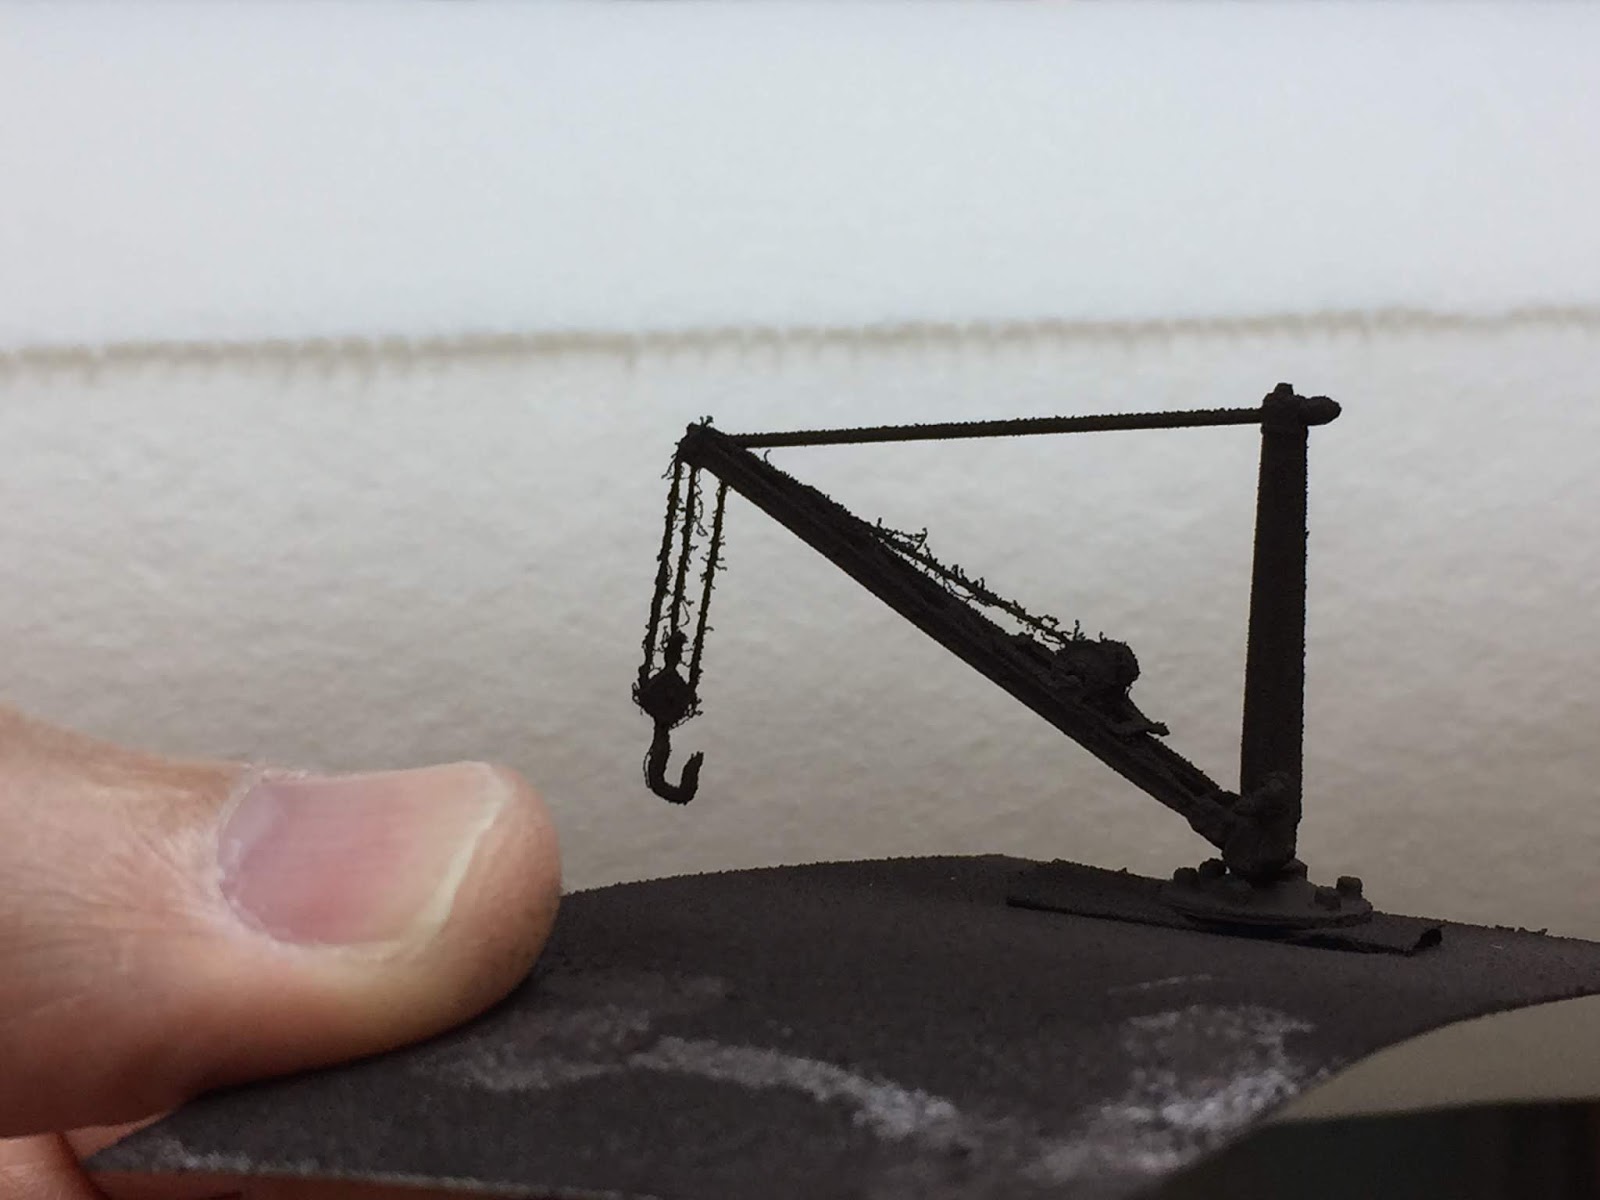
Remember what I said above about smoothing the thread? I thought I had smoothed it enough, but this is when I discovered I should have used something like beeswax. Painting the thread just made all the thread fuzz really stand out. Fortunately, everything is really stiff, so you can clip off the strands with sprue nippers like I did. UNfortunately, there are a LOT of little strands. The pic above was how it looked before I started snipping. And in this pic you can also see what I mean about making sure you weigh your cable down so it hangs at the right angle.
Thankfully, this crane will be toward the back of the East Berlin scene, and I can rotate it so that the funny hanging angle isn't as obvious. And the fuzz won't be either.
All I have left is to weather it. Oh, and build a concrete loading dock for it to go on. But that'll be for another time.
A quick look on Ebay under "Wiseman Model Services pillar crane" shows both HO & O scale kits available.
ReplyDeleteAh thanks!!! I always forget to check eBay. I guess just Googling isn't sufficient anymore. Thanks MUCH for proving me wrong!!
DeleteCT Eastern RR Museum in Willimantic has the same pillar crane as shown in the photos- I can’t remember where he said they acquired it from, but it’s all there and they have intentions of erecting it as soon as they can finance a foundation for it.
ReplyDeleteActually turns out the Middletown crane is what ended up at the CT Eastern Museum. Small world!
Delete