Wednesday, December 16, 2020

Throwback Thursday: Another "Goff Brook" House

This is only a "Throwback Thursday" in the sense that it may look like we're back to working on the farmhouse at Goff Brook. That project is long done, but this City Classics kit provides great fodder for modification. So, while I built the Goff Brook house pretty much straight out of the box, I decided to modify one for a house across the tracks from Hartford Rayon in the Dividend section of Rocky Hill.

Turns out, it's actually been since way back in August that I last did an update on the Dividend house project. So I guess that may qualify this for a Throwback Thursday, in a sense. Here's where I picked it up again back on December 2 . . .


I'd finished assembling the main structure & front porch pieces in August, so I restarted by adding the "addition" to the side of the house. Since I was attaching it to a painted, clapboard wall (a coated, uneven surface), I decided to use some gap-filling CA as an adhesive and used my handy dandy 1-2-3 blocks to press the parts together an hold them.


Next, I added the main roof. I first made sure to scrape any paint off of the top of the gables and also scraped paint off of the underside of the roof (approximately) where the walls would hit. Then I used Testor's cement (has just a bit of thickness & a longer drying time than solvent) applied to the tops of the walls/gables and places the roof halves in place, centering them the best I could end-to-end and making sure that there was no gap at the peak. There ended up being a slight gap (resulting from a bow in the roof piece), so I rested the house upside down on the bench and weighed it down with a square(!)


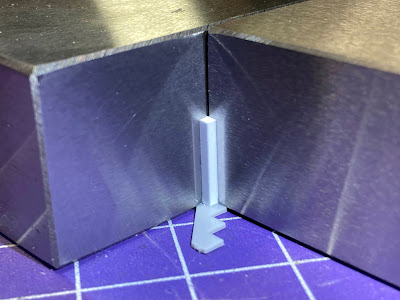
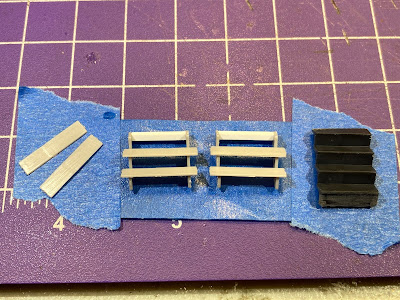
While that was curing, I turned my attention to the stairs. I used my blocks again to add a square piece of styrene between the stair stringers, as you see above and below. . .


Once the stringers were secured by the square styrene strip, adding the steps was a bit easier. I decided to leave the top step until after the stairs are attached to the house. In keeping with the "modification" part of this build (and considering the fact that the way I used the addition meant I was short a set of stairs), I decided to use a part of a Central Valley stair case too.


I decided the next morning before work would be an opportune time to spray bomb the porch pieces and stair ways with some flat white paint. That way the could be dry and ready for use by the end of the day.

But later that day, I decided to pick the low-hanging fruit of finishing off the roof with my "Best Ever Roof Material." Cutting and adding tape to a roof to simulate tar paper is about as easy and fun a structure project as there can be. Click on the link for the details.


In the case of this particular tape, it just so happens that splitting it right down the middle creates just the right width (about 30-36").


Then it's just a matter of applying it to the roof - and in the case of this particular roof, there are already lines scribed on the roof parts to guide your work. . .


Work your way from the bottom up to the peak, stopping short of the peak itself.


Then do the other side the same way, and add a "peak piece" to the tippy top - overlapping equally on both sides of the peak.


Then turn the house over . . .

. . . and trim off the excess.


Next comes the step where using this medical tape really shines . . . Just paint the roof(s) using some grimy black paint (like my $.50 PollyS alternative).


Couldn't be easier . . . I just made up three "bins" of thinner/wash (Armor All window cleaner), squeezed out some paint, and used an inexpensive brush to apply it.


As you can (hopefully) see, the result is pretty amazing - and amazingly easy. The tape takes paint really well and the texture (IMO) is spot on. Just needs some weathering.

And that's where this project sits at the moment. I haven't decided yet whether to weather the porch before or after attaching it to the house. But once I attach it, all I have left to do is add the porch roof, add the three stairways, and do any final overall weathering.

THEN I'll be able to place it on the layout. . . which will undoubtedly prompt some thinking and planning for how to do the Dividend Scene. Hope you'll stay tuned for that!


No comments:

Post a Comment