
So progress continues, just at an even slower pace than I'd before. But at least it's progress - even if it means a couple steps back every once in a while. Like with my "real concrete" road . . .
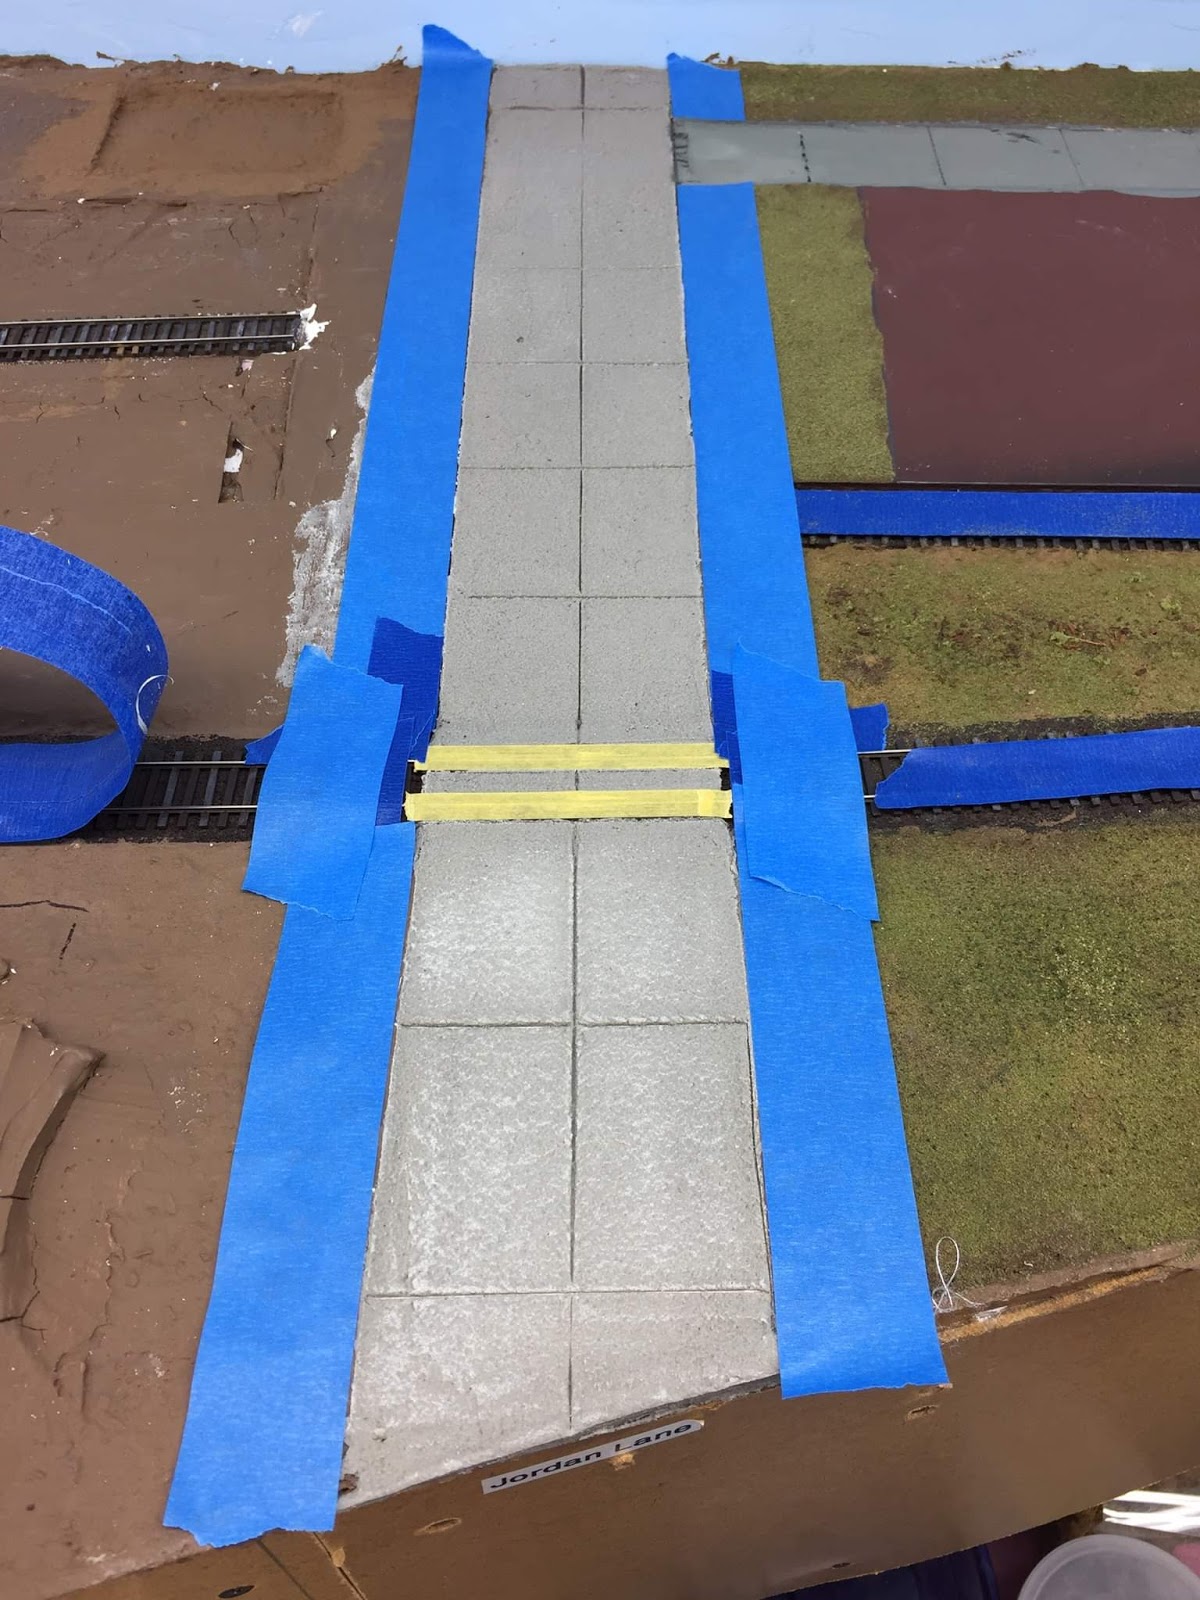
Here's where we left off last time (for how I did this grade crossing - as well as others - click here):

This road was made with DAP's concrete patch mix - and it doesn't look too bad. From a distance.

And that's the problem - as soon as you get down to "HO scale person level," the illusion is much less effective.
Now, admittedly, you're seldom looking at things this closely - especially when operating. But I plan to photograph this railroad pretty regularly when it's done and the camera doesn't lie. That concrete might be just fine for Sassi's O scale layout, but it looks pretty coarse and rough in HO scale - at least to my eye.
So, after consulting the experienced modelers over at The Valley Local Facebook Group (shameless plug), I decided to redo the road.
I'm gradually coming to the conclusion that I prefer foamcore board to make concrete roads, but I didn't want to try and rip out this road (did I mention it's actual concrete?!), especially if that meant having to redo the grade crossing - or, worse, replace the track.
My FB friends suggested I try a skim coat of joint compound over the existing concrete. I was dubious about my ability to carry this off, but I figured it would at least cover the roughness & too-wide expansion joints.
First thing I did was sand down as much of the roughness as possible. Then I masked off the road, again using the masking tape as a form but this time using only a few layers of tape since I didn't want to build the road up too high.

Then it was a matter of troweling on the topping and skreeing it as I did with the concrete. In the photo above, I'd just started to remove the tape.

Most of the tape is removed and the expansion joints are put in. MUCH less wide - actually, so faint you hardly notice them!

After all the tape is removed, I painted (though I suppose you could paint before removing the tape).
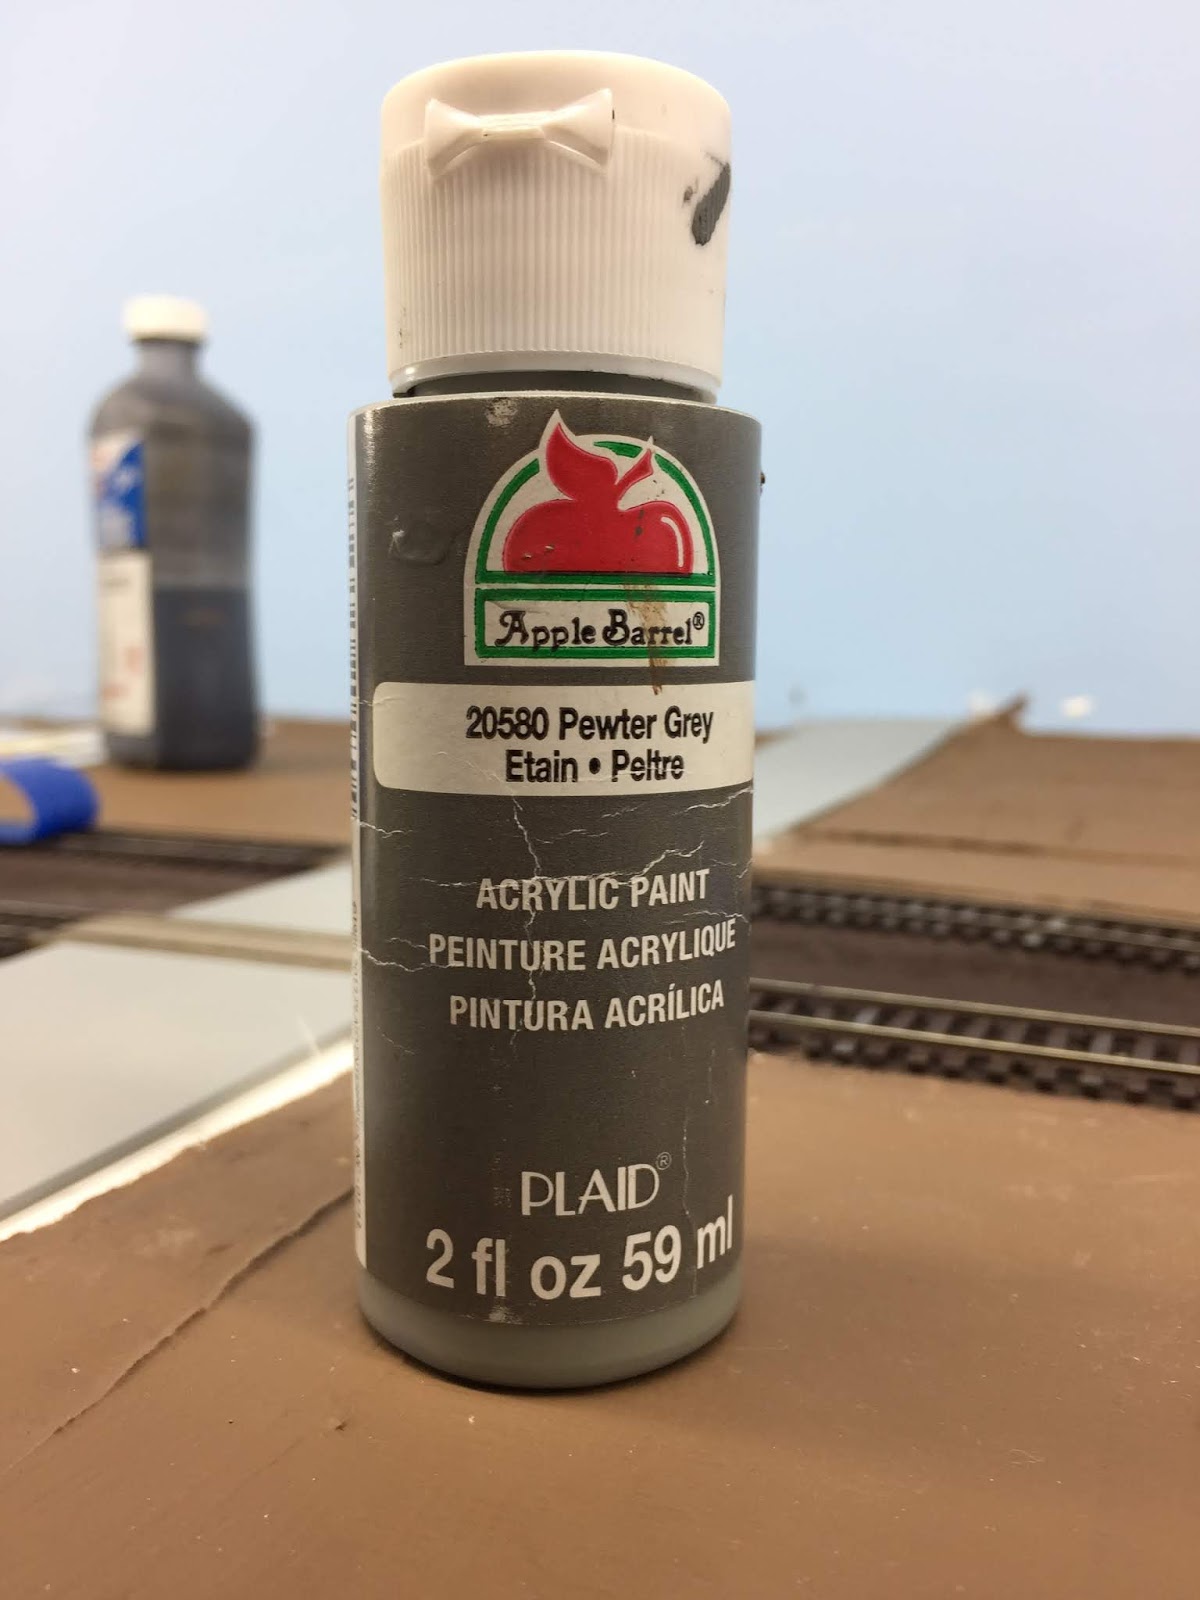
I used a dark-ish gray to match the driveway & parking lot around Ballantine's. Unfortunately, it had to be brushed on & it took two coats to get rid of the brushstrokes.

Be careful that you don't apply it too heavily and fill in all your expansion joints - which you can actually see now in the photo above.

Here I've started to add the shoulder on the right and the lot for Wethersfield Lumber on the left.

Now just to let it dry . . .
This experience has pretty much put me off using the concrete patch mix for HO scale roads. Again, it'd probably look amazing in O scale but I'm glad I redid it. Others may love and prefer using joint compound for roads, but I'm fairly ambivalent given the skill needed to skree them just right. But at least the texture is right. Just be careful you don't bump them - or be sure to add coloring to the compound before you apply it.
The paint job looks ok, but it's way too even. Definitely need to do some weathering, but for now it's a huge improvement over what I had originally. Let me know if you agree!
Next time, I try one more material for making concrete roads - and probably the most common approach: using styrene sheet. Stay tuned!
I've seen acrylic paint brushed on then dabbed with a sponge in order to reduce/remove brush strokes, to good effect.
ReplyDeleteGlad you were able to salvage the road. Your crossings are looking great!
It's quite easy to sand the road using a sponge-type sheet rock sanding block before you put in the expansion joints. So you don't need to be so perfect smoothing it out.
ReplyDeleteAlso, I haven't really had any issue on my roads in terms of damage that would show through. And remember that mine are a thin layer of joint compound over foam so I could squish it and create cracks.
However, concrete roads crack differently than asphalt, so I'm not sure if I would do concrete differently or not. I guess I'll find out as I build my sidewalks to Bill Chapin specs!