 |
With the nails holding it in place, I bend the masonite to the track I want to join to, as in the photo above.
You can put some nails in at the the other end to hold it if you want, but I just held the masonite in place with one hand while drawing a line along it with the other. You can see the result above - very nice, graceful, prototypical-looking lines.
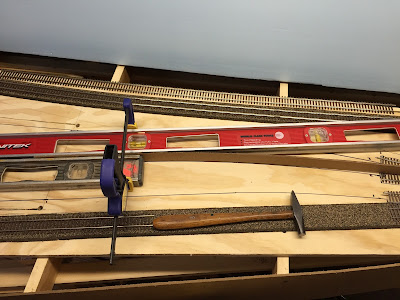
An alternative to using nails to hold the masonite on a tangent - especially useful for loooong tangents - is to clamp the masonite to a straight edge. A level is ideal for this, as in the photo above. Bonus: you can easily move this assembly side-to-side to get the line exactly where you want it.
Here is where all the staging tracks go straight. I've drawn the tangents in first and need to connect the lines back to where the turnouts are in the yard throat. Again, to get a smooth line, I'll use the masonite strip.
Now, that doesn't look like the smoothest of lines, but note that there will be a turnout where that jog is.
And here are all the staging track center lines drawn in. My only regret is that I didn't start at the back (far right) and work my way forward (left). That last line on the right is the most graceful and good-looking, and while all the lines are nice and smooth (guaranteed by the masonite), it would have been even better to have them all parallel that line on the right. If this weren't staging, I'd probably redraw the lines for aesthetic reasons - but no need to here.
With all the lines drawn in beforehand, Roman could just come in and start laying roadbed and track according to the lines.
 |
| At least it looks like he's having a good time - must be cuz all the figuring was already done... |
And you can see the result of all that work above (thanks Roman!).
If you haven't tried the "bent stick" method of laying out your curves, I highly recommend it. As you can see, it's super easy and I think you'll be happy with how it turns out.


No comments:
Post a Comment