Since this is my first post of 2023, I want to wish you and yours a Very Happy New Year! Here's hoping you have a very safe, healthy, and productive year and that you're able to knock off your to-do/bucket list some things that have been lingering for a bit too long.
One of the things that's been lingering a bit long here at The Valley Local is the B&M SW1 - though I admit I've been having a blast working on it and am simultaneously reluctant to finish it and chompin' at the bit to get it on the layout and into revenue service!
To that end, it's been a VERY productive - what - 12 days?? Despite having Christmas and New Years happening since we got back from Cape Cod on the 18th, I've just about completed this loco . . . but I'm getting a bit ahead of myself . . .
The last time I posted about it, I'd realized that I'd forgotten to add two final decals on each side sill. With the decaling/lettering now finished, I'm at the point where I usually stop. Or at least that's where I left the DEY-5. But the 1109 is "just" a "leased unit" for the Valley Line, so no risk - no pressure - no reason not to try out weathering(!)
Thankfully, my friend Ralph (who also happens to be a professional weather-er - a.k.a. "The Mudfather") was willing to be my "training wheels" and mentor me through the process. Follow along as I try and convey a few of the techniques he shared - and which, to my surprise, I discovered are not only relatively easy, but yield fantastic results!
Truck Sideframes
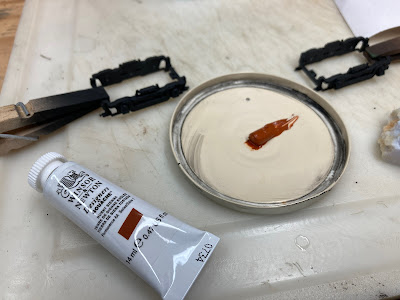
For the sideframes, Ralph had me try daubing on gouache with a sponge.
I started by spraying them with a dull coat and while that dried I prepared a sponge by tearing little bits off the corners, to create a random spotty effect. Once the sponge is soaked and wrung out with windshield washer fluid, you tap it lightly into the gouache and then tap it lightly on the trucks. Best first to try on a piece of scrap paper to get the effect - you want just the random bits to show up. Colors are Burnt Umber along the tops, and Raw Umber along the lower sides and bottoms.
I also added some thinned black oil paint to the journals and once all dry I sealed with another coat of dullcoat. Finally, I added some Bragdone rust powder to the springs. Somewhere in there I also cleaned off the wheel faces with alcohol and painted them with Tamiya Linoleum Deck Brown using a small brush.
Fading the Cab & Hood
The black cab and hood were faded using two different methods.
Acrylic Fade
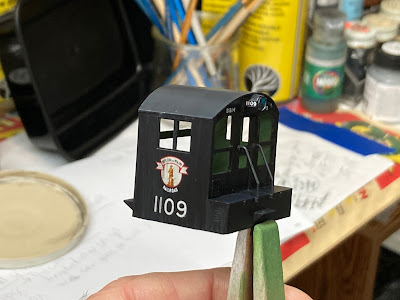
I'd already sealed the cab & hood with a coat of Tamiya Semi-Gloss Clear (X-35) after applying the decals, so the first fade was an acrylic fade. This was made up of 1 part white (Tamiya X-2) and 9 parts 91% alcohol, airbrushed at 12-15 psi down on top of the hood and cab at about a 60 degree angle, to hit mostly the tops. I found that this mix ratio required a LOT of coats in order to notice a difference - but it allowed me to build up the effect slowly. And I got a lot of practice using my airbrush.
Oil Dot Fade
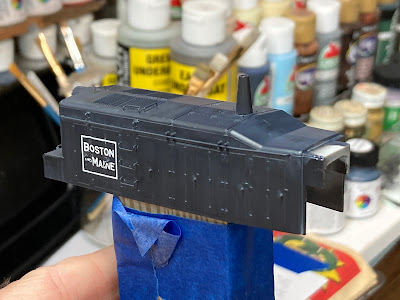
After the acrylic fade dries for at least 10 minutes, you can move on to the oil fade. Unfortunately, I don't have any in-process pictures so I'll try to describe what I did... I daubed on dots of black and white oil paint along the top center of the cab and hood, alternating between black and white. I then took a soft brush, dipped it in mineral spirits and wiped it off on a paper towel so it would only be damp. Then I held the brush at a shallow angle - not quite parallel to the surface (about 30 degrees) - and brushed/pulled the dots down across the top of the cab/hood and down the sides, blending the black and white dots as I went and trying to keep the strokes as vertical as possible. If either the black or white looked too "heavy," I simply went over it again with the brush.
While that may have described what I did, there's no good way to describe how I felt. Ralph will attest to the fact that I initially HATED this oil dot method and all during the first 5-10 minutes was totally convinced that I'd ruined a perfectly fine painted loco. But boy! did I come around... As the minutes went by, I became more comfortable with this technique - and when I started to see the results, I changed from critic to fan. The pictures above don't really do it justice - to my eye, the cab & hood transformed from black painted plastic to weathered black steel. Very cool!
Once I saw the effect on the carbody, I decided to use the same techniques on the frame, being sure to mask off the mech and electronics.
"Burning" the StackIt seems like each step of this weathering process has started with Ralph suggesting a technique, me totally balking, but then deciding to try it, and finally coming up with a great result. This process was especially evident in the exhaust stack. I'd just planned on weathering it with some black Pan Pastels, but Ralph convinced me to paint it silver (even though it didn't look silver in the prototype photos). As with most weathering (as well as scenery, so I'm finding out), success is all about layering - and silver is the first layer on a stack. . .
After that, I used my newly-acquired sponge/gouache technique to daub on Burnt Umber near the top of the stack, "fading" the random pattern/dots toward the bottom.
Keep at it until it looks rusty/heat burned near the top, and mostly silver at the bottom. You can see the result above - though I did add more black to the very top after this photo was taken.
Adding Road Dust
This step was one of the easiest, but it provided the biggest bang for the time spent. I mixed a 1:1 mixture of Tamiya Buff (XF-57) and 91% alcohol and airbrushed it along the bottom of the loco - angling the airbrush up slightly so as to hit mostly the trucks, frame, and the bottom of the carbody. This provides a nice road dust/grime effect and ties everything together (including toning down the sideframes a bit).
While I was at it, I added a bit more on the ends - in line with the wheels - to simulate road grime that's gotten kicked up along the way.
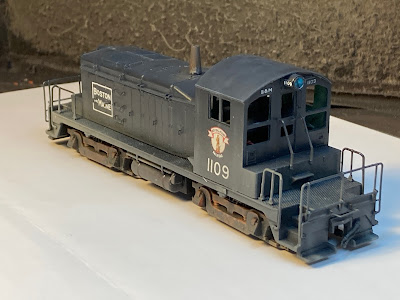
After all that's done, here's the result:
At this point, it looked so great to me I was VERY tempted to call it "done," put it back together (including windows & couplers) and put it into service. But the research prompted by my trip down the rabbit hole (aided and abetted heavily by David Hutchinson and his excellent Facebook Group on B&M/MEC paint schemes) produced this photo:
Apparently, B&M SW1s - specifically the 1109-1111 - had rerailers mounted on each side below the cab, and there was a poling pole mounted on the engineer's side over the front truck.
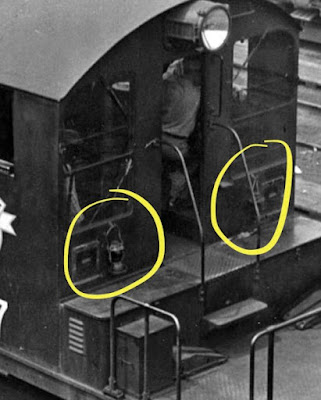
And as if that wasn't enough, the B&M also typically had some sort of cooler/lunch box on the back deck, along with hooks to hold lanterns:

I knew about these details early on, but had opted not to add them since I didn't think they were all that necessary or noticeable and - in the case of the rerailers and poling pole - might interfere with the trucks and undermine reliable operation.
But I'd come this far with this engine, so I figured out a way to add these additional details as well. Stay tuned next time for how I went about it . . .








Your switcher looks great. You've done really nice weathering on it.
ReplyDeleteJim from JSSX.
Chris, sorry, forgot to sign my above anonymous post, Bill Gill
ReplyDeleteNice job. Don't go too far down the hole... and risk damaging something!
ReplyDeleteGreat job Chris! I enjoyed reading your post. Cheers Mick Shea 👍
ReplyDeleteBill Gill, Ralph Renzetti here, that may be true of oil paints, but when the acrylics are thinned 10/90 paint/thinner that is not the case.
ReplyDelete